Unity shader之ColorMask
Color Mask解释,见unity文档:
ColorMask
ColorMask RGB | A | 0 | any combination of R, G, B, A
Set color channel writing mask. Writing ColorMask 0 turns off rendering to all color channels. Default mode is writing to all channels (RGBA), but for some special effects you might want to leave certain channels unmodified, or disable color writes completely.
When using multiple render target (MRT) rendering, it is possible to set up different color masks for each render target, by adding index (0–7) at the end. For example, ColorMask RGB 3 would make render target #3 write only to RGB channels.
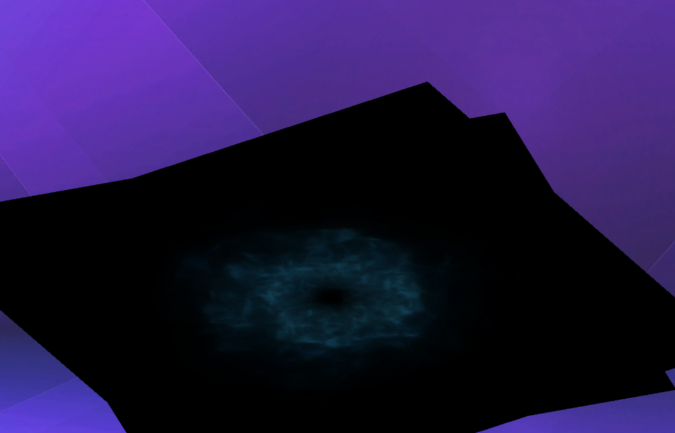
如下面问题,这是通过RenderTexture渲染了一个粒子,挂在NGUI的UITexture中。
希望去掉黑色区域而完全展现背景颜色,可通过ColorMask解决。
摄像机颜色为:

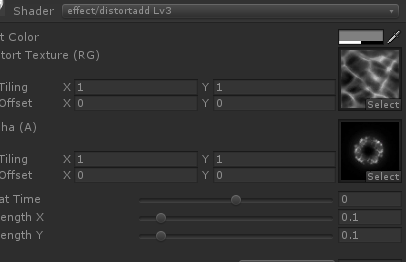
粒子shader为:
 Shader "effect/distortadd Lv3"

 {

     Properties

     {

         _TintColor ("Tint Color", Color) = (0.5,0.5,0.5,0.5)

         _NoiseTex ("Distort Texture (RG)", 2D) = "white" {}

         _MainTex ("Alpha (A)", 2D) = "white" {}

         _HeatTime  ("Heat Time", range (-,)) =

         _ForceX  ("Strength X", range (,)) = 0.1

         _ForceY  ("Strength Y", range (,)) = 0.1

     }

     Category

     {

         Tags { "Queue"="Transparent+400" "RenderType"="Transparent" }

         Blend SrcAlpha One

         Cull Off Lighting Off ZWrite Off Fog { Color (,,,) }

         BindChannels

         {

             Bind "Color", color

             Bind "Vertex", vertex

             Bind "TexCoord", texcoord

         }

         SubShader

         {

             Pass

             {

                 CGPROGRAM

                 #pragma vertex vert

                 #pragma fragment frag

                 #pragma fragmentoption ARB_precision_hint_fastest

                 #pragma multi_compile_particles

                 #include "UnityCG.cginc"

                 struct appdata_t

                 {

                     float4 vertex : POSITION;

                     fixed4 color : COLOR;

                     float2 texcoord: TEXCOORD0;

                 };

                 struct v2f

                 {

                     float4 vertex : POSITION;

                     fixed4 color : COLOR;

                     float2 uvmain : TEXCOORD1;

                 };

                 fixed4 _TintColor;

                 fixed _ForceX;

                 fixed _ForceY;

                 fixed _HeatTime;

                 float4 _MainTex_ST;

                 float4 _NoiseTex_ST;

                 sampler2D _NoiseTex;

                 sampler2D _MainTex;

                 v2f vert (appdata_t v)

                 {

                     v2f o;

                     o.vertex = UnityObjectToClipPos(v.vertex);

                     o.color = v.color;

                     o.uvmain = TRANSFORM_TEX( v.texcoord, _MainTex );

                     return o;

                 }

                 fixed4 frag( v2f i ) : COLOR

                 {

                     //noise effect

                     fixed4 offsetColor1 = tex2D(_NoiseTex, i.uvmain + _Time.xz*_HeatTime);

                     fixed4 offsetColor2 = tex2D(_NoiseTex, i.uvmain + _Time.yx*_HeatTime);

                     i.uvmain.x += ((offsetColor1.r + offsetColor2.r) - ) * _ForceX;

                     i.uvmain.y += ((offsetColor1.r + offsetColor2.r) - ) * _ForceY;

                     return 2.0f * i.color * _TintColor * tex2D( _MainTex, i.uvmain);

                 }

                 ENDCG

             }

         }

         // ------------------------------------------------------------------

         // Fallback for older cards and Unity non-Pro

         SubShader

         {

             Blend DstColor Zero

             Pass

             {

                 Name "BASE"

                 SetTexture [_MainTex] {    combine texture }

             }

         }

     }

 }
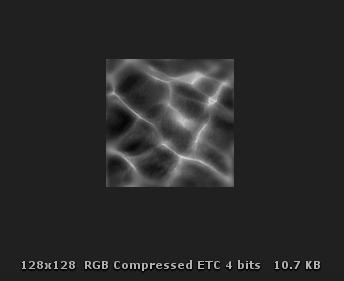
shader使用图片为:

NGUI中 UITexture使用的shader为:
 Shader "Unlit/Premultiplied Colored"

 {

     Properties

     {

         _MainTex ("Base (RGB), Alpha (A)", 2D) = "black" {}

     }

     SubShader

     {

         LOD

         Tags

         {

             "Queue" = "Transparent"

             "IgnoreProjector" = "True"

             "RenderType" = "Transparent"

         }

         Pass

         {

             Cull Off

             Lighting Off

             ZWrite Off

             AlphaTest Off

             Fog { Mode Off }

             Offset -, -

             ColorMask RGB

             Blend One OneMinusSrcAlpha

             CGPROGRAM

             #pragma vertex vert

             #pragma fragment frag

             #include "UnityCG.cginc"

             sampler2D _MainTex;

             float4 _MainTex_ST;

             struct appdata_t

             {

                 float4 vertex : POSITION;

                 float2 texcoord : TEXCOORD0;

                 half4 color : COLOR;

             };

             struct v2f

             {

                 float4 vertex : POSITION;

                 float2 texcoord : TEXCOORD0;

                 half4 color : COLOR;

             };

             v2f vert (appdata_t v)

             {

                 v2f o;

                 o.vertex = UnityObjectToClipPos(v.vertex);

                 o.texcoord = v.texcoord;

                 o.color = v.color;

                 return o;

             }

             half4 frag (v2f IN) : COLOR

             {

                 half4 col = tex2D(_MainTex, IN.texcoord) * IN.color;

                 return col;

             }

             ENDCG

         }

     }

     SubShader

     {

         LOD

         Tags

         {

             "Queue" = "Transparent"

             "IgnoreProjector" = "True"

             "RenderType" = "Transparent"

         }

         Pass

         {

             Cull Off

             Lighting Off

             ZWrite Off

             AlphaTest Off

             Fog { Mode Off }

             Offset -, -

             ColorMask RGB

             Blend One OneMinusSrcAlpha

             ColorMaterial AmbientAndDiffuse

             SetTexture [_MainTex]

             {

                 Combine Texture * Primary

             }

         }

     }

 }
只所以出现黑色,这里有两层混合,一层是摄像机中此粒子与摄像机默认颜色,因为此shader渲染出来的颜色就是黑色(见图片颜色),alpha也全为1,再通过Blend SrcAlpha One命令混合,而目标颜色为黑色,alpha为0(见摄像机颜色),因此这一层混合后只剩下图片的颜色。
第二层混合在NGUI的UITexture中,此UITexture使用shader的混合命令为:Blend One OneMinusSrcAlpha,由于srcAlpha一直为1,所以UITexture后面的背景颜色在混合中消失了,渲染出来的结果只剩下图片的颜色。
要想去除黑色,可以通过 ColorMask RGB来屏蔽此通道输出的alpha,而完全取摄像机的alpha(即为0)。见shader代码:

此时效果如下:

转载请注明出处:https://www.cnblogs.com/jietian331/p/10675265.html
之所以ColorMask会解决这个问题,是因为ColorMask和Blend命令的执行先后顺序,先Blend,再ColorMask,这样Blend时使用frag shader中输出的alpha,保持了rgb颜色的正常,再color mask,屏蔽alpha通道,此时会去取摄像机的alpha,即为0。
而UITexture使用shader的混合命令为:Blend One OneMinusSrcAlpha,所以黑色在混合时消失了,其它颜色保留下来了,且能与背景很好地融合。
资源如下:
https://files.cnblogs.com/files/jietian331/ColorMask.zip
Unity shader之ColorMask的更多相关文章
- Unity Shader 知识点总结(二)
紧接着上一篇文章的shader入门知识的总结,本文主要总结shader中的纹理贴图.透明度混合.顶点动画.后期特效处理等操作.如果有什么地方有错,请指出更正,谢谢.本文的代码主要来自开源书:unity ...
- 【原】Unity Shader VS UDK Material Editor
UDK 的材质编辑器十分好用,毕竟是所见即所得的.虽然unity也有类似第三方插件,但易用性还是差很多,下面主要是,把一些常见表达式概念对应起来. 1. UDK CameraVector (相机位向量 ...
- Unity3D学习(八):《Unity Shader入门精要》——透明效果
前言 在实时渲染中要实现透明效果,通常会在渲染模型时控制它的透明通道. Unity中通常使用两种方法来实现透明 :(1)透明度测试(AlphaTest)(2)透明度混合(AlphaBlend).前者往 ...
- Unity Shader 入门精要学习 (冯乐乐 著)
第1篇 基础篇 第1章 欢迎来到Shader的世界 第2章 渲染流水线 第3章 Unity Shader 基础 第4章 学习Shader所需的数学基础 第2篇 初级篇 第5章 开始Unity Shad ...
- Unity Shader入门精要学习笔记 - 第12章 屏幕后处理效果
建立一个基本的屏幕后处理脚本系统 屏幕后处理,顾名思义,通常指的是在渲染完整个场景得到屏幕图像后,再对这个图像进行一系列操作,实现各种屏幕特效.使用这种技术,可以为游戏画面添加更多艺术效果,例如景深. ...
- Unity Shader入门精要学习笔记 - 第8章 透明效果
转载自 冯乐乐的 <Unity Shader入门精要> 透明是游戏中经常要使用的一种效果.在实时渲染中要实现透明效果,通常会在渲染模型时控制它的透明通道.当开启透明混合后,当一个物体被渲染 ...
- Unity Shader之模板测试
Unity Shader之模板测试 一沙一世界,一花一天堂 一.Stencil testing 渲染管线 当片段着色器处理完一个片段之后,模板测试(Stencil Test)会开始执行,和深度 ...
- Unity Shader入门
Unity Shader入门 http://www.cnblogs.com/lixiang-share/p/5025662.html http://www.manew.com/blog-30559-1 ...
- Unity Shader IDE — Sublime Text2
使用MonoDevelop写了一段时间的Shader代码,发现效率太低了,所以换用Sublime Text. 安装Sublime Text 1.下载 sublime Text2 官网:http://w ...
随机推荐
- 一、自动化平台搭建-python虚拟环境安装
主要知识点介绍: 安装django环境 创建django项目 设计模型类并利用模型类和数据库进行交互 使用django后台管理数据 编写视图函数,进行URL配置 模板的使用 图书-英雄案例完成 1.虚 ...
- 20172328 2018-2019《Java软件结构与数据结构》第四周学习总结
20172328 2018-2019<Java软件结构与数据结构>第四周学习总结 概述 Generalization 本周学习了第六章·列表,主要让我们认识列表以及分析各种列表实现. 教材 ...
- Django表单字段汇总
Field.clean(value)[source] 虽然表单字段的Field类主要使用在Form类中,但也可以直接实例化它们来使用,以便更好地了解它们是如何工作的.每个Field的实例都有一个cle ...
- JAVA时间工具类,在维护的项目里的
package com.inspur.jobSchedule.util; import org.apache.commons.lang3.time.DateUtils; import org.apac ...
- Web 录音
所需文件下载地址 链接:https://pan.baidu.com/s/1Dzbv8gPUZJ3T8Fe02hOJvg 提取码:zbgt py文件 from flask import Flask, j ...
- WinForm打包或部署
一.新建InstallShield项目 二. 三. 四. 五. 六. 七. 最后重新生成,安装包一般在E\Setup1\Setup1\Express\SingleImage\DiskImages\DI ...
- C语言面试题分类->位运算
1.不用临时变量交换两个整数. a = a ^ b; b = a ^ b; a = a ^ b; 2.实现一个函数,输入一个整数,输出该数二进制表示中1的个数.例如9的二进制是1001,则输出2. i ...
- VS2017 未找到编译器可执行文件 csc.exe
vs2017 网站报错 原因Web.config是中下面这段:注释就可以了 <!--<system.codedom> <compilers> <compiler l ...
- 两个左连接SQL执行计划解析(Oracle和PGSQL对比):
上一篇解析链接如下: https://www.cnblogs.com/wcwen1990/p/9325968.html 1.SQL示例1: SQL> select * from ( select ...
- 2018-2019-2 网络对抗技术 20165317 Exp3 免杀原理与实践
2018-2019-2 网络对抗技术 20165317 Exp3 免杀原理与实践 实验内容 任务一:正确使用msf编码器,msfvenom生成如jar之类的其他文件,veil-evasion,自己利用 ...