java设计模式学习笔记
简介
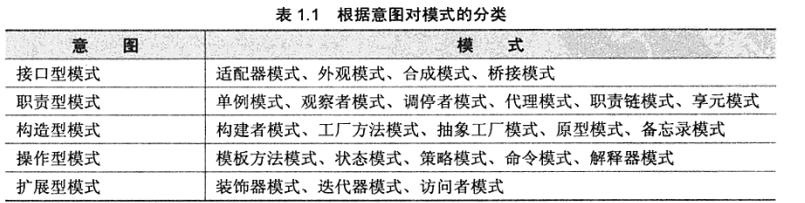
设计模式可以分为五类
- 接口型 模式:适配器模式,外观模式,合成模式,桥接模式
- 职责型 模式:单例模式,观察者模式,调停者模式,代理模式,职责链模式,享元模式
- 构造型 模式:构建者模式,工厂方法模式,抽象工厂模式,原型模式,备忘录模式
- 操作型 模式:模板方法模式,状态模式,策略模式,命令模式,解析器模式
- 扩展型 模式:装饰器模式,迭代器模式,访问者模式。
接口类
适配器模式 通过一个接口来适配类的接口
接口的优点:限制了类之间的协作 , 即使实现类发生巨大变化, 接口的客户端也不受影响
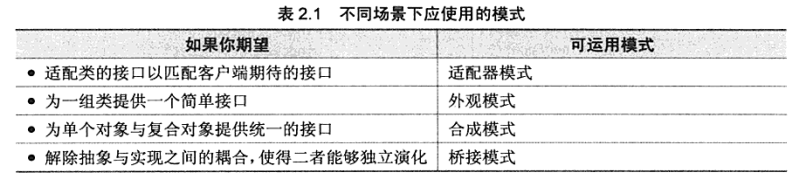
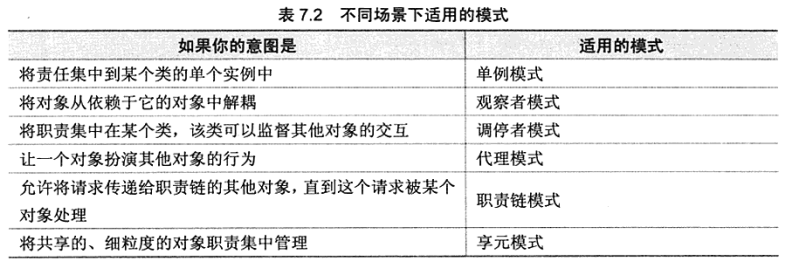
不同场景下使用 的模式
- 适配类的接口,以匹配客户端期待的接口-->适配器模式
- 为一组类提供简单接口-->外观模式
- 为简单对象和复合对象提供统一接口-->合成模式
- 解除抽象与实现之间的耦合,使得二者独立演化-->桥接模式
1. 适配器模式
类适配器
使用继承方式,是静态的继承方式
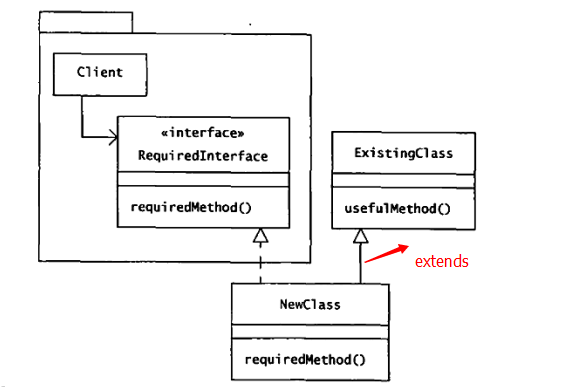
简述 :接口中的方法 分别在父类和子类中实现
写一个demo
接口中有两个方法
public interface Target {

    void firstMethod();

    void secondMethod();

}
adaptee只有一个方法
public class Adaptee {

    public void firstMethod(){

        System.out.println("this is first method.");

    }

}
adapter 继承 adaptee 并实现 secondMethod
public class Adapter extends Adaptee implements Target {

    @Override

    public void secondMethod() {

        System.out.println("this second method.");

    }

}
对象适配器
采用委派的方式
将 adaptee组合到 adpter2中
写个demo
public class Adapter2 implements Target{

    private Adaptee adaptee;

    public Adapter2(Adaptee adaptee) {

        this.adaptee = adaptee;

    }

    @Override

    public void firstMethod() {

         this.adaptee.firstMethod();

    }

    @Override

    public void secondMethod() {

        System.out.println("this second method.");

    }

}
优点:代码复用,扩展 ,灵活 ,强大
缺点:是系统零乱 不易把握
2.外观模式
外观模式的意图是为 子系统 提供提供一个接口, 方便使用
外观类可能全是静态方法
简单描述一下 为复杂的子系统 提供一个 简单的调用门面
网上找了个易于理解的例子 http://www.aichengxu.com/java/681321.htm
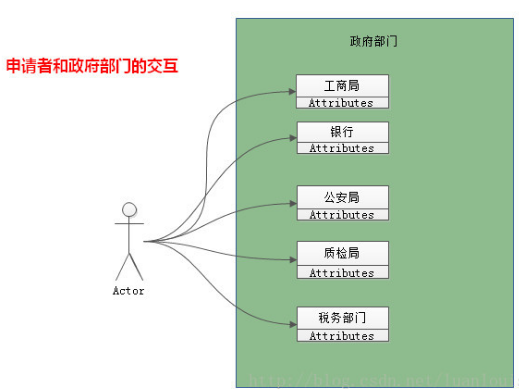
一个人申请开公司 他需要分别 去 工商局,银行,公安局,质监局,税务部门 办理相关手续 特别麻烦
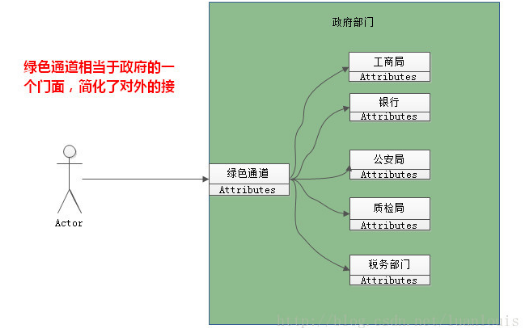
现在 有个绿色通道 ,actor只要 和它对接 既可以完成 上述操作 这个 绿色通道便可以看成是 一个 facade
这样看来 facade 模式 减少了客户端和 各个子系统之间交互,减少耦合。使接入变得简单
写一个简单的demo
工商系统
public class Indutry {

   void regist(){

       System.out.println("indutry registration.");

   }

}
公安系统
public class PoliceStation {

    void regist(){

        System.out.println("police station registration.");

    }

}
税务系统
public class RevenueDepartment {

    void regist(){

        System.out.println("revenue department registration.");

    }

}
facade
public class Facade {

    public void buildCompany() {

        Indutry indutry = new Indutry();

        PoliceStation policeStation = new PoliceStation();

        RevenueDepartment revenueDepartment = new RevenueDepartment();

        indutry.regist();

        policeStation.regist();

        revenueDepartment.regist();

    }

}
3.合成模式
composite :组合对象 ,单对象 。组对象和单对象有共同的行为
组合对象 可以包括其他组合对象,也可以包括单对象。
合成模式 作用:保证客户端调用 单对象与组合对象的一致性
安全合成模式
管理聚集的方法 只出现在树枝构建中
写一个demo
相同接口
public interface Component {

    void printStruct(String preStr);

}
组合
public class Composite implements Component {

    private List<Component> childComponens = new ArrayList<Component>();

    private String name;

    public void add(Component child) {

        childComponens.add(child);

    }

    public void remove(int index) {

        childComponens.remove(index);

    }

    public Composite(String name) {

        this.name = name;

    }

    public List<Component> getChildComponens() {

        return childComponens;

    }

    public void setChildComponens(List<Component> childComponens) {

        this.childComponens = childComponens;

    }

    public String getName() {

        return name;

    }

    public void setName(String name) {

        this.name = name;

    }

    @Override

    public void printStruct(String preStr) {

        System.out.println(preStr + "-->" + name);

        if (childComponens != null) {

            preStr += "      ";

            for (Component child : childComponens) {

                //递归调用

                child.printStruct(preStr);

            }

        }

    }

}
叶子节点
public class Leaf implements Component {

    private String name;

    public Leaf(String name) {

        this.name = name;

    }

    public String getName() {

        return name;

    }

    public void setName(String name) {

        this.name = name;

    }

    @Override

    public void printStruct(String preStr) {

        System.out.println(preStr+"-->"+name);

    }

}
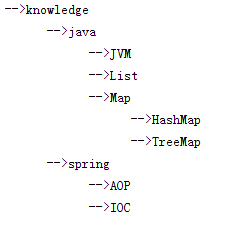
测试
public void test(){

        Composite root=new Composite("knowledge");

        //java 节点

        Composite java=new Composite("java");

        Composite map=new Composite("Map");

        map.add(new Leaf("HashMap"));

        map.add(new Leaf("TreeMap"));

        java.add(new Leaf("JVM"));

        java.add(new Leaf("List"));

        java.add(map);

        //spring节点

        Composite spring=new Composite("spring");

        spring.add(new Leaf("AOP"));

        spring.add(new Leaf("IOC"));

        // root add

        root.add(java);

        root.add(spring);

        root.printStruct("");

    }
运行结果
4. 桥接模式
桥接模式 (bridge)关注抽象
桥接模式的意图 是 将 抽象与抽象方法的实现 相互分离出来, 实现 解耦合,以便二者可以相互独立
简单的说 就是 将对象 与方法分离
书上看到一个例子:现在有 2种设备 分别有 启动 关闭 2个抽象方法。
写个简单的 demo
抽象设备
public abstract class AbstractMachine {

   private MechineMethod mechineMethod;

    public void setMechineMethod(MechineMethod mechineMethod) {

        this.mechineMethod = mechineMethod;

    }

    public MechineMethod getMechineMethod() {

        return mechineMethod;

    }

    abstract void checkMethod();

}
设备A
public class MachineA extends AbstractMachine {

    @Override

    void checkMethod() {

        System.out.println("check machine A ......");

    }

}
设备B
public class MachineB extends AbstractMachine {

    @Override

    void checkMethod() {

        System.out.println("check machine B ......");

    }

}
要检测的功能 的抽象类 (这里对方法的处理 将常规的 竖 转 横,方法平铺 )
public abstract class MechineMethod {

    abstract void methodRun();

}
start功能
public class StartMethod extends MechineMethod {

    @Override

    void methodRun() {

        System.out.println("start method running.");

    }

}
close功能
public class CloseMethod extends MechineMethod {

    @Override

    void methodRun() {

        System.out.println("close method running.");

    }

}
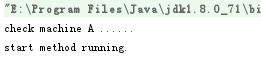
测试 检测 A设备的Start功能
//检测A设备的 start功能

 public void test() {

        //检测A设备的 start功能

        AbstractMachine machine = new MachineA();

        MechineMethod mechineMethod = new StartMethod();

        machine.setMechineMethod(mechineMethod);

        machine.checkMethod();

        machine.getMechineMethod().methodRun();

    }
输出结果
职责类
我们常见的职责模式 如
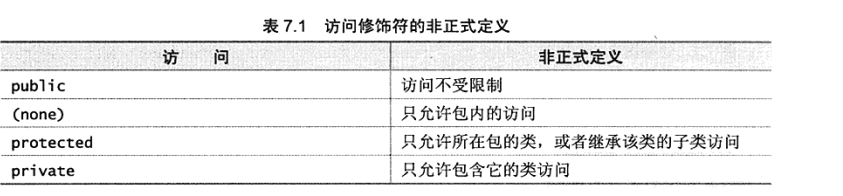
根据可见性控制职责 :java代码中的 public,private,protected
职责设计模式
- 将职责集中到某个类的单个实例中-->单例模式
- 将对象从依赖它的对象中解耦-->观察者模式
- 将职责集中在某个类,该类可以监督其他对象的交互-->调停者模式
- 让一个对象扮演其他对象的行为--代理模式
- 允许将职责链的请求传递给其他对象,直到这个请求被某个对象处理-->职责链模式
- 将共享的 细粒度的职责 进行集中管理-->享元模式
1. 单例模式
单例模式 : 是确保一个类的 有且仅有一个实例,并为它提供一个全局访问点
单例模式中 往往使用 static关键字
static 修饰的变量为 静态变量,静态变量只在类第一次调用的时候加载 ,在内存中只有一个副本。

1.饿汉模式
public class EagerSingleton {

    private static EagerSingleton eagerSingleton=new EagerSingleton();

    private EagerSingleton() {

    }

    public EagerSingleton getSingleton(){

        return eagerSingleton;

    }

}
2.懒加载模式
public class LazzySingleton {

    private static LazzySingleton lazzySingleton;

    private LazzySingleton() {

    }

    //同步方法

    public static synchronized LazzySingleton getSingleton() {

        if (lazzySingleton == null) {

            lazzySingleton = new LazzySingleton();

        }

        return lazzySingleton;

    }

}
3. 支持多线程
public class Singleton {

    private static Singleton singleton;

    private Singleton() {

    }

    public static Singleton getSingleton() {

        //先条件  后程序

        if (singleton == null) {

            //锁 住整个对象

            synchronized (Singleton.class) {

                singleton = new Singleton();

            }

        }

        return singleton;

    }

}
2. 观察者模式
Observer [əbˈzɜ:rvə(r)]
观察者模式:在多个对象之间定义一对多依赖关系,当一个对象的状态发生改变时,通知你依赖于它的对象,并根据新状态做出相应反应。

写一个demo
如 写一个 微博更新自动推送给客户
抽象 WeiBo 父类
public abstract class WeiBo {

    //保存 Observer

    private List<Observer> list = new ArrayList<Observer>();

    public void addObserver(Observer observer) {

        list.add(observer);

    }

    public void delObserver(Observer observer) {

        list.remove(observer);

    }

    //通知所有观察者

    public void notifyObservers(String operation) {

        for (Observer observer : list) {

            observer.update(operation);

        }

    }

}
具体的Video类
public class Video extends WeiBo {

    private String operation;

    public String getOperation() {

        return operation;

    }

    public void change(String operation) {

        this.operation = operation;

        notifyObservers(operation);

    }

}
观察者接口
public interface Observer {

    public void update(String operation);

}
监听文件大小的观察者
public class ObserverSize implements Observer {

    private String operation;

    @Override

    public void update(String operation) {

        this.operation = operation;

        System.out.println("Observer Size : " + operation);

    }

}
写一个测试的demo
 public void test() {

        Video video = new Video();

        Observer observer = new ObserverSize();

        video.addObserver(observer);

        video.change("compress video");//压缩视频

    }
运行结果

推模式
主题发生改变时自动推送给观察者 ,不管观察者是否需要,主题推送的通常是主题对象的全部数据 或部分数据
拉模式
主题发生改变时 只传递少了信息给观察者 ,观察者根据需再向主题拉取数据。
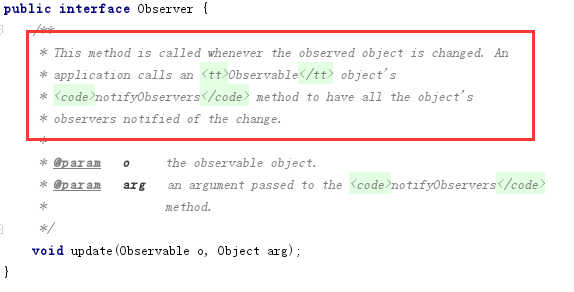
java 提供的观察者支持类
Observable
Observable [əbˈzərvəbəl] 可观察
被观察的类只要继承该类即可。

public class Observable {

    private boolean changed = false;

    private Vector<Observer> obs;

    /** Construct an Observable with zero Observers. */

    public Observable() {

        obs = new Vector<>();

    }

    /**

     * Adds an observer to the set of observers for this object, provided

     * that it is not the same as some observer already in the set.

     * The order in which notifications will be delivered to multiple

     * observers is not specified. See the class comment.

     *

     * @param   o   an observer to be added.

     * @throws NullPointerException   if the parameter o is null.

     */

    public synchronized void addObserver(Observer o) {

        if (o == null)

            throw new NullPointerException();

        if (!obs.contains(o)) {

            obs.addElement(o);

        }

    }

    /**

     * Deletes an observer from the set of observers of this object.

     * Passing <CODE>null</CODE> to this method will have no effect.

     * @param   o   the observer to be deleted.

     */

    public synchronized void deleteObserver(Observer o) {

        obs.removeElement(o);

    }

    /**

     * If this object has changed, as indicated by the

     * <code>hasChanged</code> method, then notify all of its observers

     * and then call the <code>clearChanged</code> method to

     * indicate that this object has no longer changed.

     * <p>

     * Each observer has its <code>update</code> method called with two

     * arguments: this observable object and <code>null</code>. In other

     * words, this method is equivalent to:

     * <blockquote><tt>

     * notifyObservers(null)</tt></blockquote>

     *

     * @see     java.util.Observable#clearChanged()

     * @see     java.util.Observable#hasChanged()

     * @see     java.util.Observer#update(java.util.Observable, java.lang.Object)

     */

    public void notifyObservers() {

        notifyObservers(null);

    }

    /**

     * If this object has changed, as indicated by the

     * <code>hasChanged</code> method, then notify all of its observers

     * and then call the <code>clearChanged</code> method to indicate

     * that this object has no longer changed.

     * <p>

     * Each observer has its <code>update</code> method called with two

     * arguments: this observable object and the <code>arg</code> argument.

     *

     * @param   arg   any object.

     * @see     java.util.Observable#clearChanged()

     * @see     java.util.Observable#hasChanged()

     * @see     java.util.Observer#update(java.util.Observable, java.lang.Object)

     */

    public void notifyObservers(Object arg) {

        /*

         * a temporary array buffer, used as a snapshot of the state of

         * current Observers.

         */

        Object[] arrLocal;

        synchronized (this) {

            /* We don't want the Observer doing callbacks into

             * arbitrary code while holding its own Monitor.

             * The code where we extract each Observable from

             * the Vector and store the state of the Observer

             * needs synchronization, but notifying observers

             * does not (should not).  The worst result of any

             * potential race-condition here is that:

             * 1) a newly-added Observer will miss a

             *   notification in progress

             * 2) a recently unregistered Observer will be

             *   wrongly notified when it doesn't care

             */

            if (!changed)

                return;

            arrLocal = obs.toArray();

            clearChanged();

        }

        for (int i = arrLocal.length-1; i>=0; i--)

            ((Observer)arrLocal[i]).update(this, arg);

    }

    /**

     * Clears the observer list so that this object no longer has any observers.

     */

    public synchronized void deleteObservers() {

        obs.removeAllElements();

    }

    /**

     * Marks this <tt>Observable</tt> object as having been changed; the

     * <tt>hasChanged</tt> method will now return <tt>true</tt>.

     */

    protected synchronized void setChanged() {

        changed = true;

    }

    /**

     * Indicates that this object has no longer changed, or that it has

     * already notified all of its observers of its most recent change,

     * so that the <tt>hasChanged</tt> method will now return <tt>false</tt>.

     * This method is called automatically by the

     * <code>notifyObservers</code> methods.

     *

     * @see     java.util.Observable#notifyObservers()

     * @see     java.util.Observable#notifyObservers(java.lang.Object)

     */

    protected synchronized void clearChanged() {

        changed = false;

    }

    /**

     * Tests if this object has changed.

     *

     * @return  <code>true</code> if and only if the <code>setChanged</code>

     *          method has been called more recently than the

     *          <code>clearChanged</code> method on this object;

     *          <code>false</code> otherwise.

     * @see     java.util.Observable#clearChanged()

     * @see     java.util.Observable#setChanged()

     */

    public synchronized boolean hasChanged() {

        return changed;

    }

    /**

     * Returns the number of observers of this <tt>Observable</tt> object.

     *

     * @return  the number of observers of this object.

     */

    public synchronized int countObservers() {

        return obs.size();

    }

}
Observer
观察者只要实现该类即可。
3. 调停者模式 Mediator
mediator [ˈmēdēˌātər] :中间人
调停者模式:定义一个对象,封装一组对象的交互,从而降低对象间的耦合度,避免了对象之间的显示引用,并且可以独立的改变对象间的行为。
复杂的调用关系
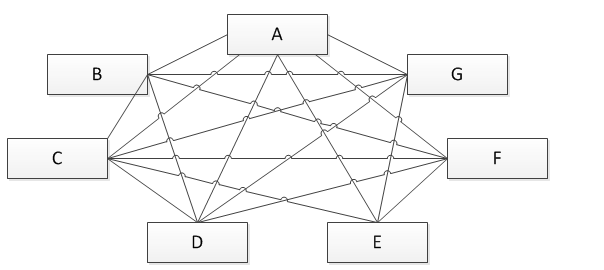
引入 mediator
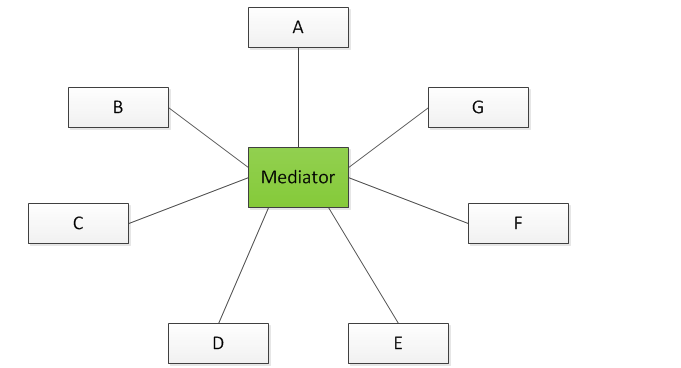

写个demo
Mediator 接口
public interface Mediator {

    void changed(Component component);

}
将A,B,C...等组件 抽象出一个父类
/**

 * A,B,C,D...抽象出一个父类 叫 Colleague

 * 因为 调停者 要和 A,B,C,D..组件关联 所以将它注入到各组件中(抽象到父类里)

 */

public abstract class Component {

    private Mediator mediator;

    public Component(Mediator mediator) {

        this.mediator = mediator;

    }

    public Mediator getMediator() {

        return mediator;

    }

}
组件A
public class ComponetA extends Component {

    public ComponetA(Mediator mediator) {

        super(mediator);

    }

    public void start(){

        getMediator().changed(this);//通过Mediator 调停者 通知 其他组件

    }

}
组件B
public class ComponetB extends Component {

    public ComponetB(Mediator mediator) {

        super(mediator);

    }

    public void start(){

        getMediator().changed(this);//通过Mediator 调停者 通知 其他组件

    }

}
实现 Mediator 类
public class MediatorConcrete implements Mediator {

    //调停者 要交互 其他组件 所以 其他组件 要注入调停者里面

    private ComponetA colleagueA;

    private ComponetB colleagueB;

    public void setColleague(ComponetA colleagueA, ComponetB colleagueB) {

        this.colleagueA = colleagueA;

        this.colleagueB = colleagueB;

    }

    @Override

    public void changed(Component colleague) {

        //通知给其他组件

        if (colleague instanceof ComponetA) {

            System.out.println("hi B,ComponetA start");

        } else if (colleague instanceof ComponetB) {

            System.out.println("hi A,ComponetB start");

        }

    }

}
测试
public void test(){

        //实例化一个调停者

        MediatorConcrete mediator = new MediatorConcrete();

        //创建两个组件,放入调停者(要通过调停者传递消息)

        ComponetA a = new ComponetA(mediator);

        ComponetB b = new ComponetB(mediator);

        //交互的组件放入 (因为一个组件change,要通知其他组件)

        mediator.setColleague(a,b);

        a.start();//a组件启动

    }
运行结果
4. 代理模式 Proxy
代理对象通常拥有一个几乎和实际对象相同的接口。它常常会控制访问,并将请求合理的转发给底层的真实对象。
Java 代理
- 静态代理
- 动态代理
静态代理
client-->subject-->proxy-->realSubject
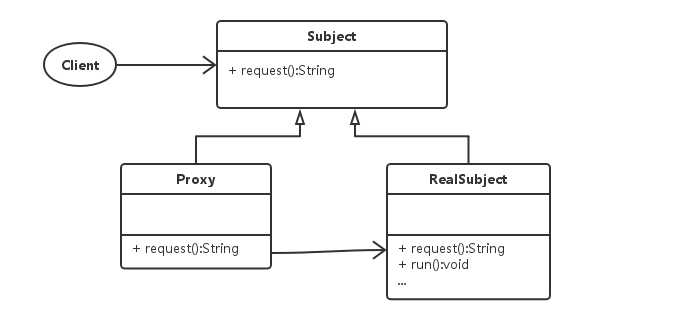
realSubject : 委托类
proxy : 代理类
subject : 委托类和代理类的接口
静态代理中 一个委托类 realSubject 对应一个代理类 proxy 代理类在编译期间就已经确定
动态代理
Java 动态代理
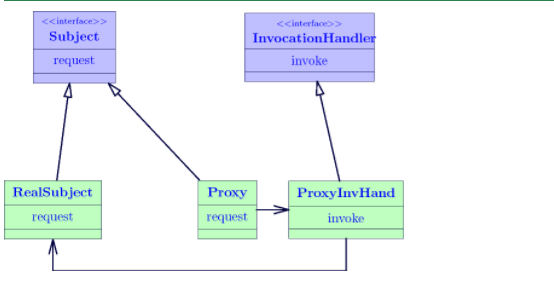
动态代理的代理类 不是在Java代码中实现 是在运行期生成
1.定义接口 SubjectService
public interface SubjectService {

     void add();

}
2.定义委托类 RealSubjectServiceImpl
public class RealSubjectServiceImpl implements SubjectService {

    @Override

    public void add() {

        System.out.println("init real sub service.");

    }

}
3.定义 myInvocationHandler 实现java.lang.reflect.InvocationHandler接口
m.invoke(obj,args) : 对目标对象的调用转发给 包装对象
public class MyInvocationHandler implements InvocationHandler {

    private Object target;//目标对象

    public MyInvocationHandler(Object target) {

        this.target = target;

    }

    @Override

    public Object invoke(Object proxy, Method method, Object[] args) throws Throwable {

        System.out.println(".....before......");

        Object result=method.invoke(target,args);

        System.out.println(".....after......");

        return result;

    }

    public Object getProxy(){

        return Proxy.newProxyInstance(Thread.currentThread().getContextClassLoader(),target.getClass().getInterfaces(),this);

    }
}
4.测试
@Test
public void proxyTest(){
    MyInvocationHandler handler=new MyInvocationHandler(new RealSubjectServiceImpl());
    //proxy
    SubjectService proxy= (SubjectService) handler.getProxy();
    proxy.add();
}
运行结果
cglib动态代理
cglib底层使用 ASM 重写 非 final 方法实现
1.创建 自己的方法拦截器 MyMethodInterceptor 实现 MethodInterceptor
2.通过 net.sf.cglib.proxy.Enhancer 创建代理对象
public class MyMethodInterceptor implements MethodInterceptor {
    private Object target;

    public MyMethodInterceptor(Object target) {
        this.target = target;
    }

    @Override
    public Object intercept(Object obj, Method method, Object[] args, MethodProxy proxy) throws Throwable {
        System.out.println(".....before......");
        Object result=proxy.invokeSuper(obj,args);
        System.out.println(".....before......");
        return result;
    }

    public Object getProxy(){
        Enhancer enhancer=new Enhancer();
        enhancer.setCallback(this);
        enhancer.setSuperclass(target.getClass());
        return enhancer.create();
    }
}
测试.
  @Test

    public void cglibTest(){

        MyMethodInterceptor interceptor=new MyMethodInterceptor(new RealSubjectServiceImpl());

        SubjectService proxy= (SubjectService) interceptor.getProxy();

        proxy.add();

    }
5. 职责链模式 chain of responsibility
职责链模式 通过给予多个对象处理请求的机会,以解除请求的发送者与接收者之间的耦合。
简单的说 :请假3天假-->leader审批-->经理审批-->人事审批
或者
我只请半天假-->leader审批-->人事审批
职责链的节点 可以自由组合
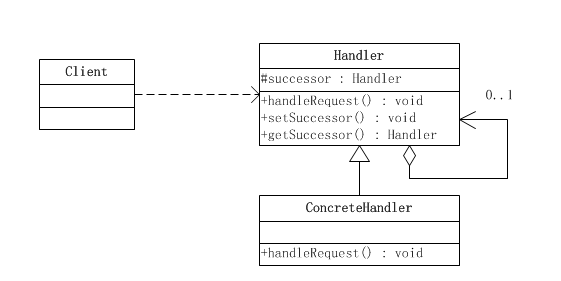
抽象一个Hander父类
public abstract class Handler {

    private Handler next;//后续责任对象

    public Handler getNext() {

        return next;

    }

    public void setNext(Handler next) {

        this.next = next;

    }

    public abstract void handleRequest();//处理请求

}
A节点
public class HanderA  extends Handler{

    @Override

    public void handleRequest() {

        System.out.println("A done..");

        if(getNext()!=null){

            getNext().handleRequest();

        }else {

            System.out.println("finish..");

        }

    }

}
B节点
public class HanderB extends Handler{

    @Override

    public void handleRequest() {

        System.out.println("B done..");

        if(getNext()!=null){

            getNext().handleRequest();

        }else {

            System.out.println("finish..");

        }

    }

}
c节点
public class HanderC extends Handler{

    @Override

    public void handleRequest() {

        System.out.println("C done..");

        if(getNext()!=null){

            getNext().handleRequest();

        }else {

            System.out.println("finish..");

        }

    }

}
测试
public void test(){
Handler a=new HanderA();
Handler b=new HanderB();
Handler c=new HanderC();
a.setNext(b);
b.setNext(c);
a.handleRequest();
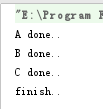
}
执行结果
6. 享元模式 flyweight
享元模式 在客户对象之间提供共享对象,并且为共享对象创建职责
共享对象发生改变 时 不需要通知其他客户端
享元模式的目的是:通过共享来支持大量细粒度对象
1.享元模式 可以 使你共享的访问 大量出现的细粒度对象
2.享元对象必须是不可变的
3.不变的部分提取出来
4.为了确保享元对象共享 ,需要强制客户端通过享元工厂来访问
5.享元工厂 做好权限限制
不变性
可以设置成枚举
java 中的String就是 享元模式
1.单纯享元模式
所有的享元对象都可以共享
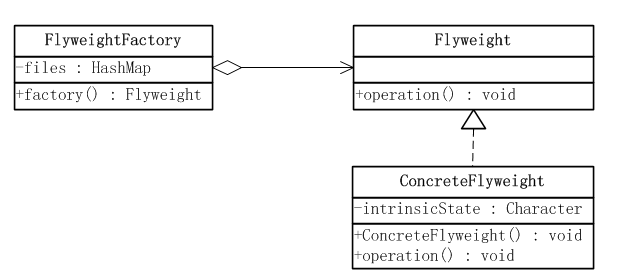
抽象一个接口
public interface Flyweight {

    void operation(String state);

}
实现一个享元对象
public class FlyweightA implements Flyweight {

    //共享对象状态

    private Character inState;

    public FlyweightA(Character inState) {

        this.inState = inState;

    }

    @Override

    public void operation(String state) {

        //state 改变方法的行为 单 不改变 共享对象的状态

        System.out.println("param :"+state);

        System.out.println("state:"+inState);

    }

}
享元工厂
public class FlyweightFactory {

    private Map<Character,Flyweight> files=new HashMap<Character, Flyweight>();

    public Flyweight factory(Character state){

        Flyweight flyweight=files.get(state);

        if(flyweight==null){

            flyweight=new FlyweightA(state);

            files.put(state,flyweight);

        }

        return flyweight;

    }

}
测试
public class FlyweightTest {
@Test
public void test() {
FlyweightFactory factory = new FlyweightFactory();
Flyweight flyweight = factory.factory(new Character('0'));
flyweight.operation("test 1");
flyweight = factory.factory(new Character('1'));
flyweight.operation("test B");
}
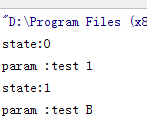
}
运行结果
2.复合享元模式
复合享元模式 意思是 单个享元对象 组成一个集合,而这个集合本身不是共享的
就是 将上述的例子 instate改成一个集合
demo
接口
public interface Flyweight {

    void operation(String state);

}
单个享元
public class FlyweightA implements Flyweight {

    //共享对象状态

    private Character inState;

    public FlyweightA(Character inState) {

        this.inState = inState;

    }

    @Override

    public void operation(String state) {

        //state 改变方法的行为 单 不改变 共享对象的状态

        System.out.println("param :"+state);

        System.out.println("state:"+inState);

    }

}
复合享元
public class FlyweightB implements Flyweight {

    //复合享元模式

    private Map<Character,Flyweight> files=new HashMap<Character, Flyweight>();

    @Override

    public void operation(String state) {

          for(Flyweight flyweight:files.values()){

              flyweight.operation(state);

          }

    }

    public void add(Character key,Flyweight value){

        files.put(key,value);

    }

}
享元工厂
public class FlyweightFactory {

    private Map<Character,Flyweight> files=new HashMap<Character, Flyweight>();

    //集合工厂

    public Flyweight factory(List<Character> states){

        FlyweightB b=new FlyweightB();

        for(Character c:states){

            //调用 单个构建

            b.add(c,factory(c));

        }

        return b;

    }

    //单参构建

    public Flyweight factory(Character state){

        //先从缓存中查找对象

        Flyweight fly = files.get(state);

        if(fly == null){

            //如果对象不存在则创建一个新的Flyweight对象

            fly = new FlyweightA(state);

            //把这个新的Flyweight对象添加到缓存中

            files.put(state, fly);

        }

        return fly;

    }

}
测试
public void test(){

        //工厂构建数据

        FlyweightFactory flyweightFactory=new FlyweightFactory();

        List<Character> param= Arrays.asList('0','1','2');

        Flyweight flyweight=flyweightFactory.factory(param);

        //操作

        flyweight.operation("test..");

    }
运行结果

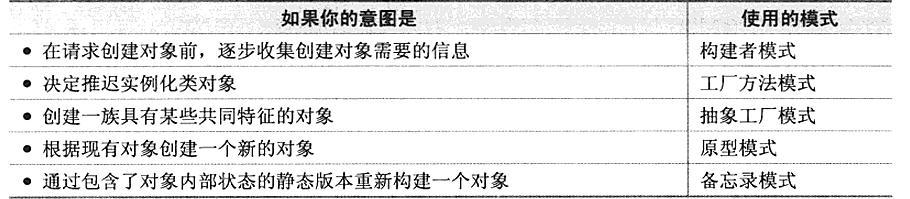
构造类
- 在请求 创建对象之前 ,逐渐收集创建对象的信息-->构建者模式
- 推迟实例化的类对象-->工厂方法模式
- 创建一组 有共同特征的对象-->抽象工厂
- 根据现有对象 创建一个对象-->原型模式
- 通过对象内部静态版本 重构对象-->备忘录模式
1.构建者模式 Builder
构建者模式 :将类的实例化逻辑 转移到类的外部。
构建模式 :将构建与对象分离 。将复杂对象的构建逻辑从对象本身抽离,这样能够简化复杂对象
网上找了个例子http://www.blogjava.net/fancydeepin/archive/2012/08/05/384783.html

我们现在需要生产一个产品 :电脑
简单的描述 就是 产品(电脑) 是一个类,构建(builder) 是一个类
然后 将 产品 放入 builder中构建
看代码:
产品
public abstract class Product {

    protected List<String> parts = new ArrayList<String>();//存储产品的各个部件

    //add

    public void add(String part) {

        parts.add(part);

    }

    //show product

    public void show() {

        for (String s : parts) {

            System.out.println(s);

        }

    }

}
宏碁电脑
public class Acer extends Product {

}
戴尔电脑
public class Dell extends Product {

}
构建者接口
public interface Builder {

    //构建产品 的几个步骤

    void buildCPU();

    void buildMemory();

    void buildGraphicsCard();

    Product getResult();

}
实现 宏碁电脑构建
public class AcerBuilder implements Builder {

    //产品和构建分离

    //创建Acer产品 进行 构建

    private Product product=new Acer();

    @Override

    public void buildCPU() {

        product.add("cpu:i5");

    }

    @Override

    public void buildMemory() {

        product.add("memory:8G");

    }

    @Override

    public void buildGraphicsCard() {

        product.add("graphics card:HD");

    }

    @Override

    public Product getResult() {

        return product;

    }

}
实现戴尔电脑构建
public class DellBuilder implements Builder {

    //产品和构建分离

    //创建Dell产品 进行 构建

    private Product product = new Dell();

    @Override

    public void buildCPU() {

        product.add("cpu:i7");

    }

    @Override

    public void buildMemory() {

        product.add("memory:16G");

    }

    @Override

    public void buildGraphicsCard() {

        product.add("graphics card:HD");

    }

    @Override

    public Product getResult() {

        return product;

    }

}
指导构建过程
public class Director {

    private Builder builder;

    public Director(Builder builder) {

        this.builder = builder;

    }

    public void Construct() {

        //控制 构建逻辑顺序

        builder.buildCPU();

        builder.buildMemory();

        builder.buildGraphicsCard();

    }

}
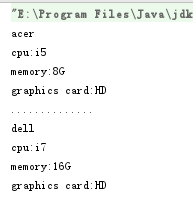
测试
public void test() {

        System.out.println("acer");

        AcerBuilder acerBuilder = new AcerBuilder();

        Director director = new Director(acerBuilder);

        director.Construct();

        //Product show

        acerBuilder.getResult().show();

        System.out.println("..............");

        System.out.println("dell");

        DellBuilder dellBuilder = new DellBuilder();

        director = new Director(dellBuilder);

        director.Construct();

        //Product show

        dellBuilder.getResult().show();

    }
运行结果
2.工厂方法 factory method
工厂方法:让服务提供者 确定实例化哪个类,而不是客户端代码
网上找了个 demo http://blog.csdn.net/jason0539/article/details/23020989
简单工厂模式
简单工厂模式 又称 静态工厂模式
客户需要一辆宝马车,客户不必自己亲自造一辆宝马车 。我们可以建立一个工厂 ,工厂负责宝马车的创建,降低 客户和宝马的耦合
首先我们抽象一个BMW类
public abstract class BMW {

}
有两种型号的 BMW
public class BMW320 extends BMW {

    public BMW320() {

        System.out.println("build bmw 320.");

    }

}
BMW523
public class BMW523 extends BMW {

    public BMW523() {

        System.out.println("build bmw 523.");

    }

}
工厂 根据传参 创建 相应产品
public class SimpleFactory {

    public BMW createBMW(int param) {

        switch (param) {

            case 320:

                return new BMW320();

            case 523:

                return new BMW523();

            default:

                break;

        }

        return null;

    }

}
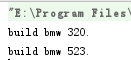
测试
 public void test(){

        SimpleFactory factory=new SimpleFactory();

        factory.createBMW(320);

        factory.createBMW(523);

    }
运行结果
工厂方法模式
简单工厂中 当客户需要 一个新产品时, simpleFactory需修改 case代码 去创建新的代码 ,这样 simpleFactory的代码会频繁改动 很是被动。这也违背了 设计模式的开闭原则。
这时 我们可以把 case部分的 静态代码抽出来,分成不同的子工厂。
Factory接口
public interface Factory {

    BMW createBMW();

}
320子工厂
public class FactoryBMW320 implements Factory {

    @Override

    public BMW createBMW() {

        return new BMW320();

    }

}
523子工厂
public class FactoryBMW523 implements Factory {

    @Override

    public BMW createBMW() {

        return new BMW523();

    }

}
测试
 public void test(){

        FactoryBMW320 factoryBMW320=new FactoryBMW320();

        factoryBMW320.createBMW();

        FactoryBMW523 factoryBMW523=new FactoryBMW523();

        factoryBMW523.createBMW();

    }
运行结果

3.抽象工厂 abstract factory
抽象工厂 创建不同的产品簇
还按上面的例子说 客户不是简单要一个BMW, 每个客户有 不同的 发动机和变速箱需求。
先创建两个类 发动机,变速箱
发动机
public abstract class Engine {

}
4缸发动机
public class Engine4 extends Engine {

    public Engine4() {

        //生产 四缸发动机

        System.out.println("create N46.");

    }

}
12缸发动机
public class Engine12 extends Engine {

    public Engine12() {

        //生产 12缸发动机

        System.out.println("create M73.");

    }

}
变速箱
public abstract class Gearbox {

}
手动变速
public class ManualGearbox extends Gearbox {

    public ManualGearbox() {

        System.out.println("create manual transmission.");

    }

}
自动变速
public class AutomaticGearbox extends Gearbox {

    public AutomaticGearbox() {

        System.out.println("create automatic transmission.");

    }

}
抽象工厂
public interface AbstractFactory {

    Engine createEngine();

    Gearbox createGearbox();

}
产品12工厂:12缸发动机,自动变速箱
public class FactoryBMW12 implements AbstractFactory {

    @Override

    public Engine createEngine() {

        return new Engine12();

    }

    @Override

    public Gearbox createGearbox() {

       return new AutomaticGearbox();

    }

}
产品 46 工厂 :4缸发动机,手动变速
public class FactoryBMW46 implements AbstractFactory {

    @Override

    public Engine createEngine() {

        return new Engine4();

    }

    @Override

    public Gearbox createGearbox() {

       return new ManualGearbox();

    }

}
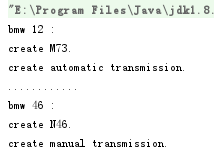
测试
public void test(){

        System.out.println("bmw 12 :");

        FactoryBMW12 factoryBMW12=new FactoryBMW12();

        factoryBMW12.createEngine();

        factoryBMW12.createGearbox();

        System.out.println("............");

        System.out.println("bmw 46 :");

        FactoryBMW46 factoryBMW46=new FactoryBMW46();

        factoryBMW46.createEngine();

        factoryBMW46.createGearbox();

    }
执行结果
4.原型模式 prototype
原型模式使用户复制对象样本来创建对象。而不是通过实例化的方式。
原型模式的核心是克隆方法,java 提供了 Cloneable接口 。
写个demo
public class Student implements Cloneable {

    private String code;

    List<String> courses;

    public List<String> getCourses() {

        return courses;

    }

    public void setCourses(List<String> courses) {

        courses = courses;

    }

    public void addCourse(String course) {

        if(courses==null) courses=new ArrayList<String>();

        courses.add(course);

    }

    public String getCode() {

        return code;

    }

    public void setCode(String code) {

        this.code = code;

    }

    @Override

    protected Student clone() {

        try {

            return (Student) super.clone();

        } catch (CloneNotSupportedException e) {

            e.printStackTrace();

        }

        return null;

    }

    @Override

    public String toString() {

        return this.code

                +",Courses : "+ Arrays.toString(courses.toArray());

    }

}
原型模式 内存二进制流copy,要比直接new性能好 。
new 的时候 也许受权限限制 ,使用原型模式可以访问一些私有对象
浅拷贝
 public void test(){

        Student student=new Student();

        student.setCode("001");

        student.addCourse("math");

        Student studentB=student.clone();

        studentB.setCode("001B");

        studentB.addCourse("java");

        studentB.addCourse("C#");

        System.out.println(student.toString());

        System.out.println(studentB.toString());

    }
输出
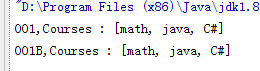
可以发现 studenB的 Courses变化 会影响到 原始Student
因为 Object提供的clone只Copy对象 对象中数组和引用对象都未copy,指向的还是元数据的 地址。
深拷贝
可以通过流式copy进行深copy
public class Teacher implements Serializable{

    private String code;

    List<String> courses;

    public List<String> getCourses() {

        return courses;

    }

    public void setCourses(List<String> courses) {

        courses = courses;

    }

    public void addCourse(String course) {

        if(courses==null) courses=new ArrayList<String>();

        courses.add(course);

    }

    public String getCode() {

        return code;

    }

    public void setCode(String code) {

        this.code = code;

    }

    @Override

    public String toString() {

        return this.code

                +",Courses : "+ Arrays.toString(courses.toArray());

    }

}
流 copy
 public void testDeep(){

        try {

            Teacher teacher=new Teacher();

            teacher.setCode("001");

            teacher.addCourse("tech math");

            //对象  写入缓存 bytes

            //申明缓存空间

            ByteOutputStream bytes=new ByteOutputStream();

            //申明 对象写入

            ObjectOutputStream out=new ObjectOutputStream(bytes);

            //对象写入

            out.writeObject(teacher);

             //bytes中读取对象

            ObjectInputStream inputStream=new ObjectInputStream(new ByteArrayInputStream(bytes.getBytes())) ;

            Teacher teacherB= (Teacher) inputStream.readObject();

            teacherB.setCode("001B");

            teacherB.addCourse("tech java");

            System.out.println(teacher.toString());

            System.out.println(teacherB.toString());

        } catch (Exception e) {

            e.printStackTrace();

        }

    }
运行结果

5.备忘录模式 Memento
备忘录模式的目的是 为对象状态 提供存储和恢复功能。
备忘录模式的结构
Originator [əˈrijəˌnātər]
Caretaker [Care taker] 管理人

- 发起人:记录当前时刻内部状态,负责定义哪些属于备份范围的状态,负责创建和恢复备忘数据。
- 备忘录:负责存储 发起人对象的内部状态,需要的时候提供 发起人需要的内部状态
- 管理角色:对备忘录进行管理,保存和提供备忘数据。
发起人代码
public class Originator {

    private String state="";

    public String getState() {

        return state;

    }

    public void setState(String state) {

        this.state = state;

    }

    //创建备忘状态

    public Memento createMemento(){

        return new Memento(this.state);

    }

    //恢复备忘状态

    public void restoreMemento(Memento memento){

        this.setState(memento.getState());

    }

}
备忘录
public class Memento {

    private String state="";

    public Memento(String state) {

        this.state = state;

    }

    public String getState() {

        return state;

    }

    public void setState(String state) {

        this.state = state;

    }

}
管理者
public class Caretaker {

    private Memento memento;

    public Memento getMemento() {

        return memento;

    }

    public void setMemento(Memento memento) {

        this.memento = memento;

    }

}
测试
public void test(){

        Originator originator=new Originator();

        originator.setState("init");

        System.out.println(originator.getState());

        //管理员 保存 现有状态

        Caretaker caretaker=new Caretaker();

        caretaker.setMemento(originator.createMemento());

        //更新状态

        originator.setState("running");

        System.out.println(originator.getState());

        //恢复状态

        originator.restoreMemento(caretaker.getMemento());

        System.out.println(originator.getState());

    }
执行结果

多状态 备忘
将 对象的属性放在map里
操作类
不同类 实现同一操作时 采用不同的方式 。类似java的多态 ,多态的设计思路被多种设计模式使用。
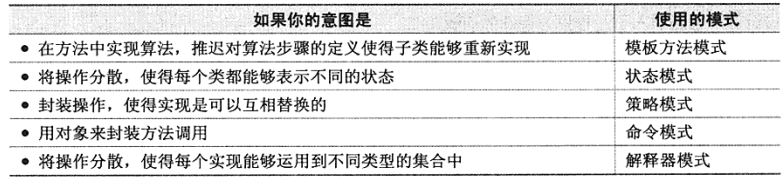
- 在方法中实现算法,推迟对算法步骤的定义,使得子类能够重新实现-->模板方法模式
- 将操作分散,使得每个类都能够表示不同的状态-->状态模式
- 封装操作,使得实现都可以相互替换-->策略模式
- 用对象来封装方法调用-->命令模式
- 将操作分散,使得每个实现运用到不同类型的集合-->解析器模式
1.模板方法模式 template mothed
模板方法:抽象一些步骤或将它定义在接口中,以便其他类可以实现这一步骤。
比如 我们去乘车 大致分为 买票-->进站安检-->检票-->入座
我现在搞一个系统 乘坐汽车,乘坐火车,乘坐地铁 都用该系统
写个demo
先抽象一个公共父类 定义基本的逻辑框架
public abstract class Ride {

    //模板 方法 final类型 子类不可以修改

    public final void action(){

        buyTicket();

        securityCheck();

        checkIn();

        seated();

        doStarted();

    }

    //购票

    protected abstract void buyTicket();

    //进站安检

    protected abstract void securityCheck();

    //检票

    protected abstract void checkIn();

    //入座

    protected abstract void seated();

    //钩子方法 ,子类可以不必要实现,如果有需求可以写

    protected void doStarted(){

        System.out.println("车辆启动..");

    }

}
汽车出行
public class Bus extends Ride {

    @Override

    protected void buyTicket() {

        System.out.println("buy a bus ticket.");

    }

    @Override

    protected void securityCheck() {

        System.out.println("bus station security check.");

    }

    @Override

    protected void checkIn() {

        System.out.println("bus station check in.");

    }

    @Override

    protected void seated() {

        //按票入座

        System.out.println("ticket seat.");

    }

}
地铁出行
public class Subway extends Ride {

    @Override

    protected void buyTicket() {

        System.out.println("buy a subway ticket.");

    }

    @Override

    protected void securityCheck() {

        System.out.println("subway station security check.");

    }

    @Override

    protected void checkIn() {

        System.out.println("subway station check in.");

    }

    @Override

    protected void seated() {

        //随便坐

        System.out.println("Sit casually.");

    }

}
测试
public void test(){
Ride ride=new Bus();
ride.action();
System.out.println(".....");
ride=new Subway();
ride.action();
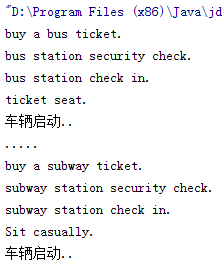
}
运行结果
2.状态模式
程序中 经常 因状态不同,执行的不同逻辑代码 。状态模式: 就是将 这些状态 分为不同的状态对象,
且 这些状态对象 有自己的状态 行为。解耦
网上找了个例子
四种颜色
Red,
White,
Blue,
Black
有 pull和 push两种操作
Color类
public enum  Color {

    Red,

    White,

    Blue,

    Black

}
操作管理类
public class Context {

    private Color color;

    public Context(Color color) {

        this.color = color;

    }

    public void push(){

        //red->white->blue->black

        if(color==Color.Red) color=Color.White;

        else if(color==Color.White) color=Color.Blue;

        else if(color==Color.Blue) color=Color.Black;

    }

    public void pull(){

        //red<-white<-blue<-black

        if(color==Color.Black) color=Color.Blue;

        else if(color==Color.Blue) color=Color.White;

        else if(color==Color.White) color=Color.Red;

    }

}
测试
public void test(){

        Context context=new Context(Color.Red);

        context.push();

        System.out.println(context.getColor().name());

        context.pull();

        System.out.println(context.getColor().name());

    }
结果

改用状态模式
public abstract class State {

    protected abstract void push(Context2 context);

    protected abstract void pull(Context2 context);

    protected abstract Color getColor();

}
public class RedState extends State {

    @Override

    protected void push(Context2 context) {

        context.setState(new WhiteState());

    }

    @Override

    protected void pull(Context2 context) {

        context.setState(new RedState());

    }

    @Override

    protected Color getColor() {

        return Color.Red;

    }

}
public class WhiteState extends State {

    @Override

    protected void push(Context2 context) {

        context.setState(new BlueState());

    }

    @Override

    protected void pull(Context2 context) {

        context.setState(new RedState());

    }

    @Override

    protected Color getColor() {

        return Color.White;

    }

}
public class BlueState extends State {

    @Override

    protected void push(Context2 context) {

        context.setState(new BlackState());

    }

    @Override

    protected void pull(Context2 context) {

        context.setState(new WhiteState());

    }

    @Override

    protected Color getColor() {

        return Color.Blue;

    }

}
public class BlackState extends State {

    @Override

    protected void push(Context2 context) {

        context.setState(new BlackState());

    }

    @Override

    protected void pull(Context2 context) {

        context.setState(new BlueState());

    }

    @Override

    protected Color getColor() {

        return Color.Black;

    }

}
测试
 public void test2(){

        Context2 context2=new Context2(new RedState());

        context2.push();

        System.out.println(context2.getState().getColor());

        context2.pull();

        System.out.println(context2.getState().getColor());

    }
运行结果

3.策略模式 strategy
strategy [ˈstratəjē]
策略模式 就是 将公共操作 ,在不同类中分别实现,也就是继承公共的接口或父类 。再用策略调用者调用自己需要的策略。
demo:
1.策略接口
public interface Strategy {

    void compress();

}
2.rar压缩算法实现
public class RarStrategy implements Strategy {

    @Override

    public void compress() {

        System.out.println("execute rar compression");

    }

}
3.zip压缩算法实现
public class ZipStrategy implements Strategy {

    @Override

    public void compress() {

        System.out.println("execute zip compression");

    }

}
4.调用者类
public class Context {

    private Strategy strategy;

    public Context(Strategy strategy) {

        this.strategy = strategy;

    }

    public void executeCompress(){

        strategy.compress();

    }

}
5.测试
public void test(){

        Context context=new Context(new RarStrategy());

        context.executeCompress();

        context=new Context(new ZipStrategy());

        context.executeCompress();

    }
执行结果

4.命令模式
命令模式的目的是 将请求 封装到 类内部
命令模式可以将请求封装在一个对象中 允许你可以像管理对象一样去 管理方法 ,传递 并且在适合的机会调用它
网上找了个例子 :http://blog.csdn.net/jason0539/article/details/45110355
开关电视机的请求
现在设置 请求命令接口
public interface Command {

    void execute();

}
然后 建立一个 TV对象 作为命令的接收者
public class TV {

    void turnOn(){

        System.out.println("The TV is turn on.");

    }

    void turnOff(){

        System.out.println("The TV is turn off.");

    }

}
开机命令
public class CommandOn implements Command {

    private TV tv;

    public CommandOn(TV tv) {

        this.tv = tv;

    }

    @Override

    public void execute() {

        tv.turnOn();

    }

}
关机命令
public class CommandOff implements Command {

    private TV tv;

    public CommandOff(TV tv) {

        this.tv = tv;

    }

    @Override

    public void execute() {

        tv.turnOff();

    }

}
控制 器 就像遥控器
public class Control {

    private CommandOn commandOn;

    private CommandOff commandOff;

    public Control(CommandOn commandOn, CommandOff commandOff) {

        this.commandOn = commandOn;

        this.commandOff = commandOff;

    }

    public void turnOn(){

        commandOn.execute();

    }

    public void turnOff(){

        commandOff.execute();

    }

}
测试
 public void test() {

        TV tv = new TV();

        CommandOn commandOn = new CommandOn(tv);

        CommandOff commandOff = new CommandOff(tv);

        Control control=new Control(commandOn,commandOff);

        control.turnOn();

        control.turnOff();

    }
执行结果
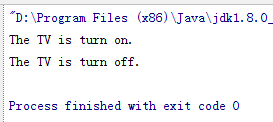
本demo将命令 开机和关机命令 封装 传递 ,并在需要的时候触发
5.解析器模式 Interpreter
扩展型设计模式
- 让开发者动态组合对象行为-->装饰器模式
- 提供一个方法 来顺序访问 集合中的元素-->迭代器模式
- 允许开发者定义新的操作 而无需改变 分层体系中的类-->访问者模式
1.装饰器模式 decorator
decorator [ˈdekəˌrātər]
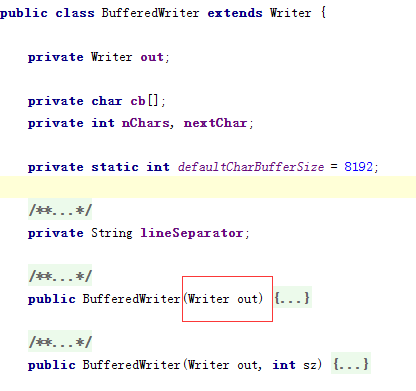
经典的装饰器模式 就是java中的流处理
 public void test(){

        try {

            FileWriter file=new FileWriter(new File("E://test//test.txt"));

            BufferedWriter writer=new BufferedWriter(file);

            writer.write("this is test file.");

            writer.flush();

            writer.close();

        } catch (IOException e) {

            e.printStackTrace();

        }

    }
这段代码中 我们从 FileWriter 组合成BufferWriter 最后输入文本;
通过构造器传入参数 ,产生了新的对象行为。
查看下 源码
2.迭代器模式 Iterator
为顺序访问集合提供一种方式
/*

 * Copyright (c) 1997, 2013, Oracle and/or its affiliates. All rights reserved.

 * ORACLE PROPRIETARY/CONFIDENTIAL. Use is subject to license terms.

 *

 *

 */

package java.util;

import java.util.function.Consumer;

/**

 * An iterator over a collection.  {@code Iterator} takes the place of

 * {@link Enumeration} in the Java Collections Framework.  Iterators

 * differ from enumerations in two ways:

 *

 * <ul>

 *      <li> Iterators allow the caller to remove elements from the

 *           underlying collection during the iteration with well-defined

 *           semantics.

 *      <li> Method names have been improved.

 * </ul>

 *

 * <p>This interface is a member of the

 * <a href="{@docRoot}/../technotes/guides/collections/index.html">

 * Java Collections Framework</a>.

 *

 * @param <E> the type of elements returned by this iterator

 *

 * @author  Josh Bloch

 * @see Collection

 * @see ListIterator

 * @see Iterable

 * @since 1.2

 */

public interface Iterator<E> {

    /**

     * Returns {@code true} if the iteration has more elements.

     * (In other words, returns {@code true} if {@link #next} would

     * return an element rather than throwing an exception.)

     *

     * @return {@code true} if the iteration has more elements

     */

    boolean hasNext();

    /**

     * Returns the next element in the iteration.

     *

     * @return the next element in the iteration

     * @throws NoSuchElementException if the iteration has no more elements

     */

    E next();

    /**

     * Removes from the underlying collection the last element returned

     * by this iterator (optional operation).  This method can be called

     * only once per call to {@link #next}.  The behavior of an iterator

     * is unspecified if the underlying collection is modified while the

     * iteration is in progress in any way other than by calling this

     * method.

     *

     * @implSpec

     * The default implementation throws an instance of

     * {@link UnsupportedOperationException} and performs no other action.

     *

     * @throws UnsupportedOperationException if the {@code remove}

     *         operation is not supported by this iterator

     *

     * @throws IllegalStateException if the {@code next} method has not

     *         yet been called, or the {@code remove} method has already

     *         been called after the last call to the {@code next}

     *         method

     */

    default void remove() {

        throw new UnsupportedOperationException("remove");

    }

    /**

     * Performs the given action for each remaining element until all elements

     * have been processed or the action throws an exception.  Actions are

     * performed in the order of iteration, if that order is specified.

     * Exceptions thrown by the action are relayed to the caller.

     *

     * @implSpec

     * <p>The default implementation behaves as if:

     * <pre>{@code

     *     while (hasNext())

     *         action.accept(next());

     * }</pre>

     *

     * @param action The action to be performed for each element

     * @throws NullPointerException if the specified action is null

     * @since 1.8

     */

    default void forEachRemaining(Consumer<? super E> action) {

        Objects.requireNonNull(action);

        while (hasNext())

            action.accept(next());

    }

}
如果一个类 支持 for循环 必须实现Iterable接口 ,并提供 Iterator方法
public interface Iterable <T>  {

    java.util.Iterator<T> iterator();

    default void forEach(java.util.function.Consumer<? super T> consumer) { /* compiled code */ }

    default java.util.Spliterator<T> spliterator() { /* compiled code */ }

}
比如我们经常使用的 ArrayList

3.访问者 visitor模式
访问者模式的意图是 不改变类层次结构前提下,对该层次结构进行扩展。
java设计模式学习笔记的更多相关文章
- java设计模式学习笔记--接口隔离原则
接口隔离原则简述 客户端不应该依赖它不需要的接口,即一个类对另一个类的依赖应建立在最小的接口上 应用场景 如下UML图 类A通过接口Interface1依赖类B,类C通过接口Interface1依赖类 ...
- java设计模式学习笔记--单一职责原则
单一职责原则注意事项和细节 1.降低类的复杂度,一个类只负责一项职责 2.提高可读性,可维护性 3.降低变更引起的风险 4.通常情况下,我们应当遵守单一职责原则,只有逻辑足够简单,才可以在代码级违反单 ...
- java设计模式学习笔记--浅谈设计模式
设计模式的目的 编写软件的过程中,程序员面临着来自耦合性,内聚性以及可维护性,可扩展性,重用性,灵活性等多方面的挑战.设计模式为了让程序具有更好的 1.代码重用性(即:相同功能的代码,不用多次编写) ...
- Java设计模式学习笔记(五) 单例模式
前言 本篇是设计模式学习笔记的其中一篇文章,如对其他模式有兴趣,可从该地址查找设计模式学习笔记汇总地址 1. 使用单例模式的原因 以Windows任务管理器为例,在Windows系统中,任务管理器是唯 ...
- Java设计模式学习笔记(二) 简单工厂模式
前言 本篇是设计模式学习笔记的其中一篇文章,如对其他模式有兴趣,可从该地址查找设计模式学习笔记汇总地址 正文开始... 1. 简介 简单工厂模式不属于GoF23中设计模式之一,但在软件开发中应用也较为 ...
- Java设计模式学习笔记(三) 工厂方法模式
前言 本篇是设计模式学习笔记的其中一篇文章,如对其他模式有兴趣,可从该地址查找设计模式学习笔记汇总地址 1. 简介 上一篇博客介绍了简单工厂模式,简单工厂模式存在一个很严重的问题: 就是当系统需要引入 ...
- Java设计模式学习笔记(四) 抽象工厂模式
前言 本篇是设计模式学习笔记的其中一篇文章,如对其他模式有兴趣,可从该地址查找设计模式学习笔记汇总地址 1. 抽象工厂模式概述 工厂方法模式通过引入工厂等级结构,解决了简单工厂模式中工厂类职责太重的问 ...
- Java设计模式学习笔记(一) 设计模式概述
前言 大约在一年前学习过一段时间的设计模式,但是当时自己的学习方式比较低效,也没有深刻的去理解.运用所学的知识. 所以现在准备系统的再重新学习一遍,写一个关于设计模式的系列博客. 废话不多说,正文开始 ...
- Java设计模式学习笔记,一:单例模式
开始学习Java的设计模式,因为做了很多年C语言,所以语言基础的学习很快,但是面向过程向面向对象的编程思想的转变还是需要耗费很多的代码量的.所有希望通过设计模式的学习,能更深入的学习. 把学习过程中的 ...
- Java设计模式学习笔记(单例模式)
最近一直在看<Head First设计模式>,这本书写的确实是很不错的,专注于怎么用最简单的方式最通俗的语言让人了解设计模式.据说GoF的设计模式那本书写的很好,是一本经典,但是就是难懂, ...
随机推荐
- STM32F4库函数里面的RCC_DeInit(void)函数分析
void RCC_DeInit(void) { /*Set HSION bit,内部高速时钟使能HSI振荡器打开*/ RCC->CR |=(uint32_t)0x00000001; /*Rese ...
- 一个简单的编译tex的Makefile
tex编译成pdf通常要经过以下步骤:tex-->dvi-->ps-->pdf.如果修改了tex文件想看一下效果,就要把命令重新敲一遍.虽然就几行命令,反复敲还是很烦人的.最直接的办 ...
- 基于JDBC的数据库连接池技术研究与应用
引言 近年来,随着Internet/Intranet建网技术的飞速发展和在世界范围内的迅速普及,计算机 应用程序已从传统的桌面应用转到Web应用.基于B/S(Browser/Server)架构的3层开 ...
- Python之set集合与collections系列
1>set集合:是一个无序且不重复的元素集合:访问速度快,解决了重复的问题: s2 = set(["che","liu","haha" ...
- 阿里云vsftp安装和简单的配置
1.系统环境 [root@jie ~]# cat /etc/redhat-release CentOS release 6.8 (Final) [root@jie ~]# [root@jie ~]# ...
- JVM 方法调用之静态分派
分派(Dispatch)可能是静态也可能是动态的,根据分派依据的宗量数可分为单分派和多分派.这两种分派方式的两两组合就构成了静态单分派,静态多分派,动态单分派,动态多分派这4种组合.本章讲静态分派. ...
- 在ie6下将png24图片透明
没想到IETester中IE6和IE6真实版本不一样...之前一直没有实现png图片的透明度,现在发现原来是版本不一样惹的祸.总之,我将解决方法以demo的方式显示出来,以供再次利用. <!DO ...
- 使用web API和NPOI导出Excel
使用MVC controller输出excel的例子,自不待言,例子满天飞. 由于本项目使用的是Asp.net MVC API,因此在本项目使用API,实现了文件下载功能.代码的原理很简单,基本上是老 ...
- C# 异常日志记录
using System;using System.Collections.Generic;using System.IO;using System.Linq;using System.Web; na ...
- c# 判断两个集合是否有交集
/// <summary> /// 判断是否有交集 /// </summary> /// <typeparam name="T"></ty ...