KVM虚拟化管理平台WebVirtMgr部署及使用
KVM虚拟化管理平台WebVirtMgr部署及使用
WebVirtMgr介绍
yum -y install https://dl.fedoraproject.org/pub/epel/7/x86_64/Packages/e/epel-release-7-12.noarch.rpm
yum -y install git python-pip libvirt-python libxml2-python python-websockify upervisor nginx novnc python-virtinst libvirt vm ridge-utils virt-manager qemu-kvm-tools virt-viewer virt-v2v tunctl unzip zip
cd /usr/local/src/

git clone git://github.com/retspen/webvirtmgr.git
cd webvirtmgr/

pip install -r requirements.txt
./manage.py syncdb    # 默认是python执行,如下报错,换用其他版本的python

You just installed Django's auth system, which means you don't have any superusers defined.

Would you like to create one now? (yes/no): yes

Username (leave blank to use 'root'): 用户

Email address: 邮箱

Password:密码

Password (again):密码

###==========================###

./manage.py collectstatic   #生成配置文件

WARNING:root:No local_settings file found.

You have requested to collect static files at the destination

location as specified in your settings.

This will overwrite existing files!

Are you sure you want to do this?

Type 'yes' to continue, or 'no' to cancel: yes

..........

..........

###==========================###

./manage.py createsuperuser   #添加管理员账号

WARNING:root:No local_settings file found.

Username: sun                      //这个是管理员账号,用上面的admin和这个管理员账号都可以登陆webvirtmgr的web界面管理平台

Email address: 1916989848@qq.com

Password:

Password (again):

Superuser created successfully.

###==========================###

/usr/bin/python2 manage.py createsuperuser   #添加管理员账号(同样使用python2版本执行,不要使用默认的python执行)
注意此处用默认的python执行上面命令,一般会报错,如下:
ImportError: No module named django.core.management
这个一般是由于python版本引起的,因为系统自带有好几个版本的python
[root@openstack webvirtmgr]# python //按Tab键自查找
python python2.6
python2 python2.6-config python-config
[root@openstack webvirtmgr]# python -V
Python 2.6.6
由此可看出,系统默认的Python版本是2.6.6
说明上面命令默认是python2.6执行的
既然使用python2.6执行上面的命令报错,那就换用其他版本python2执行(如果当前是python3.3.0,那么就将下面的/usr/bin/python2换成/usr/bin/python2.6)
cd ..

mkdir -pv /var/www

cp -Rv webvirtmgr /var/www/webvirtmg

chown -R nginx:nginx /var/www/webvirtmgr
su - nginx -s /bin/bash

ssh-keygen #产生公私钥

ssh-copy-id (kvm-ip) #由于这里webvirtmgr和kvm服务部署在同一台机器,所以这里本地信任。如果kvm部署在其他机器,那么这个是它的ip
[root@local]#vim /etc/nginx/conf.d/webvirtmgr.conf //添加下面内容到文件中

server {

listen 80;

server_name 10.3.134.35;

#access_log /var/log/nginx/webvirtmgr_access_log;

location /static/ {

root /var/www/webvirtmgr/webvirtmgr; # or /srv instead of /var

expires max;

}

location / {

proxy_pass http://127.0.0.1:8000;

proxy_set_header X-Real-IP $remote_addr;

proxy_set_header X-Forwarded-for $proxy_add_x_forwarded_for;

proxy_set_header Host $host:$server_port;

proxy_set_header X-Forwarded-Proto $remote_addr;

proxy_connect_timeout 600;

proxy_read_timeout 600;

proxy_send_timeout 600;

client_max_body_size 1024M; # Set higher depending on your needs

}

}
mv /etc/nginx/conf.d/default.conf /etc/nginx/conf.d/default.conf.bak
[root@openstack ops]# vim /etc/supervisord.conf //在文件末尾添加,注意将默认的python改为python2,因为上面只有用这个版本执行才不报错!

[program:webvirtmgr]

command=/usr/bin/python2 /var/www/webvirtmgr/manage.py run_gunicorn -c /var/www/webvirtmgr/conf/gunicorn.conf.py    #启动8000端口***如果报错无法启动,查看/var/www/wvirtmgr权限是否正常!!!

directory=/var/www/webvirtmgr

autostart=true

autorestart=true

logfile=/var/log/supervisor/webvirtmgr.log

log_stderr=true

user=nginx

[program:webvirtmgr-console]

command=/usr/bin/python2 /var/www/webvirtmgr/console/webvirtmgr-console    #启动6080端口(这是控制台vnc端口)

directory=/var/www/webvirtmgr

autostart=true

autorestart=true

stdout_logfile=/var/log/supervisor/webvirtmgr-console.log

redirect_stderr=true

user=nginx
[root@localhost ~]# netstat -lnpt

Active Internet connections (only servers)

Proto Recv-Q Send-Q Local Address               Foreign Address             State       PID/Program name

tcp        0      0 127.0.0.1:8000              0.0.0.0:*                   LISTEN      1698/python2

tcp        0      0 0.0.0.0:6080                0.0.0.0:*                   LISTEN      1697/python2

tcp        0      0 0.0.0.0:5900                0.0.0.0:*                   LISTEN      544/qemu-kvm

tcp        0      0 0.0.0.0:80                  0.0.0.0:*                   LISTEN      32518/nginx
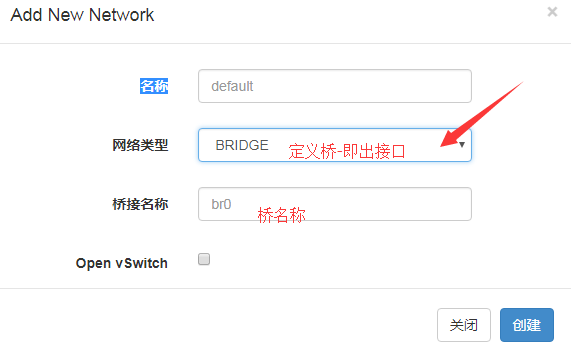
cp ifcfg-eth0 ifcfg-br0

[root@vfeelit network-scripts]# cat ifcfg-br0

TYPE=Bridge

NAME=br0

DEVICE=br0

ONBOOT=yes

BOOTPROTO=none

PEERDNS=yes

NM_CONTROLLED=no

IPADDR=192.168.10.10

NETMASK=255.255.255.0

GATEWAY=192.168.10.2

DNS1=223.5.5.5

DNS2=223.6.6.6

[root@vfeelit network-scripts]# cat ifcfg-eth0

TYPE=Ethernet

BRIDGE=br0

BOOTPROTO=none

PEERDNS="yes"

NAME="eth0"

DEVICE="eth0"

ONBOOT="yes"

NM_CONTROLLED="no"
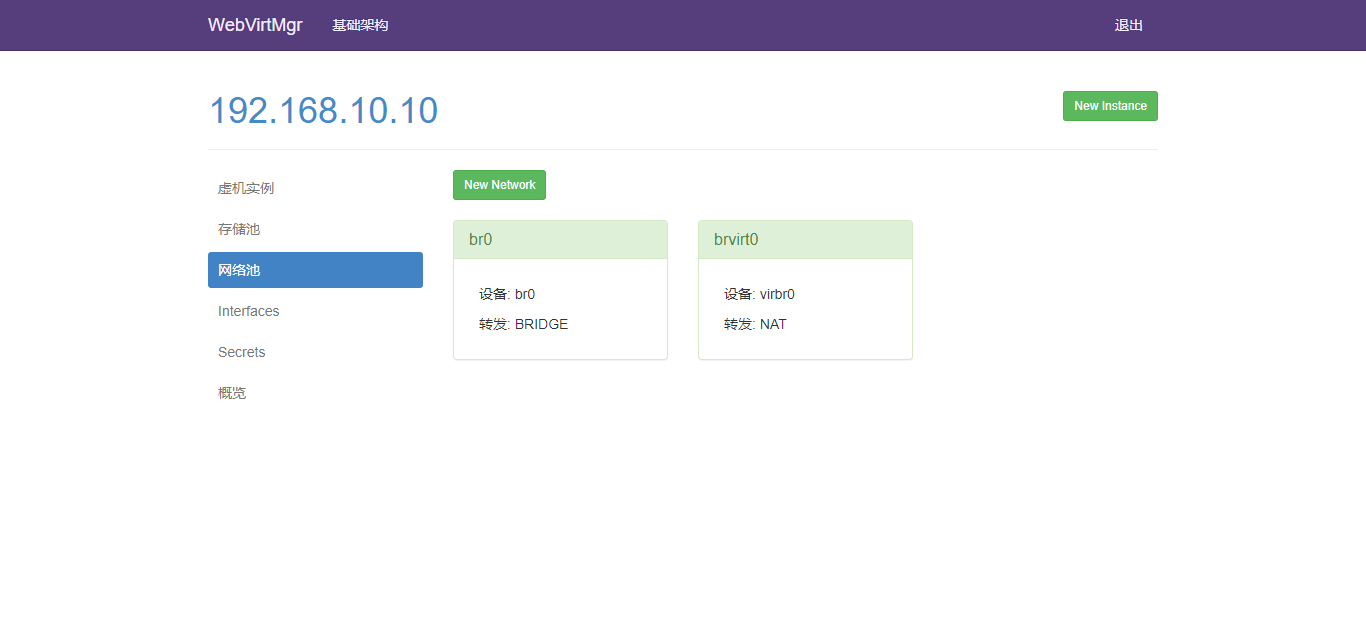
12 web访问
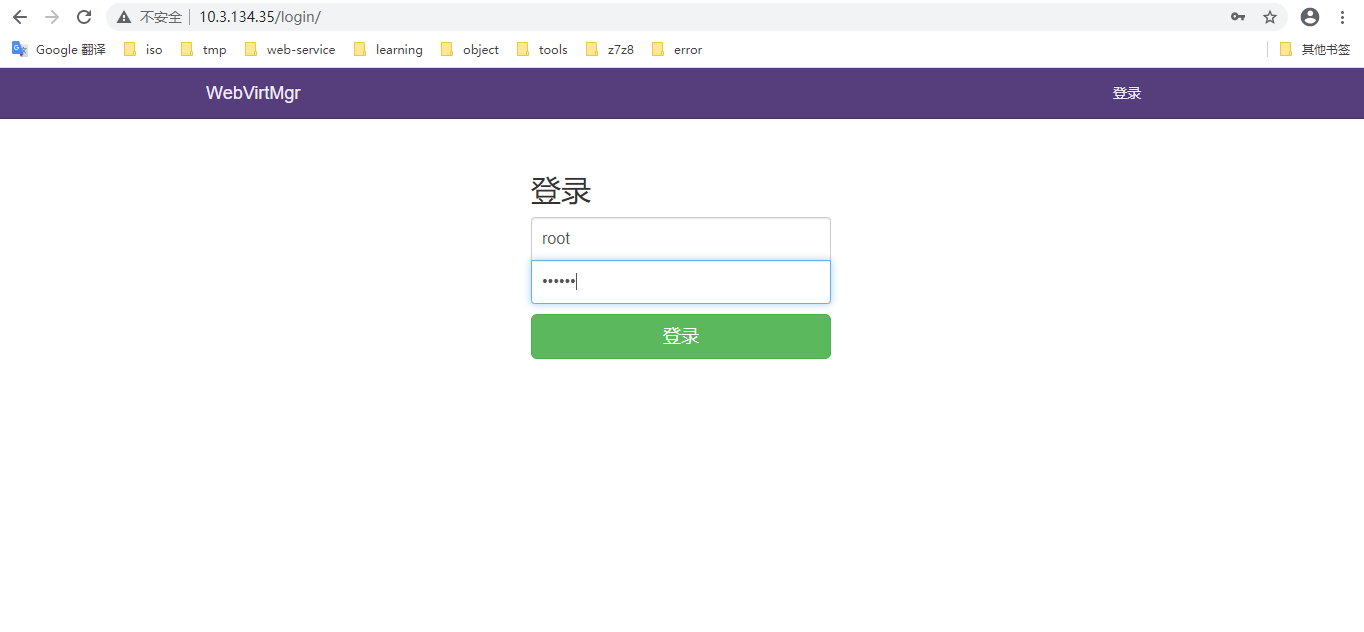
http://10.2.134.35/login/
这里用超级管理员登陆,只有超级管理员登陆后才能看到“基础构架”窗口
普通用户登陆后,只能看到“WebVirtMgr”一个窗口
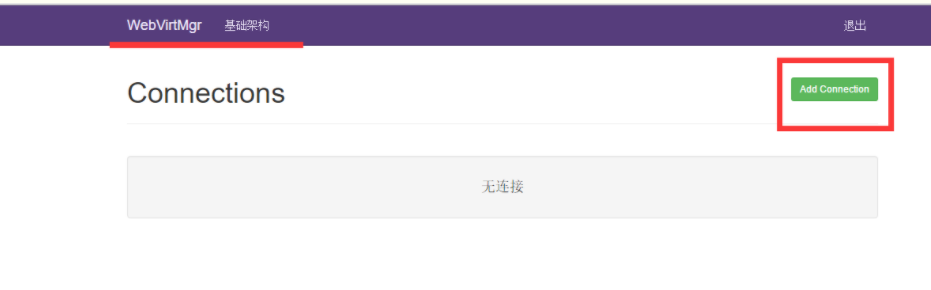
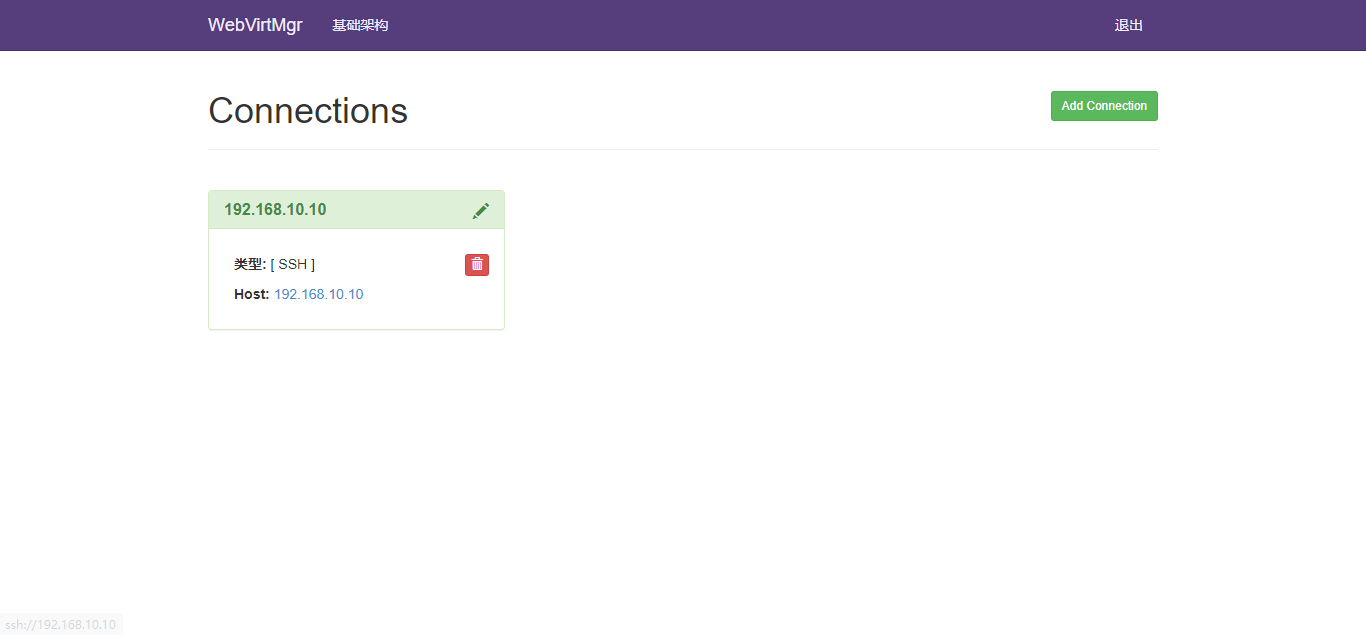
选择“SSH链接“,设置Label,IP,用户
注意:Label与IP要相同

以下为部分网友出现报错:
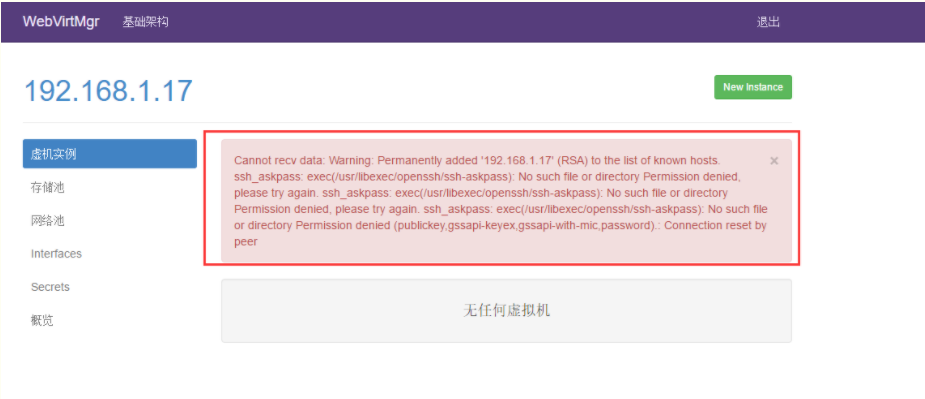
打开后,有报错!看来在上面使用ssh连接的配置环节有误所致!
解决措施:
1)在webvirtmgr服务器(服务端)上(这里kvm和WebVirtMgr部署在同一台机器上)创建nginx用户家目录(默认nginx服务安装时是没有nginx家目录的),生成nginx的公私钥
[root@openstack ops]# cd /home/
[root@openstack home]# mkdir nginx
[root@openstack home]# chown nginx.nginx nginx/
[root@openstack home]# chmod 700 nginx/ -R
[root@openstack home]# su - nginx -s /bin/bash
-bash-4.1$ ssh-keygen #期间输入yes后直接回车,回车
-bash-4.1$ touch ~/.ssh/config && echo -e "StrictHostKeyChecking=no\nUserKnownHostsFile=/dev/null" >> ~/.ssh/config
-bash-4.1$ chmod 0600 ~/.ssh/config
2)在kvm(客服端)服务器上(这里kvm和WebVirtMgr部署在同一台机器上)配置用户,这里默认采用root用户
---------------------------------------------------------------------------------------------------------------------
如果采用其他用户,比如webvirtmgr,操作如下:
[root@openstack ops]#useradd webvirtmgr
[root@openstack ops]#echo "123456" | passwd --stdin webvirtmgr
[root@openstack ops]#groupadd libvirt
[root@openstack ops]#usermod -G libvirt -a webvirtmgr
---------------------------------------------------------------------------------------------------------------------
3)在webvirtmgr服务器(服务端)上(这里kvm和WebVirtMgr部署在同一台机器上),将nginx用户的ssh-key上传到kvm服务器上(这里kvm和WebVirtMgr部署在同一台机器上)
[root@openstack ops]# su - nginx -s /bin/bash
-bash-4.1$ ssh-copy-id root@192.168.1.17
Warning: Permanently added '192.168.1.17' (RSA) to the list of known hosts.
root@192.168.1.17's password: #输入192.168.1.17即本机的root账号
Now try logging into the machine, with "ssh 'root@192.168.1.17'", and check in:
.ssh/authorized_keys
to make sure we haven't added extra keys that you weren't expecting.
---------------------------------------------------------------------------------------------------------------------
这里采用的是root用户,如果采用其他用户,比如上面假设的webvirtmgr用户,操作如下:
[root@openstack ops]#su - nginx -s /bin/bash
-bash-4.1$ssh-copy-id webvirtmgr@192.168.0.23
---------------------------------------------------------------------------------------------------------------------
4)在kvm(客服端)服务器上(这里kvm和WebVirtMgr部署在同一台机器上)配置 libvirt ssh授权
[root@openstack ops]# vim /etc/polkit-1/localauthority/50-local.d/50-libvirt-remote-access.pkla
[Remote libvirt SSH access]
Identity=unix-user:root #注意这里采用的是root用户
Action=org.libvirt.unix.manage
ResultAny=yes
ResultInactive=yes
ResultActive=yes
[root@openstack ops]# chown -R root.root /etc/polkit-1/localauthority/50-local.d/50-libvirt-remote-access.pkla
-------------------------------------------------------------------------------------------------------------------------------
这里采用的是root用户,如果采用其他用户,比如上面假设的webvirtmgr用户,操作如下:
[root@openstack ops]#vim /etc/polkit-1/localauthority/50-local.d/50-libvirt-remote-access.pkla
[Remote libvirt SSH access]
Identity=unix-user:webvirtmgr #这里就设定webvirtmgr用户
Action=org.libvirt.unix.manage
ResultAny=yes
ResultInactive=yes
ResultActive=yes
[root@openstack ops]#chown -R webvirtmgr.webvirtmgr /etc/polkit-1/localauthority/50-local.d/50-libvirt-remote-access.pkla
--------------------------------------------------------------------------------------------------------------------------------
5)重启 libvirtd 服务
/etc/init.d/libvirtd restart
web创建虚拟机;
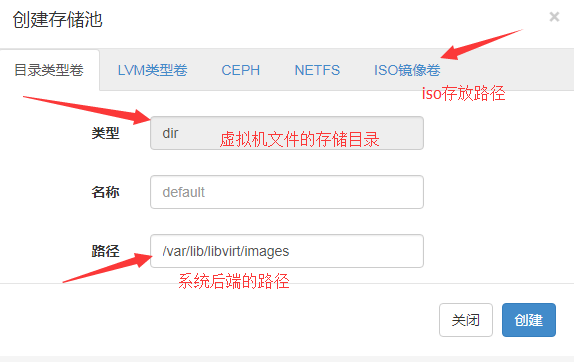
1:首先创建iso目录和虚拟机文件的存储目录
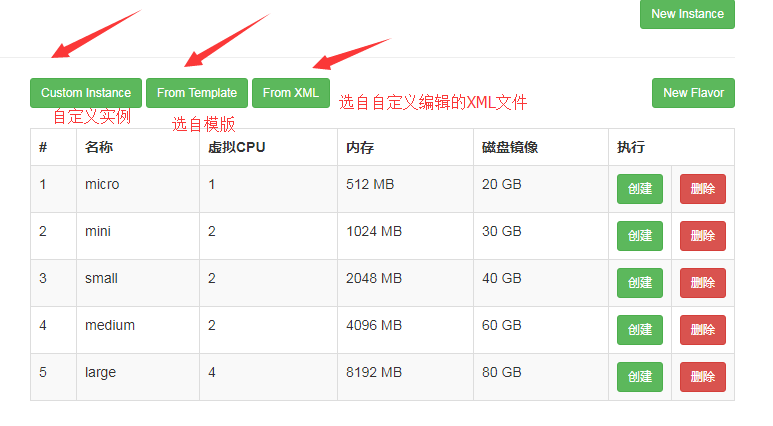
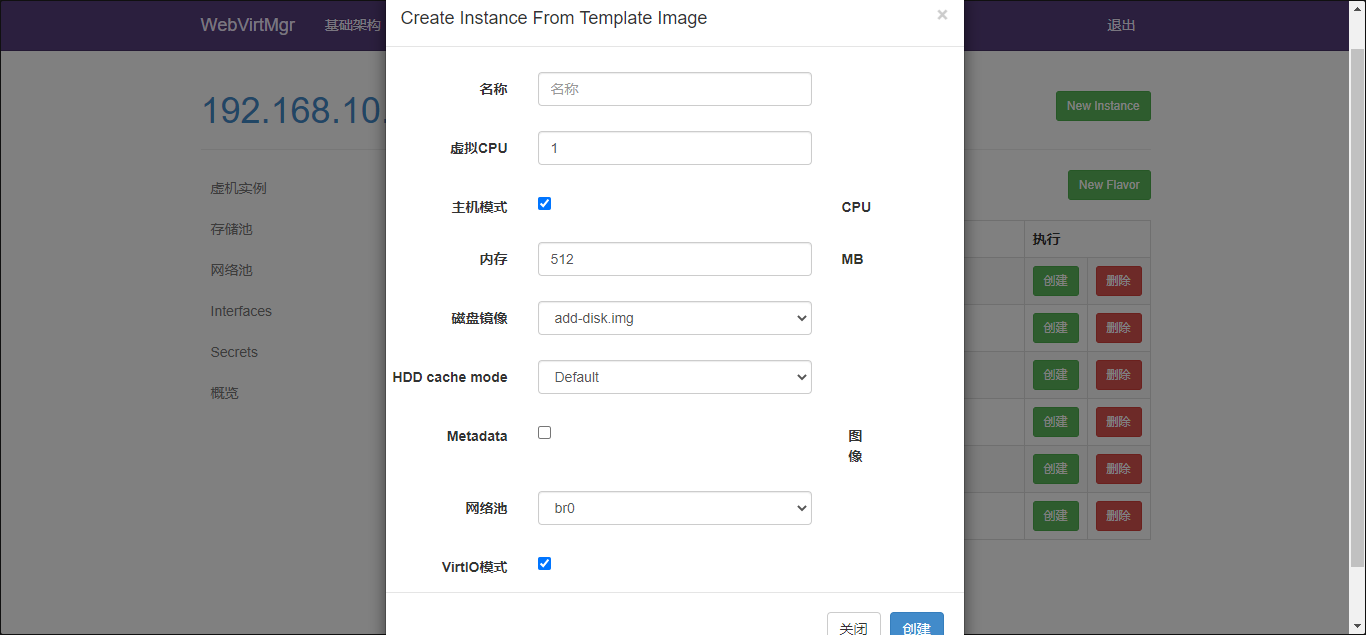
3:创建虚拟机


KVM虚拟化管理平台WebVirtMgr部署及使用的更多相关文章
- kvm虚拟化管理平台WebVirtMgr部署-完整记录(3)
继下面三篇文章完成了kvm虚拟化管理平台webvirtmgr环境的部署安装:kvm虚拟化管理平台WebVirtMgr部署-虚拟化环境安装-完整记录(0)kvm虚拟化管理平台WebVirtMgr部署-完 ...
- kvm虚拟化管理平台WebVirtMgr部署-完整记录(2)
继上一篇kvm虚拟化管理平台WebVirtMgr部署-完整记录(1),接下来说说WebVirtMgr的日常配置:添加宿主机,创建虚机,磁盘扩容,快照等具体操作记录如下: 一.配置宿主机1.登录WebV ...
- kvm虚拟化管理平台WebVirtMgr部署-完整记录(1)
公司机房有一台2U的服务器(64G内存,32核),由于近期新增业务比较多,测试机也要新增,服务器资源十分有限.所以打算在这台2U服务器上部署kvm虚拟化,虚出多台VM出来,以应对新的测试需求.当KVM ...
- centos7.2 kvm虚拟化管理平台WebVirtMgr部署
在服务器上部署kvm虚拟化,虚出多台VM出来,以应对新的测试需求.当KVM宿主机越来越多,需要对宿主机的状态进行调控,决定采用WebVirtMgr作为kvm虚拟化的web管理工具,图形化的WEB,让人 ...
- kvm虚拟化管理平台WebVirtMgr部署-完整记录(0)
打算部署kvm虚拟机环境,下面是虚拟化部署前的一些准备工作: 操作系统环境安装1)修改内核模式为兼容内核启动[root@ops ~]# uname -aLinux openstack 2.6.32-4 ...
- kvm虚拟化管理平台WebVirtMgr部署-完整记录(安装ubuntu虚拟机)-(5)
之前介绍了在webvirtmgr平台下创建centos,windows server 2008的虚拟机,今天说下创建ubuntu虚拟机的过程. (1)首先下载ubuntu16.04的iso镜像放到/u ...
- kvm虚拟化管理平台WebVirtMgr部署-完整记录(安装Windows虚拟机)-(4)
一.背景说明 在之前的篇章中,提到在webvirtmgr里安装linux系统的vm,下面说下安装windows系统虚拟机的操作记录: 由于KVM管理虚拟机的硬盘和网卡需要virtio驱动,linux ...
- 008-kvm虚拟化管理平台WebVirtMgr部署-完整记录(1)
公司机房有一台2U的服务器(64G内存,32核),由于近期新增业务比较多,测试机也要新增,服务器资源十分有限.所以打算在这台2U服务器上部署kvm虚拟化,虚出多台VM出来,以应对新的测试需求. 当KV ...
- [原创]KVM虚拟化管理平台的实现
KVM虚拟化管理平台的实现 源码链接:https://github.com/wsjhk/IaaS_admin.git 根据KVM虚拟化管理的要求,设计并实现网页操作管理KVM虚拟机.设计原理架构如下图 ...
随机推荐
- 基于docker部署jenkins
1. 拉镜像 和其他的部署的镜像的方式一样,通常是直接使用docker search jenkins 然后直接docker pull jenkins 此时,在安装插件的时候发现插件都安装失败,提示je ...
- Kafka和RocketMQ底层存储之那些你不知道的事
大家好,我是yes. 我们都知道 RocketMQ 和 Kafka 消息都是存在磁盘中的,那为什么消息存磁盘读写还可以这么快?有没有做了什么优化?都是存磁盘它们两者的实现之间有什么区别么?各自有什么优 ...
- linux_基础调优
1. 配置授时服务,使用阿里云的授时服务 echo -e "# update time\n*/5 * * * * /usr/sbin/ntpdate time1.aliyun.com &am ...
- C#编写一个较完整的记事本程序
开发环境 Visual Studio 2019 至少需安装 .NET桌面开发 创建项目并配置 创建窗体文件 配置项目名称及框架 设计界面 创建窗体文件,将控件摆放位置如下,参考系统自带的记事本程序 窗 ...
- Java安全之URLDNS链
Java安全之URLDNS链 0x00 前言 在学习Java的反序列化漏洞的时候,就不得不学习他的一个利用链.很多刚刚入门的对于利用链这个词可能比较陌生.那么这里先来了解一下Java反序列化和反序列化 ...
- JavaScript 将十进制数转换成格式类似于 0x000100 或 #000100 的十六进制数
将十进制数转换成格式类似于 0x000100 或 #000100 的十六进制数 1 <!DOCTYPE html> 2 <html> 3 <head> 4 < ...
- Prometheus第一篇:Prometheus架构解析
Prometheus是新一代的监控系统解决方案,原生支持云环境,和kubernetes无缝对接,的却是容器化监控解决方案的不二之选.当然对传统的监控方案也能够兼容,通过自定义或是用开源社区提供的各种e ...
- Angluar2 项目搭建
一 使用 Angular CLI 官方脚手架 1.安装 cli npm install -g @angular/cli 2.创建工作空间和初始应用 ng new my-app 二 tsLint 代码格 ...
- Acticiti流程引擎在已知当前流程定义id的情况下获取当前流程的所有信息(包括:节点和连线)
这里我们已知流程已经部署,我的需求是获取当前流程的所有任务节点,我使用instanceof关键字来进行匹配 private List<UserTask> getProcessUserTas ...
- shell脚本算术运算
自增自减操作 用let命令可以实现自增自减的命令,不需要$符号: #!/bin/bash set -e n=100 let n++ echo $n 还可以实现自增自减指定的值: #!/bin/bash ...