CentOS 安装hping3工具及安装遇到的错误及解决方法
hping是用于生成和解析TCPIP协议数据包的开源工具。创作者是Salvatore Sanfilippo。目前最新版是hping3,支持使用tcl脚本自动化地调用其API。hping是安全审计、防火墙测试等工作的标配工具。它不仅能发送 ICMP 回应请求,它还可以支持 TCP、UDP、ICMP 和 RAW-IP 协议,它有一个路由跟踪模式,能够在两个相互包含的通道之间传送文件。Hping 常被用于检测网络和主机,其功能非常强大,可在多种操作系统下运行,如 Linux,FreeBSD,NetBSD,OpenBSD,Solaris,MacOs X,Windows。因此用户可以灵活对目标机进行细致地探测。
http://www.hping.org/download.html
参数如下:
-H --help 显示帮助。

-v -VERSION 版本信息。

-c --count count 发送数据包的次数 关于countreached_timeout 可以在hping2.h里编辑。

-i --interval 包发送间隔时间(单位是毫秒)缺省时间是1秒,此功能在增加传输率上很重要,在idle/spoofing扫描时此功能也会被用到,你可以参考hping-howto获得更多信息-fast 每秒发10个数据包。

-n -nmeric 数字输出,象征性输出主机地址。

-q -quiet 退出。

-I --interface interface name 无非就是eth0之类的参数。

-v --verbose 显示很多信息,TCP回应一般如:len=46 ip=192.168.1.1 flags=RADF seq=0 ttl=255 id=0 win=0 rtt=0.4ms tos=0 iplen=40 seq=0 ack=1380893504 sum=2010 urp=0

-D --debug 进入debug模式当你遇到麻烦时,比如用HPING遇到一些不合你习惯的时候,你可以用此模式修改HPING,(INTERFACE DETECTION,DATA LINK LAYER ACCESS,INTERFACE SETTINGS,.......)

-z --bind 快捷键的使用。

-Z --unbind 消除快捷键。
default mode TCP (缺省使用TCP进行PING处理)

-O --rawip RAWIP模式,在此模式下HPING会发送带数据的IP头。

-1 --icmp ICMP模式,此模式下HPING会发送IGMP应答报,你可以用--ICMPTYPE --ICMPCODE选项发送其他类型/模式的ICMP报文。

-2 --udp UDP 模式,缺省下,HPING会发送UDP报文到主机的0端口,你可以用--baseport --destport --keep选项指定其模式。
-8 --scan SCAN mode. 扫描模式 指定扫描对应的端口。example:hping --scan 1-30,70-90 -S http://www.target.host

-9 --listen signatuer hping的listen模式,用此模式,HPING会接收指定的数据。

-a --spoof hostname 伪造IP攻击,防火墙就不会记录你的真实IP了,当然回应的包你也接收不到了。

-t --ttl time to live 可以指定发出包的TTL值。

-H --ipproto 在RAW IP模式里选择IP协议。

-w --WINID UNIX ,WINDIWS的id回应不同的,这选项可以让你的ID回应和WINDOWS一样。

-r --rel 更改ID的,可以让ID曾递减输出,详见HPING-HOWTO。

-F --FRAG 更改包的FRAG,这可以测试对方对于包碎片的处理能力,缺省的“virtual mtu”是16字节。

-x --morefrag 此功能可以发送碎片使主机忙于恢复碎片而造成主机的拒绝服务。

-y -dontfrag 发送不可恢复的IP碎片,这可以让你了解更多的MTU PATH DISCOVERY。

-G --fragoff fragment offset value set the fragment offset

-m --mtu mtu value 用此项后ID数值变得很大,50000没指定此项时3000-20000左右。

-G --rroute 记录路由,可以看到详悉的数据等等,最多可以经过9个路由,即使主机屏蔽了ICMP报文。

-C --ICMPTYPE type 指定ICMP类型,缺省是ICMP echo REQUEST。

-K --ICMPCODE CODE 指定ICMP代号,缺省0。

--icmp-ipver 把IP版本也插入IP头。

--icmp-iphlen 设置IP头的长度,缺省为5(32字节)。

--icmp-iplen 设置IP包长度。

--icmp-ipid 设置ICMP报文IP头的ID,缺省是RANDOM。

--icmp-ipproto 设置协议的,缺省是TCP。

-icmp-cksum 设置校验和。

-icmp-ts alias for --icmptype 13 (to send ICMP timestamp requests)

--icmp-addr Alias for --icmptype 17 (to send ICMP address mask requests)

-s --baseport source port hping 用源端口猜测回应的包,它从一个基本端口计数,每收一个包,端口也加1,这规则你可以自己定义。

-p --deskport [+][+]desk port 设置目标端口,缺省为0,一个加号设置为:每发送一个请求包到达后,端口加1,两个加号为:每发一个包,端口数加1。

--keep 上面说过了。

-w --win 发的大小和windows一样大,64BYTE。

-O --tcpoff Set fake tcp data offset. Normal data offset is tcphdrlen / 4.

-m --tcpseq 设置TCP序列数。

-l --tcpck 设置TCP ack。

-Q --seqnum 搜集序列号的,这对于你分析TCP序列号有很大作用。
一、安装
yum install libpcap-devel tc-devel

ln -s /usr/include/pcap-bpf.h /usr/include/net/bpf.h

wget http://www.hping.org/hping3-20051105.tar.gz

tar zxvf hping3-20051105.tar.gz

cd hping3-20051105

./configure

make

make install
在安装过程中报错:
出现问题:ars.h:190:2: error: #error “Please, edit Makefile and add -DBYTE_ORDER_(BIG|LITTLE)_ENDIAN”
解决办法:bytesex.h 在#if defined(__i386__) \ 前面添加 #define BYTE_ORDER_LITTLE_ENDIAN
出现问题:bytesex.h:22:3: 错误:#error can not find the byte order for this architecture, fix bytesex.h
解决方法:在#if defined(__i386__) \后面添加||defined(__x86_64__)\
出现问题:libpcap_stuff.c:20:21: 错误:net/bpf.h:没有那个文件或目录
解决办法:yum install -y libpcap libpcap-devel
二者都已安装,那么就无需yum安装了,只需ln -sf /usr/include/pcap-bpf.h /usr/include/net/bpf.h
出现问题:/usr/bin/ld: cannot find -ltcl
解决方法:yum -y install tcl tcl-devel
下面为安装时遇到的错误及解决方法:
[root@bqh-118 hping3-20051105]# ./configure

build byteorder.c...

create byteorder.h...

./configure: line 81: -: command not found

==> WARNING: no Tcl header files found!

--------------------------------------

system type: LINUX

LIBPCAP      : PCAP=-lpcap

PCAP_INCLUDE :

MANPATH      : /usr/local/man

USE_TCL      :

TCL_VER      :

TCL_INC      :

LIBTCL       : -ltcl -lm -lpthread

TCLSH        :

(to modify try configure --help)

--------------------------------------

creating Makefile...

creating dependences...

在包含自 ars.h:20 的文件中,

                 从 apd.c:19:

bytesex.h:22:3: 错误:#error can not find the byte order for this architecture, fix bytesex.h

在包含自 apd.c:19 的文件中:

ars.h:190:2: 错误:#error "Please, edit Makefile and add -DBYTE_ORDER_(BIG|LITTLE)_ENDIAN"

ars.h:254:2: 错误:#error "Please, edit Makefile and add -DBYTE_ORDER_(BIG|LITTLE)_ENDIAN"

ars.h:323:2: 错误:#error "Please, edit Makefile and add -DBYTE_ORDER_(BIG|LITTLE)_ENDIAN"
解决办法:在#if defined(__i386__) \后面添加||defined(__x86_64__)\
[root@bqh-118 hping3-20051105]# vim bytesex.h

/* Original code from the Linux C library */

/* Copyright (C) 2000,2001 Salvatore Sanfilippo <antirez@invece.org>

 * This code is under the original GNU C library license (GPL) */

/* $Id: bytesex.h,v 1.1.1.1 2003/08/31 17:23:48 antirez Exp $ */

#ifndef ARS_BYTESEX_H

#define ARS_BYTESEX_H

#define BYTE_ORDER_LITTLE_ENDIAN

#if     defined(__i386__) \

        ||defined(__x86_64__)\

        || defined(__alpha__) \

        || (defined(__mips__) && (defined(MIPSEL) || defined (__MIPSEL__)))

#define BYTE_ORDER_LITTLE_ENDIAN

#elif   defined(__mc68000__) \

        || defined (__sparc__) \

        || defined (__sparc) \

        || defined (__PPC__) \

        || defined (__BIG_ENDIAN__) \

        || (defined(__mips__) && (defined(MIPSEB) || defined (__MIPSEB__)))

#define BYTE_ORDER_BIG_ENDIAN

#else

# error can not find the byte order for this architecture, fix bytesex.h

#endif

#endif /* ARS_BYTESEX_H */
继续安装
[root@bqh-118 hping3-20051105]# make

gcc -c -O2 -Wall    -g  main.c

gcc -c -O2 -Wall    -g  getifname.c

getifname.c: 在函数‘get_output_if’中:

getifname.c:343: 警告:传递‘getsockname’的参数 3 给指针时,目标与指针符号不一致

/usr/include/sys/socket.h:119: 附注:需要类型‘socklen_t * __restrict__’,但实参的类型为‘int *’

getifname.c: 在函数‘get_if_name’中:

getifname.c:61: 警告:此函数中的‘sa.sin_addr.s_addr’在使用前可能未初始化

gcc -c -O2 -Wall    -g  getlhs.c

gcc -c -O2 -Wall    -g  parseoptions.c

gcc -c -O2 -Wall    -g  datafiller.c

gcc -c -O2 -Wall    -g  datahandler.c

gcc -c -O2 -Wall    -g  binding.c

gcc -c -O2 -Wall    -g  logicmp.c

gcc -c -O2 -Wall    -g  waitpacket.c

gcc -c -O2 -Wall    -g  sendip.c

gcc -c -O2 -Wall    -g  sendicmp.c

gcc -c -O2 -Wall    -g  sendudp.c

gcc -c -O2 -Wall    -g  sendtcp.c

gcc -c -O2 -Wall    -g  cksum.c

gcc -c -O2 -Wall    -g  statistics.c

gcc -c -O2 -Wall    -g  version.c

gcc -c -O2 -Wall    -g  listen.c

gcc -c -O2 -Wall    -g  sendhcmp.c

gcc -c -O2 -Wall    -g  rtt.c

gcc -c -O2 -Wall    -g  relid.c

gcc -c -O2 -Wall    -g  sendip_handler.c

gcc -c -O2 -Wall    -g  libpcap_stuff.c

libpcap_stuff.c: 在函数‘pcap_recv’中:

libpcap_stuff.c:61: 警告:对指针赋值时目标与指针符号不一致

gcc -c -O2 -Wall    -g  ip_opt_build.c

gcc -c -O2 -Wall    -g  display_ipopt.c

gcc -c -O2 -Wall    -g  sendrawip.c

gcc -c -O2 -Wall    -g  send.c

gcc -c -O2 -Wall    -g  arsglue.c

gcc -c -O2 -Wall    -g  random.c

gcc -c -O2 -Wall    -g  scan.c

scan.c: 在函数‘receiver’中:

scan.c:458: 警告:对指针赋值时目标与指针符号不一致

gcc -c -O2 -Wall    -g  hstring.c

gcc -c -O2 -Wall    -g  script.c

gcc -c -O2 -Wall    -g  interface.c

gcc -c -O2 -Wall    -g  adbuf.c

adbuf.c: 在函数‘adbuf_addchar’中:

adbuf.c:130: 警告:初始化指针时目标与指针符号不一致

gcc -c -O2 -Wall    -g  hex.c

gcc -c -O2 -Wall    -g  apdutils.c

gcc -c -O2 -Wall    -g  sbignum.c

gcc -c -O2 -Wall    -g  sbignum-tables.c

gcc -c -O2 -Wall    -g  ars.c

ars.c: 在函数‘ars_multi_cksum’中:

ars.c:485: 警告:与字面字符串比较的结构是不可预测的

gcc -c -O2 -Wall    -g  apd.c

apd.c: 在函数‘ars_decode_hex’中:

apd.c:823: 警告:返回指针时目标与指针符号不一致

apd.c: 在函数‘ars_decode_string’中:

apd.c:852: 警告:返回指针时目标与指针符号不一致

gcc -c -O2 -Wall    -g  split.c

gcc -c -O2 -Wall    -g  rapd.c

gcc -o hping3 -O2 -Wall    -g main.o getifname.o getlhs.o parseoptions.o datafiller.o datahandler.

o gethostname.o binding.o getusec.o opensockraw.o logicmp.o waitpacket.o resolve.o sendip.o sendicmp.o sendudp.o sendtcp.o cksum.o statistics.o usage.o version.o antigetopt.o sockopt.o listen.o sendhcmp.o memstr.o rtt.o relid.o sendip_handler.o libpcap_stuff.o memlockall.o memunlockall.o memlock.o memunlock.o ip_opt_build.o display_ipopt.o sendrawip.o signal.o send.o strlcpy.o arsglue.o random.o scan.o hstring.o script.o interface.o adbuf.o hex.o apdutils.o sbignum.o sbignum-tables.o ars.o apd.o split.o rapd.o -L/usr/local/lib -lpcap  -ltcl -lm -lpthread/usr/bin/ld: cannot find -ltcl

collect2: ld 返回 1

make: *** [hping3] 错误 1
解决方法: ln -s /usr/include/pcap.h /usr/include/net/bpf.h && yum -y install tcl tcl-devel
继续安装
[root@bqh-118 hping3-20051105]# make

gcc -o hping3 -O2 -Wall    -g main.o getifname.o getlhs.o parseoptions.o datafiller.o datahandler.

o gethostname.o binding.o getusec.o opensockraw.o logicmp.o waitpacket.o resolve.o sendip.o sendicmp.o sendudp.o sendtcp.o cksum.o statistics.o usage.o version.o antigetopt.o sockopt.o listen.o sendhcmp.o memstr.o rtt.o relid.o sendip_handler.o libpcap_stuff.o memlockall.o memunlockall.o memlock.o memunlock.o ip_opt_build.o display_ipopt.o sendrawip.o signal.o send.o strlcpy.o arsglue.o random.o scan.o hstring.o script.o interface.o adbuf.o hex.o apdutils.o sbignum.o sbignum-tables.o ars.o apd.o split.o rapd.o -L/usr/local/lib -lpcap  -ltcl -lm -lpthread

./hping3 -v

hping version 3.0.0-alpha-1 ($Id: release.h,v 1.4 2004/04/09 23:38:56 antirez Exp $)

NO TCL scripting support compiled in

use `make strip' to strip hping3 binary

use `make install' to install hping3
解决方法:make strip && make install
继续安装
[root@bqh-118 hping3-20051105]# make install

cp -f hping3 /usr/sbin/

chmod 755 /usr/sbin/hping3

ln -s /usr/sbin/hping3 /usr/sbin/hping

ln -s /usr/sbin/hping3 /usr/sbin/hping2

@@@@@@ WARNING @@@@@@

Can't install the man page: /usr/local/man/man8 does not exist
ok安装成功!下面我们测试一下是否可用:
[root@bqh-118 hping3-20051105]# hping3 -c 4 -n -i 2 192.168.43.117

HPING 192.168.43.117 (eth0 192.168.43.117): NO FLAGS are set, 40 headers + 0 data bytes

len=46 ip=192.168.43.117 ttl=64 DF id=0 sport=0 flags=RA seq=0 win=0 rtt=0.3 ms

len=46 ip=192.168.43.117 ttl=64 DF id=0 sport=0 flags=RA seq=1 win=0 rtt=0.5 ms

len=46 ip=192.168.43.117 ttl=64 DF id=0 sport=0 flags=RA seq=2 win=0 rtt=0.5 ms

len=46 ip=192.168.43.117 ttl=64 DF id=0 sport=0 flags=RA seq=3 win=0 rtt=0.5 ms

--- 192.168.43.117 hping statistic ---

4 packets tramitted, 4 packets received, 0% packet loss

round-trip min/avg/max = 0.3/0.4/0.5 ms
注:
-c 发送4个报文 -n 不进行名称解析 -i 包发送时间间隔。
显示信息解释:len,返 回ip报文大小;ttl; id,IP的ID域;sport,源端口,flags,返回的IP报设置的TCP标志 (R:RESET,A:ACK;S:SYN;F:FIN;P:PUSH;U:URGENT);seq:序列号;win:tcp窗口大小;rtt:往返 时,EIGRP似乎有这个设置。
若探测的主机阻止了ICMP报文了,也可以显示对方主机是否运行的信息,例如:
我们在另一台机器上iptables阻止icmp包响应。
[root@bqh-117 ~]# iptables -A INPUT -p icmp --icmp-type 8 -s 0/0 -j DROP

[root@bqh-117 ~]# iptables -L

Chain INPUT (policy ACCEPT)

target     prot opt source               destination

DROP       icmp --  anywhere             anywhere            icmp echo-request

Chain FORWARD (policy ACCEPT)

target     prot opt source               destination

Chain OUTPUT (policy ACCEPT)

target     prot opt source               destination
现在我们ping192.168.43.117机器发现已被阻止了
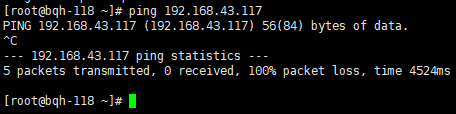
我们用hping3命令来测试一下:
[root@bqh-118 ~]# hping3 192.168.43.117

HPING 192.168.43.117 (eth0 192.168.43.117): NO FLAGS are set, 40 headers + 0 data bytes

len=46 ip=192.168.43.117 ttl=64 DF id=0 sport=0 flags=RA seq=0 win=0 rtt=0.3 ms

len=46 ip=192.168.43.117 ttl=64 DF id=0 sport=0 flags=RA seq=1 win=0 rtt=0.4 ms

len=46 ip=192.168.43.117 ttl=64 DF id=0 sport=0 flags=RA seq=2 win=0 rtt=0.4 ms

len=46 ip=192.168.43.117 ttl=64 DF id=0 sport=0 flags=RA seq=3 win=0 rtt=0.5 ms

^C

--- 192.168.43.117 hping statistic ---

4 packets tramitted, 4 packets received, 0% packet loss

round-trip min/avg/max = 0.3/0.4/0.5 ms
使用Hping3测试防火墙规则
使用Hping3指定各种数据包字段,依次对防火墙进行详细测试,详情请跳:http://0daysecurity.com/articles/hping3_examples.html
hping有类似NMAP的方法来检测并收集关于潜在的防火墙的规则和能力的信息。如果一个主机对ping没有任何相应,而对hping有响应,假定目标的主机为192.168.43.117,一旦主机对hping作出了响应,那么下一步我们先用nmap先进行一个端口扫描,
当然这个hping2也可以作扫描。如下:
[root@bqh-118 ~]# hping2 --scan 21-25 -S 192.168.43.117

Scanning 192.168.43.117 (192.168.43.117), port 21-25

5 ports to scan, use -V to see all the replies

+----+-----------+---------+---+-----+-----+-----+

|port| serv name |  flags  |ttl| id  | win | len |

+----+-----------+---------+---+-----+-----+-----+

   22 ssh        : .S..A...  64     0 14600    46

All replies received. Done.

Not responding ports:

[root@bqh-118 ~]# nmap -sT -P0 -p 21-25 192.168.43.117

Starting Nmap 5.51 ( http://nmap.org ) at 2019-06-08 06:42 CST

Nmap scan report for bqh-117 (192.168.43.117)

Host is up (0.00018s latency).

PORT   STATE  SERVICE

21/tcp closed ftp

22/tcp open   ssh

23/tcp closed telnet

24/tcp closed priv-mail

25/tcp closed smtp

Nmap done: 1 IP address (1 host up) scanned in 0.03 seconds
以上信息显示除了ssh端口外,其他端口被阻塞.
然后可以试试用hping向各个被阻塞的端口发送空的报文.用-p的开关,可以对指定的目的端口进行hping
[root@bqh-118 ~]# hping2 -c 2 -n -i 2 -p 21 192.168.43.117

HPING 192.168.43.117 (eth0 192.168.43.117): NO FLAGS are set, 40 headers + 0 data bytes

len=46 ip=192.168.43.117 ttl=64 DF id=0 sport=21 flags=RA seq=0 win=0 rtt=0.3 ms

len=46 ip=192.168.43.117 ttl=64 DF id=0 sport=21 flags=RA seq=1 win=0 rtt=0.4 ms

--- 192.168.43.117 hping statistic ---

2 packets tramitted, 2 packets received, 0% packet loss

round-trip min/avg/max = 0.3/0.3/0.4 ms

[root@bqh-118 ~]# hping2 -c 2 -n -i 2 -p 23 192.168.43.117

HPING 192.168.43.117 (eth0 192.168.43.117): NO FLAGS are set, 40 headers + 0 data bytes

len=46 ip=192.168.43.117 ttl=64 DF id=0 sport=23 flags=RA seq=0 win=0 rtt=0.2 ms

len=46 ip=192.168.43.117 ttl=64 DF id=0 sport=23 flags=RA seq=1 win=0 rtt=0.5 ms

--- 192.168.43.117 hping statistic ---

2 packets tramitted, 2 packets received, 0% packet loss

round-trip min/avg/max = 0.2/0.3/0.5 ms

[root@bqh-118 ~]# hping2 -c 2 -n -i 2 -p 24 192.168.43.117

HPING 192.168.43.117 (eth0 192.168.43.117): NO FLAGS are set, 40 headers + 0 data bytes

len=46 ip=192.168.43.117 ttl=64 DF id=0 sport=24 flags=RA seq=0 win=0 rtt=0.2 ms

len=46 ip=192.168.43.117 ttl=64 DF id=0 sport=24 flags=RA seq=1 win=0 rtt=0.4 ms

--- 192.168.43.117 hping statistic ---

2 packets tramitted, 2 packets received, 0% packet loss

round-trip min/avg/max = 0.2/0.3/0.4 ms

[root@bqh-118 ~]# hping2 -c 2 -n -i 2 -p 25 192.168.43.117

HPING 192.168.43.117 (eth0 192.168.43.117): NO FLAGS are set, 40 headers + 0 data bytes

len=46 ip=192.168.43.117 ttl=64 DF id=0 sport=25 flags=RA seq=0 win=0 rtt=0.3 ms

len=46 ip=192.168.43.117 ttl=64 DF id=0 sport=25 flags=RA seq=1 win=0 rtt=0.4 ms

--- 192.168.43.117 hping statistic ---

2 packets tramitted, 2 packets received, 0% packet loss

round-trip min/avg/max = 0.3/0.4/0.4 ms
端口21 23 24 25 获得了RST/ACK响应.这说明,虽然这些端口被禁止PING,但没有工具在该端口上监听,然而为什么NMAP没有得到响应,因为NMAP虽然使用 TCP连接,但它在TCP报头中设置了TCP SYN标记位,而HPING 使用了空标记的报文,这就告诉我们
说,在主机192.168.18.117上只阻塞进入的TCP连接。
接下来使用hping创建一个SYN报文然后将其发送到5个端口再测试。
[root@bqh-118 ~]# hping2 -c 2 -n -i 2 -S -p 21 192.168.43.117

HPING 192.168.43.117 (eth0 192.168.43.117): S set, 40 headers + 0 data bytes

len=46 ip=192.168.43.117 ttl=64 DF id=0 sport=21 flags=RA seq=0 win=0 rtt=0.4 ms

len=46 ip=192.168.43.117 ttl=64 DF id=0 sport=21 flags=RA seq=1 win=0 rtt=0.4 ms

--- 192.168.43.117 hping statistic ---

2 packets tramitted, 2 packets received, 0% packet loss

round-trip min/avg/max = 0.4/0.4/0.4 ms

[root@bqh-118 ~]# hping2 -c 2 -n -i 2 -S -p 22 192.168.43.117

HPING 192.168.43.117 (eth0 192.168.43.117): S set, 40 headers + 0 data bytes

len=46 ip=192.168.43.117 ttl=64 DF id=0 sport=22 flags=SA seq=0 win=14600 rtt=0.3 ms

len=46 ip=192.168.43.117 ttl=64 DF id=0 sport=22 flags=SA seq=1 win=14600 rtt=0.6 ms

--- 192.168.43.117 hping statistic ---

2 packets tramitted, 2 packets received, 0% packet loss

round-trip min/avg/max = 0.3/0.4/0.6 ms

[root@bqh-118 ~]# hping2 -c 2 -n -i 2 -S -p 23 192.168.43.117

HPING 192.168.43.117 (eth0 192.168.43.117): S set, 40 headers + 0 data bytes

len=46 ip=192.168.43.117 ttl=64 DF id=0 sport=23 flags=RA seq=0 win=0 rtt=0.3 ms

len=46 ip=192.168.43.117 ttl=64 DF id=0 sport=23 flags=RA seq=1 win=0 rtt=0.5 ms

--- 192.168.43.117 hping statistic ---

2 packets tramitted, 2 packets received, 0% packet loss

round-trip min/avg/max = 0.3/0.4/0.5 ms

[root@bqh-118 ~]# hping2 -c 2 -n -i 2 -S -p 24 192.168.43.117

HPING 192.168.43.117 (eth0 192.168.43.117): S set, 40 headers + 0 data bytes

len=46 ip=192.168.43.117 ttl=64 DF id=0 sport=24 flags=RA seq=0 win=0 rtt=0.3 ms

len=46 ip=192.168.43.117 ttl=64 DF id=0 sport=24 flags=RA seq=1 win=0 rtt=0.4 ms

--- 192.168.43.117 hping statistic ---

2 packets tramitted, 2 packets received, 0% packet loss

round-trip min/avg/max = 0.3/0.4/0.4 ms

[root@bqh-118 ~]# hping2 -c 2 -n -i 2 -S -p 25 192.168.43.117

HPING 192.168.43.117 (eth0 192.168.43.117): S set, 40 headers + 0 data bytes

len=46 ip=192.168.43.117 ttl=64 DF id=0 sport=25 flags=RA seq=0 win=0 rtt=0.2 ms

len=46 ip=192.168.43.117 ttl=64 DF id=0 sport=25 flags=RA seq=1 win=0 rtt=0.5 ms

--- 192.168.43.117 hping statistic ---

2 packets tramitted, 2 packets received, 0% packet loss

round-trip min/avg/max = 0.2/0.3/0.5 ms
只有22端口响应,说明SSH端口是开放的,但有工具在上面监听,该端口没有进行过滤。
-----Hping 是功能最强大的一款工具,可以测试防火墙功能、端口扫描、Idle 扫描、拒绝服务攻击、木马功能等。
参考资料:
https://docs.microsoft.com/en-us/sysinternals/downloads/psping
http://zhjwpku.com/2016/12/17/tcpping-hping-mtr.html
https://www.slashroot.in/what-tcp-ping-and-how-it-usedyouy
http://tookdes.org/geek/archives/tcping-intro.html
CentOS 安装hping3工具及安装遇到的错误及解决方法的更多相关文章
- window10 安装出现the error code is 2503错误的解决方法
window10 安装出现the error code is 2503错误的解决方法: 设置 C:\WINDOWS\TEMP的权限
- ORACLE安装过程中检查步骤出现的错误和解决方法【转】
Checking operating system requirements ...Expected result: One of redhat-3,redhat-4,SuSE-9,asianux-1 ...
- OpenNMS在安装”我找不到jrrd.dll“错误的解决方法
在Windows 2003 Server(虚拟机)安装OpenNMS.找不到jrrd.dll错误.尝试从学习OpenNMS官网下载jrrd-1.0.7.tar.gz,我们没有发现标dll文件,编译需要 ...
- 安装virtualbox出现2503、2502的错误提示解决方法
安装virtualbox右键选择以管理员的身份打开即可
- Mysql安装过程中出现apply security settings错误的解决方法
在学习Mysql的过程中,首先要安装Mysql.然而在第一遍安装过程中难免会出现安装错误的时候,当卸载后第二次安装(或者第三次甚至更多次)的时候,往往在安装最后一步会出现apply security ...
- 安装gem invalid date format in specification错误的解决方法
别的不说,报错信息直接贴图: 解决方法: 1.找到你环境目录下的spec,例如:D:\Ruby187\lib\ruby\gems\1.8\specifications. 2.找到引起错误文件的gems ...
- Windows 7 64bit上安装Oracle Database 12c [INS-30131] 错误的解决方法
Windows 7 64bit上安装Oracle Database 12c,出现以下错误: 解决方法: 第一步:控制面板>所有控制面板项>管理工具>服务>SERVER 启动 ...
- 在VMware 虚拟机中配置 windows2003系统的NLB负载均衡;0x800706D5错误的解决方法;没有接口可用于安装新的群集
首先在VM里面 我装了3个2003的系统, 分别为 webservice01 ,webservice 02 , 以及 webview 这3台. 前面两台用于配置负载均衡,后面的webview就是 ...
- 安装oracle11g INS-30131执行安装程序验证所需的初始设置失败的解决方法
安装oracle11g [INS-30131] 执行安装程序验证所需的初始设置失败. 解决方法 第一步:控制面板>所有控制面板项>管理工具>服务>SERVER 启动 TCP/I ...
随机推荐
- tcpdump抓包代码
tcpdump - tcp[:]=:]=0x4854 or tcp 抓出来的包可以导入wireshark分析 以上代码曾经在ios越狱机器上使用,用于抓包,具体也记不起来了 导入wireshark效果
- 【ARTS】01_37_左耳听风-201900722~201900728
ARTS: Algrothm: leetcode算法题目 Review: 阅读并且点评一篇英文技术文章 Tip/Techni: 学习一个技术技巧 Share: 分享一篇有观点和思考的技术文章 Algo ...
- MOQ中CallBase的作用
当使用Moq来Mock一个具体的类,类里的方法为virtual时,Moq会将当前类,所有的virtual方法默认重写成空实现. 如果我们想要访问真实的代码,有两种方法 1.在创建Mock时,设置Cal ...
- from表单上提交的数据都去了哪里呢?
from表单上提交的数据都去了哪里呢? 一个简单的from案例如下: <form> 姓名:<br> <input type="text" name=& ...
- 【miscellaneous】各种音视频编解码学习详解
编解码学习笔记(一):基本概念 媒体业务是网络的主要业务之间.尤其移动互联网业务的兴起,在运营商和应用开发商中,媒体业务份量极重,其中媒体的编解码服务涉及需求分析.应用开发.释放license收费等等 ...
- php utf8 gbk 数组 互转
这些都是工作中常用的 前几年写过 但没有记录的习惯,后边有要用到麻烦,现在记录下 以后直接拿来用 数组里的 utf8_to_gbk 方法 是上一篇写的 直接调用 public static funct ...
- Leetcode739 - Daily Temperatures
题目描述 Leetcode 739 本题考察了栈的使用.题目输入是一段温度值列表,然后返回一个列表.这个列表包含了输入列表中每一天还有多少天温度升高.如果未来没有升高的情况,则输入 0. # Exam ...
- nginx 工作原理总结
1. Nginx的模块与工作原理 Nginx由内核和模块组成,其中,内核的设计非常微小和简洁,完成的工作也非常简单,仅仅通过查找配置文件将客户端请求映射到一个location block(locat ...
- CentOS7.5下安装nginx --项目部署
1.安装ngnix一些依赖包 [root@VM_39_157_centos ~]# yum -y install gcc gcc-c++ openssl-devel pcre-devel httpd- ...
- mysql 按照配置文件启动
有时,我们的机器上面装了很多个mysql,但只有一个3306端口,其余的mysql服务器需要重新指定端口.我们需要多个配置文件来启动它们.那么我们怎么通过指定配置文件的方式来启动呢? 例如,按 ...