canvas的基本使用
一、定义
- canvas最早是由Apple引入Webkit的,<canvas>元素包含于HTML5中
- HTML5的canvas元素使用JavaScript在网页上绘制图像,画布是一个矩形区域,可以控制其每一像素,拥有多种绘制路径、矩形、圆形、字符以及添加图像的方法
二、基本使用(步骤)
①创建canvas元素,向HTML5页面添加canvas元素(准备画布)
②设置画布宽度和高度(默认是白色的,大小默认300*150)
③通过JavaScript来绘制(在什么地方画)
④准备绘制工具(获取上下文,指一种环境getContext('2d'))
⑤利用工具绘图:移动画笔(moveTo),规定轨迹(lineTo),描边(stroke)或者填充(fill)....
三、体验
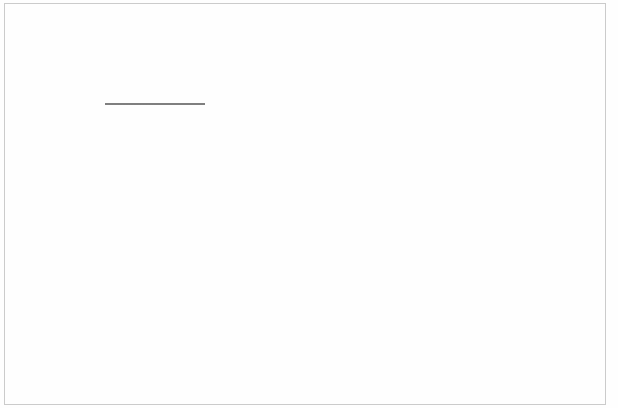
①画一条直线
- 关于画布大小的书写位置:设置画布大小在canvas的行内设置,不建议内嵌式或者外链式
- 关于轨迹的理解:轨迹是看不见的,只有通过描边或者填充才能看见形态
- 关于2d的说明:目前只有2d,未来可能出现3d,目前的网页的3d效果通常是使用Web GL制作的
<!DOCTYPE html>

<html lang="en">

<head>

    <meta charset="UTF-8">

    <title>canvas的基本使用</title>

    <style>

        canvas{

            border: 1px solid #ccc;

        }

    </style>

</head>

<body>

    <canvas width="600" height="400"></canvas>

    <script>

        var myCanvas=document.querySelector("canvas");

        var ctx=myCanvas.getContext('2d');

        ctx.moveTo(100,100);

        ctx.lineTo(200,100);

        ctx.stroke();

    </script>

</body>

</html>
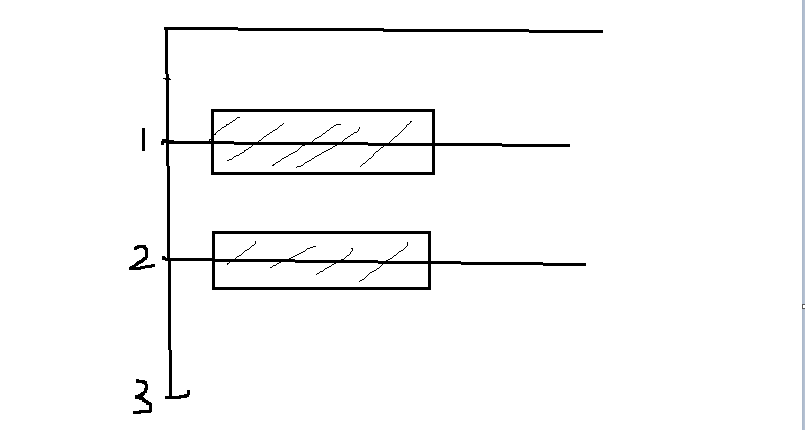
②画两条平行线
- 线条的默认大小和颜色:默认宽度是1px,默认颜色是黑色
- 线条模糊的原因:线条的大小是1像素,是画在画布像素刻度中间的位置,所以会出现不饱和的情况,颜色偏灰,并且因为屏幕的最小单位是1px,所以画布显示的大小会略大
<!DOCTYPE html>

<html lang="en">

<head>

    <meta charset="UTF-8">

    <title>canvas的基本使用</title>

    <style>

        canvas{

            border: 1px solid #ccc;

        }

    </style>

</head>

<body>

    <canvas width="600" height="400"></canvas>

    <script>

        var myCanvas=document.querySelector("canvas");

        var ctx=myCanvas.getContext('2d');

        ctx.moveTo(100,100-0.5);

        ctx.lineTo(300,100-0.5);

        ctx.moveTo(100,200);

        ctx.lineTo(300,200);

        ctx.stroke();

    </script>

</body>

</html>

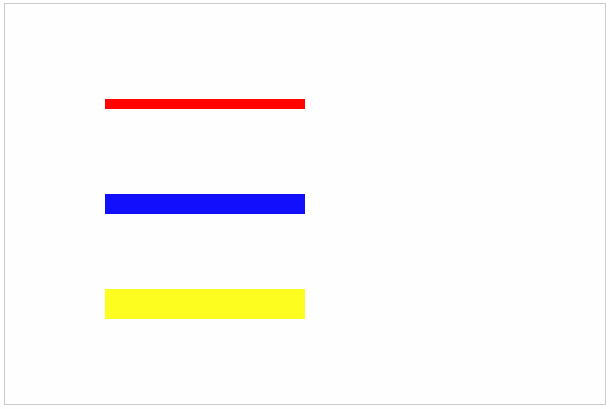
③画三条不同颜色和宽度的平行线
- 颜色:strokeStyle=‘ 颜色’
- 宽度:lineWidth=‘ num ’ (没有单位)
- 解决样式覆盖问题:开启新的路径 beginPath()
<!DOCTYPE html>

<html lang="en">

<head>

    <meta charset="UTF-8">

    <title>canvas的基本使用</title>

    <style>

        canvas{

            border: 1px solid #ccc;

        }

    </style>

</head>

<body>

    <canvas width="600" height="400"></canvas>

    <script>

        var myCanvas=document.querySelector("canvas");

        var ctx=myCanvas.getContext('2d');

        // 红色 10px

        ctx.beginPath();

        ctx.moveTo(100,100);

        ctx.lineTo(300,100);

        ctx.strokeStyle='red';

        ctx.lineWidth='10';

        ctx.stroke();

        // 蓝色 20px

        ctx.beginPath();

        ctx.moveTo(100,200);

        ctx.lineTo(300,200);

        ctx.strokeStyle='blue';

        ctx.lineWidth='20';

        ctx.stroke();

        // 黄色 30px

        ctx.beginPath();

        ctx.moveTo(100,300);

        ctx.lineTo(300,300);

        ctx.strokeStyle='yellow';

        ctx.lineWidth='30';

        ctx.stroke();

    </script>

</body>

</html>
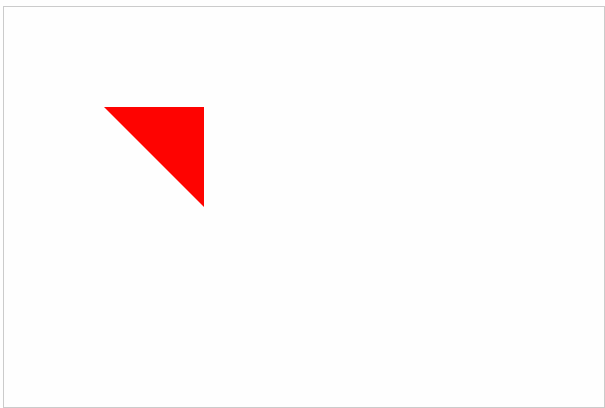
④绘制一个填充颜色的三角形
- 填充 :fill( )
- 填充颜色: fillStyle=‘颜色’
- 描边情况下起始点和lineto的结束点无法完全闭合(缺角)的解决办法:closePath( ) 自动闭合
<!DOCTYPE html>

<html lang="en">

<head>

    <meta charset="UTF-8">

    <title>canvas的基本使用</title>

    <style>

        canvas{

            border: 1px solid #ccc;

        }

    </style>

</head>

<body>

    <canvas width="600" height="400"></canvas>

    <script>

        var myCanvas=document.querySelector("canvas");

        var ctx=myCanvas.getContext('2d');

        ctx.moveTo(100,100);

        ctx.lineTo(200,100);

        ctx.lineTo(200,200);

        //ctx.lineTo(100,100);无法完全闭合

        ctx.closePath();

        //ctx.strokeStyle='red';

        ctx.fillStyle='red';

        //ctx.lineWidth='10';

        //ctx.stroke();

        ctx.fill();

    </script>

</body>

</html>
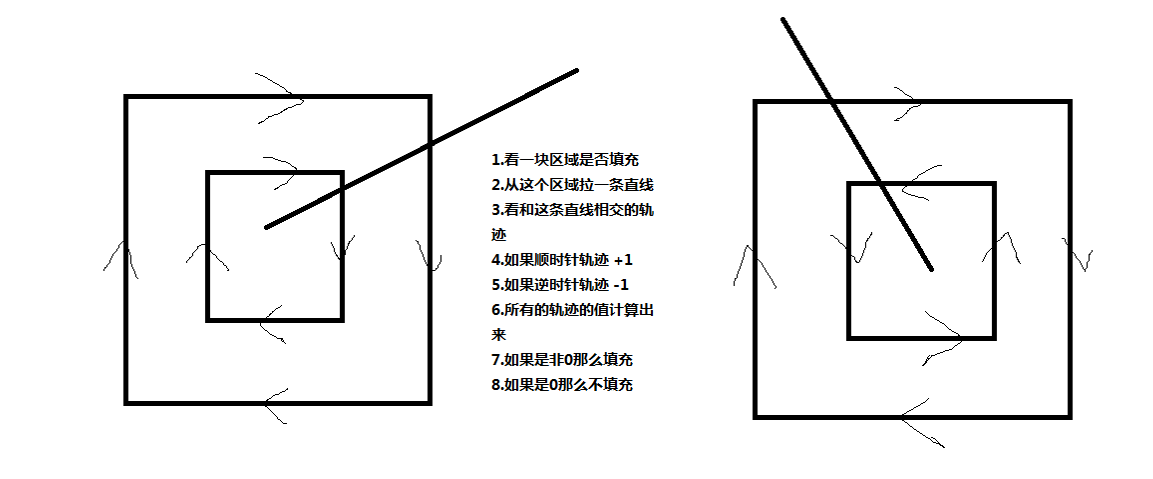
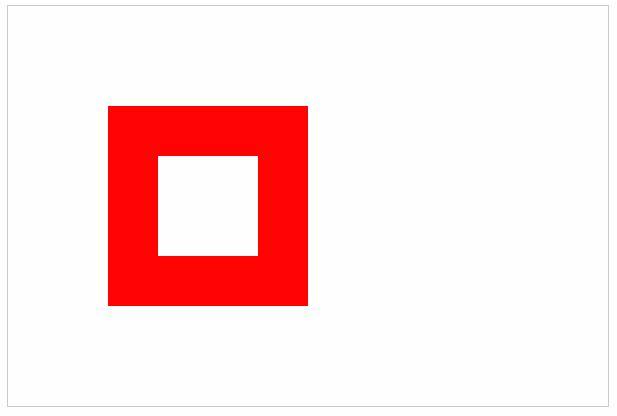
⑤绘制一个镂空的正方形
- 画法:大正方形顺时针,小正方形逆时针
- 原理:非零环绕填充规则
<!DOCTYPE html>

<html lang="en">

<head>

    <meta charset="UTF-8">

    <title>canvas的基本使用</title>

    <style>

        canvas{

            border: 1px solid #ccc;

        }

    </style>

</head>

<body>

    <canvas width="600" height="400"></canvas>

    <script>

        var myCanvas=document.querySelector("canvas");

        var ctx=myCanvas.getContext('2d');

        // 大正方形(顺时针)

        ctx.moveTo(100,100);

        ctx.lineTo(300,100);

        ctx.lineTo(300,300);

        ctx.lineTo(100,300);

        ctx.closePath();

        // 小正方形(逆时针)

        ctx.moveTo(150,150);

        ctx.lineTo(150,250);

        ctx.lineTo(250,250);

        ctx.lineTo(250,150);

        ctx.closePath();

        // 填充

        ctx.fillStyle='red';

        ctx.fill();

    </script>

</body>

</html>
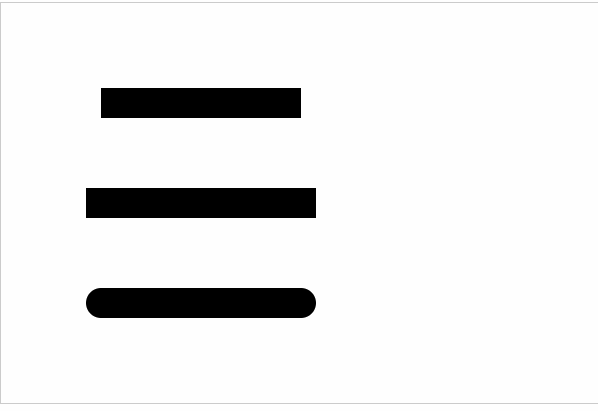
⑥两端样式和拐点样式
- 两端样式:lineCap=“ ” 可以填butt(默认) 、square(方)、round(圆)
<!DOCTYPE html>

<html lang="en">

<head>

    <meta charset="UTF-8">

    <title>canvas的基本使用</title>

    <style>

        canvas{

            border: 1px solid #ccc;

        }

    </style>

</head>

<body>

    <canvas width="600" height="400"></canvas>

    <script>

        var myCanvas=document.querySelector("canvas");

        var ctx=myCanvas.getContext('2d');

        // 两端默认 30px

        ctx.beginPath();

        ctx.moveTo(100,100);

        ctx.lineTo(300,100);

        ctx.lineWidth='30';

        ctx.lineCap='butt';

        ctx.stroke();

        // 两端方形 30px

        ctx.beginPath();

        ctx.moveTo(100,200);

        ctx.lineTo(300,200);

        ctx.lineWidth='30';

        ctx.lineCap='square'

        ctx.stroke();

        // 两端圆形 30px

        ctx.beginPath();

        ctx.moveTo(100,300);

        ctx.lineTo(300,300);

        ctx.lineWidth='30';

        ctx.lineCap='round';

        ctx.stroke();

    </script>

</body>

</html>
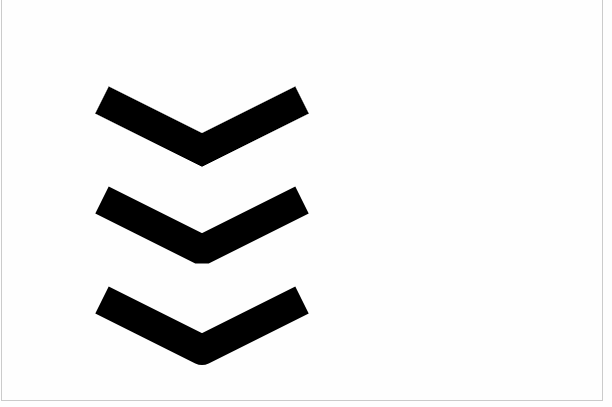
- 拐点样式:lineJoin=‘ ’ 可以填miter(默认)、bevel(方)、round(圆)
<!DOCTYPE html>

<html lang="en">

<head>

    <meta charset="UTF-8">

    <title>canvas的基本使用</title>

    <style>

        canvas{

            border: 1px solid #ccc;

        }

    </style>

</head>

<body>

    <canvas width="600" height="400"></canvas>

    <script>

        var myCanvas=document.querySelector("canvas");

        var ctx=myCanvas.getContext('2d');

        // 拐点默认 30px

        ctx.beginPath();

        ctx.moveTo(100,100);

        ctx.lineTo(200,150);

        ctx.lineTo(300,100);

        ctx.lineWidth='30';

        ctx.lineJoin='miter';

        ctx.stroke();

        // 拐点方形 30px

        ctx.beginPath();

        ctx.moveTo(100,200);

        ctx.lineTo(200,250);

        ctx.lineTo(300,200);

        ctx.lineWidth='30';

        ctx.lineJoin='bevel'

        ctx.stroke();

        // 拐点圆形 30px

        ctx.beginPath();

        ctx.moveTo(100,300);

        ctx.lineTo(200,350);

        ctx.lineTo(300,300);

        ctx.lineWidth='30';

        ctx.lineJoin='round';

        ctx.stroke();

    </script>

</body>

</html>
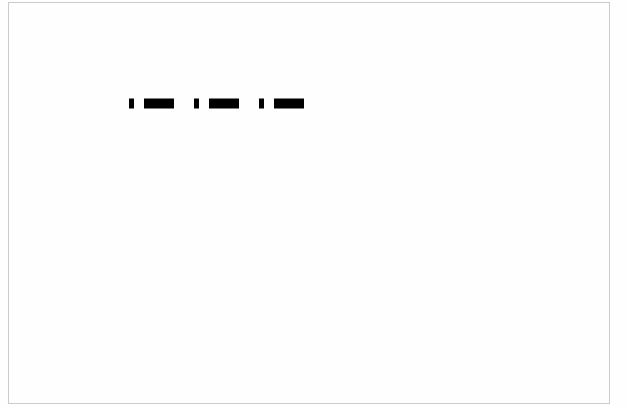
⑦绘制虚线
- 设置虚线的排列方式:setlineDash([ ])数组用来描述排列方式的
- 获取虚线的排列方式:getlineDash()获取的是不重复的那一段排列方式
- 虚线偏移量:lineDashoffset=' num ' 如果是正的,往后偏移;如果是负的往前偏移
<canvas width="600" height="400"></canvas>

    <script>

        var myCanvas=document.querySelector("canvas");

        var ctx=myCanvas.getContext('2d');

        ctx.moveTo(100,100.5);

        ctx.lineTo(300,100.5);

        //虚线是由一段虚线加一段实线组成的,数组描述的就是虚线和实线的大小

        ctx.setLineDash([5,10,30,20]);

        console.log(ctx.getLineDash());//(4) [5, 10, 30, 20]

        ctx.lineDashOffset=-20;

        ctx.lineWidth=10;

        ctx.stroke();

    </script>

</body>

</html>
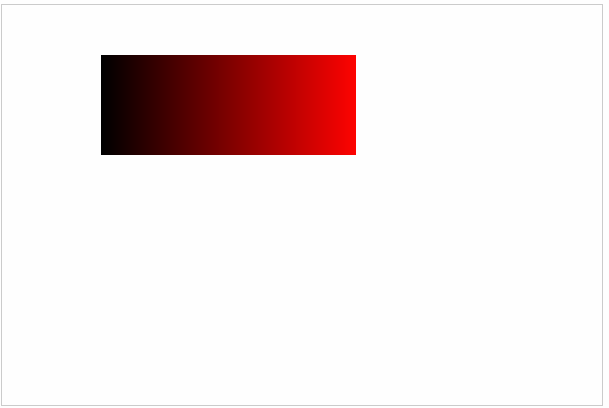
⑧绘制一个颜色渐变的矩形
<!DOCTYPE html>

<html lang="en">

<head>

    <meta charset="UTF-8">

    <title>canvas的基本使用</title>

    <style>

        canvas{

            border: 1px solid #ccc;

        }

    </style>

</head>

<body>

    <canvas width="600" height="400"></canvas>

    <script>

        var myCanvas=document.querySelector("canvas");

        var ctx=myCanvas.getContext('2d');

        ctx.lineWidth=100;

        for(var i=0;i<255;i++){

            ctx.beginPath();

            ctx.moveTo(100+i-1,100);

            ctx.lineTo(100+i,100);

            ctx.strokeStyle='rgba('+i+',0,0)';

            ctx.stroke();

        }

    </script>

</body>

</html>
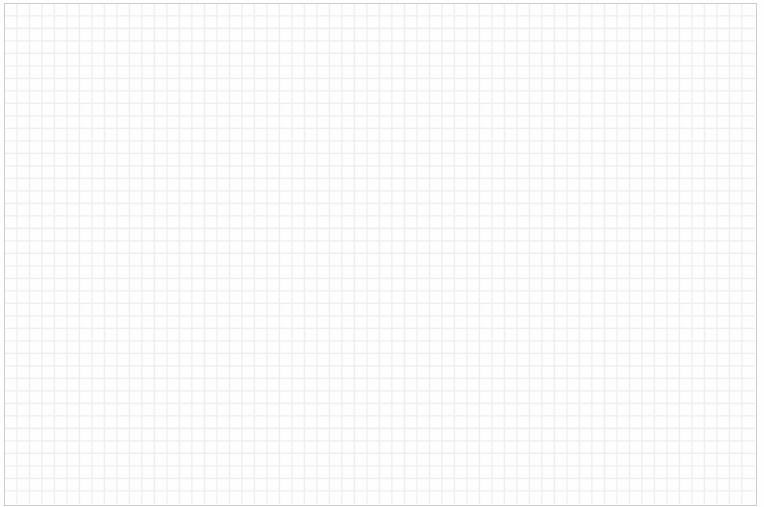
⑨绘制折线图(面向对象)
- 绘制网格
<!DOCTYPE html>

<html lang="en">

<head>

    <meta charset="UTF-8">

    <title>canvas的基本使用</title>

    <style>

        canvas{

            border: 1px solid #ccc;

        }

    </style>

</head>

<body>

    <canvas width="600" height="400"></canvas>

    <script>

        var myCanvas=document.querySelector("canvas");

        var ctx=myCanvas.getContext('2d');

        //网格的大小,画布的宽度和高度

        var gridSize=10;

        var canvasHeight=ctx.canvas.height;

        var canvasWidth=ctx.canvas.width;

        //x轴方向的线

        var xLineTotal=Math.floor(canvasHeight/gridSize);

        for(var i=0;i<xLineTotal;i++){

            ctx.beginPath();

            ctx.moveTo(0,i*gridSize-0.5);

            ctx.lineTo(canvasWidth,i*gridSize-0.5);

            ctx.strokeStyle='#eee';

            ctx.stroke();

        }

        //y轴方向的线

        var yLineTotal=Math.floor(canvasWidth/gridSize);

        for(var i=0;i<yLineTotal;i++){

            ctx.beginPath();

            ctx.moveTo(i*gridSize-0.5,0);

            ctx.lineTo(i*gridSize-0.5,canvasHeight);

            ctx.strokeStyle='#eee';

            ctx.stroke();

        }

    </script>

</body>

</html>
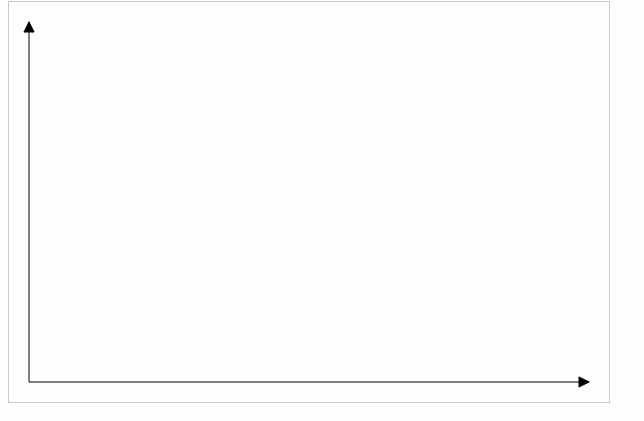
- 绘制坐标系
<!DOCTYPE html>

<html lang="en">

<head>

    <meta charset="UTF-8">

    <title>canvas的基本使用</title>

    <style>

        canvas{

            border: 1px solid #ccc;

        }

    </style>

</head>

<body>

    <canvas width="600" height="400"></canvas>

    <script>

        var myCanvas=document.querySelector("canvas");

        var ctx=myCanvas.getContext('2d');

        // 确定原点的坐标(x0,y0)

        var space=20;

        var canvasWidth=ctx.canvas.width;

        var canvasHeight=ctx.canvas.height;

        var x0=space;

        var y0=canvasHeight-space;

        // 绘制x轴

        ctx.beginPath();

        ctx.moveTo(x0,y0);

        ctx.lineTo(canvasWidth-space,y0);

        // 绘制x轴的箭头

        var arrowSize=10;

        ctx.lineTo(canvasWidth-space-arrowSize,y0+arrowSize/2);

        ctx.lineTo(canvasWidth-space-arrowSize,y0-arrowSize/2);

        ctx.lineTo(canvasWidth-space,y0);

        ctx.fill();

        ctx.stroke();

        // 绘制y轴

        ctx.beginPath();

        ctx.moveTo(x0,y0);

        ctx.lineTo(space,space);

        // 绘制y轴的箭头

        ctx.lineTo(space+arrowSize/2,space+arrowSize);

        ctx.lineTo(space-arrowSize/2,space+arrowSize);

        ctx.lineTo(space,space);

        ctx.fill();

        ctx.stroke();

    </script>

</body>

</html
- 绘制点
<!DOCTYPE html>

<html lang="en">

<head>

    <meta charset="UTF-8">

    <title>canvas的基本使用</title>

    <style>

        canvas{

            border: 1px solid #ccc;

        }

    </style>

</head>

<body>

    <canvas width="600" height="400"></canvas>

    <script>

        var myCanvas=document.querySelector("canvas");

        var ctx=myCanvas.getContext('2d');

        // 点坐标

        var coordinate={

            x:100,

            y:100

        }

        // 点的尺寸大小

        var dottedSize=10;

        // 在画布上绘制点

        ctx.moveTo(coordinate.x-dottedSize/2,coordinate.y-dottedSize/2);

        ctx.lineTo(coordinate.x+dottedSize/2,coordinate.y-dottedSize/2);

        ctx.lineTo(coordinate.x+dottedSize/2,coordinate.y+dottedSize/2);

        ctx.lineTo(coordinate.x-dottedSize/2,coordinate.y+dottedSize/2);

        ctx.closePath();

        ctx.fill();

    </script>

</body>

</html>
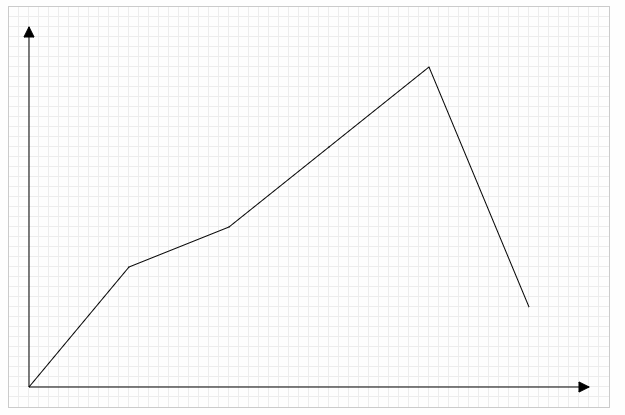
- 面向对象的方式绘制折线图
<!DOCTYPE html>

<html lang="en">

<head>

    <meta charset="UTF-8">

    <title>canvas的基本使用</title>

    <style>

        canvas{

            border: 1px solid #ccc;

        }

    </style>

</head>

<body>

    <canvas width="600" height="400"></canvas>

    <script>

        var myCanvas=document.querySelector("canvas");

        var ctx=myCanvas.getContext('2d');

        /*  1.构造折线图的函数 */

        var LineChart=function(ctx){

            // 获取绘图工具

            this.ctx=ctx||document.querySelector('canvas').getContext('2d');

            // 获取画布的大小

            this.canvasWidth=this.ctx.canvas.width;

            this.canvasHeight=this.ctx.canvas.height;

            // 网格的大小

            this.gridSize=10;

            // 坐标系的间距

            this.space=20;

            // 坐标原点

            this.x0=this.space;

            this.y0=this.canvasHeight-this.space;

            // 箭头的大小

            this.arrowSize=10;

            // 绘制点的大小

            this.dottedSize=6;

        }

        /*  2.添加原型方法 */

        // 初始化

        LineChart.prototype.init=function(data){

            this.drawGrid();

            this.drawAxis();

            this.drawDotted(data);

        };

        // 绘制网格

        LineChart.prototype.drawGrid=function(){

            // x轴方向的线

            var xLineTotal=Math.floor(this.canvasHeight/this.gridSize);

            this.ctx.strokeStyle='#eee';

            for(var i=0;i<xLineTotal;i++){

                this.ctx.beginPath();

                this.ctx.moveTo(0,i*this.gridSize-0.5);

                this.ctx.lineTo(this.canvasWidth,i*this.gridSize-0.5);

                this.ctx.stroke();

            }

            // y轴方向的线

            var yLineTotal=Math.floor(this.canvasWidth/this.gridSize);

            for(var i=0;i<yLineTotal;i++){

                this.ctx.beginPath();

                this.ctx.moveTo(i*this.gridSize-0.5,0);

                this.ctx.lineTo(i*this.gridSize-0.5,this.canvasHeight);

                this.ctx.stroke();

            }

        };

        //绘制坐标系

        LineChart.prototype.drawAxis=function(){

            // x轴和x轴的箭头

            this.ctx.beginPath();

            this.ctx.strokeStyle='#000';

            this.ctx.moveTo(this.x0,this.y0);

            this.ctx.lineTo(this.canvasWidth-this.space,this.y0);

            this.ctx.lineTo(this.canvasWidth-this.space-this.arrowSize,this.y0+this.arrowSize/2);

            this.ctx.lineTo(this.canvasWidth-this.space-this.arrowSize,this.y0-this.arrowSize/2);

            this.ctx.lineTo(this.canvasWidth-this.space,this.y0);

            this.ctx.stroke();

            this.ctx.fill();

            // y轴和y轴的箭头

            this.ctx.beginPath();

            this.ctx.strokeStyle='#000';

            this.ctx.moveTo(this.x0,this.y0);

            this.ctx.lineTo(this.space,this.space);

            this.ctx.lineTo(this.space+this.arrowSize/2,this.space+this.arrowSize);

            this.ctx.lineTo(this.space-this.arrowSize/2,this.space+this.arrowSize);

            this.ctx.lineTo(this.space,this.space);

            this.ctx.stroke();

            this.ctx.fill();

        };

        //绘制所有点

        LineChart.prototype.drawDotted=function(data){

            //转化当前对象为that,因为后面循环内的this已经不是当前对象

            var that=this;

            data.forEach(function(item,i){

                // 数据的坐标需要转换为canvas坐标

                var canvasX=that.x0+item.x;//x=原点的x坐标+数据的x坐标

                var canvasY=that.y0-item.y;//y=原点的y坐标+数据的y坐标

                // 进行点的绘制

                that.ctx.beginPath();

                that.ctx.moveTo(canvasX-that.dottedSize/2,canvasY-that.dottedSize/2);

                that.ctx.moveTo(canvasX+that.dottedSize/2,canvasY-that.dottedSize/2);

                that.ctx.moveTo(canvasX+that.dottedSize/2,canvasY+that.dottedSize/2);

                that.ctx.moveTo(canvasX-that.dottedSize/2,canvasY+that.dottedSize/2);

                that.ctx.closePath();

                that.ctx.fill();

                // 连线

                if(i==0){//第一个点,起点是x0,y0

                    that.ctx.beginPath();

                    that.ctx.moveTo(that.x0,that.y0);

                    that.ctx.lineTo(canvasX,canvasY);

                    that.ctx.stroke();

                }else{//后面的点,起点是上一个点

                    that.ctx.beginPath();

                    that.ctx.moveTo(prevCanvasX,prevCanvasY);

                    that.ctx.lineTo(canvasX,canvasY);

                    that.ctx.stroke();

                }

                // 记录当前的坐标,下一次要用

                prevCanvasX=canvasX;

                prevCanvasY=canvasY;

            });

        };

       /* 3.数据和实例化对象 */

       var data=[

           {x:100,y:120},

           {x:200,y:160},

           {x:300,y:240},

           {x:400,y:320},

           {x:500,y:80}

       ]

       var lineChart=new LineChart();

       lineChart.init(data);

    </script>

</body>

</html>
canvas的基本使用的更多相关文章
- html5 canvas常用api总结(三)--图像变换API
canvas的图像变换api,可以帮助我们更加方便的绘画出一些酷炫的效果,也可以用来制作动画.接下来将总结一下canvas的变换方法,文末有一个例子来更加深刻的了解和利用这几个api. 1.画布旋转a ...
- 【探索】利用 canvas 实现数据压缩
前言 HTTP 支持 GZip 压缩,可节省不少传输资源.但遗憾的是,只有下载才有,上传并不支持.如果上传也能压缩,那就完美了.特别适合大量文本提交的场合,比如博客园,就是很好的例子. 虽然标准不支持 ...
- 简单入门canvas - 通过刮奖效果来学习
一 .前言 一直在做PC端的前端开发,从互联网到行业软件.最近发现移动端已经成为前端必备技能了,真是不能停止学习.HTML5新增的一些东西,canvas是用的比较多也比较复杂的一个,简单的入门了一下, ...
- 获取Canvas当前坐标系矩阵
前言 在我的另一篇博文 Canvas坐标系转换 中,我们知道了所有的平移缩放旋转操作都会影响到画布坐标系.那在我们对画布进行了一系列操作之后,怎么再知道当前矩阵数据状态呢. 具体代码 首先请看下面的一 ...
- Canvas坐标系转换
默认坐标系与当前坐标系 canvas中的坐标是从左上角开始的,x轴沿着水平方向(按像素)向右延伸,y轴沿垂直方向向下延伸.左上角坐标为x=0,y=0的点称作原点.在默认坐标系中,每一个点的坐标都是直接 ...
- Canvas绘图之平移translate、旋转rotate、缩放scale
画布操作介绍 画布绘图的环境通过translate(),scale(),rotate(), setTransform()和transform()来改变,它们会对画布的变换矩阵产生影响. 函数 方法 描 ...
- 用html5的canvas和JavaScript创建一个绘图程序
本文将引导你使用canvas和JavaScript创建一个简单的绘图程序. 创建canvas元素 首先准备容器Canvas元素,接下来所有的事情都会在JavaScript里面. <canvas ...
- html5标签canvas函数drawImage使用方法
html5中标签canvas,函数drawImage(): 使用drawImage()方法绘制图像.绘图环境提供了该方法的三个不同版本.参数传递三种形式: drawImage(image,x,y):在 ...
- 使用 JavaScript 和 canvas 做精确的像素碰撞检测
原文地址:Pixel accurate collision detection with Javascript and Canvas 译者:nzbin 我正在开发一个需要再次使用碰撞检测的游戏.我通常 ...
- H5项目开发分享——用Canvas合成文字
以前曾用Canvas合成.裁剪.图片等<用H5中的Canvas等技术制作海报>.这次用Canvas来画文字. 下图中"老王考到驾照后"这几个字是画在Canvas上的,与 ...
随机推荐
- vue2.0版本中v-html中过滤器的使用
Vue 2.0 不再支持在 v-html 中使用过滤器 解决方法: 1:全局方法(推荐) 2:computed 属性 3:$options.filters(推荐) 1:使用全局方法: 可以在 Vue ...
- linux 文件夹分享
1.在 linux 安装 samba,安装好之后 配置文件在 /etc/samba/smb.conf 目录下. yum install samba samba-client(yum install s ...
- .net Dapper 学习系列(2) ---Dapper进阶
目录 写在前面 前期准备 Dapper 单表批量添加 在Dapper 多表查询 在Dapper 调用存储过程 在Dapper 使用QueryMultiple进行多表查询 在Dapper 使用事务进行多 ...
- 1005 继续(3n+1)猜想(C#)
一.题目内容: 卡拉兹(Callatz)猜想已经在1001中给出了描述.在这个题目里,情况稍微有些复杂. 当我们验证卡拉兹猜想的时候,为了避免重复计算,可以记录下递推过程中遇到的每一个数.例如对 n= ...
- c# js 时间
DateTime GetTime(double timeStamp) { DateTime dtStart = TimeZone.CurrentTimeZone.ToLocalTime(new Dat ...
- WebRTC 入门教程(二)| WebRTC信令控制与STUN/TURN服务器搭建
WebRTC 入门教程(二)| WebRTC信令控制与STUN/TURN服务器搭建 四月 4, 2019 作者:李超,音视频技术专家.本文首发于 RTC 开发者社区,欢迎在社区留言与作者交流. htt ...
- 关于MVC接收Ajax调用无法访问的问题
例如:下面代码有两个int类型的参数,如果Ajax调用时没有在data属性中为其赋值,AJAX会出500异常. public JsonResult GetList(int pageIndex, int ...
- Thymeleaf前后端分页查询
分页查询是一个很常见的功能,对于分页也有很多封装好的轮子供我们使用. 比如使用mybatis做后端分页可以用Pagehelper这个插件,如果使用SpringDataJPA更方便,直接就内置的分页查询 ...
- 2019 东方明珠java面试笔试题 (含面试题解析)
本人3年开发经验.18年年底开始跑路找工作,在互联网寒冬下成功拿到阿里巴巴.今日头条.东方明珠等公司offer,岗位是Java后端开发,最终选择去了东方明珠. 面试了很多家公司,感觉大部分公司考察的点 ...
- SAP成都研究院的小伙伴们庆祝公司再次获得2019年最佳雇主的场景
日前,怡安集团旗下全球领先的人力资本管理咨询机构怡安翰威特与全球高管寻聘和领导力顾问公司史宾沙旗下Kincentric共同揭晓2019年中国最佳雇主榜单.SAP中国研究院凭借企业的创新文化和多元环境, ...