标准WPS框架下的空间信息处理服务部署方法
笔者第一篇博客里面曾介绍过将专题图制作功能发布为WPS,但随着后面的研究,才发现那时候发布的不是真正WPS框架下的服务,而只是通过Servlet将其发布为可调用的网络服务,所以今天再具体介绍一下真正的WPS服务到底如何发布。
WPS(Web Processing Service)是OGC组织制定的空间信息处理服务的标准规范,旨在以标准化的方式在网络上共享空间信息处理功能。WPS主要用来处理空间数据,实现通过网络向客户端提供地理数据的处理服务,使客户无需安装桌面软件就能实现相关的处理功能。它定义一个标准的接口来帮助实现地理进程发布和绑定进程与客户端,“进程”包括任何能够操作空间数据的算法、计算或模型,“发布”意思是提供机器可读的绑定信息和人们可读的元数据信息以便服务的发现和使用。一个WPS可以被配置提供任何功能的GIS空间数据处理功能,将WPS进程链接在一起能够生成可以复用的工作流。
在WPS中,客户端和服务器采用基于XML的通信方式,在WPS接口中定义了三个主要操作,用于向客户端提供服务详细信息、查询部署在服务器上的进程描述和执行进程,这三个主要操作分别是:GetCapabilities、DescribeProcess和Execute。GetCapabilities操作允许客户端从服务器中检索元数据,使客户端通过请求获得描述具体信息的元数据文档,该文档包括所有可执行的进程简要的元数据信息描述。DescribeProcess操作使客户通过请求获得进程的详细信息,包括输入、输出参数和格式等。Execute操作允许WPS客户端提供输入参数值,然后在服务器端运行指定的进程,并返回输出结果。
下面介绍将算子模型部署到WPS框架的具体步骤:
一、获取WPS工程
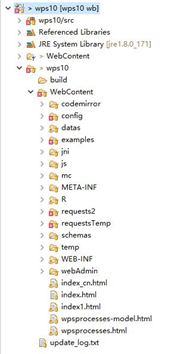
我使用的工程来自师门提供,不能外传,可以从网上找到开源的相关代码,其目录结构如下所示:
二、部署需要调用的Java类
将算法调用java文件放到cn.edu.whu.lmars.reflect.services路径下,将文件名和类名更改统一,比如此处改为DzLdksmnProcess.java,添加对接口IReflectService的实现,如下语句所示:
public class DzLdksmnProcess extends Model implements IReflectService
添加接口方法的实现函数:
public Object execute(HashMap<Object, Object> layers, HashMap<Object, Object> paramters)
建议先完成四、五两个步骤之后再实现这个接口,最终实现后的函数内容如下:
 @Override

 public Object execute(HashMap<Object, Object> layers, HashMap<Object, Object> paramters) {

     // TODO Auto-generated method stub

     String firstInput = "QuHuaShp";

     String secondInput = "LieDuShp";

     String input1_href = layers.get(firstInput + IReflectService.DATAHREF).toString();

     String input2_href = layers.get(secondInput + IReflectService.DATAHREF).toString();

     String output = layers.get(IReflectService.OUTPUTNAME).toString();

     File file = new File(output);

     if(file.exists()){

             file.delete();

     }

     try {

         DzLdksmnProcess.mainprocess(input1_href, input2_href, output);

     } catch (Exception e) {

         e.printStackTrace();

     }

     return true;

 }
三、在jni目录下添加编译文件
如果有需要调用的其他文件,比如.exe、.dll、.py、.so等文件,要将其放到wps10/WebContent/jni目录下,并添加相应的引用。
此例子中需要将arcobjects.jar添加到Referenced Libraries,jar包文件放于wps10/WebContent/WEB-INF/lib目录下,并将其添加到Build Path。
四、添加ProcessDescription的xml文档
创建DzLdksmnProcess类的ProcessDescription XML文档,注意其中的Identifier属性要和类名一样,内容编辑完成后将其放到wps10/ WebContent/config/processes路径下。
DzLdksmnProcess.xml内容如下:
 <?xml version="1.0" encoding="UTF-8"?>

 <wps:ProcessDescriptions xmlns:wps="http://www.opengis.net/wps/1.0.0"

     xmlns:xsi="http://www.w3.org/2001/XMLSchema-instance"

     xmlns:ows="http://www.opengis.net/ows/1.1"

     xsi:schemaLocation="http://www.opengis.net/wps/1.0.0 http://schemas.opengis.net/wps/1.0.0/wpsDescribeProcess_response.xsd"

     xml:lang="en-US" service="WPS" version="1.0.0">

 <ProcessDescription statusSupported="true" storeSupported="true" wps:processVersion="1.1.0">

     <ows:Identifier>DzLdksmnProcess</ows:Identifier>

     <ows:Title>地震烈度模型</ows:Title>

     <ows:Abstract>利用地震震级、震中地理坐标和震源机制解等相关参数绘制地震烈度图</ows:Abstract>

     <DataInputs>

     <Input minOccurs="1" maxOccurs="1">

         <ows:Identifier>QuHuaShp</ows:Identifier>

         <ows:Title>行政区划图</ows:Title>

         <ComplexData>

             <Default>

                 <Format>

                 <MimeType>application/x-zipped-shp</MimeType>

                 </Format>

             </Default>

             <Supported>

                 <Format>

                     <MimeType>application/x-zipped-shp</MimeType>

                 </Format>

                 <Format>

                     <MimeType>text/xml; subtype=gml</MimeType>

                 </Format>

                 <Format>

                     <MimeType>text/xml; subtype=gml/2.0.0</MimeType>

                 </Format>

                 <Format>

                     <MimeType>text/xml; subtype=gml/2.1.1</MimeType>

                 </Format>

                 <Format>

                     <MimeType>text/xml; subtype=gml/2.1.2</MimeType>

                 </Format>

                 <Format>

                     <MimeType>text/xml; subtype=gml/2.1.2.1</MimeType>

                 </Format>

                 <Format>

                     <MimeType>text/xml; subtype=gml/3.0.0</MimeType>

                 </Format>

                 <Format>

                     <MimeType>text/xml; subtype=gml/3.0.1</MimeType>

                 </Format>

                 <Format>

                     <MimeType>text/xml; subtype=gml/3.1.0</MimeType>

                 </Format>

                 <Format>

                     <MimeType>text/xml; subtype=gml/3.1.1</MimeType>

                 </Format>

                 <Format>

                     <MimeType>text/xml; subtype=gml/3.2.1</MimeType>

                 </Format>

             </Supported>

         </ComplexData>

     </Input>

     <Input minOccurs="1" maxOccurs="1">

         <ows:Identifier>LieDuShp</ows:Identifier>

         <ows:Title>断裂带分布图</ows:Title>

         <ComplexData>

             <Default>

                 <Format>

                 <MimeType>application/x-zipped-shp</MimeType>

                 </Format>

             </Default>

             <Supported>

                 <Format>

                     <MimeType>application/x-zipped-shp</MimeType>

                 </Format>

                 <Format>

                     <MimeType>text/xml; subtype=gml</MimeType>

                 </Format>

                 <Format>

                     <MimeType>text/xml; subtype=gml/2.0.0</MimeType>

                 </Format>

                 <Format>

                     <MimeType>text/xml; subtype=gml/2.1.1</MimeType>

                 </Format>

                 <Format>

                     <MimeType>text/xml; subtype=gml/2.1.2</MimeType>

                 </Format>

                 <Format>

                     <MimeType>text/xml; subtype=gml/2.1.2.1</MimeType>

                 </Format>

                 <Format>

                     <MimeType>text/xml; subtype=gml/3.0.0</MimeType>

                 </Format>

                 <Format>

                     <MimeType>text/xml; subtype=gml/3.0.1</MimeType>

                 </Format>

                 <Format>

                     <MimeType>text/xml; subtype=gml/3.1.0</MimeType>

                 </Format>

                 <Format>

                     <MimeType>text/xml; subtype=gml/3.1.1</MimeType>

                 </Format>

                 <Format>

                     <MimeType>text/xml; subtype=gml/3.2.1</MimeType>

                 </Format>

             </Supported>

         </ComplexData>

     </Input>

     </DataInputs>

     <ProcessOutputs>

     <Output>

         <ows:Identifier>OutputData</ows:Identifier>

         <ows:Title>地震烈度图</ows:Title>

         <ComplexOutput>

             <Default>

                 <Format>

                 <MimeType>application/x-zipped-shp</MimeType>

                 </Format>

             </Default>

             <Supported>

                 <Format>

                     <MimeType>application/x-zipped-shp</MimeType>

                 </Format>

                 <Format>

                     <MimeType>text/xml; subtype=gml</MimeType>

                 </Format>

                 <Format>

                     <MimeType>text/xml; subtype=gml/2.0.0</MimeType>

                 </Format>

                 <Format>

                     <MimeType>text/xml; subtype=gml/2.1.1</MimeType>

                 </Format>

                 <Format>

                     <MimeType>text/xml; subtype=gml/2.1.2</MimeType>

                 </Format>

                 <Format>

                     <MimeType>text/xml; subtype=gml/2.1.2.1</MimeType>

                 </Format>

                 <Format>

                     <MimeType>text/xml; subtype=gml/3.0.0</MimeType>

                 </Format>

                 <Format>

                     <MimeType>text/xml; subtype=gml/3.0.1</MimeType>

                 </Format>

                 <Format>

                     <MimeType>text/xml; subtype=gml/3.1.0</MimeType>

                 </Format>

                 <Format>

                     <MimeType>text/xml; subtype=gml/3.1.1</MimeType>

                 </Format>

                 <Format>

                     <MimeType>text/xml; subtype=gml/3.2.1</MimeType>

                 </Format>

             </Supported>

         </ComplexOutput>

     </Output>

     </ProcessOutputs>

 </ProcessDescription>

 </wps:ProcessDescriptions>
五、添加Execute的xml文档
创建DzLdksmnProcess类的Execute XML文档,注意其中的Identifier属性要和类名一样,内容编辑完成后将其放到wps10/WebContent/requests2路径下。
DzLdksmnProcess.xml内容如下:
 <?xml version="1.0" encoding="UTF-8" standalone="yes"?>

 <wps:Execute service="WPS" version="1.0.0" xmlns:wps="http://www.opengis.net/wps/1.0.0"

     xmlns:ows="http://www.opengis.net/ows/1.1"

     xmlns:ogc="http://www.opengis.net/ogc"

     xmlns:xlink="http://www.w3.org/1999/xlink"

     xmlns:xsi="http://www.w3.org/2001/XMLSchema-instance"

     xsi:schemaLocation="http://www.opengis.net/wps/1.0.0 http://schemas.opengis.net/wps/1.0.0/wpsExecute_request.xsd">

     <ows:Identifier>DzLdksmnProcess</ows:Identifier>

     <ows:Title>地震烈度模型</ows:Title>

     <ows:Abstract>利用地震震级、震中地理坐标和震源机制解等相关参数绘制地震烈度图</ows:Abstract>

     <wps:DataInputs>

     <wps:Input>

         <ows:Identifier>QuHuaShp</ows:Identifier>

         <ows:Title>行政区划图</ows:Title>

         <wps:Reference mimeType="application/x-zipped-shp"

             xlink:href="http://localhost:8080/wps10/datas/shapefile/china.zip" method="GET"/>

     </wps:Input>

     <wps:Input>

         <ows:Identifier>LieDuShp</ows:Identifier>

         <ows:Title>断裂带分布图</ows:Title>

         <wps:Reference mimeType="application/x-zipped-shp"

             xlink:href="http://localhost:8080/wps10/datas/shapefile/Duanceng.zip" method="GET"/>

     </wps:Input>

     </wps:DataInputs>

     <wps:ResponseForm>

     <wps:ResponseDocument storeExecuteResponse="false" lineage="false" status="false">

       <wps:Output asReference="true" mimeType="application/x-zipped-shp" encoding="UTF-8">

         <ows:Identifier>OutputData</ows:Identifier>

         <ows:Title>地震烈度图</ows:Title>

       </wps:Output>

     </wps:ResponseDocument>

     </wps:ResponseForm>

 </wps:Execute>
六、在common_algorithms.properties下添加键值对
打开wps10/WebContent/config路径下的
common_algorithms.properties文件,在最后一行下面添加:
DzLdksmnProcess=cn.edu.whu.lmars.reflect.ReflectAlgorithm
(注意key要和类名一样)
七、在index.html添加执行页面
打开wps10/WebContent路径下的index.html文件,找到
var requests = new Array();并在下面添加新的指定值:
requests[159] = datafolder + "DzLdksmnProcess.xml";
(注意这里是添加第五步的Execute xml文档)
八、测试
至此,所有部署工作已经完成,将整个工程用tomcat发布,本地的访问页面如下所示:

可以成功访问即可。
标准WPS框架下的空间信息处理服务部署方法的更多相关文章
- linux下syslog-ng日志集中管理服务部署记录
syslog是Linux系统默认的日志守护进程,默认的syslog配置文件是/etc/syslog.conf文件.syslog守护进程是可配置的,它允许人们为每一种类型的系统信息精确地指定一个存放地点 ...
- Win7系统下彻底删除无用服务的方法
win7系统下中有非常多的服务项,用户来满足不同行业用户间的所有需求,系统服务也是执行指定系统功能的程序,许多情况下我们想要运行软件或执行外接设备都无法离开系统服务,但并非所有系统服务都是我们用到的, ...
- 基于CXF框架下的SOAP Webservice服务端接口开发
最近对webservice 进行入门学习,网上也是找了很多的学习资料.总得感觉就是这了解点,那了解点.感觉不够系统,不够容易入门.差不多断断续续看了一个星期了,今天小有成果,把客户端,服务端都搞定了. ...
- LINUX 下.NET Core 微服务部署实战
前言 最近一直在开发部署.也没有总结一下.从5月份开始出差到现在基本没有发过博客,哎,惭愧. 一直在弄微服务,后续会慢慢更新下面这个系列.欢迎各位大佬交流指点. 分布式理论专题 1..net core ...
- [转载] 新兵训练营系列课程——平台服务部署及Web框架
原文: http://weibo.com/p/1001643875679132642345 大纲 微博平台主要负责微博基础功能.接下来将会介绍 平台的作用,以及服务提供的形式 平台Web服务的部署 平 ...
- Python框架下django 的并发和多线程
django 的并发能力真的是令人担忧,django本身框架下只有一个线程在处理请求,任何一个请求阻塞,就会影响另一个情感求的响应,尤其是涉及到IO操作时,基于框架下开发的视图的响应并没有对应的开启多 ...
- Keras框架下的保存模型和加载模型
在Keras框架下训练深度学习模型时,一般思路是在训练环境下训练出模型,然后拿训练好的模型(即保存模型相应信息的文件)到生产环境下去部署.在训练过程中我们可能会遇到以下情况: 需要运行很长时间的程序在 ...
- Chris Richardson微服务翻译:微服务部署
Chris Richardson 微服务系列翻译全7篇链接: 微服务介绍 构建微服务之使用API网关 构建微服务之微服务架构的进程通讯 微服务架构中的服务发现 微服务之事件驱动的数据管理 微服务部署( ...
- yii框架的部署方法
yii框架(yii framework)的部署方法 刚開始学习的人来说,部署yii框架还是有一定难度的,Yii是一个基于组件.用于开发大型 Web 应用的高性能 PHP 框架.Yii提供了今日Web ...
随机推荐
- 如何绕过Win8、Win10的systemsetting与注册表校验设置默认浏览器
*本文原创作者:浪子_三少,属Freebuf原创奖励计划,未经许可禁止转载 在win7时我们只需修改注册表就能设置默认浏览器,但是win8.win10下不能直接修改的因为同样的注册表项,win8.wi ...
- BUPT复试专题—寻找i*j=m的个数(2016)
题目描述 3*3的矩阵内容. 1 2 3 2 4 6 3 6 9 即a[i][j](1<=i<=n,1<=j<=n)=i*j. 问一个这样n*n的矩阵里面,里面m出现的次数. ...
- 在windows中增加linux命令
在windows中增加linux命令 无它,复用git中的即可:
- SolidEdge 装配体中如何快速的搞定一个面上所有螺丝 如何在装配体上进行阵列
1 点击"规则排列" 选择要排列的螺丝 2 选择被规则排列的架子 3 选择所有的圆孔(鼠标滑到任意圆孔位置,左键单击即可选中所有圆孔) 4 选择参考的基准孔(已经上了螺 ...
- java8 stream sorted
1.对象类型配列 List<Person> list = Arrays.asList( new Person(22, "shaomch", "man" ...
- 字符串类型ip与数值型ip地址相互转换
/** * 返回Integer类型的ip地址 * @return */ private static Integer ipToInt(){ String ip="192.168.1.201& ...
- 算法和流程控制 --《高性能JavaScript》
总结: 1.for, while, do-while循环性能相当,并没有一种循环类型明显快于或满于其他类型. 2.避免使用for-in循环,除非要遍历一个属性数量未知的对象. 3.改善循环性能的最佳形 ...
- iOS 内购遇到的坑
一.内购沙盒测试账号在支付成功后,再次购买相同 ID 的物品,会提示如下内容的弹窗.您以购买过此APP内购项目,此项目将免费恢复 原因: 当使用内购购买过商品后没有把这个交易事件关,所以当我们再次去购 ...
- 设计模式学习笔记——Chain of Responsibility职责链模式
重点在链.一条链,如果本节点处理不了,则传递给下一个节点处理. 关键是如何传给下一个节点? 主要是由本节点决定传给哪一个节点. public class Client { public static ...
- sanic官方文档解析之Exception和Middleware,Listeners
1,异常 异常是从处理请求内部抛出来的,并且通过Sanic自动的被处理异常,,异常用第一个参数携带异常信息,还可以接受在HTTP响应中要传递回的状态代码.引发异常 1.1引发异常 自动触发异常,,简单 ...