Element UI table组件源码分析
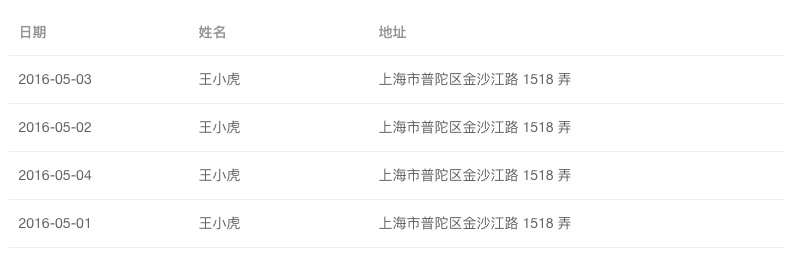
本文章从如下图所示的最基本的table入手,分析table组件源代码。本人已经对table组件原来的源码进行削减,源码点击这里下载。本文只对重要的代码片段进行讲解,推荐下载代码把项目运行起来,跟着文章的思路阅读。
思路
```<template>
<div class="el-table">
<!-- 隐藏列: slot里容纳table-column -->
<div class="hidden-columns" ref="hiddenColumns">
<slot></slot>
</div>
<div class="el-table__header-wrapper"

     ref="headerWrapper">

  <table-header ref="tableHeader"

                :store="store">

  </table-header>

</div>

<div class="el-table__body-wrapper"

     ref="bodyWrapper">

  <table-body :context="context"

              :store="store">

  </table-body>

</div>
</div>
</template>
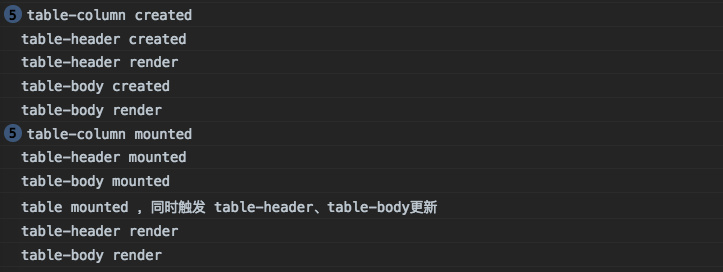
<p>table、table-header、table-body、table-column之间通过table-store进行状态管理。table-header、table-body对table-store数据进行监听,每当table改变table-store数据时触发table-header、table-body重新渲染。</p>
<p>table-column为列数据column绑定相应的renderCell函数,供table-body渲染时使用。table-column这个组件自身不做任何渲染。所以会看到模板将其隐藏。还有就是table-header、table-body通过render函数进行渲染。</p>
<h2>初始化顺序</h2>
<h2>table</h2>
<ol>
<li>
<p>初始化store</p>
data() {
const store = new TableStore(this);
return {
store,
};
}
</li>
<li>
<p>将store共享给table-header、table-body</p>
``` <div class="el-table__header-wrapper"
ref="headerWrapper">
<table-header :store="store"></table-header>
</div>
<div class="el-table__body-wrapper"
ref="bodyWrapper">
<table-body :store="store"></table-body>
</div>
将数据存储到store,供table-body获取data将其渲染
watch: {

    data: {

      immediate: true,

      handler(value) {

        // 供 table-body computed.data 使用

        this.store.commit('setData', value);

        // ......

      }

    },

},
设置tableId
created() {

      //.....

      this.tableId = `el-table_${tableIdSeed}`;

      //.....

  }
调用 updateColumns 触发 table-header、table-body 二次render更新,标记mounted完成
mounted() {

    // .....

    this.store.updateColumns();

    // .....

    this.$ready = true;

}
table-column
生成column,并为column绑定
renderCell函数供table-body使用
created(){

      // .........

      let column = getDefaultColumn(type, {

          id: this.columnId,

          columnKey: this.columnKey,

          label: this.label,

          property: this.prop || this.property,// 旧版element ui为property,现在的版本是prop

          type, // selection、index、expand

          renderCell: null,

          renderHeader: this.renderHeader, // 提供给table-column, table-column.js line 112

          width,

          formatter: this.formatter,

          context: this.context,

          index: this.index,

        });

      // .........

      // 提table-body使用, table-body.js line 69

      column.renderCell = function (createElement, data) {

        if (_self.$scopedSlots.default) {

          renderCell = () => _self.$scopedSlots.default(data);

          //<template slot-scope="{row}">

          //<span>{{row.frequentlyUsed | formatBoolean}}</span>

          //</template>

        }

        if (!renderCell) {// table-header不渲染index列的走这里,

          /*<div className="cell">王小虎</div>*/

          renderCell = DEFAULT_RENDER_CELL;

        }

        //  <ElTableColumn

        //      type="index"

        //      width="50"/>

        return <div className="cell">{renderCell(createElement, data)}</div>;

      };

}
给store.state._columns数组填充数据
mounted() {

    // ......

    owner.store.commit('insertColumn', this.columnConfig, columnIndex, this.isSubColumn ? parent.columnConfig : null);

}
table-store
table-store有两个很重要的属性_columns、data,_columns保存列的相关信息,data则保存开发者传入的表格数据。还有两个重要的函数insertColumn与updateColumns。
insertColumn为_columns填充数据
TableStore.prototype.mutations = {

  insertColumn(states, column, index, parent) {

    let array = states._columns;

    // ......

    if (typeof index !== 'undefined') {

      // 在index的位置插入column

      array.splice(index, 0, column);

    } else {

      array.push(column);

    }

    // .....

  },

}
updateColumns 对_columns进行过滤得到columns
TableStore.prototype.updateColumns = function() {

  const states = this.states;

  const _columns = states._columns || [];

  const notFixedColumns = _columns.filter(column => !column.fixed);

  // .....

  const leafColumns = doFlattenColumns(notFixedColumns);

  // .....

  states.columns = [].concat(leafColumns);

  // ....

}
table-header、table-body
table-header、table-body都拥有以下属性
props: {

    store: {

      required: true

    },

}

computed: {

    columns() {

      return this.store.states.columns;

    },

},

render(){

    // 渲染columns的数据

}
这两个组件的工作原理是监听columns数据变化以触发render渲染。在table组件的mounted阶段会调用 updateColumns 更新 columns,从而触发 table-header、table-body 重新渲染。
另外table-body还会监听data变化,触发render。例如当组件加载后发送请求,待请求响应赋值data,重新渲染table-body。
  computed: {

    data() {

      // table.vue watch.data 中 调用 setData 在store 中存储 data

      return this.store.states.data;

    },

  },
参考
来源:https://segmentfault.com/a/1190000015756225
Element UI table组件源码分析的更多相关文章
- 开源MyBatisGenerator组件源码分析
开源MyBatisGenerator组件源码分析 看源码前,先了解Generator能做什么? MyBatisGenerator是用来生成mybatis的Mapper接口和xml文件的工具,提供多种启 ...
- Django-restframework 源码之认证组件源码分析
Django-restframework 源码之认证组件源码分析 一 前言 之前在 Django-restframework 的流程分析博客中,把最重要的关于认证.权限和频率的方法找到了.该方法是 A ...
- element-ui 组件源码分析整理笔记目录
element-ui button组件 radio组件源码分析整理笔记(一) element-ui switch组件源码分析整理笔记(二) element-ui inputNumber.Card .B ...
- ceph-csi组件源码分析(1)-组件介绍与部署yaml分析
更多ceph-csi其他源码分析,请查看下面这篇博文:kubernetes ceph-csi分析目录导航 ceph-csi组件源码分析(1)-组件介绍与部署yaml分析 基于tag v3.0.0 ht ...
- element-ui button组件 radio组件源码分析整理笔记(一)
Button组件 button.vue <template> <button class="el-button" @click="handleClick ...
- element-ui input组件源码分析整理笔记(六)
input 输入框组件 源码: <template> <div :class="[ type === 'textarea' ? 'el-textarea' : 'el-in ...
- element-ui MessageBox组件源码分析整理笔记(十二)
MessageBox组件源码,有添加部分注释 main.vue <template> <transition name="msgbox-fade"> < ...
- Django REST framework —— 权限组件源码分析
在上一篇文章中我们已经分析了认证组件源码,我们再来看看权限组件的源码,权限组件相对容易,因为只需要返回True 和False即可 代码 class ShoppingCarView(ViewSetMix ...
- Django REST framework —— 认证组件源码分析
我在前面的博客里已经讲过了,我们一般编写API的时候用的方式 class CoursesView(ViewSetMixin,APIView): pass 这种方式的有点是,灵活性比较大,可以根据自己的 ...
随机推荐
- Leetcode95. Unique Binary Search Trees II不同的二叉搜索树2
给定一个整数 n,生成所有由 1 ... n 为节点所组成的二叉搜索树. 示例: 输入: 3 输出: [ [1,null,3,2], [3,2,null,1], [3,1,null,nul ...
- csp-s模拟测试51(b)attack,tree题解
题面:https://www.cnblogs.com/Juve/articles/11598286.html attack: 支配树裸题? 看一下支配树是什么: 问题:我们有一个有向图(可以有环),定 ...
- QEventLoop配合QTimer实现阻塞任务超时处理
A阻塞主线程正常运行,需要做特殊处理. 以下代码可实现,A阻塞或者正常处理时,均不阻塞主线程正常处理. QEventLoop eventloop; // use point to manage eve ...
- c++ 读取8, 10, 16进制数
c++基础知识都快忘了..记一下 dec-十进制(默认) oct-八进制 hex-十六进制
- 通过原生JS打印一个空心菱形图案
<!doctype html> <html> <head> <meta charset="utf-8"> <title> ...
- 提交代码出现 Push to origin/master was rejected 错误解决方法
转至博客:http://www.xtyos.cn/archives/qt-1-index 为什么会出现这样的问题 一般发生在 GitHub 或 码云 刚刚创建仓库第一次pull的时候,两个仓库的差别非 ...
- 通过BlukLoad的方式快速导入海量数据
http://www.cnblogs.com/MOBIN/p/5559575.html 摘要 加载数据到HBase的方式有多种,通过HBase API导入或命令行导入或使用第三方(如sqoop)来导入 ...
- 移植别人的vcpkg包到自己的项目
修改该目录下的文件即可: 或者修改你的项目文件下的所有不对的路径,类似于这种:
- vue 如何发起网络请求 之 axios
1 1 2 3 4 5 6 7 8 9 10 // axios 请求 在main.js里边写入 import Axios from 'axios' // 配置请求信息 var $http = ...
- sql 分页rownumber方式
alter procedure [dbo].[proc_getpaging] ( ), --表名(可以为多表) ) = '*', --字段名(全部字段为*) ), --排序字段(支持多字段不用加ord ...