windows下apache+https环境配置
windows下apache+https环境配置
1、修改配置文件conf/httpd.conf,去掉以下语句注释符号‘#’:

修改配置文件conf/extra/httpd-ssl.conf,把相应的选项改成如下:
2、配置php(php-5.6.30)
将php路径加入系统环境变量:
右击计算机 -> 属性 -> 高级系统设置 -> 高级 -> 环境变量 -> 用户变量 -> 新建环境变量。
变量名:PHP_HOME
变量值:D:\wamp\php-5.6.30
3、生成证书
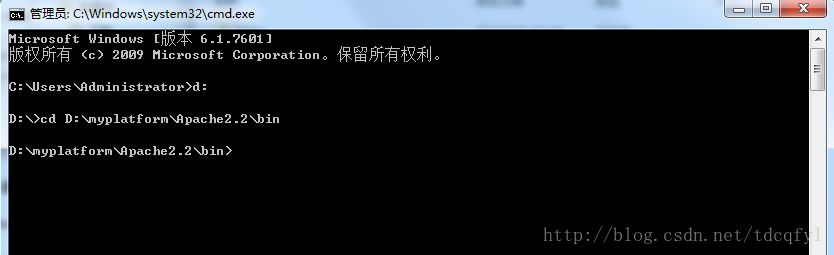
3.1 cmd进入命令行模式,切换至apache的bin目录:cd D:\wamp\httpd-2.4.25\bin;
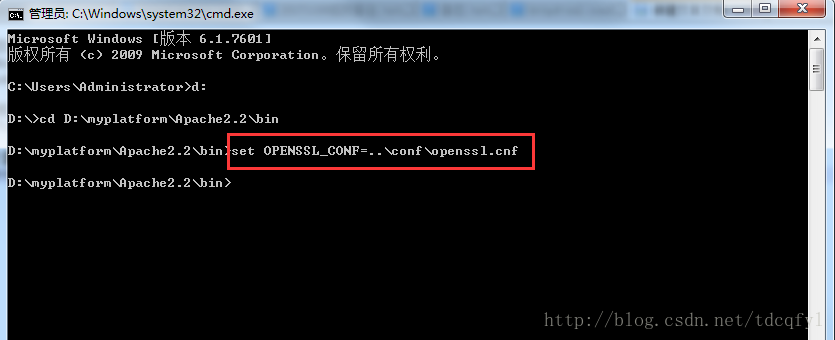
3.2 设置OPENSSL_CONFIG配置,执行命令:set OPENSSL_CONF=../conf/openssl.cnf
3.3 首先要生成服务端的私钥(key文件):openssl genrsa -des3 -out server.key 1024
3.4 生成server.csr,Certificate Signing Request(CSR),生成的csr文件交给CA签名后形成服务端自己的证书。屏幕上将有提示,依照其提示一步一步输入要求的个人信息即可。
openssl req -new -key server.key -out server.csr -config ../conf/openssl.cnf
3.5 对客户端也用同样的命令生成key及csr文件
openssl genrsa -des3 -out client.key 1024
openssl req -new -key client.key -out client.csr -config ../conf/openssl.cnf
3.6 CSR文件必须有CA的签名才可形成证书。可将此文件发送到verisign等地方由它验证,要交一大笔钱,何不自己做CA呢。
openssl req -new -x509 -keyout ca.key -out ca.crt -config ../conf/openssl.cnf
3.7 在bin目录下新建一个demoCA文件夹,进入它
新建newcerts文件夹,不需要进入
新建index.txt
新建serial,打开后输入01保存即可
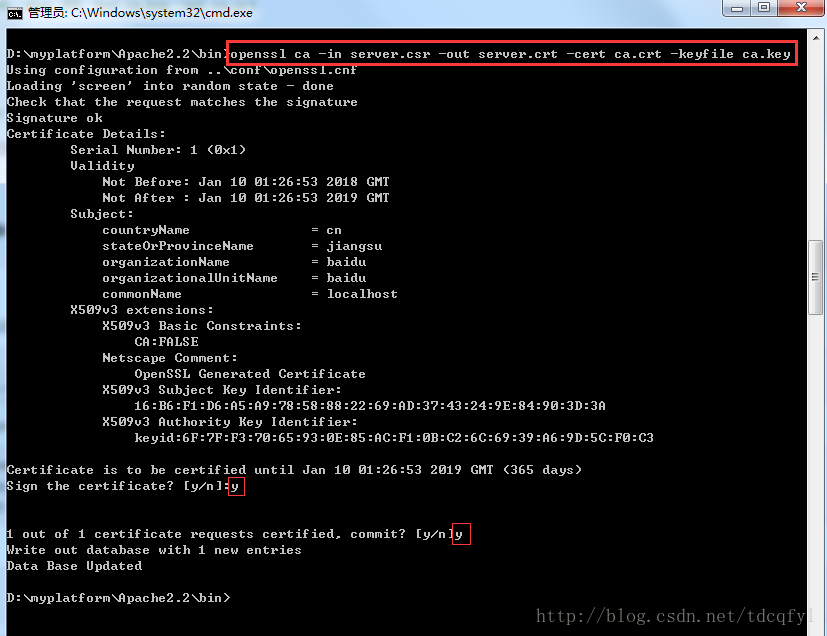
3.8 用生成的CA的证书为刚刚生成的server.csr,client.csr文件签名:
openssl ca -in server.csr -out server.crt -cert ca.crt -keyfile ca.key -config ../conf/openssl.cnf
openssl ca -in client.csr -out client.crt -cert ca.crt -keyfile ca.key -config ../conf/openssl.cnf
注:如果指令出现如下错误,进入demoCA,然后打开index.txt.attr,把unique_subject=no即可。

3.9 生成一个ca.pfx:
openssl pkcs12 -export -in ca.crt -inkey ca.key -out ca.pfx
3.10 导入证书
打开IE浏览器 -> 工具 -> Internet选项 -> 内容 -> 证书,按照提示导入ca.pfx,这里要输入刚才生成ca.pfx过程中输入的密码。
3.11 以上操作生成了
client使用的文件有: ca.crt, client.crt, client.key
server使用的文件有:ca.crt, server.crt, server.key
把ca.crt, server.crt, server.key复制到conf目录下去。
3.12 重启apache,访问https://127.0.0.1/index.php
3.15 如果出现以下错误
Starting the 'Apache2.4' service
The 'Apache2.4' service is running.
sl:emerg] [pid 8200:tid 500] AH02577: Init: SSLPassPhraseDialog builtin is not supported on Win32 (key file D:/wamp/httpd-2.4.25/conf/server.key)
[Tue Mar 14 16:37:57.740113 2017] [ssl:emerg] [pid 8200:tid 500] AH02311: Fatal error initialising mod_ssl, exiting. See D:/wamp/httpd-2.4.25/logs/error.log for more information
[Tue Mar 14 16:37:57.740113 2017] [ssl:emerg] [pid 8200:tid 500] AH02564: Failed to configure encrypted (?) private key example:1443:0, check D:/wamp/httpd-2.4.25/conf/server.key
[Tue Mar 14 16:37:57.740113 2017] [ssl:emerg] [pid 8200:tid 500] SSL Library Error: error:0D0680A8:asn1 encoding routines:ASN1_CHECK_TLEN:wrong tag
[Tue Mar 14 16:37:57.740113 2017] [ssl:emerg] [pid 8200:tid 500] SSL Library Error: error:0D08303A:asn1 encoding routines:ASN1_TEMPLATE_NOEXP_D2I:nested asn1 error
[Tue Mar 14 16:37:57.740113 2017] [ssl:emerg] [pid 8200:tid 500] SSL Library Error: error:0D0680A8:asn1 encoding routines:ASN1_CHECK_TLEN:wrong tag
[Tue Mar 14 16:37:57.740113 2017] [ssl:emerg] [pid 8200:tid 500] SSL Library Error: error:0D07803A:asn1 encoding routines:ASN1_ITEM_EX_D2I:nested asn1 error (Type=RSA)
[Tue Mar 14 16:37:57.740113 2017] [ssl:emerg] [pid 8200:tid 500] SSL Library Error: error:04093004:rsa routines:OLD_RSA_PRIV_DECODE:RSA lib
[Tue Mar 14 16:37:57.740113 2017] [ssl:emerg] [pid 8200:tid 500] SSL Library Error: error:0D0680A8:asn1 encoding routines:ASN1_CHECK_TLEN:wrong tag
[Tue Mar 14 16:37:57.740113 2017] [ssl:emerg] [pid 8200:tid 500] SSL Library Error: error:0D07803A:asn1 encoding routines:ASN1_ITEM_EX_D2I:nested asn1 error (Type=PKCS8_PRIV_KEY_INFO)
AH00016: Configuration Failed
这就是说windows不支持加密密钥,还记得生成server.key输入的密码吗?就是这个地方的错误,现在取消它。
openssl rsa -in server.key -out server.key
把生成的server.key复制到conf目录下覆盖原来的。
5.参考资料
http://blog.csdn.net/wlmnzf/article/details/50244409
http://blog.csdn.net/decajes/article/details/41706739
windows下配置apache+https
1. 修改conf/httpd.conf
取消ssl及proxy相关注释
#LoadModule ssl_module modules/mod_ssl.so (去掉前面的#号)
#Include conf/extra/httpd-ssl.conf (去掉前面的#号)
#LoadModule proxy_module modules/mod_proxy.so (去掉前面的#号)
#LoadModule proxy_http_module modules/mod_proxy_http.so (去掉前面的#号)
2. 生成证书
cmd进入命令行,进入apache安装目录的bin目录。
2.1 设置OPENSSL_CONFIG配置
执行命令:set OPENSSL_CONF=..\conf\openssl.cnf
2.2 生成服务端的key文件
执行命令:openssl genrsa -out server.key 1024

完成后,会在bin目录下生成server.key文件
2.3 生成签署申请
执行命令:openssl req -new -out server.csr -key server.key

完成后,会在bin目录下生成server.csr文件,其中 Common Name <eg,YOUR name>[] 需要与配置文件中的ServerName一致,否则apache启动时将会报错。
2.4 生成CA的key文件
执行命令:openssl genrsa -out ca.key 1024

完成后,会在目录bin下生成ca.key文件
2.5 生成CA自签署证书
执行命令:openssl req -new -x509 -days 365 -key ca.key -out ca.crt
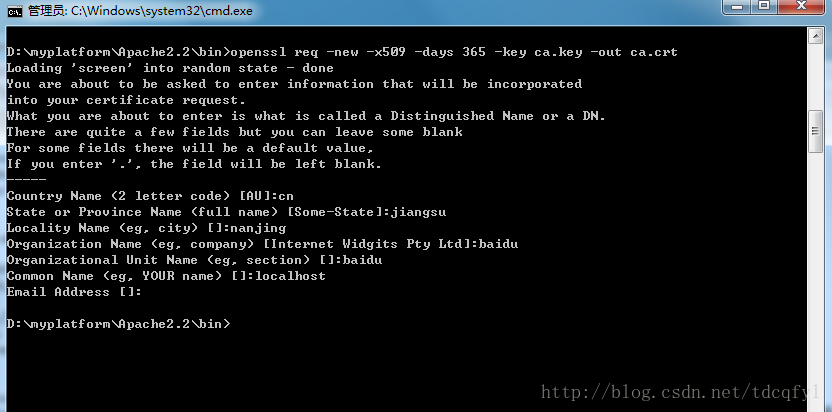
完成后,会在目录bin下生成ca.crt文件,此处填写的信息与2.3步中类似。
2.6 生成CA的服务器签署证书
执行命令:openssl ca -in server.csr -out server.crt -cert ca.crt -keyfile ca.key
此处如果没有创建好相关目录,将会报如下错误:

根据提示,手动创建相关目录:在bin下新建demoCA文件夹bin/demoCA在demoCA下新建index.txtbin/demoCA/index.txt在demoCA下新建serial.txt,其内容为01,重命名删除.txt后缀bin/demoCA/serial在demoCA下新建newcert文件夹bin/demoCA/newcerts完成后,会在bin目录下生成server.crt文件。demoCA目录的最终结构如下:

3. 修改conf/extra/httpd-ssl.conf文件
3.1 修改https端口号
根据需要修改httpd-ssl.conf的默认端口号"443",这里将所有的443修改为"6443",同时修改ServerName。
具体如下:Listen 6443<VirtualHost _default_:6443>ServerName localhost提示:此处如果保持https默认的443端口,则访问的时候,无需再加端口号。
3.2 修改相关证书路径
在apache安装目录的conf目录下,新建一个key目录,名称随意,然后将bin目录中的相关证书复制到key目录中。key目录最终的文件结构如下:

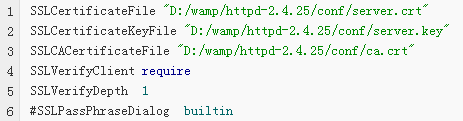
接着修改conf/extra/httpd-ssl.conf文件中的如下内容:SSLCertificateFile "xxx/conf/key/server.crt"SSLCertificateKeyFile "xxx/conf/key/server.key"SSLCACertificateFile "xxx/conf/key/ca.crt"#SSLVerifyClient require (去掉前面的#号,进行客户端验证时需要)#SSLVerifyDepth 1 (去掉前面的#号,把10改为1,进行客户端验证时需要)
4. 重启apache
在浏览器中,输入https://localhost:6443,如果页面出现提示 It works! ,则说明https配置成功了。如图:

5. 项目部署方式
5.1 以https的方式部署项目
- <VirtualHost *:6443>
- ServerName localhost
- DocumentRoot D:/javapro/bms
- SSLEngine on
- SSLProxyEngine on
- SSLCertificateFile "D:/myplatform/Apache2.2/conf/key/server.crt"
- SSLCertificateKeyFile "D:/myplatform/Apache2.2/conf/key/server.key"
- <Directory "/">
- Options None
- AllowOverride All
- Order allow,deny
- Allow From All
- </Directory>
- </VirtualHost>
5.2 以反向代理的方式部署项目
5.2.1 以二级目录的方式部署反向代理
- <VirtualHost *:80>
- ServerName local.bms
- DocumentRoot "D:/javapro/bms"
- Alias /bms "D:/javapro/bms"
- <Directory "/">
- Options None
- AllowOverride All
- Order allow,deny
- Allow From All
- </Directory>
- </VirtualHost>
- <VirtualHost *:6443>
- ServerName localhost
- SSLEngine on
- SSLProxyEngine on
- SSLCertificateFile "D:/myplatform/Apache2.2/conf/key/server.crt"
- SSLCertificateKeyFile "D:/myplatform/Apache2.2/conf/key/server.key"
- ProxyRequests Off
- <Proxy *>
- Order allow,deny
- Allow from all
- </Proxy>
- ProxyPass /bms http://local.bms/bms
- ProxyPassReverse /bms http://local.bms/bms
- </VirtualHost>
5.2.2 以一级目录的方式部署反向代理
- <VirtualHost *:80>
- ServerName local.bms
- DocumentRoot "D:/javapro/bms"
- <Directory "/">
- Options None
- AllowOverride All
- Order allow,deny
- Allow From All
- </Directory>
- </VirtualHost>
- <VirtualHost *:6443>
- ServerName localhost
- SSLEngine on
- SSLProxyEngine on
- SSLCertificateFile "D:/myplatform/Apache2.2/conf/key/server.crt"
- SSLCertificateKeyFile "D:/myplatform/Apache2.2/conf/key/server.key"
- ProxyRequests Off
- <Proxy *>
- Order allow,deny
- Allow from all
- </Proxy>
- ProxyPass / http://local.bms/
- ProxyPassReverse / http://local.bms/
- </VirtualHost>
windows下apache+https环境配置的更多相关文章
- windows下spark开发环境配置
http://www.cnblogs.com/davidwang456/p/5032766.html windows下spark开发环境配置 --本篇随笔由同事葛同学提供. windows下spark ...
- 【Objective-C】Windows下Objective-C开发环境配置
[Objective-C]Windows下Objective-C开发环境配置 ftp://ftpmain.gnustep.org/pub/gnustep/binaries/windows/ 最近打 ...
- Windows下Apache+mod_python+Django配置
Windows下Apache+mod_python+Django配置 Apache 首先要安装Apache,我安装的版本是2.2.*: Python python肯定是要安装的,我安装的版本是2.5的 ...
- Metabase在Windows下的开发环境配置
Metabase在Windows下的开发环境配置 */--> pre.src {background-color: #292b2e; color: #b2b2b2;} Metabase在Wind ...
- Windows 下apache https配置(phpstudy)
1.首先获取证书,https://www.pianyissl.com/ 免费三个月的 或者 自己生成私钥.证书,然后应用到apache中. http://blog.sina.com.cn/s/blo ...
- windows下python+flask环境配置详细图文教程
本帖是本人在安装配置python和flask环境时所用到的资源下载及相关的教程进行了整理罗列,来方便后面的人员,省去搜索的时间.如果你在安装配置是存在问题可留言给我. 首先罗列一下python+fla ...
- Windows下Hadoop编程环境配置指南
刘勇 Email: lyssym@sina.com 本博客记录作者在工作与研究中所经历的点滴,一方面给自己的工作与生活留下印记,另一方面若是能对大家有所帮助,则幸甚至哉矣! 简介 鉴于最近在研究 ...
- Windows下Spark单机环境配置
1. 环境配置 a) java环境配置: JDK版本为1.7,64位: 环境变量配置如下: JAVA_HOME为JDK安装路径,例如D:\software\workSoftware\JAVA 在pa ...
- Windows 下 Swoole开发环境配置
一直停留在windows,入了 jetbrains 的全家桶.准备入门 Swoole,不可能每做一点修改就 git push 运行一下.因此要在 windows 上配置 swoole 运行环境.对比了 ...
随机推荐
- JGUI源码:Tab组件实现(9)
程序界面效果如下 Tab组件由多个TabItem组成,超出部分隐藏,可以通过左右按钮滑动显示出来 1.封装 // 初始化内容 $(function () { J.JTab($(".jgui- ...
- D3 learning notes
D3 https://d3js.org/ 数据驱动文档显示, 利用 SVG HTML CSS技术. D3.js is a JavaScript library for manipulating doc ...
- 20155324《网络对抗》Exp2 后门原理与实践
20155324<网络对抗>Exp2 后门原理与实践 20155324<网络对抗>Exp2 后门原理与实践 常用后门工具实践 Windows获得Linux Shell 在Win ...
- win 域
域/AD域/域环境: 1.域:Domain 2.微软技术:1)工作组:平等 2)域 3.主要优点:集中管理/统一管理 4.域成员:1)域控制器:DC 2)成 ...
- echarts笔记
常见问题: 1.x轴和y轴type同时为category时不可行 只能改变方式显示,返回不同名称,如加上百分比显示 formatter:"value%"; var waterLev ...
- JDBC——连接数据库
JDBC的基本介绍 1.概述:jdbc是使用Java访问各种数据库的一种技术 (1)jdbc工作原理 2.jdbc核心Java类(API) (1)DriverManager类 作用:管理各种数据库的驱 ...
- JavaWeb处理GET、POST时的编码乱码问题
对于GET方法,只要设置了res.setContentType("text/html;charset=UTF-8"), req.getParameter()就不会产生乱码. 对于P ...
- Django first lesson 环境搭建
pycharm ide集成开发环境 (提高开发效率) 解释器/编译器 编辑器 调试环境 虚拟机连接 设置VirtualBox端口 操作1 操作2 点击+号添加,名称为SSH,其中主机端口为物理机的端口 ...
- Visual studio 2017添加引用时报错未能正确加载ReferenceManagerPackage包的解决方法
vs2017添加引用时报错未能正确加载“ReferenceManagerPackage”包. - AusonSir - 博客园https://www.cnblogs.com/-bao/p/674941 ...
- 【Flask】Flask学习笔记(一) 应用基本结构
初始化 使用前必须创建一个应用实例 from flask import Flask app = Flask(__name__) 路由和视图函数 请求流程 客户端(web浏览器)--> web服 ...