Linux平台下源码安装mysql多实例数据库
Linux平台下源码安装mysql多实例数据库[root@linux-node1 ~]# netstat -tlunp | grep 330tcp6 0 0 :::3306 :::* LISTEN 6191/mysqld
[root@linux-node1 ~]# ss -tlunp | grep 330tcp LISTEN 0 80 :::3306 :::* users:(("mysqld",pid=6191,fd=10))
[root@linux-node1 ~]# systemctl status mysqld.service● mysqld.service - LSB: start and stop MySQL Loaded: loaded (/etc/rc.d/init.d/mysqld; bad; vendor preset: disabled) Active: active (running) since Fri 2019-03-29 12:01:11 CST; 2min 40s ago Docs: man:systemd-sysv-generator(8) Process: 6056 ExecStart=/etc/rc.d/init.d/mysqld start (code=exited, status=0/SUCCESS) CGroup: /system.slice/mysqld.service ├─6065 /bin/sh /application/mysql-5.6.41/bin/mysqld_safe --datadir=/application/mysql-5.6.41/data --pid-file=/application... └─6191 /application/mysql-5.6.41/bin/mysqld --basedir=/application/mysql-5.6.41 --datadir=/application/mysql-5.6.41/data ...
Mar 29 12:01:07 linux-node1.eric.com systemd[1]: Starting LSB: start and stop MySQL...Mar 29 12:01:11 linux-node1.eric.com mysqld[6056]: Starting MySQL.... SUCCESS!Mar 29 12:01:11 linux-node1.eric.com systemd[1]: Started LSB: start and stop MySQL.
1、先停掉之前的3306单实例数据库[root@linux-node1 ~]# systemctl stop mysqld.service[root@linux-node1 ~]# netstat -tlunp | grep 330[root@linux-node1 ~]# netstat -tlunp | grep mysql[root@linux-node1 ~]# chkconfig mysqld off[root@linux-node1 ~]# chkconfig --list mysqldmysqld 0:off 1:off 2:off 3:off 4:off 5:off 6:off
2、mysql多实例常见的配置方案(1).单一配置文件、单一启动程序多实例部署方案(不推荐)该方案缺点:耦合度太高,只有一个配置文件,不好管理。工作中开发和运维的统一原则是:降低耦合度。my.cnf配置文件示例[mysqld_multi]mysqld = /usr/bin/mysqld_safemysqladmin = /usr/bin/mysqladminuser = mysql
[mysqld1]socket = /var/lib/mysql/mysql.sockport = 3306pid-file = /var/lib/mysql/mysql.piddatadir = /var/lib/mysql/user = mysql
[mysqld2]socket = /mnt/data/db1/mysql.sockport = 3302pid-file = /mnt/data/db1/mysql.piddatadir = /mnt/data/db1/user = mysql
skip-name-resolvserver-id=10default-storage-engine=innodbinnodb_buffer_pool_size=512Minnodb_additional_mem_pool=10Mdefault_character_set=utf8character_set_server=utf8#read-onlyrelay-log-space-limit=3Gexpire_logs_day=20
启动程序的命令如下:mysqld_multi --config-file=/data/mysql/my_multi.cnf start 1,2
(2).多配置文件、多启动程序部署方案mysql双实例的目录信息:[root@linux-node1 ~]# tree /data/data├── 3306│ ├── data #3306实例的数据目录│ ├── my.cnf #3306实例的配置文件│ └── mysql #3306实例的启动文件└── 3307 ├── data #3307实例的数据目录 ├── my.cnf #3307实例的配置文件 └── mysql #3307实例的启动文件
4 directories, 4 files
3、安装并配置多实例mysql数据库基于上节课的单实例mysql数据库环境来做实验生产环境一般以2~4个实例为佳
4、创建mysql多实例的数据文件目录[root@linux-node1 ~]# mkdir -p /data/{3306,3307}/data[root@linux-node1 ~]# tree /data//data/├── 3306 #3306实例目录│ └── data #3306实例的数据文件目录├── 3307 #3307实例目录 └── data #3307实例的数据文件目录
4 directories, 0 files
5、创建mysql多实例的配置文件和启动文件在这里我直接rz上传了[root@linux-node1 ~]# cd /disk/[root@linux-node1 disk]# rzrz waiting to receive. zmodem trl+C ȡ 100% 3 KB 3 KB/s 00:00:01 0 Errors
[root@linux-node1 disk]# ls -lhtotal 37Mdrwxr-xr-x 13 root root 4.0K Mar 28 21:25 cmake-2.8.12.2-rw-r--r-- 1 root root 5.8M Mar 26 08:58 cmake-2.8.12.2.tar.gz-rw-r--r-- 1 root root 3.6K Mar 28 17:48 data.zipdrwxr-xr-x 35 7161 31415 4.0K Mar 28 21:54 mysql-5.6.41-rw-r--r-- 1 root root 31M Jun 15 2018 mysql-5.6.41.tar.gz
解压[root@linux-node1 disk]# unzip data.zip -d /Archive: data.zip inflating: /data/3306/my.cnf inflating: /data/3306/mysql inflating: /data/3307/my.cnf inflating: /data/3307/mysql
[root@linux-node1 disk]# tree /data//data/├── 3306│ ├── data│ ├── my.cnf│ └── mysql└── 3307 ├── data ├── my.cnf └── mysql
4 directories, 4 files
6、启动实例方法:例如:启动3306实例的命令如下:mysqld_safe --defaults-file=/data/3306/my.cnf > /dev/null 2>&1 &
例如:启动3307实例的命令如下:mysqld_safe --defaults-file=/data/3307/my.cnf > /dev/null 2>&1 &
7、停止实例方法:停止3306实例的命令如下:mysqladmin -u root -poldboy123 -S /data/3306/mysql.sock shutdown
停止3307实例的命令如下:mysqladmin -u root -poldboy123 -S /data/3307/mysql.sock shutdown
8、要先创建mysql多实例数据库的错误日志文件,不然后面启动mysql实例会报错[root@linux-node1 ~]# touch /data/3306/mysql_zhouwanchun3306.err[root@linux-node1 ~]# touch /data/3307/mysql_zhouwanchun3307.err例如:[root@linux-node1 ~]# /data/3306/mysql startStarting MySQL...190329 16:27:49 mysqld_safe error: log-error set to '/data/3306/mysql_zhouwanchun3306.err', however file don't exists. Create writable for user 'mysql'.
9、配置mysql多实例的文件权限[root@linux-node1 ~]# chown -R mysql:mysql /data
[root@linux-node1 ~]# find /data -name mysql|xargs ls -l-rw-r--r-- 1 mysql mysql 1307 Jul 15 2013 /data/3306/mysql-rw-r--r-- 1 mysql mysql 1307 Jul 21 2013 /data/3307/mysql
[root@linux-node1 ~]# find /data -name mysql|xargs chmod 700
[root@linux-node1 ~]# find /data -name mysql|xargs ls -l-rwx------ 1 mysql mysql 1307 Jul 15 2013 /data/3306/mysql-rwx------ 1 mysql mysql 1307 Jul 21 2013 /data/3307/mysql
[root@linux-node1 ~]# find /data -name mysql -exec ls -l {} \;-rwx------ 1 mysql mysql 1307 Jul 15 2013 /data/3306/mysql-rwx------ 1 mysql mysql 1307 Jul 21 2013 /data/3307/mysql
10、初始化mysql多实例的数据库文件[root@linux-node1 ~]# cd /application/mysql/scripts/
./mysql_install_db \--defaults-file=/data/3306/my.cnf \--basedir=/application/mysql \--datadir=/data/3306/data \--user=mysql
./mysql_install_db \--defaults-file=/data/3307/my.cnf \--basedir=/application/mysql \--datadir=/data/3307/data \--user=mysql
两个初始化,每个初始化有两个OK字样,一共4个Ok字样
[root@linux-node1 scripts]# tree /data
11、启动数据库实例启动多实例3306的命令[root@linux-node1 ~]# /data/3306/mysql start
启动多实例3307的命令[root@linux-node1 ~]# /data/3307/mysql start
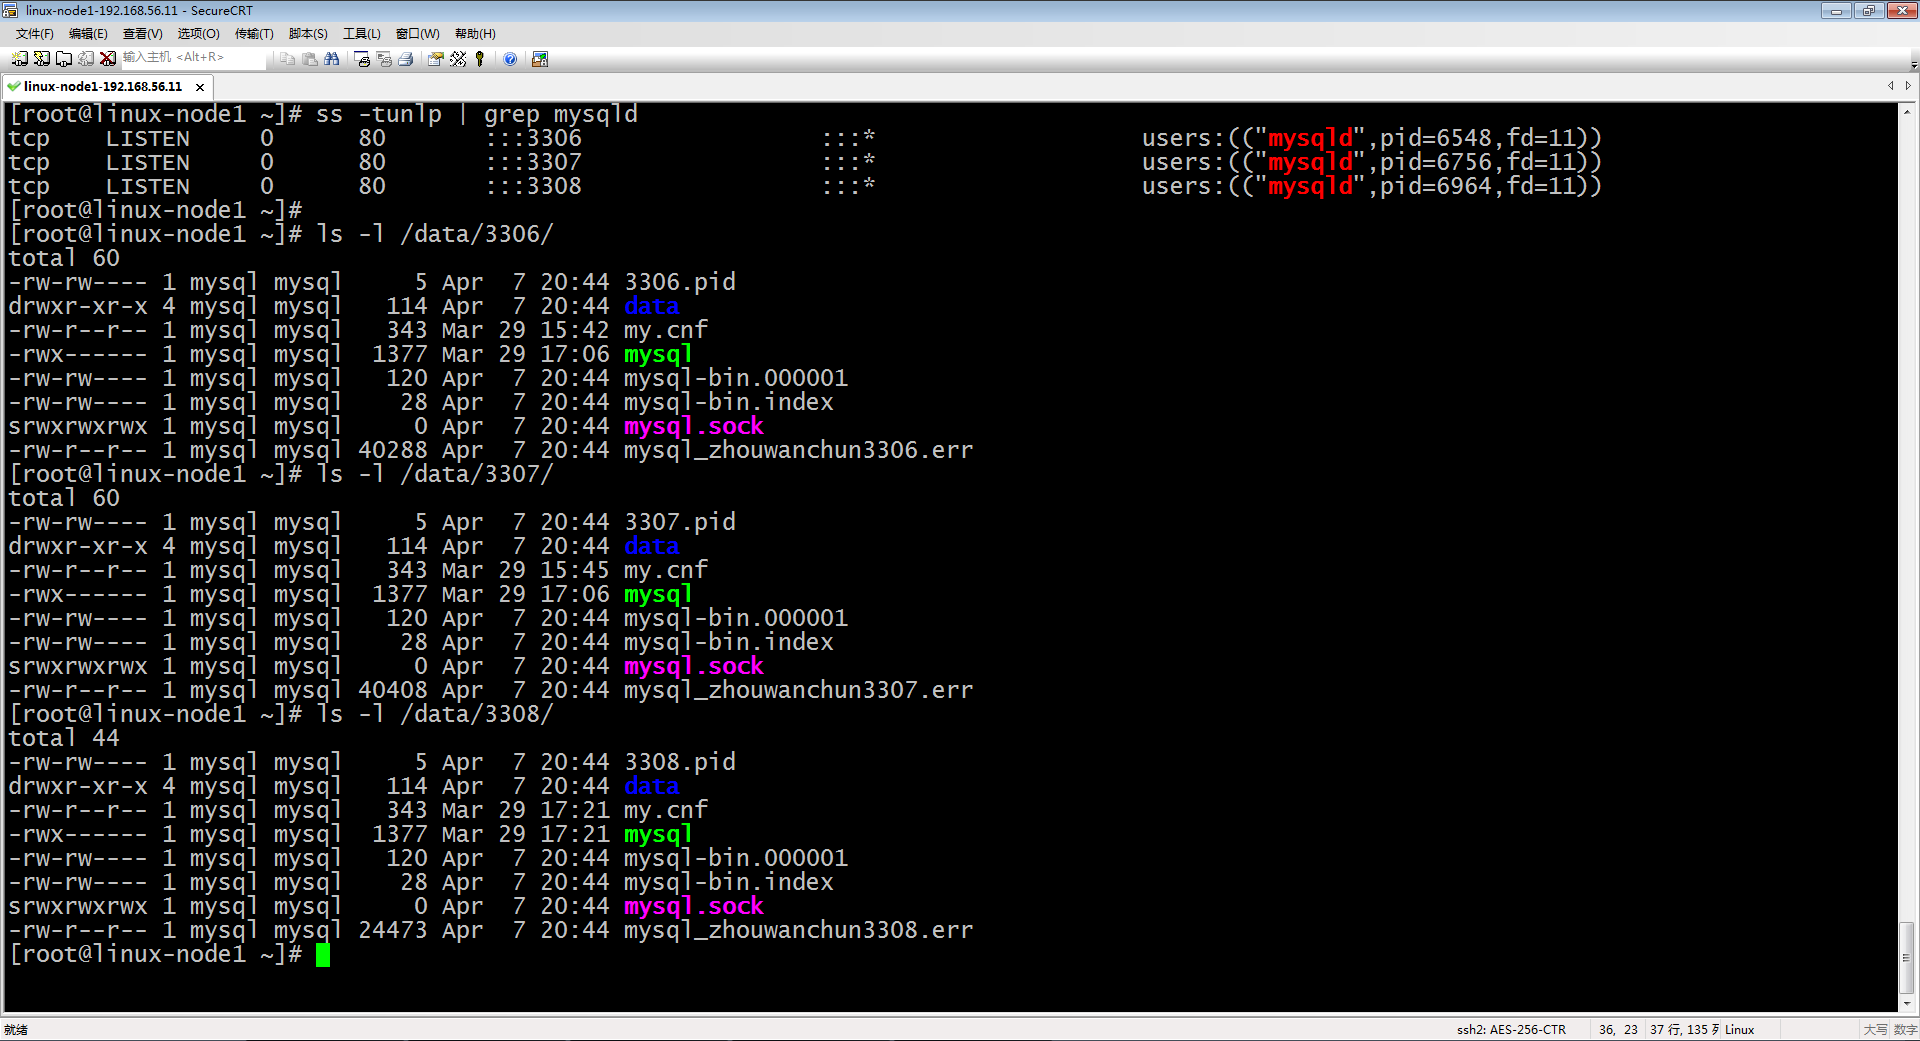
[root@linux-node1 ~]# netstat -tlunp | grep 330tcp6 0 0 :::3306 :::* LISTEN 7134/mysqldtcp6 0 0 :::3307 :::* LISTEN 7376/mysqld
如果mysql多实例数据库有服务端口没有被启动,稍微等几秒再检查。netstat -lntup | grep 330因为mysql服务的启动比Web服务慢一些
如果还是不行,请查看mysql服务对应实例的错误日志[root@linux-node1 ~]# grep log-error /data/3306/my.cnf | tail -1log-error=/data/3306/mysql_zhouwanchun3306.err[root@linux-node1 ~]# tail /data/3306/mysql_zhouwanchun3306.err
12、配置mysql多实例数据库开机自启动[root@linux-node1 ~]# echo "# mysql multi instances" >> /etc/rc.local[root@linux-node1 ~]# echo "/data/3306/mysql start" >> /etc/rc.local[root@linux-node1 ~]# echo "/data/3307/mysql start" >> /etc/rc.local[root@linux-node1 ~]# tail -3 /etc/rc.local# mysql multi instances/data/3306/mysql start/data/3307/mysql start
13、登录数据库密码默认为空[root@linux-node1 ~]# mysql -S /data/3306/mysql.sockWelcome to the MySQL monitor. Commands end with ; or \g.Your MySQL connection id is 1Server version: 5.6.41-log Source distributionCopyright (c) 2000, 2018, Oracle and/or its affiliates. All rights reserved.Oracle is a registered trademark of Oracle Corporation and/or itsaffiliates. Other names may be trademarks of their respectiveowners.Type 'help;' or '\h' for help. Type '\c' to clear the current input statement.
mysql> select user() ;+----------------+| user() |+----------------+| root@localhost |+----------------+1 row in set (0.00 sec)
mysql> exit ;Bye
[root@linux-node1 ~]# mysql -S /data/3307/mysql.sockWelcome to the MySQL monitor. Commands end with ; or \g.Your MySQL connection id is 1Server version: 5.6.41-log Source distributionCopyright (c) 2000, 2018, Oracle and/or its affiliates. All rights reserved.Oracle is a registered trademark of Oracle Corporation and/or itsaffiliates. Other names may be trademarks of their respectiveowners.Type 'help;' or '\h' for help. Type '\c' to clear the current input statement.
mysql> select user() ;+----------------+| user() |+----------------+| root@localhost |+----------------+1 row in set (0.00 sec)
mysql> exit ;Bye
mysql.sock文件mysql服务端与本地mysql客户端进行通信的Unix套接字文件。
14、mysql多实例数据库的管理[root@linux-node1 ~]# /data/3306/mysql stopStoping MySQL...[root@linux-node1 ~]# /data/3306/mysql startStarting MySQL...[root@linux-node1 ~]# /data/3306/mysql restartRestarting MySQL...Stoping MySQL...Starting MySQL...
[root@linux-node1 ~]# mysqladmin -u root -p -S /data/3306/mysql.sock shutdown[root@linux-node1 ~]# mysqladmin -u root -p -S /data/3307/mysql.sock shutdown
15、mysql安全配置(1).分别给mysql不同实例的数据库管理员root用户设置独立密码[root@linux-node1 ~]# mysqladmin -uroot -S /data/3306/mysql.sock password 'oldboy3306'Warning: Using a password on the command line interface can be insecure.[root@linux-node1 ~]# mysqladmin -uroot -S /data/3307/mysql.sock password 'oldboy3306'Warning: Using a password on the command line interface can be insecure.
再次登录数据库无法登录[root@linux-node1 ~]# mysql -S /data/3306/mysql.sockERROR 1045 (28000): Access denied for user 'root'@'localhost' (using password: NO)
[root@linux-node1 ~]# mysql -S /data/3307/mysql.sockERROR 1045 (28000): Access denied for user 'root'@'localhost' (using password: NO)
[root@linux-node1 ~]# mysql -uroot -p -S /data/3306/mysql.sockEnter password: 输入密码Welcome to the MySQL monitor. Commands end with ; or \g.Your MySQL connection id is 3Server version: 5.6.41-log Source distributionCopyright (c) 2000, 2018, Oracle and/or its affiliates. All rights reserved.Oracle is a registered trademark of Oracle Corporation and/or itsaffiliates. Other names may be trademarks of their respectiveowners.Type 'help;' or '\h' for help. Type '\c' to clear the current input statement.mysql> exit ;Bye
[root@linux-node1 ~]# mysql -uroot -p -S /data/3307/mysql.sockEnter password: 输入密码Welcome to the MySQL monitor. Commands end with ; or \g.Your MySQL connection id is 5Server version: 5.6.41-log Source distributionCopyright (c) 2000, 2018, Oracle and/or its affiliates. All rights reserved.Oracle is a registered trademark of Oracle Corporation and/or itsaffiliates. Other names may be trademarks of their respectiveowners.Type 'help;' or '\h' for help. Type '\c' to clear the current input statement.mysql> exit ;Bye
也可以带着密码登录mysql -uroot -poldboy3306 -S /data/3306/mysql.sockmysql -uroot -poldboy3306 -S /data/3307/mysql.sock
(2).修改密码[root@linux-node1 ~]# mysqladmin -uroot -S /data/3307/mysql.sock -poldboy3306 password 'oldboy3307'[root@linux-node1 ~]# mysql -uroot -poldboy3306 -S /data/3307/mysql.sock 登录失败[root@linux-node1 ~]# mysql -uroot -poldboy3307 -S /data/3307/mysql.sock 登录成功
16、远程连接登录mysql多实例mysql -uroot -p'oldboy123' -h 192.168.56.11 -P 3306mysql -ueric -p'oldboy123' -h 192.168.56.11 -P 3306
17、如何再增加一个mysql的实例mkdir -p /data/3308/datacp /data/3306/my.cnf /data/3308/cp /data/3306/mysql /data/3308/sed -i 's#3306#3308#g' /data/3308/my.cnfsed -i 's#server-id = 6#server-id = 8#g' /data/3308/my.cnfsed -i 's#3306#3308#g' /data/3308/mysqltouch /data/3308/mysql_zhouwanchun3308.errchown -R mysql:mysql /data/3308chmod 700 /data/3308/mysqlcd /application/mysql/scripts/./mysql_install_db --defaults-file=/data/3308/my.cnf --basedir=/application/mysql --datadir=/data/3308/data --user=mysqlchown -R mysql:mysql /data/3308egrep "server-id|log-bin" /data/3308/my.cnf/data/3308/mysql startnetstat -tlunp | grep 3308echo "/data/3308/mysql start" >> /etc/rc.localtail -4 /etc/rc.localmysql -S /data/3308/mysql.sockmysqladmin -uroot -S /data/3308/mysql.sock password 'oldboy3308'mysql -uroot -poldboy3308 -S /data/3308/mysql.sock
18、给mysql做基本安全配置(1).为root用户设置密码(密码已经设置)(2).清除mysql服务器内无用的用户[root@linux-node1 ~]# mysql -uroot -poldboy3306 -S /data/3306/mysql.sockWarning: Using a password on the command line interface can be insecure.Welcome to the MySQL monitor. Commands end with ; or \g.Your MySQL connection id is 6Server version: 5.6.41-log Source distributionCopyright (c) 2000, 2018, Oracle and/or its affiliates. All rights reserved.Oracle is a registered trademark of Oracle Corporation and/or itsaffiliates. Other names may be trademarks of their respectiveowners.Type 'help;' or '\h' for help. Type '\c' to clear the current input statement.
mysql> select user, host from mysql.user ;+------+----------------------+| user | host |+------+----------------------+| root | 127.0.0.1 || root | ::1 || | linux-node1.eric.com || root | linux-node1.eric.com || | localhost || root | localhost |+------+----------------------+6 rows in set (0.00 sec)
mysql> drop user root@'::1' ;Query OK, 0 rows affected (0.01 sec)
mysql> drop user root@'linux-node1.eric.com' ;Query OK, 0 rows affected (0.00 sec)
mysql> drop user ''@'linux-node1.eric.com' ;Query OK, 0 rows affected (0.00 sec)
mysql> drop user ''@'localhost' ;Query OK, 0 rows affected (0.00 sec)
mysql> select user, host from mysql.user ;+------+-----------+| user | host |+------+-----------+| root | 127.0.0.1 || root | localhost |+------+-----------+2 rows in set (0.00 sec)
(3).删除mysql数据库内无用的test库mysql> show databases ;+--------------------+| Database |+--------------------+| information_schema || mysql || performance_schema || test |+--------------------+4 rows in set (0.00 sec)
mysql> drop database test ;Query OK, 0 rows affected (0.01 sec)
mysql> show databases ;+--------------------+| Database |+--------------------+| information_schema || mysql || performance_schema |+--------------------+3 rows in set (0.00 sec)
19、重启Linux操作系统[root@linux-node1 ~]# reboot
Linux平台下源码安装mysql多实例数据库的更多相关文章
- CentOS 7下源码安装MySQL 5.7
网上说linux安装mysql服务分两种安装方法: ①源码安装,优点是安装包比较小,只有几十M左右,缺点是安装依赖的库多,安装编译时间长,安装步骤复杂容易出错: ②使用官方编译好的二进制文件安装,优点 ...
- lnux下源码安装MySQL 5.6
nux下源码安装MySQL 5.6 说明:本文是我自己测试的MySQL5.6源码安装,经本人亲自实践,完全可用,另在5.6之前的版本也是可以按照本文源码安装的.我是在两台linux下一台安装5.5,另 ...
- centos 6x系统下源码安装mysql操作记录
在运维工作中经常部署各种运维环境,涉及mysql数据库的安装也是时常需要的.mysql数据库安装可以选择yum在线安装,但是这种安装的mysql一般是系统自带的,版本方面可能跟需求不太匹配.可以通过源 ...
- CentOS 7下源码安装MySQL 5.6
本文转载,并非原创. 目录 准备工作 运行环境 确认你的安装版本 下载MySQL 安装MySQL 准备安装环境 编译和安装 配置MySQL 单实例配置 单实例配置方法 添加防火墙 启动MySQL 重启 ...
- CentOS 6.5下源码安装MySQL 5.6
变量lower_case_file_system说明是否数据目录所在的文件系统对文件名的大小写敏感.ON说明对文件名的大小写不敏感,OFF表示敏感. 在my.cnf中[mysqld]更改lower_c ...
- CentOS下源码安装MySQL
一.创建mysql用户与组,相关目录 useradd mysql -s /sbin/nologin mkdir /usr/local/mysql chown -R mysql.mysql mkdir ...
- Linux环境下源码安装PostgreSQL
1.下载PostgreSQL源码包,并保存到Linux操作系统的一个目录下 2.解压PostgreSQL源码包 :tar zxvf postgresql-9.2.4.tar.gz 或 tar jxvf ...
- Linux系统下源码安装rz/sz命令
背景:在windows环境下,使用xshell远程连接公司内部做的一个类似centos的系统,但该linux系统yum install有问题,只能源码安装. root 账号登陆后,依次执行以下命令: ...
- Linux环境下源码安装Apache2.2.25
操作环境:RedHat Enterprise Linux 5.6 一.安装准备 安装Apache一般依赖3个组件:apr.apr-util.pcre. 确保这三个组件已经安装. [root@bigsr ...
随机推荐
- 统计cpu相关信息
我的cpu为i3310m 适用类型:笔记本 CPU系列:酷睿i3 3代系列 CPU主频:2.4GHz 三级缓存:3MB 插槽类型:FCBGA1023,FCPGA988 封装大小:37.5×37.5mm ...
- wget命令的使用
wget是在命令行下载文件的命令 -c 断点续传,用于大文件的下载或者网络不稳定的情况下,一般不写也可以 -P 指定下载到那个目录(是大写的P) 举例 [root@bogon local]# wget ...
- python基础(三)——类的研究
class Employee: //定义类 以冒号结束 '所有员工的基类' //帮助信息 empCount = 0 def __init__(self, name, salary): //调用时初始化 ...
- gtk_init()
#include<stdio.h> #if 0int main(int argc, char *argv[]){ char ***p = &argv; //传参退化成二级指针,对二 ...
- 在树莓派是安装并配置NTP服务
我们都知道树莓派的小巧和省电节省空间等太多的优势,这里就不一一列举了,那么树莓派就需要长时间的运行,可以7×24的方式运行,那么我们就把树莓派当作一个小的服务器来运行,可以跑一些小的应用,例如可以在局 ...
- JavaScript 中 this的指向
this 一方面便利了让大家在JS开发当, 但是另一方面让开发者头痛的是不清楚this 指代什么. 指向全局Window: <script> console.log(this); < ...
- 详解Linux查看实时网卡流量的几种方式(转)
转自https://www.jb51.net/article/112965.htm 假如Keepalived有10个VIP,怎么查看每个VIP的流量呢? 这里就可以使用sar命令查看网卡流量了.前提是 ...
- [转]Java对象的序列化和反序列化
一.序列化和反序列化的概念 把对象转换为字节序列的过程称为对象的序列化. 把字节序列恢复为对象的过程称为对象的反序列化. 对象的序列化主要有两种用途: 1) 把对象的字节序列永久地保存到硬盘上,通常存 ...
- re正则匹配使用
print(result.span()) #输入字符串的范围 如果在匹配语句中有括号,group(1)就是提取第一个括号的内容,以此类推. 扩展思考:如果要从文本中匹配出目标字符串可以使用括号加gro ...
- jupyter notebook的路径
跟你执行jupyter notebook的当前路径有关系:你在哪个路径下执行的这个语句,那么你就是以那个路径为基础的workspace