使用jQuery.FileUpload和Backload自定义控制器上传多个文件
当需要在控制器中处理除了文件的其他表单字段,执行控制器独有的业务逻辑......等等,这时候我们可以自定义控制器。
通过继承BackloadController
□ 思路
BackloadController的HandleRequestAsync()方法可以用来处理异步请求,通过继承BackloadController,子类也有了处理异步文件请求的能力。客户端方面,需要一个指向自定义控制器的初始化js文件。
□ FileUploadDerivedController继承BackloadController
1: public class FileUploadDerivedController : BackloadController
2: {
3: public ActionResult Index()
4: {
5: return View();
6: }
7:
8: public async Task<ActionResult> FileHandler()
9: {
10: ActionResult result = await base.HandleRequestAsync();
11: return result;
12: }
13: }
□ 创建一个指向自定义控制器的js文件main.js
1: $(function () {
2: 'use strict';
3:
4: var fileUploadUrl = "/FileUploadDerived/FileHandler";
5:
6: // Initialize the jQuery File Upload widget:
7: $('#fileupload').fileupload({
8: url: fileUploadUrl,
9: acceptFileTypes: /(jpg)|(jpeg)|(png)|(gif)$/i // Allowed file types
10: });
11:
12: // Optional: Initial ajax request to load already existing files.
13: $.ajax({
14: url: fileUploadUrl,
15: dataType: 'json',
16: context: $('#fileupload')[0]
17: })
18: .done(function (result) {
19: $(this).fileupload('option', 'done')
20: .call(this, null, { result: result });
21: // Attach the Colorbox plugin to the image files to preview them in a modal window. Other file types (e.g. pdf) will show up in a
22: // new browser window.
23: $(".files tr[data-type=image] a").colorbox();
24: });
25:
26:
27: // Initialize the jQuery ui theme switcher:
28: $('#theme-switcher').change(function () {
29: var theme = $('#theme');
30: theme.prop(
31: 'href',
32: theme.prop('href').replace(
33: /[\w\-]+\/jquery-ui.css/,
34: $(this).val() + '/jquery-ui.css'
35: )
36: );
37: });
38: });
39:
40:
41: $("document").ready(function () {
42: // The Colorbox plugin needs to be informed on new uploaded files in the template in order to bind a handler to it.
43: // There must be a little delay, because the fileuploaddone event is triggered before the new template item is created.
44: // A more elegant solution would be to use jQuery's delegated .on method, which automatically binds to the anchors in a
45: // newly created template item, and then call colorbox manually.
46: $('#fileupload').bind('fileuploaddone', function(e, data) {
47: setTimeout(function() { $(".files tr[data-type=image] a").colorbox() }, 1000);
48: });
49: });
50:
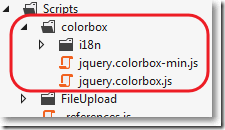
□ 其中用到了colorbox插件
install-package colorbox

□ FileUploadDerived/Index.cshtml视图
@{
ViewBag.Title = "Index";
Layout = "~/Views/Shared/_Layout.cshtml";
}
<div>
<!-- The file upload form used as target for the file upload widget -->
<form id="fileupload" action="/Backload/UploadHandler" method="POST" enctype="multipart/form-data">
<!-- Redirect browsers with JavaScript disabled to the origin page -->
<noscript><input type="hidden" name="redirect" value="/"></noscript>
<!-- The fileupload-buttonbar contains buttons to add/delete files and start/cancel the upload -->
<div class="row fileupload-buttonbar">
<div class="span7">
<!-- The fileinput-button span is used to style the file input field as button -->
<span class="btn btn-success fileinput-button">
<i class="icon-plus icon-white"></i>
<span>添加文件...</span>
<input type="file" name="files[]" multiple>
</span>
<button type="submit" class="btn btn-primary start">
<i class="icon-upload icon-white"></i>
<span>开始上传</span>
</button>
<button type="reset" class="btn btn-warning cancel">
<i class="icon-ban-circle icon-white"></i>
<span>取消上传</span>
</button>
<button type="button" class="btn btn-danger delete">
<i class="icon-trash icon-white"></i>
<span>删除</span>
</button>
<input type="checkbox" class="toggle">
<!-- The loading indicator is shown during file processing -->
<span class="fileupload-loading"></span>
</div>
<!-- The global progress information -->
<div class="span5 fileupload-progress fade">
<!-- The global progress bar -->
<div class="progress progress-success progress-striped active" role="progressbar" aria-valuemin="0" aria-valuemax="100">
<div class="bar" style="width:0%;"></div>
</div>
<!-- The extended global progress information -->
<div class="progress-extended"> </div>
</div>
</div>
<!-- The table listing the files available for upload/download -->
<table role="presentation" class="table table-striped"><tbody class="files" data-toggle="modal-gallery" data-target="#modal-gallery"></tbody></table>
</form>
<!-- The template to display files available for upload -->
<script id="template-upload" type="text/x-tmpl">
{% for (var i=0, file; file=o.files[i]; i++) { %}
<tr class="template-upload fade">
<td>
<span class="preview"></span>
</td>
<td>
<p class="name">{%=file.name%}</p>
{% if (file.error) { %}
<div><span class="label label-important">Error</span> {%=file.error%}</div>
{% } %}
</td>
<td>
<p class="size">{%=o.formatFileSize(file.size)%}</p>
{% if (!o.files.error) { %}
<div class="progress progress-success progress-striped active" role="progressbar" aria-valuemin="0" aria-valuemax="100" aria-valuenow="0"><div class="bar" style="width:0%;"></div></div>
{% } %}
</td>
<td>
{% if (!o.files.error && !i && !o.options.autoUpload) { %}
<button class="btn btn-primary start">
<i class="icon-upload icon-white"></i>
<span>Start</span>
</button>
{% } %}
{% if (!i) { %}
<button class="btn btn-warning cancel">
<i class="icon-ban-circle icon-white"></i>
<span>Cancel</span>
</button>
{% } %}
</td>
</tr>
{% } %}
</script>
<!-- The template to display files available for download -->
<script id="template-download" type="text/x-tmpl">
{% for (var i=0, file; file=o.files[i]; i++) { %}
<tr class="template-download fade">
<td>
<span class="preview">
{% if (file.thumbnail_url) { %}
<a href="{%=file.url%}" title="{%=file.name%}" data-gallery="gallery" download="{%=file.name%}"><img src="{%=file.thumbnail_url%}"></a>
{% } %}
</span>
</td>
<td>
<p class="name">
<a href="{%=file.url%}" title="{%=file.name%}" data-gallery="{%=file.thumbnail_url&&'gallery'%}" download="{%=file.name%}">{%=file.name%}</a>
</p>
{% if (file.error) { %}
<div><span class="label label-important">Error</span> {%=file.error%}</div>
{% } %}
</td>
<td>
<span class="size">{%=o.formatFileSize(file.size)%}</span>
</td>
<td>
<button class="btn btn-danger delete" data-type="{%=file.delete_type%}" data-url="{%=file.delete_url%}"{% if (file.delete_with_credentials) { %} data-xhr-fields='{"withCredentials":true}'{% } %}>
<i class="icon-trash icon-white"></i>
<span>Delete</span>
</button>
<input type="checkbox" name="delete" value="1" class="toggle">
</td>
</tr>
{% } %}
</script>
</div>
@section scripts
{
@* <script src="~/Scripts/FileUpload/backload.demo.js"></script>*@
<script src="~/Scripts/main.js"></script>
}
□ 在web.config中设置目的文件夹CustomerController
1: <configuration>
2: <configSections>
3: ...
4: <section name="backload" type="Backload.Configuration.BackloadSection, Backload, Version=1.9.3.1, Culture=neutral, PublicKeyToken=02eaf42ab375d363" requirePermission="false" />
5: </configSections>
6:
7: <backload xmlns:xsi="http://www.w3.org/2001/XMLSchema-instance" xmlns:name="urn:fileupload-schema" xsi:noNamespaceSchemaLocation="Web.FileUpload.xsd">
8: <fileSystem filesRoot="~/CustomerController" />
9: </backload>
10: </configuration>
□ 结果
上传界面:

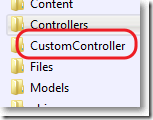
CustomerController文件夹:
CustomerController文件夹内容:
通过为FileUploadHandler的事件IncomingRequestStarted注册方法
□ 思路
为FileUploadHandler的事件IncomingRequestStarted注册方法,再让事件处理异步文件请求。客户端方面,需要一个指向自定义控制器的初始化js文件。
□ FileUploadInstanceController
1: public class FileUploadInstanceController : Controller
2: {
3: public ActionResult Index()
4: {
5: return View();
6: }
7:
8: public async Task<ActionResult> FileHandler()
9: {
10: FileUploadHandler handler = new FileUploadHandler(Request, this);
11: handler.IncomingRequestStarted += handler_IncomingRequestStarted;
12: ActionResult result = await handler.HandleRequestAsync();
13: return result;
14: }
15:
16: void handler_IncomingRequestStarted(object sender, Backload.Eventing.Args.IncomingRequestEventArgs e)
17: {
18: //禁止添加操作
19: if (e.Context.HttpMethod == "PUT")
20: {
21: e.Context.PipelineControl.ExecutePipeline = false;
22: }
23: }
24: }
25:
□ 创建一个指向自定义控制器的js文件main.js
1: $(function () {
2: 'use strict';
3:
4: var fileUploadUrl = "/FileUploadInstance/FileHandler";
5:
6:
7: // Initialize the jQuery File Upload widget:
8: $('#fileupload').fileupload({
9: url: fileUploadUrl,
10: acceptFileTypes: /(jpg)|(jpeg)|(png)|(gif)$/i // Allowed file types
11: });
12:
13: // Optional: Initial ajax request to load already existing files.
14: $.ajax({
15: url: fileUploadUrl,
16: dataType: 'json',
17: context: $('#fileupload')[0]
18: })
19: .done(function (result) {
20: $(this).fileupload('option', 'done')
21: .call(this, null, { result: result });
22: // Attach the Colorbox plugin to the image files to preview them in a modal window. Other file types (e.g. pdf) will show up in a
23: // new browser window.
24: $(".files tr[data-type=image] a").colorbox();
25: });
26:
27:
28:
29: // Initialize the jQuery ui theme switcher:
30: $('#theme-switcher').change(function () {
31: var theme = $('#theme');
32: theme.prop(
33: 'href',
34: theme.prop('href').replace(
35: /[\w\-]+\/jquery-ui.css/,
36: $(this).val() + '/jquery-ui.css'
37: )
38: );
39: });
40: });
41:
42:
43: $("document").ready(function () {
44: // The Colorbox plugin needs to be informed on new uploaded files in the template in order to bind a handler to it.
45: // There must be a little delay, because the fileuploaddone event is triggered before the new template item is created.
46: // A more elegant solution would be to use jQuery's delegated .on method, which automatically binds to the anchors in a
47: // newly created template item, and then call colorbox manually.
48: $('#fileupload').bind('fileuploaddone', function(e, data) {
49: setTimeout(function() { $(".files tr[data-type=image] a").colorbox() }, 1000);
50: });
51: });
52:
□ FileUploadInstance/Index.cshtml视图
同上
□ 在web.config中设置目的文件夹FileUpload
1: <configuration>
2: <configSections>
3: ...
4: <section name="backload" type="Backload.Configuration.BackloadSection, Backload, Version=1.9.3.1, Culture=neutral, PublicKeyToken=02eaf42ab375d363" requirePermission="false" />
5: </configSections>
6:
7: <backload xmlns:xsi="http://www.w3.org/2001/XMLSchema-instance" xmlns:name="urn:fileupload-schema" xsi:noNamespaceSchemaLocation="Web.FileUpload.xsd">
8: <fileSystem filesRoot="~/FileUpload" />
9: </backload>
10: </configuration>
□ 结果
上传界面:

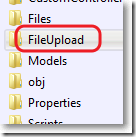
FileUpload文件夹:
FileUpload文件夹内容:
使用jQuery.FileUpload和Backload自定义控制器上传多个文件的更多相关文章
- MVC文件上传06-使用客户端jQuery-File-Upload插件和服务端Backload组件自定义控制器上传多个文件
当需要在控制器中处理除了文件的其他表单字段,执行控制器独有的业务逻辑......等等,这时候我们可以自定义控制器. MVC文件上传相关兄弟篇: MVC文件上传01-使用jquery异步上传并客户端验证 ...
- MVC文件上传-使用jQuery.FileUpload和Backload组件实现文件上传
本篇使用客户端jQuery-File-Upload插件和服务端Badkload组件实现多文件异步上传.MVC文件上传相关兄弟篇: 处理文件上传的服务端组件Backload 用于处理文件上传的服务端组件 ...
- jQuery+AJAX实现网页无刷新上传
新年礼,提供简单.易套用的 jQuery AJAX上传示例及代码下载.后台对文件的上传及检查,以 C#/.NET Handler 处理 (可视需要改写成 Java 或 PHP). 有时做一个网站项目 ...
- FileUpload控件「批次上传 / 多档案同时上传」的范例--以「流水号」产生「变量名称」
原文出處 http://www.dotblogs.com.tw/mis2000lab/archive/2013/08/19/multiple_fileupload_asp_net_20130819. ...
- ueditor 百度编辑器 自定义图片上传路径和格式化上传文件名
今天项目中需要自定义图片上传的保存路径,并且不需要按照日期自动创建存储文件夹和文件名,我的ueditor版本是1.3.6.下面记录一下我配置成功的方法,如果有什么不对的地方欢迎指出,共同学习: 1:我 ...
- CKEditor5 + vue2.0 自定义图片上传、highlight、字体等用法
因业务需求,要在 vue2.0 的项目里使用富文本编辑器,经过调研多个编辑器,CKEditor5 支持 vue,遂采用.因 CKEditor5 文档比较少,此处记录下引用和一些基本用法. CKEdit ...
- vue-quill-editor富文本编辑器,上传图片自定义为借口上传
vue-quill-editor富文本编辑器,上传图片自定义为借口上传 博客地址:https://blog.csdn.net/lyj2018gyq/article/details/82585194
- vue项目富文本编辑器vue-quill-editor之自定义图片上传
使用富文本编辑器的第一步肯定是先安装依赖 npm i vue-quill-editor 1.如果按照官网富文本编辑器中的图片上传是将图片转为base64格式的,如果需要上传图片到自己的服务器,需要修改 ...
- jQuery+php+ajax实现无刷新上传文件功能
jQuery+php+ajax实现无刷新上传文件功能,还带有上传进度条动画效果,支持图片.视频等大文件上传. js代码 <script type='text/javascript' src='j ...
随机推荐
- JNI总结(一)
JNI 是 Java平台中的一个强大特性.应用程序能够通过 JNI把 C/C++代码集成进 Java程序中.通过 JNI.开发人员在利用 Java平台强大功能的同一时候,又不必放弃对原有代码的投资.由 ...
- 一个仿 github for windows 及 windows 8 的进度条
https://github.com/wly2014/ProgressBar
- max_user_connections 与 max_connections,max_connect_errors, nr_open, file-max
LINUX文件设置: ulimit -n <num> ----> [/etc/profile,/.bashrc] ---->/etc/security/limits.conf ...
- 用java开发的网站或者程序
中国移动的官网即其相关业务系统 阿里巴巴.淘宝网 58同城是java做的后台 铁道部12306 腾讯的拍拍网等 各大银行的交互应用系统,比如有的信用卡网银 另外,Android手机的大部分应用,其他智 ...
- mysql distinct跟group by性能
mysql distinct和group by性能 1,测试前的准备 //准备一张测试表 mysql> CREATE TABLE `test_test` ( -> `id` int ...
- How the Kernel Manages Your Memory
http://duartes.org/gustavo/blog/post/how-the-kernel-manages-your-memory/ After examining the virtual ...
- 键盘工具栏的快速集成--HcCustomKeyboard
源项目地址:HcCustomKeyboard HcCustomKeyboard是一个键盘工具栏控件: 效果: HcCustomKeyboard使用很方便: 三部: 添加控件->操作处理-> ...
- 关于RSS
RSS(简易信息聚合)是一种消息来源格式规范,用以聚合经常发布更新数据的网站,例如博客文章.新闻.音频或视频的网摘.RSS文件(或称做摘要.网络摘要.或频更新,提供到频道)包含了全文或是节录的文字,再 ...
- 3.x vector的用法
#include<vector> //struct struct GOLD_STRUCT { Sprite * goldspSprite; int goldValue; ...
- JavaScript 一个等号 两个等号 三个等号的区别
一个等号 =:表示赋值 : 两个等号 ==:先转换类型再比较 : 三个等号 ===:先判断类型,如果不是同一类型直接false.
