【SpringMVC】---搭建框架步骤
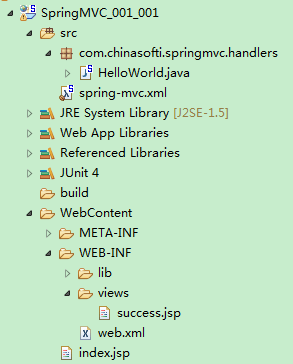
项目如下
一、加入 Jar 包

部分jar包可以不导(第4、9、11个可以不导入)
二、在 Web.xml 中配置 DispatcherServlet
<?xml version="1.0" encoding="UTF-8"?>

<web-app xmlns:xsi="http://www.w3.org/2001/XMLSchema-instance" xmlns="http://java.sun.com/xml/ns/javaee" xsi:schemaLocation="http://java.sun.com/xml/ns/javaee http://java.sun.com/xml/ns/javaee/web-app_2_5.xsd" id="WebApp_ID" version="2.5">

  <display-name>SpringMVC_001_001</display-name>

  <welcome-file-list>

    <welcome-file>index.html</welcome-file>

    <welcome-file>index.htm</welcome-file>

    <welcome-file>index.jsp</welcome-file>

    <welcome-file>default.html</welcome-file>

    <welcome-file>default.htm</welcome-file>

    <welcome-file>default.jsp</welcome-file>

  </welcome-file-list>

    <!-- 配置 DispatcherServlet -->

  <servlet>

      <!-- springDispatcherServlet 在应用启动的时候被创建,不是调用的时候被创建。 -->

      <!-- 实际上也可以不通过 contextConfigLocation 来配置 springmvc 的配置文件,而使用默认的。 -->

    <!-- 默认的配置文件为:/WEB-INF/<servlet-name>-servlet.xml -->

    <!-- 把 SRC 下的 spring-mvc.xml 移动在/WEB-INF/下并改名为 springDispatcherServlet-servlet.xml的文件,并注释 R20~R23 -->

    <!--配置 DispatcherServlet 初始化参数,作用是配置 SpringMVC 配置文件的位置和名称-->

    <servlet-name>springDispatcherServlet</servlet-name>

    <servlet-class>org.springframework.web.servlet.DispatcherServlet</servlet-class>

    <init-param>

      <param-name>contextConfigLocation</param-name>

      <param-value>classpath:spring-mvc.xml</param-value>

    </init-param>

    <load-on-startup>1</load-on-startup>

  </servlet>

      <!-- 将所有请求映射到DispatcherServlet处理 -->

  <servlet-mapping>

      <!--配置 DispatcherServlet 初始化参数,作用是配置 SpringMVC 配置文件的位置和名称-->

    <servlet-name>springDispatcherServlet</servlet-name>

    <url-pattern>/</url-pattern>

  </servlet-mapping>

  <!-- 配置HiddenHttpMethodFilter,可以把POST请求转换为DELETE或PUT请求 -->

  <filter>

    <filter-name>hiddenHttpMethodFilter</filter-name>

    <filter-class>org.springframework.web.filter.HiddenHttpMethodFilter</filter-class>

  </filter>

  <filter-mapping>

    <filter-name>hiddenHttpMethodFilter</filter-name>

    <url-pattern>/*</url-pattern>

  </filter-mapping>

</web-app>
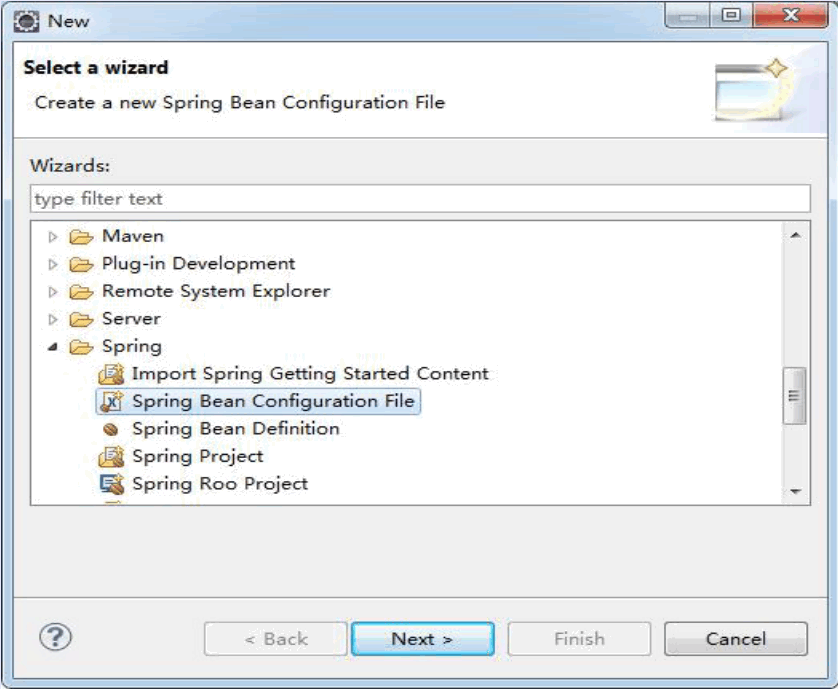
三、加入 SpringMVC 的配置文件
在 SRC 下面创建 spring-mvc.xml

<?xml version="1.0" encoding="UTF-8"?>

<beans xmlns="http://www.springframework.org/schema/beans"

    xmlns:xsi="http://www.w3.org/2001/XMLSchema-instance"

    xmlns:aop="http://www.springframework.org/schema/aop"

    xmlns:context="http://www.springframework.org/schema/context"

    xmlns:jdbc="http://www.springframework.org/schema/jdbc"

    xmlns:mvc="http://www.springframework.org/schema/mvc"

    xmlns:tx="http://www.springframework.org/schema/tx"

    xsi:schemaLocation="http://www.springframework.org/schema/beans http://www.springframework.org/schema/beans/spring-beans.xsd

        http://www.springframework.org/schema/aop http://www.springframework.org/schema/aop/spring-aop-4.3.xsd

        http://www.springframework.org/schema/context http://www.springframework.org/schema/context/spring-context-4.3.xsd

        http://www.springframework.org/schema/jdbc http://www.springframework.org/schema/jdbc/spring-jdbc-4.3.xsd

        http://www.springframework.org/schema/mvc http://www.springframework.org/schema/mvc/spring-mvc-4.3.xsd

        http://www.springframework.org/schema/tx http://www.springframework.org/schema/tx/spring-tx-4.3.xsd">

    <!-- 配置自动扫描的包 -->

    <context:component-scan base-package="com.chinasofti"></context:component-scan>

    <!-- 配置视图解析器:如何把 handler 方法返回值解析为实际的物理视图 -->

    <bean class="org.springframework.web.servlet.view.InternalResourceViewResolver">

        <property name="prefix" value="/WEB-INF/views/"></property>

        <property name="suffix" value=".jsp"></property>

    </bean>

</beans>
四、编写处理请求的处理器,并标识为处理器
package com.chinasofti.springmvc.handlers;

import org.springframework.stereotype.Controller;

import org.springframework.web.bind.annotation.RequestMapping;

@Controller

public class HelloWorld {

    /**

    * 1、使用 RequestMapping 注解来映射请求的 URL(统一资源定位)

    * 2、返回值会通过视图解析器解析为实际的物理视图,对于 InternalResourceViewResolver 而言,

    * 视图解析器会做如下的解析:

    * 2.1、通过 prefix + returnVal + 后缀这样的方式得到实际的物理视图,然后做转发操作。

    * 如:/WEB-INF/views/success.jsp

    * @return

    */

    public static final String SUCCESS="success";

    @RequestMapping("/helloword")

    public String hello(){

        System.out.println("hello word");

        return SUCCESS;

        }

}
五、在 spring-mvc.xml 中配置自动扫描的包(见步骤三)
六、给 HelloWord 注解为控制器(SpringMVC 里面叫 handler,也叫请求处理器)(见步骤四)
七、在 Spring-mvc.xml 中配置视图解析器(见步骤三)
success.jsp页面
<%@ page language="java" contentType="text/html; charset=UTF-8"

    pageEncoding="UTF-8"%>

<!DOCTYPE html PUBLIC "-//W3C//DTD HTML 4.01 Transitional//EN" "http://www.w3.org/TR/html4/loose.dtd">

<html>

<head>

<meta http-equiv="Content-Type" content="text/html; charset=UTF-8">

<title>Insert title here</title>

</head>

<body>

成功?

</body>

</html>
八、编写请求视图
创建 index.jsp
<%@ page language="java" contentType="text/html; charset=UTF-8"

    pageEncoding="UTF-8"%>

<!DOCTYPE html PUBLIC "-//W3C//DTD HTML 4.01 Transitional//EN" "http://www.w3.org/TR/html4/loose.dtd">

<html>

<head>

<meta http-equiv="Content-Type" content="text/html; charset=UTF-8">

<title>Insert title here</title>

</head>

<body>

<a href="helloword">跳转</a>

</body>

</html>
九、运行项目
总结
添加 Jar 包
配置 Web.xml 文件
配置 DispatcherServlet
引入 contextConfigLocation 配置 spring 文件初始化参数
配置那些请求可以请求 DispatcherServlet
配置 springmvc 的配置文件
配置注解扫描包
配置视图解析器
编写控制器 handler
通过@RequestMapping 注解映射请求
配置视图
【SpringMVC】---搭建框架步骤的更多相关文章
- 初学springMVC搭建框架过程及碰到的问题
刚刚开始学spring框架,因为接了一个网站的项目,想用spring+springMVC+hibernate整合来实现它,现在写下搭建框架的过程及碰到的问题.希望给自己看到也能让大家看到不要踏坑. 一 ...
- 【SpringMVC】SpringMVC搭建框架
开发环境 IDE:idea 2019.3.2 构建工具:maven3.5.4 服务器:tomcat 9.0.30 Spring版本:5.3.1 创建maven工程 添加打包方式:war 引入依赖 &l ...
- SSM(Spring+SpringMVC+Mybatis)框架环境搭建(整合步骤)(一)
1. 前言 最近在写毕设过程中,重新梳理了一遍SSM框架,特此记录一下. 附上源码:https://gitee.com/niceyoo/jeenotes-ssm 2. 概述 在写代码之前我们先了解一下 ...
- Spring+SpringMvc+Mybatis框架集成搭建教程
一.背景 最近有很多同学由于没有过SSM(Spring+SpringMvc+Mybatis , 以下简称SSM)框架的搭建的经历,所以在自己搭建SSM框架集成的时候,出现了这样或者那样的问题,很是苦恼 ...
- 使用intellij idea搭建MAVEN+springmvc+mybatis框架
原文:使用intellij idea搭建MAVEN+springmvc+mybatis框架 1.首先使用idea创建一个maven项目 2.接着配置pom.xml,以下为我的配置 <projec ...
- 用IntelliJ IDEA 开发Spring+SpringMVC+Mybatis框架 分步搭建四:配置springmvc
在用IntelliJ IDEA 开发Spring+SpringMVC+Mybatis框架 分步搭建三:配置spring并测试的基础上 继续进行springmvc的配置 一:配置完善web.xml文件
- 用IntelliJ IDEA 开发Spring+SpringMVC+Mybatis框架 分步搭建三:配置spring并测试
这一部分的主要目的是 配置spring-service.xml 也就是配置spring 并测试service层 是否配置成功 用IntelliJ IDEA 开发Spring+SpringMVC+M ...
- 用IntelliJ IDEA 开发Spring+SpringMVC+Mybatis框架 分步搭建二:配置MyBatis 并测试(2 配置spring-dao和测试)
用IntelliJ IDEA 开发Spring+SpringMVC+Mybatis框架 分步搭建二:配置MyBatis 并测试(1 搭建目录环境和依赖) 四:在\resources\spring 下面 ...
- 用IntelliJ IDEA 开发Spring+SpringMVC+Mybatis框架 分步搭建二:配置MyBatis 并测试(1 构建目录环境和依赖)
引言:在用IntelliJ IDEA 开发Spring+SpringMVC+Mybatis框架 分步搭建一 的基础上 继续进行项目搭建 该部分的主要目的是测通MyBatis 及Spring-dao ...
随机推荐
- Java中Collection、Map常用实现类研究分析
接口/实现类 描述 key是否可为null 为null是否报错 key是否重复 key重复是否报错 key是否和添加一致 是否线程安全 List 一组元素的集合 ArrayList 基于数组存储,读取 ...
- laravel-admin 表单提交报错
Method App\Admin\Controllers\GoodsSpecController::store does not exist. Method App\Admin\Controllers ...
- web部署命令简单记录
非 root 用户设置环境变量:在< .bash_profile >中设置 后台运行:nohup dosomething >> log.out & nginx 启动ng ...
- Python核心技术与实战——十八|Python并发编程之Asyncio
我们在上一章学习了Python并发编程的一种实现方法——多线程.今天,我们趁热打铁,看看Python并发编程的另一种实现方式——Asyncio.和前面协程的那章不太一样,这节课我们更加注重原理的理解. ...
- AI换脸教程:DeepFaceLab使用教程(1.安装及分解视频)
首先需要选择合适的DeepFaceLab下载(https://www.deepfacelabs.com/list-5-1.html),然后安装相应的显卡驱动,如果已经准备好这些工作,那么恭喜你,终于开 ...
- JAVA并发编程的艺术 JMM内存模型
锁的升级和对比 java1.6为了减少获得锁和释放锁带来的性能消耗,引入了"偏向锁"和"轻量级锁". 偏向锁 偏向锁为了解决大部分情况下只有一个线程持有锁的情况 ...
- xmlns, xmlns:xsi, xsi:schemaLocation 解释
xmlns, xmlns:xsi, xsi:schemaLocation 解释 xmlnsxsischemaLocation 我们在写 xml 文件时,尤其是 spring .mybatis 的配置文 ...
- Maven私服仓库
Maven私服仓库 现象:在maven install的时候,会做以下事情 [INFO] Installing /Users/cqq/Documents/VanDreamPro/vandream-er ...
- vue 解决axios 跨域问题
闲着没事,假期敲vue 请求数据,总结下vue跨越问题 第一种.服务器服务器不支持跨域请求 1.当跨域无法请求的时候我们可以修改工程下config文件夹下的index.js中的dev:{}部分. ...
- 导入Excel扩展名是.xls 和.xlsx的
1.首先是导入Excel2003以前(包括2003)的版本,扩展名是.xls 的 /** * 操作Excel2003以前(包括2003)的版本,扩展名是.xls * @param templetFil ...