IDEA spring mvc整合mybatis
准备工作
IDEA 2019.3.1
MySql 8.0.17
Tomcat 7.0.9
开始步骤
一、创建一个项目,添加Web支持
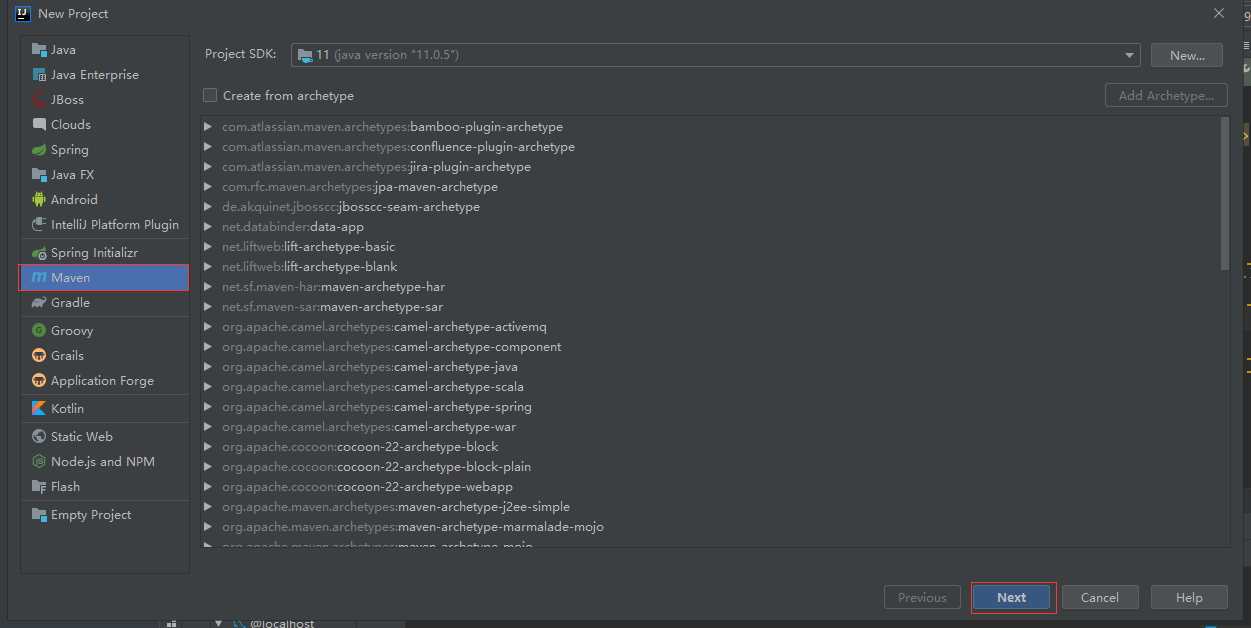
点击菜单:File->NEW->Project

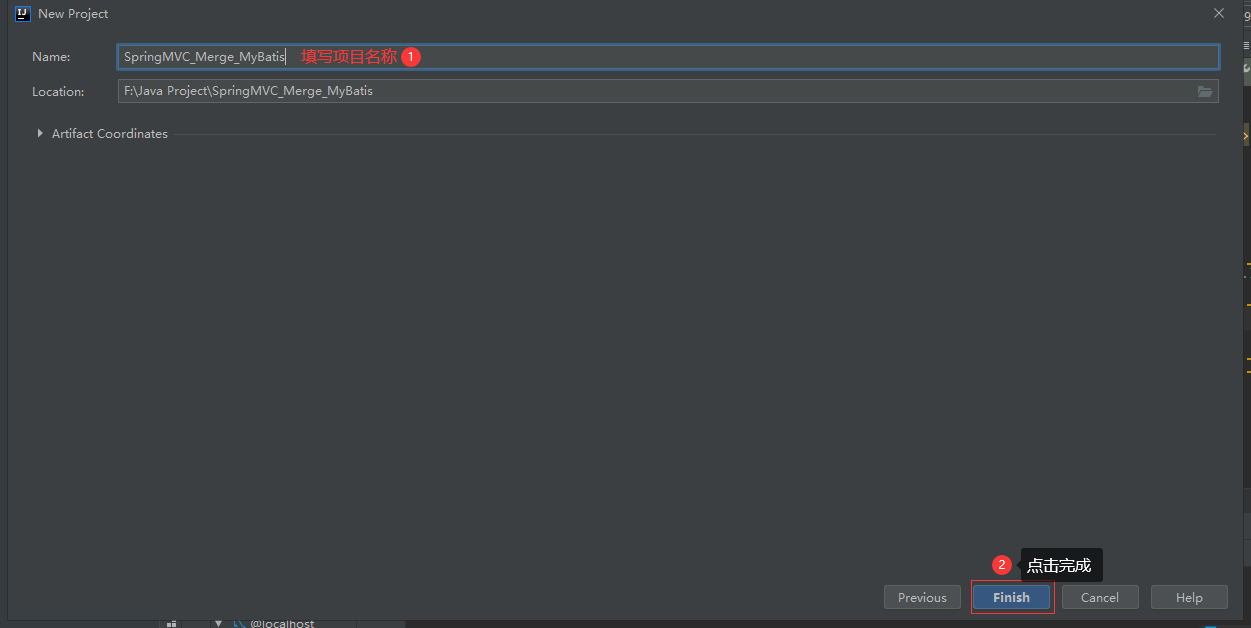
选择左侧的Maven项目,这里的 Create from archetype先不要选择,然后点击Next
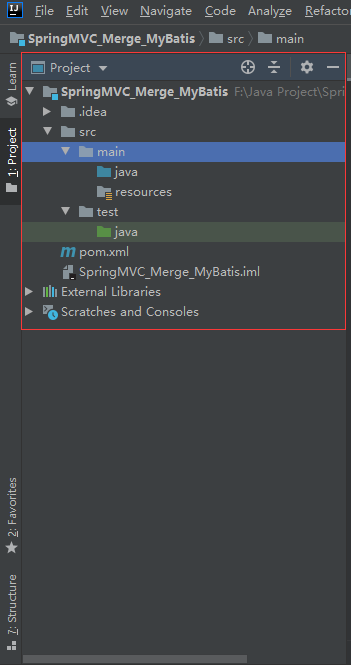
项目建好之后,目录结构如下:
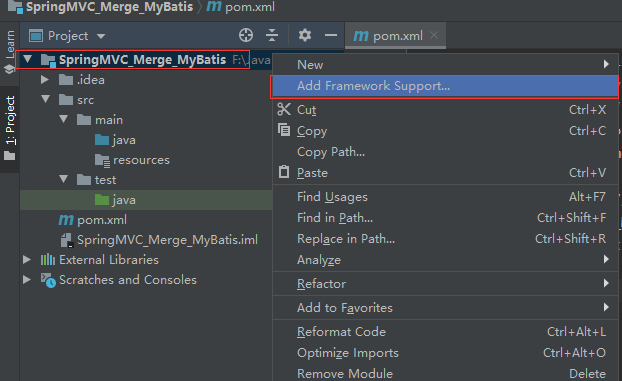
在项目上右键单击,弹出菜单,选择 Add Framework Support
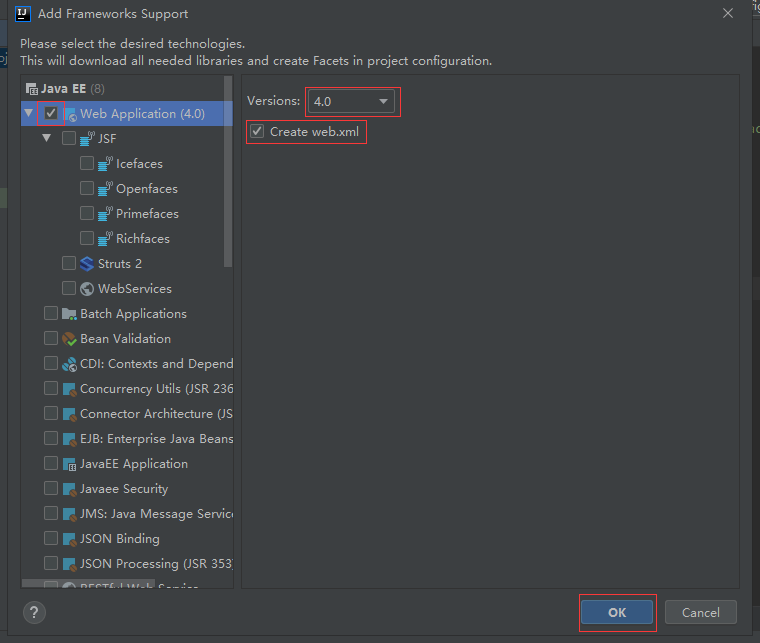
弹出如下界面,勾选左侧的Web Application(4.0),点击OK
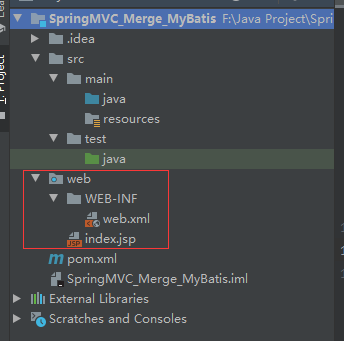
点击OK之后,可以看到项目的目录结构有web文件夹了
二、项目搭建
1.数据库
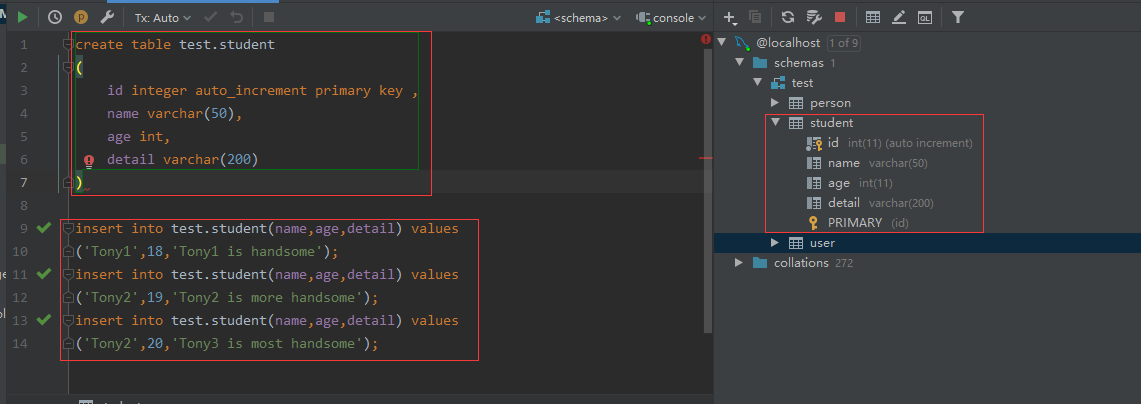
新建数据库,创建一个student表,并插入几条数据
create table test.student

(

    id integer auto_increment primary key ,

    name varchar(50),

    age int,

    detail varchar(200)

)

insert into test.student(name,age,detail) values

('Tony1',18,'Tony1 is handsome');

insert into test.student(name,age,detail) values

('Tony2',19,'Tony2 is more handsome');

insert into test.student(name,age,detail) values

('Tony2',20,'Tony3 is most handsome');
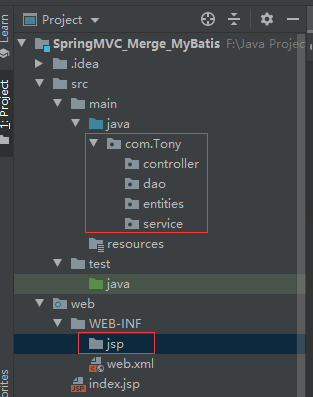
2.项目目录
在项目结构的/src/main/java文件夹下创建一个包,并添加dao,service,entities,controller这四个文件夹,在/web/WEB-INF目录下添加jsp文件夹:
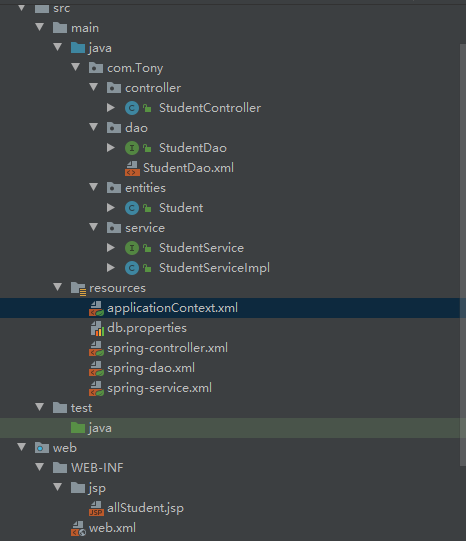
3.配置文件
本项目总共有7个配置文件:
web.xml:项目的配置文件
applicationContext.xml:spring总的配置文件,会引用controller/service/dao的配置文件
spring-controller.xml:controller层的配置文件
spring-service.xml:service层的配置文件
spring-dao.xml:dao层的配置文件,同时配置,mybatis的配置扫描
db.properties:数据库配置文件,被dao引用
StudentDao.xml:mybatis实体类映射文件
4.maven配置
引入springmvc ,mybatis所需的包,配置如下:
<dependencies>

        <!--Junit-->

        <dependency>

            <groupId>junit</groupId>

            <artifactId>junit</artifactId>

            <version>4.12</version>

        </dependency>

        <!--数据库驱动-->

        <dependency>

            <groupId>mysql</groupId>

            <artifactId>mysql-connector-java</artifactId>

            <version>5.1.47</version>

        </dependency>

        <!-- 数据库连接池 -->

        <dependency>

            <groupId>com.mchange</groupId>

            <artifactId>c3p0</artifactId>

            <version>0.9.5.2</version>

        </dependency>

        <!--Servlet - JSP -->

        <dependency>

            <groupId>javax.servlet</groupId>

            <artifactId>servlet-api</artifactId>

            <version>2.5</version>

        </dependency>

        <dependency>

            <groupId>javax.servlet.jsp</groupId>

            <artifactId>jsp-api</artifactId>

            <version>2.2</version>

        </dependency>

        <dependency>

            <groupId>javax.servlet</groupId>

            <artifactId>jstl</artifactId>

            <version>1.2</version>

        </dependency>

        <!--Mybatis-->

        <dependency>

            <groupId>org.mybatis</groupId>

            <artifactId>mybatis</artifactId>

            <version>3.5.2</version>

        </dependency>

        <dependency>

            <groupId>org.mybatis</groupId>

            <artifactId>mybatis-spring</artifactId>

            <version>2.0.2</version>

        </dependency>

        <!--Spring-->

        <dependency>

            <groupId>org.springframework</groupId>

            <artifactId>spring-webmvc</artifactId>

            <version>5.1.9.RELEASE</version>

        </dependency>

        <dependency>

            <groupId>org.springframework</groupId>

            <artifactId>spring-jdbc</artifactId>

            <version>5.1.9.RELEASE</version>

        </dependency>

        <dependency>

            <groupId>org.springframework</groupId>

            <artifactId>spring-context</artifactId>

            <version>5.1.9.RELEASE</version>

        </dependency>

        <dependency>

            <groupId>org.projectlombok</groupId>

            <artifactId>lombok</artifactId>

            <version>1.18.10</version>

        </dependency>

    </dependencies>
解决资源文件的依赖问题:
<build>

        <resources>

            <resource>

                <directory>src/main/java</directory>

                <includes>

                    <include>**/*.properties</include>

                    <include>**/*.xml</include>

                </includes>

                <filtering>false</filtering>

            </resource>

            <resource>

                <directory>src/main/resources</directory>

                <includes>

                    <include>**/*.properties</include>

                    <include>**/*.xml</include>

                </includes>

                <filtering>false</filtering>

            </resource>

        </resources>

    </build>
三、代码编写
1.在entities包中添加Student类:
package com.Tony.entities;

public class Student {

    private int id;

    public int getId() {

        return id;

    }

    public void setId(int id) {

        this.id = id;

    }

    public String getName() {

        return name;

    }

    public void setName(String name) {

        this.name = name;

    }

    public int getAge() {

        return age;

    }

    public void setAge(int age) {

        this.age = age;

    }

    public String getDetail() {

        return detail;

    }

    public void setDetail(String detail) {

        this.detail = detail;

    }

    private String name;

    private int age;

    private String detail;

}
2.在dao包中添加StudentDao接口:
package com.Tony.dao;

import com.Tony.entities.Student;

import java.util.List;

public interface StudentDao {

    Student findStudentById(int id);

    List<Student> findAllStudent();

    int deleteStudent(int id);

    int updateStudent(Student student);

    int addStudent(Student student);

}
3.在dao中添加StudentDao.xml 映射文件
<?xml version="1.0" encoding="UTF-8"?>

<!DOCTYPE mapper PUBLIC "-//mybatis.org//DTD Mapper 3.0//EN" "http://mybatis.org/dtd/mybatis-3-mapper.dtd">

<mapper namespace="com.Tony.dao.StudentDao">

    <select id="findStudentById" parameterType="int" resultType="com.Tony.entities.Student">

        select * from test.student where id=#{id}

    </select>

    <select id="findAllStudent" resultType="com.Tony.entities.Student">

        select * from test.student

    </select>

    <delete id="deleteStudent" parameterType="int">

        delete from test.student where id=#{id}

    </delete>

    <update id="updateStudent" parameterType="com.Tony.entities.Student">

        update test.student set name=#{name},age=#{age},detail=#{detail} where id=#{id}

    </update>

    <insert id="addStudent" parameterType="com.Tony.entities.Student">

        insert into test.student(name,age,detail) values

        (#{name},#{age},#{detail})

    </insert>

</mapper>
4.在service包中添加StudentService接口和其实现类StudentServiceImpl:
StudentService:
package com.Tony.service;

import com.Tony.entities.Student;

import java.util.List;

public interface StudentService {

    Student findStudentById(int id);

    List<Student> findAllStudent();

    int deleteStudent(int id);

    int updateStudent(Student student);

    int addStudent(Student student);

}
StudentServiceImpl:
package com.Tony.service;

import com.Tony.dao.StudentDao;

import com.Tony.entities.Student;

import org.springframework.beans.factory.annotation.Autowired;

import org.springframework.stereotype.Service;

import java.util.List;

@Service

public class StudentServiceImpl implements StudentService {

    @Autowired

    private StudentDao studentDao;

    public Student findStudentById(int id) {

        return this.studentDao.findStudentById(id);

    }

    public List<Student> findAllStudent() {

        return this.studentDao.findAllStudent();

    }

    public int deleteStudent(int id) {

        return this.studentDao.deleteStudent(id);

    }

    public int updateStudent(Student student) {

        return this.studentDao.updateStudent(student);

    }

    public int addStudent(Student student) {

        return this.studentDao.addStudent(student);

    }

}
5.在controller包中添加StudentController,并添加showAllStudent接口:
package com.Tony.controller;

import com.Tony.entities.Student;

import com.Tony.service.StudentService;

import org.springframework.beans.factory.annotation.Autowired;

import org.springframework.stereotype.Controller;

import org.springframework.ui.Model;

import org.springframework.web.bind.annotation.RequestMapping;

import java.util.List;

@Controller

@RequestMapping("/student")

public class StudentController {

    @Autowired

    private StudentService studentService;

    @RequestMapping("/showAllStudent")

    public String showAllStudent(Model model)

    {

        List<Student> list=studentService.findAllStudent();

        model.addAttribute("list",list);

        return "allStudent";

    }

}
6.在/web/WEB-INF/jsp/文件夹中添加allStudent.jsp页面:
<%@ taglib prefix="c" uri="http://java.sun.com/jsp/jstl/core" %>

<%@ page contentType="text/html;charset=UTF-8" language="java" %>

<html>

<head>

    <title>显示所有的学生</title>

</head>

<body>

    <table>

        <thead>

        <tr>

            <td>学生ID</td>

            <td>学生姓名</td>

            <td>学生年龄</td>

            <td>学生明细</td>

        </tr>

        </thead>

        <tbody>

        <c:forEach var="student" items="${requestScope.get('list')}">

            <tr>

                <td>${student.id}</td>

                <td>${student.name}</td>

                <td>${student.age}</td>

                <td>${student.detail}</td>

            </tr>

        </c:forEach>

        </tbody>

    </table>

</body>

</html>
四、配置文件
1.db.properties
jdbc.url=jdbc:mysql://localhost:3306/test

jdbc.username=root

jdbc.password=123456

jdbc.driver=com.mysql.jdbc.Driver
2.spring-dao.xml
<?xml version="1.0" encoding="UTF-8"?>

<beans xmlns="http://www.springframework.org/schema/beans"

       xmlns:xsi="http://www.w3.org/2001/XMLSchema-instance"

       xmlns:context="http://www.springframework.org/schema/context"

       xsi:schemaLocation="http://www.springframework.org/schema/beans

        http://www.springframework.org/schema/beans/spring-beans.xsd

        http://www.springframework.org/schema/context

        https://www.springframework.org/schema/context/spring-context.xsd">

    <context:property-placeholder location="classpath:db.properties"></context:property-placeholder>

    <bean id="dataSource" class="com.mchange.v2.c3p0.ComboPooledDataSource">

        <property name="driverClass" value="${jdbc.driver}"></property>

        <property name="user" value="${jdbc.username}"></property>

        <property name="password" value="${jdbc.password}"></property>

        <property name="jdbcUrl" value="${jdbc.url}"></property>

    </bean>

    <bean id="sqlSessionFactory" class="org.mybatis.spring.SqlSessionFactoryBean">

        <property name="dataSource" ref="dataSource"></property>

    </bean>

    <bean class="org.mybatis.spring.mapper.MapperScannerConfigurer">

        <property name="sqlSessionFactoryBeanName" value="sqlSessionFactory"></property>

        <property name="basePackage" value="com.Tony.dao"></property>

    </bean>

</beans>
3.spring-service.xml
<?xml version="1.0" encoding="UTF-8"?>

<beans xmlns="http://www.springframework.org/schema/beans"

       xmlns:xsi="http://www.w3.org/2001/XMLSchema-instance"

       xmlns:context="http://www.springframework.org/schema/context"

       xmlns:cache="http://www.springframework.org/schema/cache"

       xsi:schemaLocation="http://www.springframework.org/schema/beans

        http://www.springframework.org/schema/beans/spring-beans.xsd

        http://www.springframework.org/schema/context

        http://www.springframework.org/schema/context/spring-context.xsd

        http://www.springframework.org/schema/cache

        http://www.springframework.org/schema/cache/spring-cache.xsd">

        <context:component-scan base-package="com.Tony.service"></context:component-scan>

</beans>
4.spring-controller.xml
<?xml version="1.0" encoding="UTF-8"?>

<beans xmlns="http://www.springframework.org/schema/beans"

       xmlns:xsi="http://www.w3.org/2001/XMLSchema-instance"

       xmlns:context="http://www.springframework.org/schema/context"

       xmlns:mvc="http://www.springframework.org/schema/mvc"

       xsi:schemaLocation="http://www.springframework.org/schema/beans

    http://www.springframework.org/schema/beans/spring-beans.xsd

    http://www.springframework.org/schema/context

    http://www.springframework.org/schema/context/spring-context.xsd

    http://www.springframework.org/schema/mvc

    https://www.springframework.org/schema/mvc/spring-mvc.xsd">

    <!--扫描@controller注解-->

    <context:component-scan base-package="com.Tony.controller"></context:component-scan>

    <!--@RequestMapping生效-->

    <mvc:annotation-driven></mvc:annotation-driven>

    <bean id="internalResourceViewResolver" class="org.springframework.web.servlet.view.InternalResourceViewResolver">

        <property name="prefix" value="/WEB-INF/jsp/"></property>

        <property name="suffix" value=".jsp"></property>

    </bean>

</beans>
5.applicationContext.xml
<?xml version="1.0" encoding="UTF-8"?>

<beans xmlns="http://www.springframework.org/schema/beans"

       xmlns:xsi="http://www.w3.org/2001/XMLSchema-instance"

       xsi:schemaLocation="http://www.springframework.org/schema/beans

        http://www.springframework.org/schema/beans/spring-beans.xsd">

    <import resource="classpath:spring-controller.xml"></import>

    <import resource="classpath:spring-dao.xml"></import>

    <import resource="classpath:spring-service.xml"></import>

</beans>
6.web.xml
<?xml version="1.0" encoding="UTF-8"?>

<web-app xmlns="http://xmlns.jcp.org/xml/ns/javaee"

         xmlns:xsi="http://www.w3.org/2001/XMLSchema-instance"

         xsi:schemaLocation="http://xmlns.jcp.org/xml/ns/javaee http://xmlns.jcp.org/xml/ns/javaee/web-app_4_0.xsd"

         version="4.0">

    <servlet>

        <servlet-name>springmvc</servlet-name>

        <servlet-class>org.springframework.web.servlet.DispatcherServlet</servlet-class>

        <init-param>

            <param-name>contextConfigLocation</param-name>

            <param-value>classpath:applicationContext.xml</param-value>

        </init-param>

        <load-on-startup>1</load-on-startup>

    </servlet>

    <servlet-mapping>

        <servlet-name>springmvc</servlet-name>

        <url-pattern>/</url-pattern>

    </servlet-mapping>

</web-app>
最后,整个项目的目录结构如下:
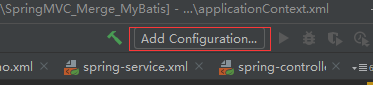
五、配置Tomcat
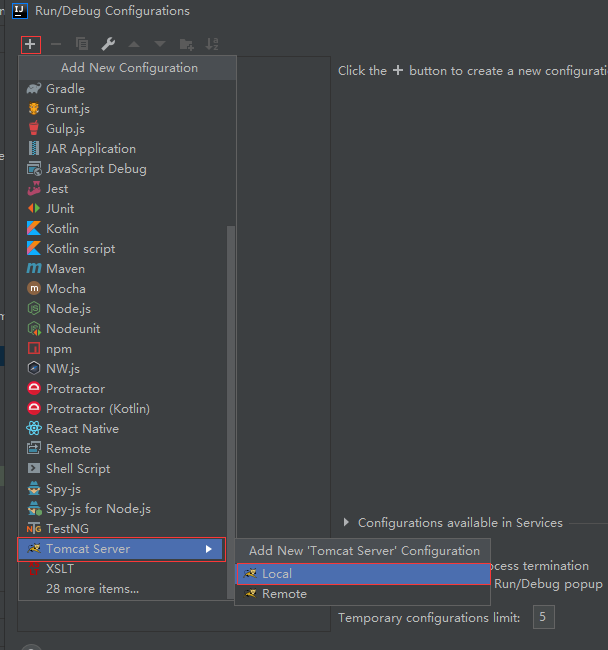
点击上方的AddConfiguration按钮
弹出如下界面,点击+号,选择Tomcat Server->Local
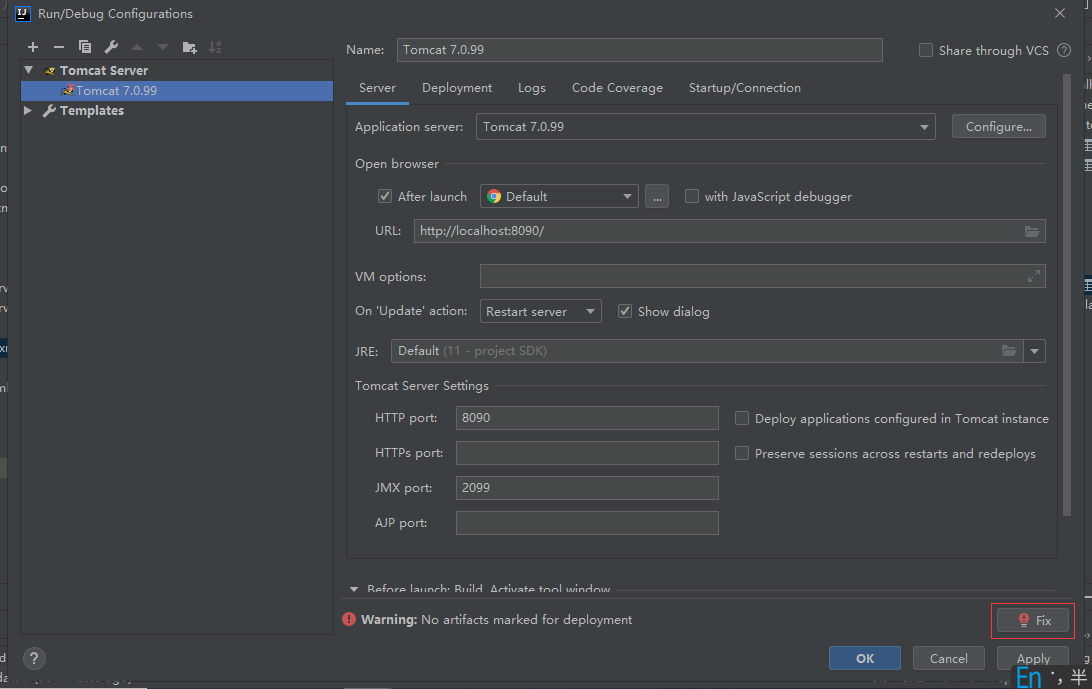
弹出如下界面,点击fix:
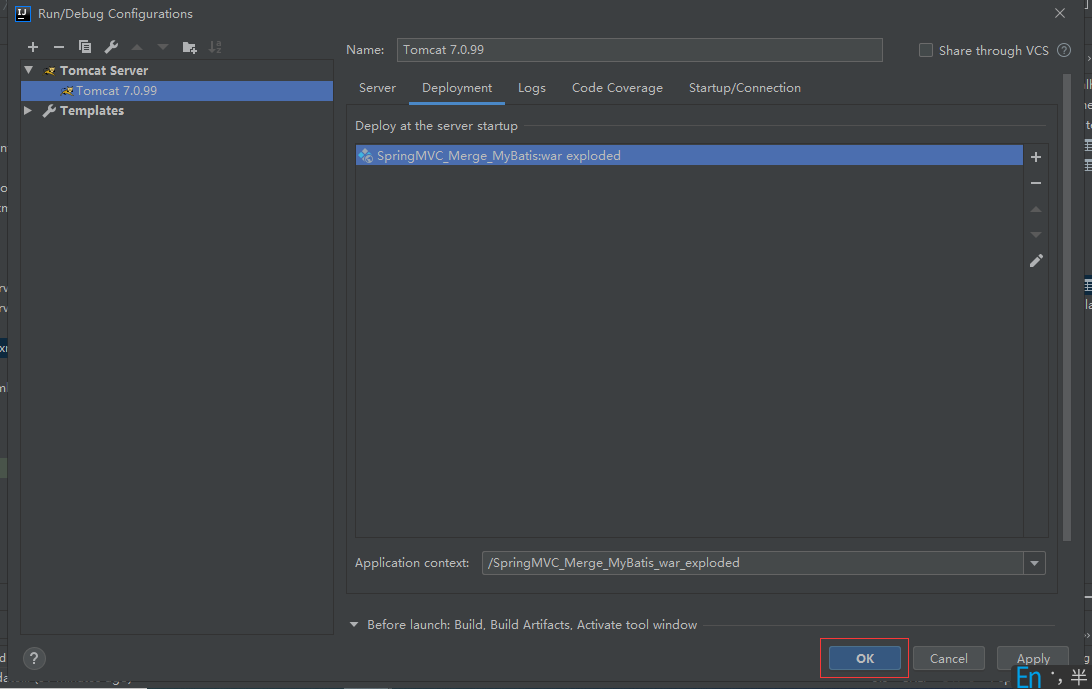
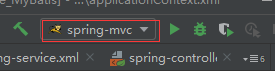
配置后,这里就看得到刚配置的Tomcat服务器名了:
六、配置打包的Artifacts:
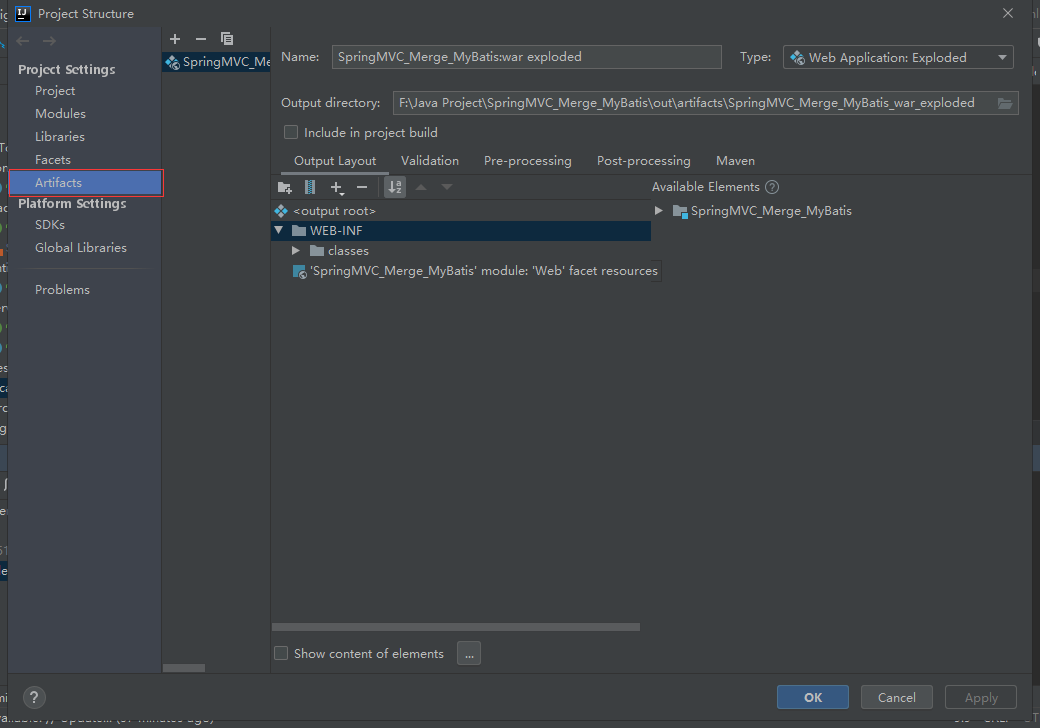
点击菜单File->Project Structure:

弹出如下界面,选择左侧的Artifacts:
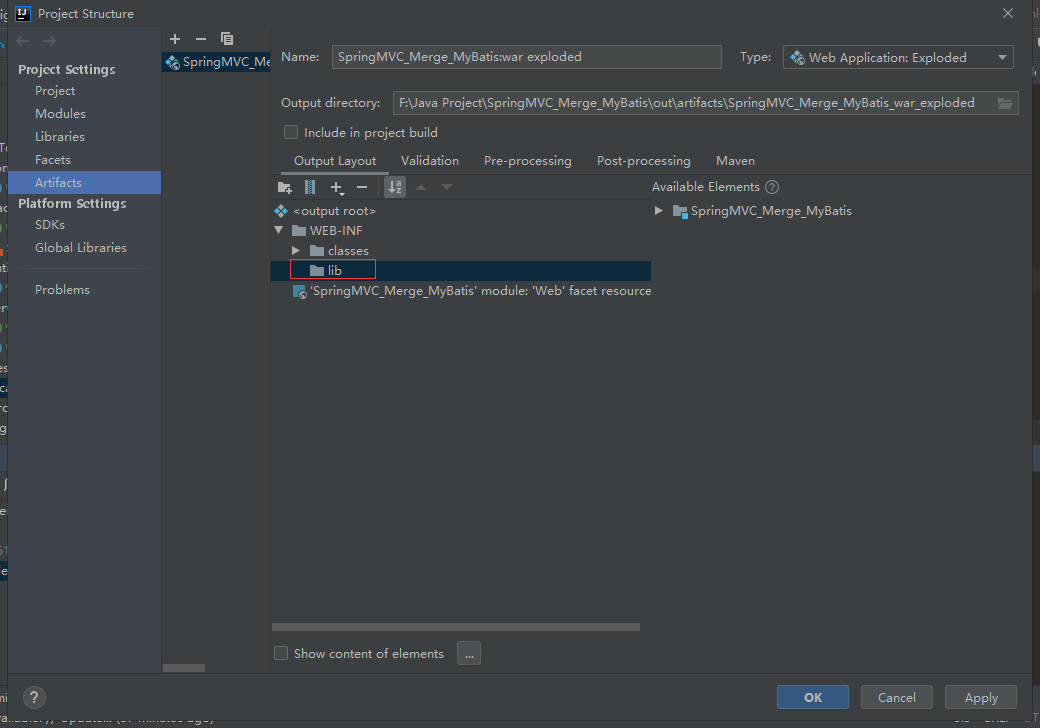
在Output Layout的WEB-INF下新建一个lib文件夹(注意此处必须是lib,全部是小写,写错了会导致出各种错误):
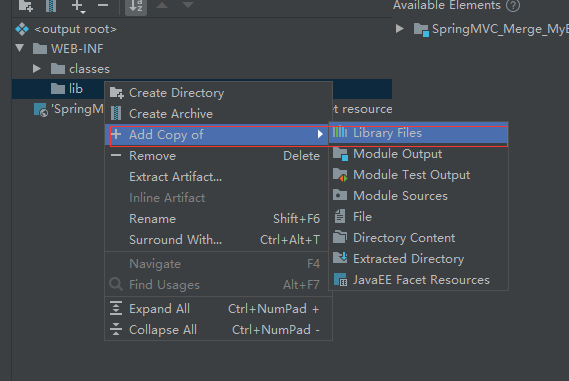
选中lib文件夹,右键单击,弹出菜单,选择Add Copy of->Library Files:


七、运行项目:
点击如下的播放按钮运行项目,运行起来之后,IDEA会自动打开浏览器

打开浏览器之后,默认是如下的网址:

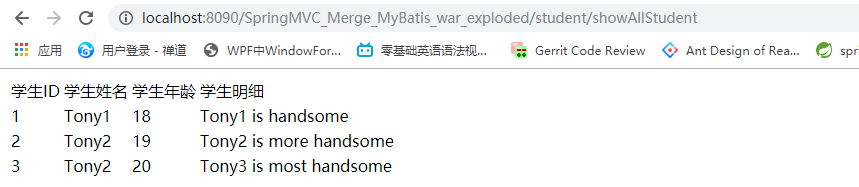
我们需要加上显示所有学生的网址,然后按回车键,就可以显示所有的学生了:
八、各种问题排查
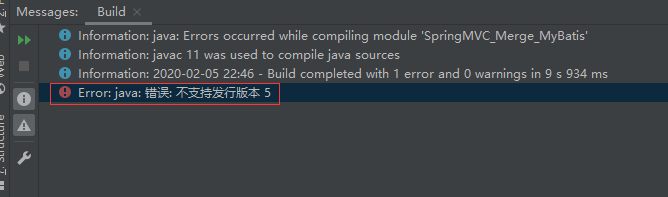
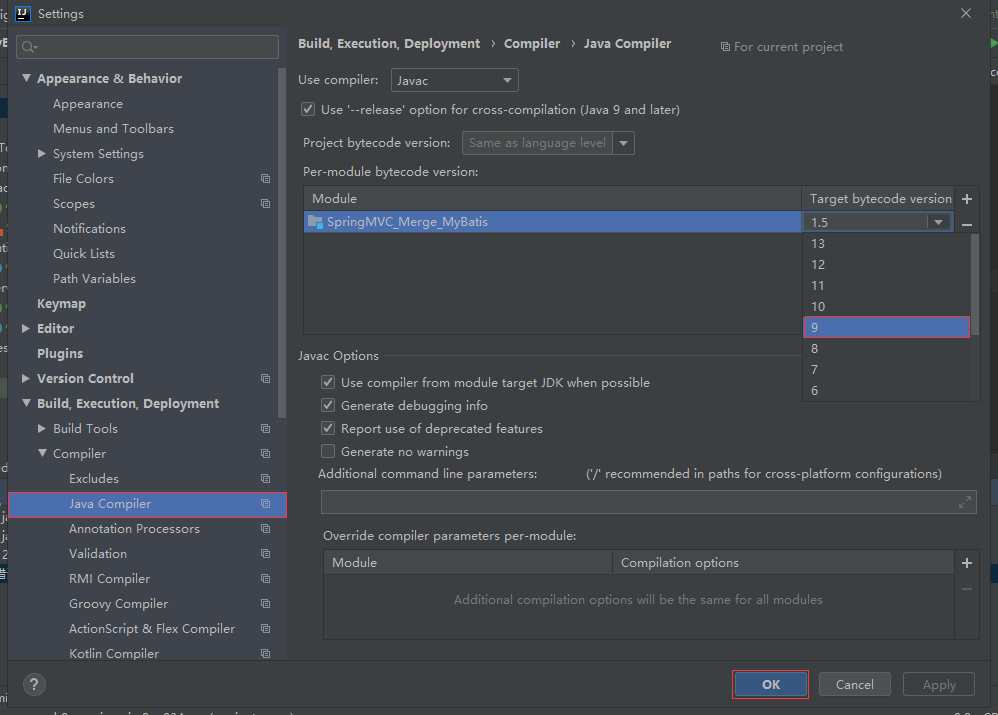
1.不支持发行版本5:
解决办法:
点击菜单:File->Setting,弹出如下界面,选择左边的Build,Execution,Deployment->Compiler->Java Compiler,
将项目的target bytecode version从1.5改为9
IDEA spring mvc整合mybatis的更多相关文章
- spring MVC(十)---spring MVC整合mybatis
spring mvc可以通过整合hibernate来实现与数据库的数据交互,也可以通过mybatis来实现,这篇文章是总结一下怎么在springmvc中整合mybatis. 首先mybatis需要用到 ...
- Spring MVC整合Mybatis 入门
本文记录使用Intellij创建Maven Web工程搭建Spring MVC + Mybatis 的一个非常简单的示例.关于Mybatis的入门使用可参考这篇文章,本文在该文的基础上,引入了Spri ...
- spring mvc整合mybaitis和log4j
在上一篇博客中,我介绍了在mac os上用idea搭建spring mvc的maven工程,但是一个完整的项目肯定需要数据库和日志管理,下面我就介绍下spring mvc整合mybatis和log4j ...
- MyBatis+Spring+Spring MVC整合开发
MyBatis+Spring+Spring MVC整合开发课程观看地址:http://www.xuetuwuyou.com/course/65课程出自学途无忧网:http://www.xuetuwuy ...
- IDEA下创建Maven项目,并整合使用Spring、Spring MVC、Mybatis框架
项目创建 本项目使用的是IDEA 2016创建. 首先电脑安装Maven,接着打开IDEA新建一个project,选择Maven,选择图中所选项,下一步. 填写好GroupId和ArtifactId, ...
- 转载 Spring、Spring MVC、MyBatis整合文件配置详解
Spring.Spring MVC.MyBatis整合文件配置详解 使用SSM框架做了几个小项目了,感觉还不错是时候总结一下了.先总结一下SSM整合的文件配置.其实具体的用法最好还是看官方文档. ...
- Java基础-SSM之Spring和Mybatis以及Spring MVC整合案例
Java基础-SSM之Spring和Mybatis以及Spring MVC整合案例 作者:尹正杰 版权声明:原创作品,谢绝转载!否则将追究法律责任. 能看到这篇文章的小伙伴,详细你已经有一定的Java ...
- Spring MVC、MyBatis整合文件配置详解
Spring:http://spring.io/docs MyBatis:http://mybatis.github.io/mybatis-3/ Building a RESTful Web Serv ...
- Mybaits-从零开始-Spring、Spring MVC、MyBatis整合(未万待续)
Spring.Spring MVC.MyBatis整合(未万待续)
随机推荐
- left join 、right join 和inner join之间的区别
SQL的left join .right join 和inner join之间的区别 left join(左联接) 返回包括左表中的所有记录和右表中联结字段相等的记录 right join(右联接) ...
- ArrayList、Vector和LinkedList
List接口特点 1.有序的 collection. 2.可以对列表中每个元素的插入位置进行精确地控制. 3.可以根据元素的索引访问元素,并搜索列表中的元素. 4.列表通常允许重复的元素. 5.允许存 ...
- 单播反向路径转发uRPF
uRPF将数据包的源地址和存储在转发信息库(FIB)中的信息进行对照,以判定数据包的合法性.FIB是Cisco CEF技术中的一张表,包含从路由表中复制过来的转发信息,可以将其视为路由表的镜像,FIB ...
- 关于High CPU及基本排查
在实际的网络中,总会存在设备出现high CPU的情况,这种情况下,往往会让网络管理员比较着急,因为如果CPU持续high,可能导致设备的性能降低,严重还可能导致设备down掉. 本篇记录,主要记录一 ...
- ISR4K-IOS XE EPC
1.该操作在ISR4K的平台操作,简单的执行了一个控制层面的抓包 配置命令: R01#monitor capture A control-plane both R01#monitor capture ...
- pytorch资料
torchvision是独立于pytorch的关于图像操作的一些方便工具库. torchvision的详细介绍在:https://pypi.org/project/torchvision/ torch ...
- Update(Stage4):Spark原理_运行过程_高级特性
如何判断宽窄依赖: =================================== 6. Spark 底层逻辑 导读 从部署图了解 Spark 部署了什么, 有什么组件运行在集群中 通过对 W ...
- 解决CentOS下boost安装后不能使用的问题
先说一说整个经历. 因为之前没有注意到gcc4.8.5比较旧,就已经安装好boost了,当时已经可以使用了,后来发现gcc太老了,一些软件安装需要比较新的gcc支持,所以决定升级gcc,结果boost ...
- MySQL8.0 ROW_NUMBER、RANK、DENSE_RANK窗口函数 分组排序排名
MySQL8.0 (ROW_NUMBER)窗口函数 排名 暂时理解函数意义,后面再进行优化,如果有关变量排序,查看这个大哥的 mysql的分组排序和变量赋值顺序 先查看一个例子: # 按照每科课程分数 ...
- 基于 Chrome 浏览器的扩展插件来进行的安装Postman
我会给你一个安装包,见附件.你应该下载下来,解压缩到你喜欢的位置. 打开 Chrome 浏览器的「扩展程序」 点击「加载已解压的扩展程序...」按钮,找到你刚刚下载的安装包的位置,点击确定. 你去看看 ...