tars环境部署
author: headsen chen
date: 2018-10-18 12:35:40
注意:依据Git上的tars搭建步骤整理而来
参考:
https://max.book118.com/html/2017/0527/109698528.shtm

https://github.com/TarsCloud/Tars/blob/master/Install.zh.md
环境: centos7.3-x86_64 kernel :3.10
1,依赖
yum install mpfr -y

yum install gmp -y

yum install *mpc* -y

yum install glibc-static libstdc++-static -y

yum -y install gcc gcc-c++

yum -y install autoconf automake libtool curl make g++ unzip zlib zlib-devel

yum install glibc-devel -y

yum install cmake -y

yum install perl -y

yum install -y git

yum install ncurses-devel -y
2,安装gcc
# 安装,下载好包并放在/mnt下面

cd /mnt

tar  fx gcc-6.3.0.tar.gz

cd gcc-6.3.0/

./contrib/download_prerequisites

./configure -enable-checking=release -enable-languages=c,c++ -disable-multilib

make -j2

make install

# 配置gcc环境变量

mv /usr/bin/gcc /usr/bin/gcc4.4.7

ln -s /usr/local/bin/gcc /usr/bin/gcc

mv /usr/bin/g++ /usr/bin/g++4.4.7

ln -s /usr/local/bin/g++ /usr/bin/g++

mv /usr/bin/cc /usr/bin/cc4.4.7

ln -s /usr/local/bin/cc /usr/bin/cc

mv /usr/bin/c++ /usr/bin/c++4.4.7

ln -s /usr/local/bin/c++ /usr/bin/c++

gcc --version

echo "/usr/local/lib64" >>/etc/ld.so.conf

ldconfig
3,安装protoc-3.6.1
cd /mnt

unzip protobuf-master.zip

cd protobuf-master/

./autogen.sh

./configure

make

make check

make install

protoc --\version
4,安装jdk
cd /mnt

tar xf jdk-8u181-linux-x64.tar.gz -C /usr/java

cat >> /etc/profile << EOF

export JAVA_HOME=/usr/java/jdk1.8.0_181

export JRE_HOME=\${JAVA_HOME}/jre

export CLASSPATH=.:\${JAVA_HOME}/lib:\${JRE_HOME}/lib

export PATH=\${JAVA_HOME}/bin:\$PATH

EOF

source /etc/profile

echo $JAVA_HOME
5,安装mysql-5.6
# 安装mysql

useradd mysql

tar fx mysql-5.6.35.tar.gz

cd  mysql-5.6.35/

cmake . -DCMAKE_INSTALL_PREFIX=/usr/local/mysql -DWITH_INNOBASE_STORAGE_ENGINE=1 -DMYSQL_USER=mysql -DDEFAULT_CHARSET=utf8 -DDEFAULT_COLLATION=utf8_general_ci

make && make install
#配置mysql

yum -y install perl

cd /usr/local/mysql/

rm  -rf /usr/local/mysql/data/

mkdir -p /data/mysql-data

ln -s /data/mysql-data/ /usr/local/mysql/data

chown -R mysql. /data/mysql-data/

chown -R mysql. /usr/local/mysql/data/

cp support-files/mysql.server /etc/init.d/mysql

rm -rf /etc/my.cnf

yum install -y perl-Module-Install.noarch

perl scripts/mysql_install_db --user=mysql
[root@bogon mysql]# vim /usr/local/mysql/my.cnf
# For advice on how to change settings please see

# http://dev.mysql.com/doc/refman/5.6/en/server-configuration-defaults.html

[mysqld]

# Remove leading # and set to the amount of RAM for the most important data

# cache in MySQL. Start at 70% of total RAM for dedicated server, else 10%.

innodb_buffer_pool_size = 128M

# Remove leading # to turn on a very important data integrity option: logging

# changes to the binary log between backups.

log_bin

# These are commonly set, remove the # and set as required.

basedir = /usr/local/mysql

datadir = /usr/local/mysql/data

# port = .....

# server_id = .....

socket = /tmp/mysql.sock

bind-address=172.25.196.66

# Remove leading # to set options mainly useful for reporting servers.

# The server defaults are faster for transactions and fast SELECTs.

# Adjust sizes as needed, experiment to find the optimal values.

join_buffer_size = 128M

sort_buffer_size = 2M

read_rnd_buffer_size = 2M

sql_mode=NO_ENGINE_SUBSTITUTION,STRICT_TRANS_TABLES

~
ln -s /usr/local/mysql /usr/local/mysql-5.6.35

service mysql start

netstat -plnt |grep 3306

chkconfig mysql on

mkdir -p /var/lib/mysql/

ln -s /tmp/mysql.sock /var/lib/mysql/mysql.sock
# 添加环境变量

echo "PATH=$PATH:/usr/local/mysql/bin" >>/etc/profile

echo "export PATH" >>/etc/profile

source /etc/profile

service mysql restart

./bin/mysqladmin -u root password 'root@appinside'

./bin/mysqladmin -u root -h 172.25.196.66 password 'root@appinside'

echo "/usr/local/mysql/lib/" >>/etc/ld.so.conf

ldconfig
6,安装resin
cd /usr/local/

wget http://www.caucho.com/download/resin-4.0.49.tar.gz

tar xf resin-4.0.49.tar.gz

ln -s resin-4.0.49 resin
7,安装maven
cd /mnt

tar fx apache-maven-3.5.4-bin.tar.gz

mv apache-maven-3.5.4 /usr/local/maven

cp /etc/profile /etc/profile.bak

echo "export MVEN_HOME=/usr/local/maven" >>/etc/profile

echo "export PATH=$MVEN_HOME/bin:$PATH" >>/etc/profile

source /etc/profile

mvn -version
8,安装web管理系统开发环境nvm
wget -qO- https://raw.githubusercontent.com/creationix/nvm/v0.33.11/install.sh | bash

source ~/.bashrc

nvm install v8.11.3

npm install -g pm2 --registry=https://registry.npm.taobao.org
9,安装bison组件和flex组件
yum -y install bison flex
10,安装Java语言工具包
cd /mnt

tar fx thirdparty.tgz

cd  thirdparty/tars-1.5.0/;ls

----->

build  docs           Install_faq.en.md  Install.md          Introduction.md  LICENSE.TXT  php      README.en.md  tup

cpp    Install.en.md  Install_faq.md     Introduction.en.md  java             nodejs       plugins  README.md     web

cd java

mvn clean install

mvn clean install -f core/client.pom.xml

mvn clean install -f core/server.pom.xml
12、安装c++环境
yum -y install dos2unix flex bison


cd /mnt/thirdparty/tars-1.5.0/cpp/thirdparty
git clone https://github.com/Tencent/rapidjson.git

cd /mnt/thirdparty/tars-1.5.0/cpp/build/

./build.sh all

mkdir /usr/local/tars

make install
13、tars数据库环境初始化
mysql -uroot -proot@appinside -e "grant all on *.* to 'tars'@'%' identified by 'tars2015' with grant option;"

mysql -uroot -proot@appinside -e "grant all on *.* to 'tars'@'localhost' identified by 'tars2015' with grant option;"

mysql -uroot -proot@appinside -e "grant all on *.* to 'tars'@'${MachineName}' identified by 'tars2015' with grant option;"

mysql -uroot -proot@appinside -e "flush privileges;"
cd /mnt/thirtparty/tars-1.5.0/cpp/framework/sql

sed -i "s/192.168.2.131/172.25.196.66/g" `grep 192.168.2.131 -rl ./*`

sed -i "s/db.tars.com/172.25.196.66/g" `grep db.tars.com -rl ./*`

chmod u+x exec-sql.sh

./exec-sql.sh
14、打包框架基础服务
cd /mnt/thirdparty/tars-1.5.0/cpp/build/

make framework-tar

make tarsstat-tar

make tarsnotify-tar

make tarsproperty-tar

make tarslog-tar

make tarsquerystat-tar

make tarsqueryproperty-tar
15、安装核心基础服务
mkdir -p /usr/local/app/tars/

cd /mnt/thirtyparty/tars-1.5.0/cpp/build

cp framework.tgz /usr/local/app/tars/

cd /usr/local/app/tars

tar xf framework.tgz

sed -i "s/192.168.2.131/172.25.196.66/g" `grep 192.168.2.131 -rl ./*`

sed -i "s/db.tars.com/172.25.196.66/g" `grep db.tars.com -rl ./*`

sed -i "s/registry.tars.com/172.25.196.66/g" `grep registry.tars.com -rl ./*`

sed -i "s/web.tars.com/172.25.196.66/g" `grep web.tars.com -rl ./*`

chmod u+x tars_install.sh

./tars_install.sh

./tarspatch/util/init.sh
16、安装web管理系统
cd /mnt/thirtparty/tars-1.5.0/web/

sed -i "s/db.tars.com/172.25.196.66/g" `grep db.tars.com -rl ./src/main/resources/*`

sed -i "s/registry1.tars.com/172.25.196.66/g" `grep registry1.tars.com -rl ./src/main/resources/*`

sed -i "s/registry2.tars.com/172.25.196.66/g" `grep registry2.tars.com -rl ./src/main/resources/*`

mvn clean package

cp ./target/tars.war /usr/local/resin/webapps/

#./web/target/tars/WEB-INF/classes/log4j.properties  这里可以修改日志目录

mkdir -p /data/log/tars/

mv /usr/local/resin/conf/resin.xml /usr/local/resin/conf/resin.xml.backup
cat > /usr/local/resin/conf/resin.xml << EOF

<!--

   - Resin 4.0 configuration file.

  -->

<resin xmlns="http://caucho.com/ns/resin"

       xmlns:resin="urn:java:com.caucho.resin">

  <!-- property-based Resin configuration -->

  <resin:properties path="\${__DIR__}/resin.properties" optional="true"/>

  <resin:if test="\${properties_import_url}">

     <resin:properties path="\${properties_import_url}"

                    optional="true" recover="true"/>

  </resin:if>

  <!-- Logging configuration for the JDK logging API -->

  <log-handler name="" level="all" path="stdout:"

               timestamp="[%y-%m-%d %H:%M:%S.%s]"

               format=" {\${thread}} \${log.message}"/>

  <!--

     - Alternative pseudo-TTCC log format

     -

     - <log-handler name="" level="all" path="stdout:"

     -           timestamp="%y-%m-%d %H:%M:%S.%s"

     -           format=" [\${thread}] \${log.level} \${log.shortName} - \${log.message}"/>

    -->

  <!--

     - level='info' for production

     - 'fine' or 'finer' for development and troubleshooting

    -->

  <logger name="" level="\${log_level?:'info'}"/>

  <logger name="com.caucho.java" level="config"/>

  <logger name="com.caucho.loader" level="config"/>

  <!--

     - Default configuration applied to all clusters, including

     - HTTP, HTTPS, and /resin-admin configuration.

    -->

  <resin:import path="\${__DIR__}/cluster-default.xml"/>

  <!--

     - health configuration

    -->

  <resin:import path="\${__DIR__}/health.xml"/>

  <!--

     - Remote management requires at least one enabled admin user.

    -->

  <resin:AdminAuthenticator>

    <user name="\${admin_user}" password="\${admin_password}"/>

    <resin:import path="\${__DIR__}/admin-users.xml" optional="true"/>

  </resin:AdminAuthenticator>

  <!--

     - For clustered systems, create a password in as cluster_system_key

    -->

  <cluster-system-key>\${cluster_system_key}</cluster-system-key>

  <!--

     - For production sites, change dependency-check-interval to something

     - like 600s, so it only checks for updates every 10 minutes.

    -->

  <dependency-check-interval>\${dependency_check_interval?:'2s'}</dependency-check-interval>

  <!-- For resin.properties dynamic cluster joining -->

  <home-cluster>\${home_cluster}</home-cluster>

  <home-server>\${home_server}</home-server>

  <elastic-server>\${elastic_server}</elastic-server>

  <elastic-dns>\${elastic_dns}</elastic-dns>

  <!--

     - Configures the main application cluster.  Load-balancing configurations

     - will also have a web cluster.

    -->

  <cluster id="app">

    <!-- define the servers in the cluster -->

    <server-multi id-prefix="app-" address-list="\${app_servers}" port=""/>

    <host-default>

      <!-- creates the webapps directory for .war expansion -->

      <web-app-deploy path="webapps"

                      expand-preserve-fileset="WEB-INF/work/**"

                      multiversion-routing="\${webapp_multiversion_routing}"

                      path-suffix="\${elastic_webapp?resin.id:''}"/>

    </host-default>

    <!-- auto virtual host deployment in hosts/foo.example.com/webapps -->

    <host-deploy path="hosts">

      <host-default>

        <resin:import path="host.xml" optional="true"/>

      </host-default>

    </host-deploy>

    <!-- the default host, matching any host name -->

    <host id="" root-directory=".">

      <!--

         - webapps can be overridden/extended in the resin.xml

        -->

      <web-app id="/" document-directory="webapps/tars"/>

    </host>

    <resin:if test="\${resin_doc}">

      <host id="\${resin_doc_host}" root-directory="\${resin_doc_host}">

        <web-app id="/resin-doc" root-directory="\${resin.root}/doc/resin-doc"/>

      </host>

    </resin:if>

  </cluster>

  <cluster id="web">

    <!-- define the servers in the cluster -->

    <server-multi id-prefix="web-" address-list="\${web_servers}" port=""/>

    <host id="" root-directory="web">

      <web-app id="">

        <resin:LoadBalance regexp="" cluster="app"/>

      </web-app>

    </host>

  </cluster>

  <cluster id="memcached" xmlns:memcache="urn:java:com.caucho.memcached">

    <!-- define the servers in the cluster -->

    <server-multi id-prefix="memcached-" address-list="\${memcached_servers}" port="">

      <!-- listen for the memcache protocol -->

      <listen port="\${memcached_port?:11211}"

              keepalive-timeout="600s" socket-timeout="600s">

        <memcache:MemcachedProtocol/>

      </listen>

    </server-multi>

  </cluster>

  <cluster id="proxycache">

    <!-- define the servers in the cluster -->

    <server-multi id-prefix="proxycache-" address-list="\${proxycache_servers}" port=""/>

    <host id="" root-directory="proxycache">

      <web-app id="">

        <resin:HttpProxy regexp=".*">

          <!-- backend HTTP servers to proxy to -->

          <addresses>\${backend_servers}</addresses>

        </resin:HttpProxy>

      </web-app>

    </host>

  </cluster>

</resin>

EOF
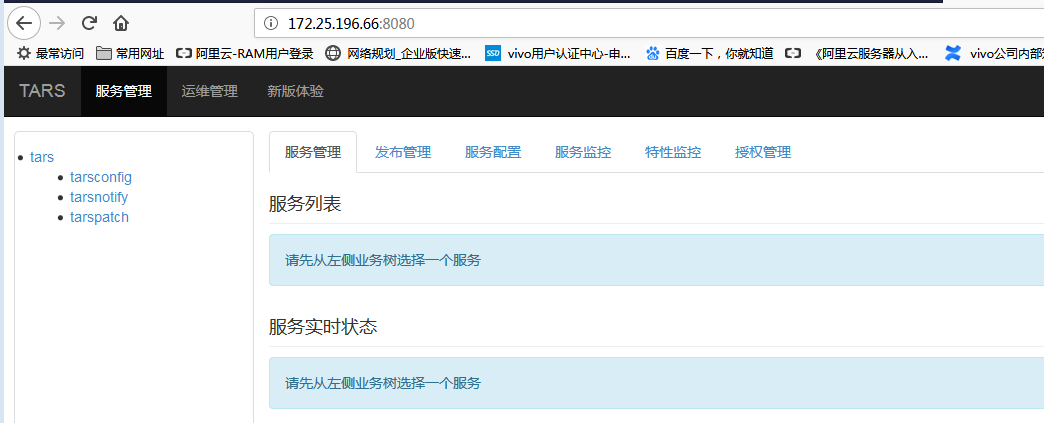
17、现在可以访问8080端口的web管理系统了
/usr/local/resin/bin/resin.sh start
http://172.25.196.66:8080
tars环境部署的更多相关文章
- Web应用之LAMP源码环境部署
一.LAMP环境的介绍 1.LAMP环境的重要性 思索许久,最终还是决定写一篇详细的LAMP的源码编译安装的实验文档,一来是为了给自己一个交代,把技术进行系统的归纳,将技术以极致的形式呈现出来,做为一 ...
- Jmeter安装与环境部署
Jmeter安装与环境部署 版权声明:本文为博主原创文章,未经博主允许不得转载. 博主:海宁 联系:whnsspu@163.com
- 微信公众号开发系列教程一(调试环境部署续:vs远程调试)
http://www.cnblogs.com/zskbll/p/4080328.html 目录 C#微信公众号开发系列教程一(调试环境部署) C#微信公众号开发系列教程一(调试环境部署续:vs远程调试 ...
- .Net Core 跨平台系列之环境部署
前言 作为一名.NET程序员,很多时候都会被什么拖控件.跨平台等字眼所鄙视过,但是在我的的内心还是没有把自己看低过.因为说到底,平台和语言只是我们吃饭的工具.很多时候公司的发展是取决于商业竞争的,微软 ...
- DotNet Core 1.0 集成 CentOS 开发与运行环境部署
一. DotNet Core 1.0 开发环境部署 操作系统安装 我们使用CentOS 7.2.1511版本. 安装libunwind库 执行:sudo yum install libunwi ...
- Nutch2+Hbase环境部署和基本使用
由于项目想借助Nutch来做网络爬虫,所以一番研究,发现网上文档比较散,学习的很艰难,因此总结了一些,放上来与大家交流. 1 环境部署 Nutch有1.x系列和2.x系列,主要区别是2.x ...
- Anyconnect的VPN环境部署(2)-在Linux客户机上连接Anyconnect
由于之前已经在机房IDC安装了Anyconnect的VPN服务环境(参考:Anyconnect的VPN环境部署(1)-OpenConnect server(ocserv)服务安装)今天介绍下在linu ...
- Jenkins实现生产环境部署文件的回滚操作(Windows)
由于dotnet项目的生产环境环境部署工具比较少,所以我使用jenkins作为生产环境的自动化部署工具. 既然有回滚操作,那么就会有部署操作:要实现回滚,先要实现部署的操作,我在jenkins搭建了一 ...
- storm单机环境部署
前面说过storm集群的部署,这篇主要介绍storm单机环境部署,其实他们之间很类似,就是将之前配置文件中所有的集群条目改成本机的地址即可,部署之前应该按前面solr和zookeeper单机环境部署那 ...
随机推荐
- Xming导致的SecureCRT远程登录的普通用户图形程序不能运行
SecureCRT+Xming,用惯之后感觉特别方便,就是绘制效率稍差,不过可以忍受. 但是今天发生奇怪错误: 启动liteide后一切正常,但是选择打开目录菜单后就崩溃退出: 重新连接没用: 重新连 ...
- 在IE和Firefox中实现Flash透明背景
要在一个静态的背景上加一个透明的Flash会显示动态的效果,按照常规方式加了代码后,在IE中能显示透明背景Flash,但是用Firefox浏览器却发现没有透明的效果,那究竟应该怎么加呢?于是搜索和研究 ...
- python中的List 和 Tuple
#-*- coding:UTF-8 -*- classmates=["Michael","Bob","Tracy"] print(class ...
- jquery判断某个属性是否存在 hasAttr
在JQuery编码中,我们会判断元素是否存在某个属性.比如是否包含 class="new" 的样式呢.JQuery判断就非常简单了,因为有 hasClass这个方法 $(" ...
- rpc框架thrift
跨语言的rpc框架 新建一个thrift文件 # ping service demoservice PingService { string ping(), ping函数的返回类型是字符串} serv ...
- gtk界面设计
一.GTK基本 #include <gtk/gtk.h> int main( int argc, char *argv[]) { GtkWidget *window; /*初始化整个GTK ...
- 九度 1552 座位问题(递推DP)
题目描述: 计算机学院的男生和女生共n个人要坐成一排玩游戏,因为计算机的女生都非常害羞,男生又很主动,所以活动的组织者要求在任何时候,一个女生的左边或者右边至少有一个女生,即每个女生均不会只与男生相邻 ...
- ios开发之--MJRefresh的简单使用
MJRefresh是MJ大神写的框架,很强大,好多外国开发者都在用! 具体方法如下: -(void)requestData { NSString *userIdStr = [NSString stri ...
- 【NLP】pyhanlp flask
D:\ProgramData\Anaconda3\Lib\site-packages\pyhanlp\__init__.py 加入 WordVectorModel = LazyLoadingJClas ...
- mysql中concat 和 group_concat()的用法
一.CONCAT()函数CONCAT()函数用于将多个字符串连接成一个字符串.使用数据表Info作为示例,其中SELECT id,name FROM info LIMIT 1;的返回结果为+----+ ...