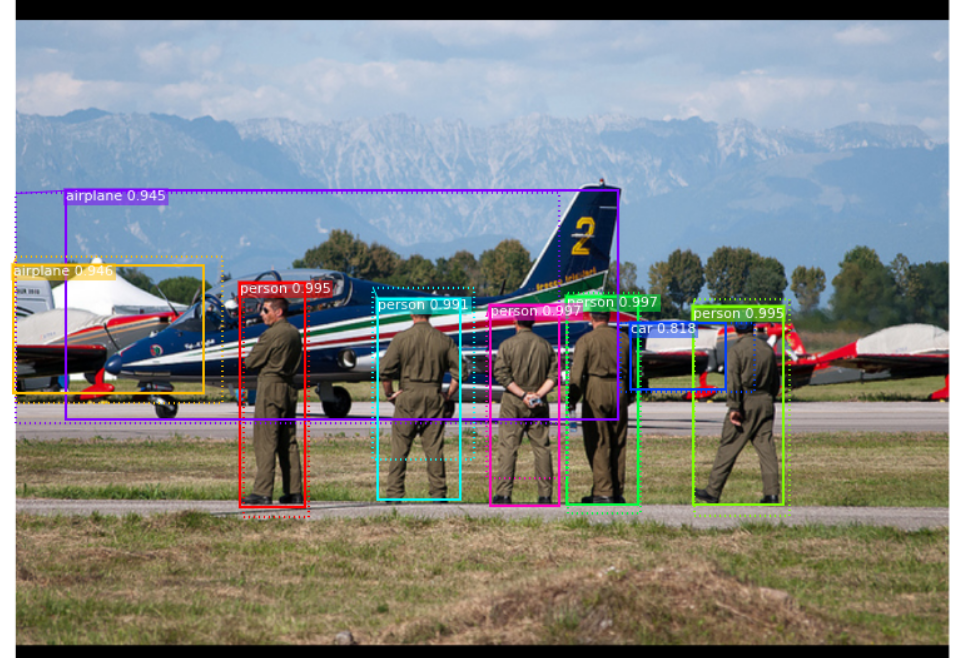
『计算机视觉』Mask-RCNN_项目文档翻译
基础介绍
项目地址:Mask_RCNN
语言框架:Python 3, Keras, and TensorFlow
Python 3.4, TensorFlow 1.3, Keras 2.0.8 其他依赖见:requirements.txt
基础网络:Feature Pyramid Network (FPN) and a ResNet101 backbone
文件介绍
以下是模型主体文件,
demo.ipynb Is the easiest way to start. It shows an example of using a model pre-trained on MS COCO to segment objects in your own images. It includes code to run object detection and instance segmentation on arbitrary images.
train_shapes.ipynb shows how to train Mask R-CNN on your own dataset. This notebook introduces a toy dataset (Shapes) to demonstrate training on a new dataset.
(model.py, utils.py, config.py): These files contain the main Mask RCNN implementation.
下面的几个文件是观察理解模型所用,
inspect_data.ipynb. This notebook visualizes the different pre-processing steps to prepare the training data.
inspect_model.ipynb This notebook goes in depth into the steps performed to detect and segment objects. It provides visualizations of every step of the pipeline.
inspect_weights.ipynb This notebooks inspects the weights of a trained model and looks for anomalies and odd patterns.
可视化展示:
下面图片展示了RPN网络的输出,即同时包含了积极锚框和消极锚框的proposal们:

下面展示了送入回归器之前的(第一步中的proposal)和最终输出的定位框坐标:

mask展示,

查看不同层的激活特征,

权重分布直方图,

调用训练
Training on MS COCO
作者已经提供了一个预训练好的基于COCO数据的权重以便我们快速启动训练任务,相关代码位于samples/coco/coco.py,我们既可以将之作为包导入到自己的代码中,也可以如下在命令行直接调用该部分代码,
# Train a new model starting from pre-trained COCO weights

python3 samples/coco/coco.py train --dataset=/path/to/coco/ --model=coco

# Train a new model starting from ImageNet weights

python3 samples/coco/coco.py train --dataset=/path/to/coco/ --model=imagenet

# Continue training a model that you had trained earlier

python3 samples/coco/coco.py train --dataset=/path/to/coco/ --model=/path/to/weights.h5

# Continue training the last model you trained. This will find

# the last trained weights in the model directory.

python3 samples/coco/coco.py train --dataset=/path/to/coco/ --model=last
如果我们希望验证COCO数据于最后保存的模型之上,
# Run COCO evaluation on the last trained model

python3 samples/coco/coco.py evaluate --dataset=/path/to/coco/ --model=last
相关参数仍然位于samples/coco/coco.py。
Training on Your Own Dataset
作者推荐了一篇博客blog post about the balloon color splash sample,介绍了从标注图片到训练它们再到将结果应用于一个小例子中的流程,其源码也位于本项目内,见samples/coco/balloon。
为了训练自己的数据,我们需要修改继承两个类,
ConfigThis class contains the default configuration.Subclass it and modify the attributes you need to change.
DatasetThis class provides a consistent way to work with any dataset. // 一个class可以处理不同数据集It allows you to use new datasets for training without having to change the code of the model. // 通过这个class我们可以最大程度避免修改model文件本身
It also supports loading multiple datasets at the same time, which is useful if the objects you want to detect are not all available in one dataset. // 可以同时处理不同数据集用于一次训练,满足特殊需求
有关使用示例见这四个文件:
samples/shapes/train_shapes.ipynb,
samples/coco/coco.py,
samples/balloon/balloon.py,
samples/nucleus/nucleus.py。
不同于论文之处
为了代码的简单和可扩展性,作者对工程进行了小幅度调整,其统计如下:
Image Resizing:本工程的图像尺寸预调整不同于原论文中的,以COCO数据集为例,作者将数据调整为1024*1024的大小,为了保证长宽比不变(语义不受影响),作者采取了填充0将图片变为1:1长宽比的方式,而非直接裁剪插值。
Bounding Boxes:数据集中的数据标签,除了带有mask标签之外,还有gt box标签,作者为了统一并简化操作,舍弃了box标签,完全使用mask图,使用它们生成一个完全覆盖全部标记像素的框作为gt box,这一步骤很大程度上简化了图像增强操作,很多例如旋转处理一样的预处理操一旦涉及gt box就会变得很麻烦,采用mash生成方式可以使得预处理操作更为方便。
为了验证计算出来的gt box和原数据gt box的差异,作者进行了比较,效果如下:
We found that ~2% of bounding boxes differed by 1px or more, ~0.05% differed by 5px or more, and only 0.01% differed by 10px or more.
Learning Rate:原论文使用0.02的学习率,作者实验觉得该学习率偏大,经常性造成梯度爆炸,特别是当batch很小时,作者有两点猜测:这可能是因为caffe与TensorFlow在多GPU上传播更新梯度的策略不同所致(sum vs mean across batches and GPUs);或者这是由于paper团队使用了clip梯度的方式规避了梯度爆照的发生,但是作者提到他采用的clipping操作效果并不显著。
安装工程
1、Install dependencies
pip3 install -r requirements.txt
2、Clone this repository
3、Run setup from the repository root directory
python3 setup.py install
4、Download pre-trained COCO weights (mask_rcnn_coco.h5) from the releases page.
5、(Optional) To train or test on MS COCO install pycocotools from one of these repos. They are forks of the original pycocotools with fixes for Python3 and Windows (the official repo doesn't seem to be active anymore).
- Linux: https://github.com/waleedka/coco
- Windows: https://github.com/philferriere/cocoapi. You must have the Visual C++ 2015 build tools on your path (see the repo for additional details)
最后,作者展示了几个使用了本框架的工程,这里不再引用。
『计算机视觉』Mask-RCNN_项目文档翻译的更多相关文章
- 『计算机视觉』经典RCNN_其二:Faster-RCNN
项目源码 一.Faster-RCNN简介 『cs231n』Faster_RCNN 『计算机视觉』Faster-RCNN学习_其一:目标检测及RCNN谱系 一篇讲的非常明白的文章:一文读懂Faster ...
- 『计算机视觉』经典RCNN_其一:从RCNN到Faster-RCNN
RCNN介绍 目标检测-RCNN系列 一文读懂Faster RCNN 一.目标检测 1.两个任务 目标检测可以拆分成两个任务:识别和定位 图像识别(classification)输入:图片输出:物体的 ...
- 『计算机视觉』Mask-RCNN
一.Mask-RCNN流程 Mask R-CNN是一个实例分割(Instance segmentation)算法,通过增加不同的分支,可以完成目标分类.目标检测.语义分割.实例分割.人体姿势识别等多种 ...
- 『计算机视觉』Mask-RCNN_推断网络其六:Mask生成
一.Mask生成概览 上一节的末尾,我们已经获取了待检测图片的分类回归信息,我们将回归信息(即待检测目标的边框信息)单独提取出来,结合金字塔特征mrcnn_feature_maps,进行Mask生成工 ...
- 『计算机视觉』Mask-RCNN_从服装关键点检测看KeyPoints分支
下图Github地址:Mask_RCNN Mask_RCNN_KeyPoints『计算机视觉』Mask-RCNN_论文学习『计算机视觉』Mask-RCNN_项目文档翻译『计算机视觉』Mas ...
- 『计算机视觉』Mask-RCNN_训练网络其三:训练Model
Github地址:Mask_RCNN 『计算机视觉』Mask-RCNN_论文学习 『计算机视觉』Mask-RCNN_项目文档翻译 『计算机视觉』Mask-RCNN_推断网络其一:总览 『计算机视觉』M ...
- 『计算机视觉』Mask-RCNN_训练网络其二:train网络结构&损失函数
Github地址:Mask_RCNN 『计算机视觉』Mask-RCNN_论文学习 『计算机视觉』Mask-RCNN_项目文档翻译 『计算机视觉』Mask-RCNN_推断网络其一:总览 『计算机视觉』M ...
- 『计算机视觉』Mask-RCNN_训练网络其一:数据集与Dataset类
Github地址:Mask_RCNN 『计算机视觉』Mask-RCNN_论文学习 『计算机视觉』Mask-RCNN_项目文档翻译 『计算机视觉』Mask-RCNN_推断网络其一:总览 『计算机视觉』M ...
- 『计算机视觉』Mask-RCNN_锚框生成
Github地址:Mask_RCNN 『计算机视觉』Mask-RCNN_论文学习 『计算机视觉』Mask-RCNN_项目文档翻译 『计算机视觉』Mask-RCNN_推断网络其一:总览 『计算机视觉』M ...
- 『计算机视觉』FPN:feature pyramid networks for object detection
对用卷积神经网络进行目标检测方法的一种改进,通过提取多尺度的特征信息进行融合,进而提高目标检测的精度,特别是在小物体检测上的精度.FPN是ResNet或DenseNet等通用特征提取网络的附加组件,可 ...
随机推荐
- 【Spring Security】四、自定义页面
在前面例子中,登陆页面都是用的Spring Security自己提供的,这明显不符合实际开发场景,同时也没有退出和注销按钮,因此在每次测试的时候都要通过关闭浏览器来注销达到清除session的效果. ...
- asp.net mvc 加三层架构 完美搭配
http://www.hysql.org/aspnet/20180630/5712.html 先来一张项目的层级结构图: Model:模型层,主要是各种类型.枚举以及ORM框架,框架完成数据库和实体类 ...
- Windows,远程计算机:X.X.X.X,这可能是由于CredSSP加密Oracle修正
https://blog.csdn.net/wyhwlls/article/details/80320301 近期window 10家庭版更新后,远程桌面连不到服务器了 网上有卸载补丁,修改组策略什么 ...
- 题解——洛谷P3812【模板】线性基
学了下线性基 使用好像并不复杂 打了板子 但是要注意位运算优先级 #include <cstdio> #include <algorithm> #include <cst ...
- Awesome Torch
Awesome Torch This blog from: A curated list of awesome Torch tutorials, projects and communities. T ...
- vue.js精讲02
2017-09-17 笔记及源码地址 : https://github.com/wll8/vue_note vue 中的事件深入. 事件: @click/mouseover…事件简写: @ 如 @cl ...
- MySQL中查询时间最大的一条记录
在项目中要查询用户最近登录的一条记录的 ip 直接写如下 SQL: SELECT ip,MAX(act_time) FROM users_login GROUP BY login_id; 但是这样是取 ...
- R----ggplot2包介绍学习--转载
https://www.cnblogs.com/nxld/p/6059603.html 分析数据要做的第一件事情,就是观察它.对于每个变量,哪些值是最常见的?值域是大是小?是否有异常观测? ggplo ...
- URL helper 逆向破解思路+详细过程 利用messagebox破解
先了解一下软件的运行: 打开后是这样的,要注册 随便输入假注册码,看他怎么响应: 会弹出一个信息窗(massageBox)提示注册失败.到这里就行了,关掉,然后用OD打开,按F9跑起来: 这里输入假码 ...
- centos7 查看防火墙状态
[root@xxx ~]# firewall-cmd --state not running
