asp.net core网关Ocelot的简单介绍& Ocelot集成Identity认证
文章简介
Ocelot网关简介
Ocelot集成Idnetity认证处理
Ocelot网关简介
Ocelot是一个基于netcore实现的API网关,本质是一组按特定顺序排列的中间件。Ocelot内部实现了路由转发,限流,熔断,请求聚合,服务发现(集成consul,eureka等),负载均衡,认证(集成Identity)功能。
这里简单介绍下ocelot的配置文件,也就是说以下图为例,请求地址为localhost:18002/users会被转发到localhost:18000/api/users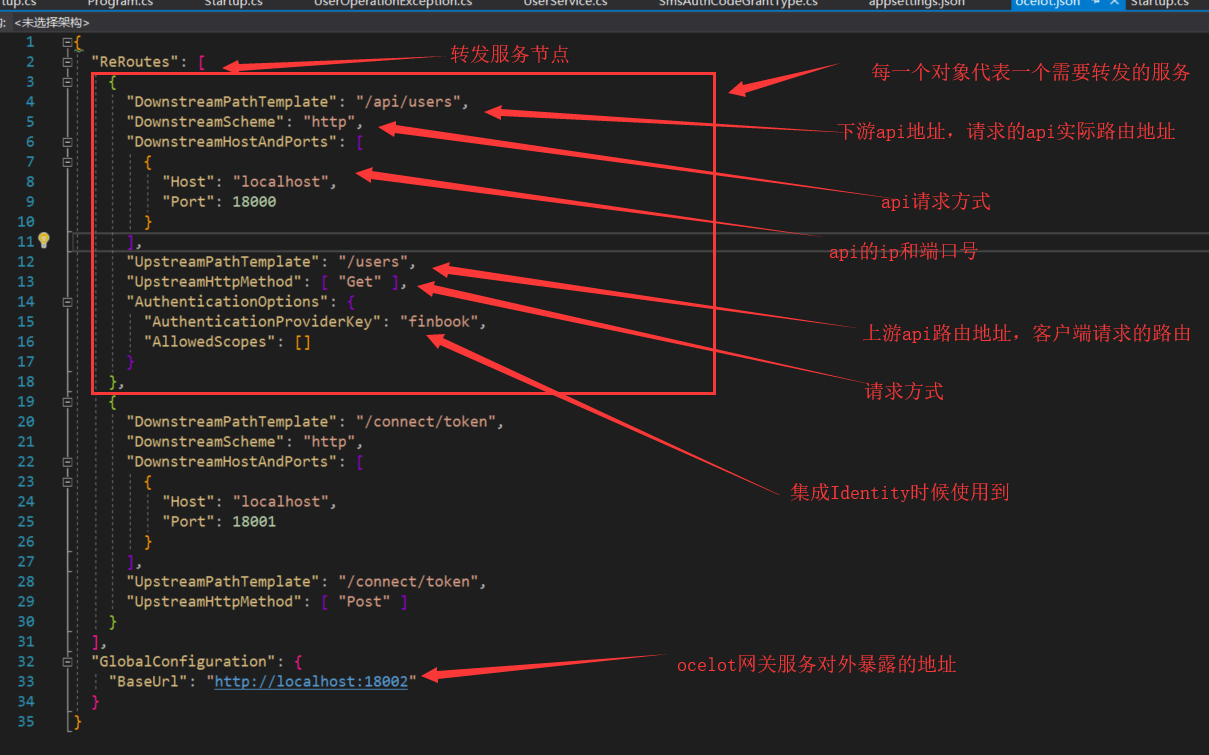
更多关于Ocelot的介绍可以看https://www.cnblogs.com/jesse2013/p/net-core-apigateway-ocelot-docs.html这篇博客或者https://ocelot.readthedocs.io/en/latest/index.html官方文档。
Ocelot集成Identity认证
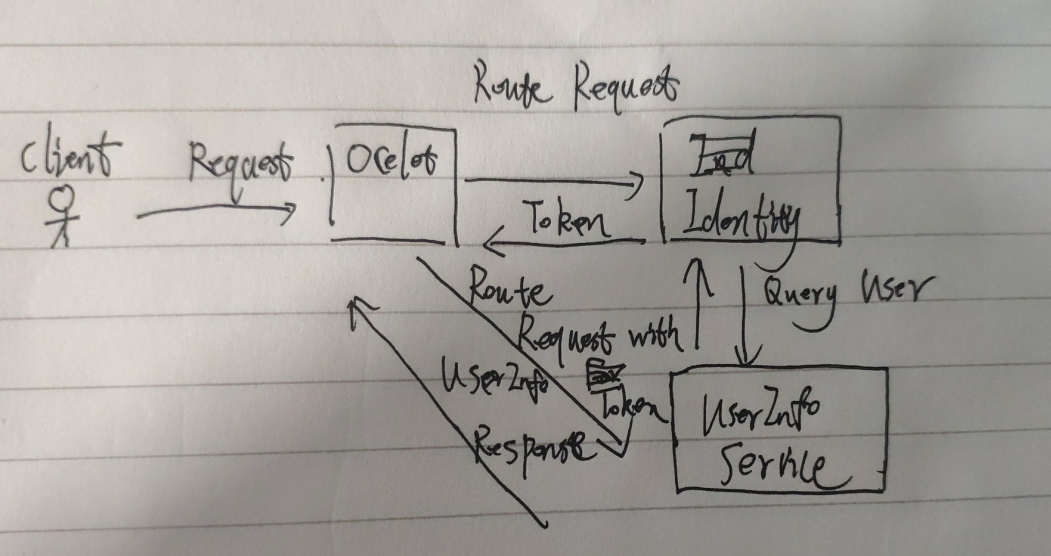
这里我们实现一个Ocelot集成Idnetity做认证的Demo;我们这里客户端请求ocelot网关服务,ocelot网关服务集成Idnetity获取token,再通过返回的token请求用户信息服务,如下图所示。这里扩展一个知识点,我们的Identity服务使用扩展认证,这个认证需要实现IExtensionGrantValidator接口的ValidateAsync方法,从http请求上下文中获取自定义参数,获取方法为context.Request.Raw。(oauth2默认的认证方式有password,authcode等,扩展认证文档=》http://docs.identityserver.io/en/latest/topics/extension_grants.html?highlight=IExtensionGrantValidator)
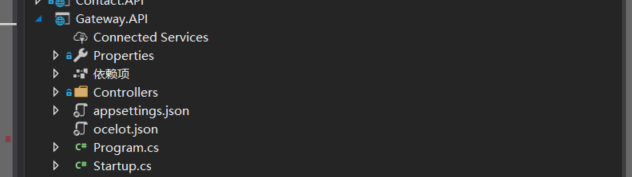
首先我们创建三个服务,分别为Ocelot网关服务(端口号设置为18002),Identity认证服务(端口号设置为18001),UserInfo用户信息服务(端口号设置为18000),如下图所示=》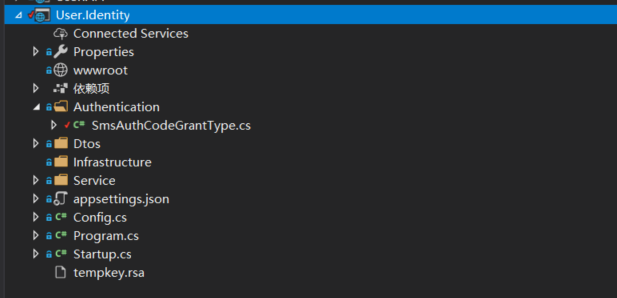
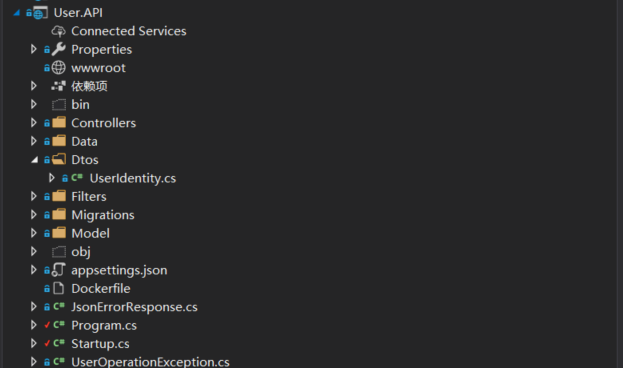
- 首先我们配置User.API服务,这个服务很简单,开放一个返回用户信息的端口,关键代码如下所示 =》
 namespace User.API.Controllers

 {

     [Route("api/users")]

     public class UserController : BaseController

     {

         private readonly UserContext _userContext;

         private ILogger<UserController> _logger;

         public UserController(UserContext userContext, ILogger<UserController> logger)

         {

             _userContext = userContext;

             _logger = logger;

         }

         [HttpGet]

         public async Task<IActionResult> Get()

         {

             var user = await _userContext.Set<AppUser>()

                 .AsNoTracking()

                 .Include(u => u.userProperties)

                 .FirstOrDefaultAsync(t => t.Id == );

             if (user == null)

             {

                 _logger.LogError("登录用户为空");

                 throw new UserOperationException("用户登录异常");

             }

             return Json(user);

         }

 ..... other
User.Api
         [Route("check_or_create")]

         [HttpPost]

         public async Task<IActionResult> CheckOrCreate(string phone)

         {

             var user = await _userContext.Users.SingleOrDefaultAsync(u => u.Phone == phone);

             if (user == null)

             {

                 user = new AppUser { Phone = phone };

                 _userContext.Users.Add(new AppUser { Phone = phone });

                 await _userContext.SaveChangesAsync();

             }

             return Ok(new {

                 user.Id,

                 user.Name,

                 user.Company,

                 user.Title,

                 user.Avatar

             });

         }
User.Api 验证用户手机号,返回用户信息
- 然后配置我们的Identity认证服务,引入IdnttiyServer4 nuget包,添加Ids4配置文件Config.cs。注意:这里的client_grant_type为sms_auth_code
     public class Config

     {

         public static IEnumerable<Client> GetClients()

         {

             return new List<Client>{

                 new Client{

                     ClientId = "android",

                     ClientSecrets = new List<Secret>

                     {

                         new Secret("secret".Sha256())

                     },

                     RefreshTokenExpiration  = TokenExpiration.Sliding,

                     AllowOfflineAccess = true,

                     RequireClientSecret = false,

                     AllowedGrantTypes = new List<string>{"sms_auth_code"},

                     AlwaysIncludeUserClaimsInIdToken = true,

                     AllowedScopes = new List<string>

                     {

                         "gateway_api",

                         IdentityServerConstants.StandardScopes.OfflineAccess,

                         IdentityServerConstants.StandardScopes.OpenId,

                         IdentityServerConstants.StandardScopes.Profile

                     }

                 }

             };

         }

         public static IEnumerable<IdentityResource> GetIdentityResources()

         {

             return new List<IdentityResource>

             {

                 new IdentityResources.OpenId(),

                 new IdentityResources.Profile()

             };

         }

         public static IEnumerable<ApiResource> GetApiResources()

         {

             return new List<ApiResource>

             {

                 new ApiResource("gateway_api","user service")

             };

         }

     }
Config
编写我们的自定义自定义验证服务类,我们验证客户端传入的手机号&验证码是否正确(Demo逻辑中只需要填写正确手机号就可以了)
     public class SmsAuthCodeGrantType : IExtensionGrantValidator

     {

         private IUserService _userService;

         private IAuthCodeService _authCodeService;

         public SmsAuthCodeGrantType(IUserService userService, IAuthCodeService authCodeService)

         {

             _userService = userService;

             _authCodeService = authCodeService;

         }

         public string GrantType => "sms_auth_code";

         /// <summary>

         ///

         /// </summary>

         /// <param name="context"></param>

         /// <returns></returns>

         public async Task ValidateAsync(ExtensionGrantValidationContext context)

         {

             var phone = context.Request.Raw["phone"];

             var code = context.Request.Raw["auth_code"];

             var errorValidationResult = new GrantValidationResult(TokenRequestErrors.InvalidGrant);

             if (string.IsNullOrWhiteSpace(phone) || string.IsNullOrWhiteSpace(code))

             {

                 context.Result = errorValidationResult;

                 return;

             }

             //检查验证码

             if (!_authCodeService.Validate(phone, code))

             {

                 context.Result = errorValidationResult;

                 return;

             }

             //完成用户注册

             var userinfo = await _userService.CheckOrCreate(phone);

             if (userinfo== null)

             {

                 context.Result = errorValidationResult;

                 return;

             }

             var claims = new Claim[]

             {

                 new Claim("name",userinfo.Name??string.Empty),

                 new Claim("company",userinfo.Company??string.Empty),

                 new Claim("title",userinfo.Tiltle??string.Empty),

                 new Claim("avatar",userinfo.Avatar??string.Empty),

             };

             context.Result = new GrantValidationResult(userinfo.Id.ToString(),

                 GrantType,

                 claims);

         }

     }
SmsAuthCodeGrantType
其他的验证服务和与User.API服务通信的服务类和返回的UserInfoDto
     public class UserInfo

     {

         public int Id { get; set; }

         public string Name { get; set; }

         public string Company { get; set; }

         public string Tiltle { get; set; }

         public string Avatar { get; set; }

     }
UserInfo
     public interface IAuthCodeService

     {

         /// <summary>

         /// 根据手机号验证验证码

         /// </summary>

         /// <param name="phone"></param>

         /// <param name="authCode"></param>

         /// <returns></returns>

         bool Validate(string phone, string authCode);

     }
IAuthCodeService
     public class TestAuthCodeService : IAuthCodeService

     {

         public bool Validate(string phone, string authCode)

         {

             return true;

         }

     }
TestAuthCodeService
     public interface IUserService

     {

         /// <summary>

         /// 检查手机号是否注册,未注册就注册

         /// </summary>

         /// <param name="phone"></param>

         Task<UserInfo> CheckOrCreate(string phone);

     }
IUserService
     public class UserService : IUserService

     {

         private HttpClient _httpClient;

         private string _userServiceUrl = "http://localhost:18000";

         public UserService(HttpClient httpClient)

         {

             _httpClient = httpClient;

         }

         public async Task<UserInfo> CheckOrCreate(string phone)

         {

             var from = new Dictionary<string, string>

             {

                 { "phone",phone }

             };

             var content = new FormUrlEncodedContent(from);

             var response = await _httpClient.PostAsync(_userServiceUrl + "/api/users/check_or_create", content);

             if (response.StatusCode == System.Net.HttpStatusCode.OK)

             {

                 var result = await response.Content.ReadAsStringAsync();

                 var userinfo = JsonConvert.DeserializeObject<UserInfo>(result);

                 //int.TryParse(userId,out int UserIdInt);

                 return userinfo;

             }

             return null;

         }

     }
UserService
配置Startup,注意要在我们的DI容器中注入自定义服务验证类(SmsAuthCodeGrantType)
     public class Startup

     {

         public Startup(IConfiguration configuration)

         {

             Configuration = configuration;

         }

         public IConfiguration Configuration { get; }

         // This method gets called by the runtime. Use this method to add services to the container.

         public void ConfigureServices(IServiceCollection services)

         {

             services.AddMvc();

             services.AddIdentityServer()

                 .AddExtensionGrantValidator<SmsAuthCodeGrantType>()

                 .AddDeveloperSigningCredential()

                 .AddInMemoryClients(Config.GetClients())

                 .AddInMemoryIdentityResources(Config.GetIdentityResources())

                 .AddInMemoryApiResources(Config.GetApiResources());  //identityserver 认证

             services.AddScoped<IAuthCodeService, TestAuthCodeService>()

                 .AddScoped<IUserService, UserService>();

             services.AddSingleton(new HttpClient());

         }

         // This method gets called by the runtime. Use this method to configure the HTTP request pipeline.

         public void Configure(IApplicationBuilder app, IHostingEnvironment env)

         {

             if (env.IsDevelopment())

             {

                 app.UseDeveloperExceptionPage();

             }

             app.UseIdentityServer();

             app.UseMvc();

         }

     }
Startup
- 最后配置我们的网关Ocelot站点,首先添加nuget包IdentityServer4.AccessTokenValidation和Ocelot。添加配置文件ocelot.json,其实就是博客开头的配置文件截图,这里特别说明下AuthenticationOptions节点,AuthenticationOptions是ocelot集成Identity所需要配置节点,AuthenticationProviderKey需要跟startup的authenticationScheme匹配
 {

   "ReRoutes": [

     {

       "DownstreamPathTemplate": "/api/users",

       "DownstreamScheme": "http",

       "DownstreamHostAndPorts": [

         {

           "Host": "localhost",

           "Port":

         }

       ],

       "UpstreamPathTemplate": "/users",

       "UpstreamHttpMethod": [ "Get" ],

       "AuthenticationOptions": {

         "AuthenticationProviderKey": "finbook",

         "AllowedScopes": []

       }

     },

     {

       "DownstreamPathTemplate": "/connect/token",

       "DownstreamScheme": "http",

       "DownstreamHostAndPorts": [

         {

           "Host": "localhost",

           "Port":

         }

       ],

       "UpstreamPathTemplate": "/connect/token",

       "UpstreamHttpMethod": [ "Post" ]

     }

   ],

   "GlobalConfiguration": {

     "BaseUrl": "http://localhost:18002"

   }

 }
ocelot.json
将配置文件加载到服务中,修改Program的CreateWebHostBuilder方法
     public class Program

     {

         public static void Main(string[] args)

         {

             CreateWebHostBuilder(args).Build().Run();

         }

         public static IWebHostBuilder CreateWebHostBuilder(string[] args) =>

             WebHost.CreateDefaultBuilder(args)

                 .UseStartup<Startup>()

                 .UseContentRoot(Directory.GetCurrentDirectory())

                 .ConfigureAppConfiguration((hostingContext, config) =>

                 {

                     config

                        .SetBasePath(hostingContext.HostingEnvironment.ContentRootPath)

                        //.AddJsonFile("appsettings.json", true, true)

                        //.AddJsonFile($"appsettings.{hostingContext.HostingEnvironment.EnvironmentName}.json", true, true)

                        .AddJsonFile("ocelot.json")

                        .AddEnvironmentVariables();

                 })

                 .UseUrls("http://+:18002");

     }
Program
配置startup,在DI容器中加入Identity自定义认证,加入Ocelot,启用Ocelot中间件
     public class Startup

     {

         public Startup(IConfiguration configuration)

         {

             Configuration = configuration;

         }

         public IConfiguration Configuration { get; }

         // This method gets called by the runtime. Use this method to add services to the container.

         public void ConfigureServices(IServiceCollection services)

         {

             services.AddMvc().SetCompatibilityVersion(CompatibilityVersion.Version_2_2);

             //添加 认证信息

             var authenticationProviderKey = "finbook";

             services.AddAuthentication()

                 .AddIdentityServerAuthentication(authenticationProviderKey, options =>

                 {

                     options.Authority = "http://localhost:18001";

                     options.ApiName = "gateway_api";

                     options.SupportedTokens = IdentityServer4.AccessTokenValidation.SupportedTokens.Both;

                     options.ApiSecret = "secret";

                     options.RequireHttpsMetadata = false;

                 });

             services.AddOcelot();

         }

         // This method gets called by the runtime. Use this method to configure the HTTP request pipeline.

         public void Configure(IApplicationBuilder app, IHostingEnvironment env)

         {

             if (env.IsDevelopment())

             {

                 app.UseDeveloperExceptionPage();

             }

             else

             {

                 // The default HSTS value is 30 days. You may want to change this for production scenarios, see https://aka.ms/aspnetcore-hsts.

                 app.UseHsts();

             }

             //app.UseAuthentication();

             app.UseOcelot(); //.Wait()

             app.UseHttpsRedirection();

             app.UseMvc();

         }

     }
Startup
- 验证运行
首先获取token,访问ocelot网关的/connect/token地址,转发到Idnetity服务,注意下grant_type参数要和Identity服务中的配置相同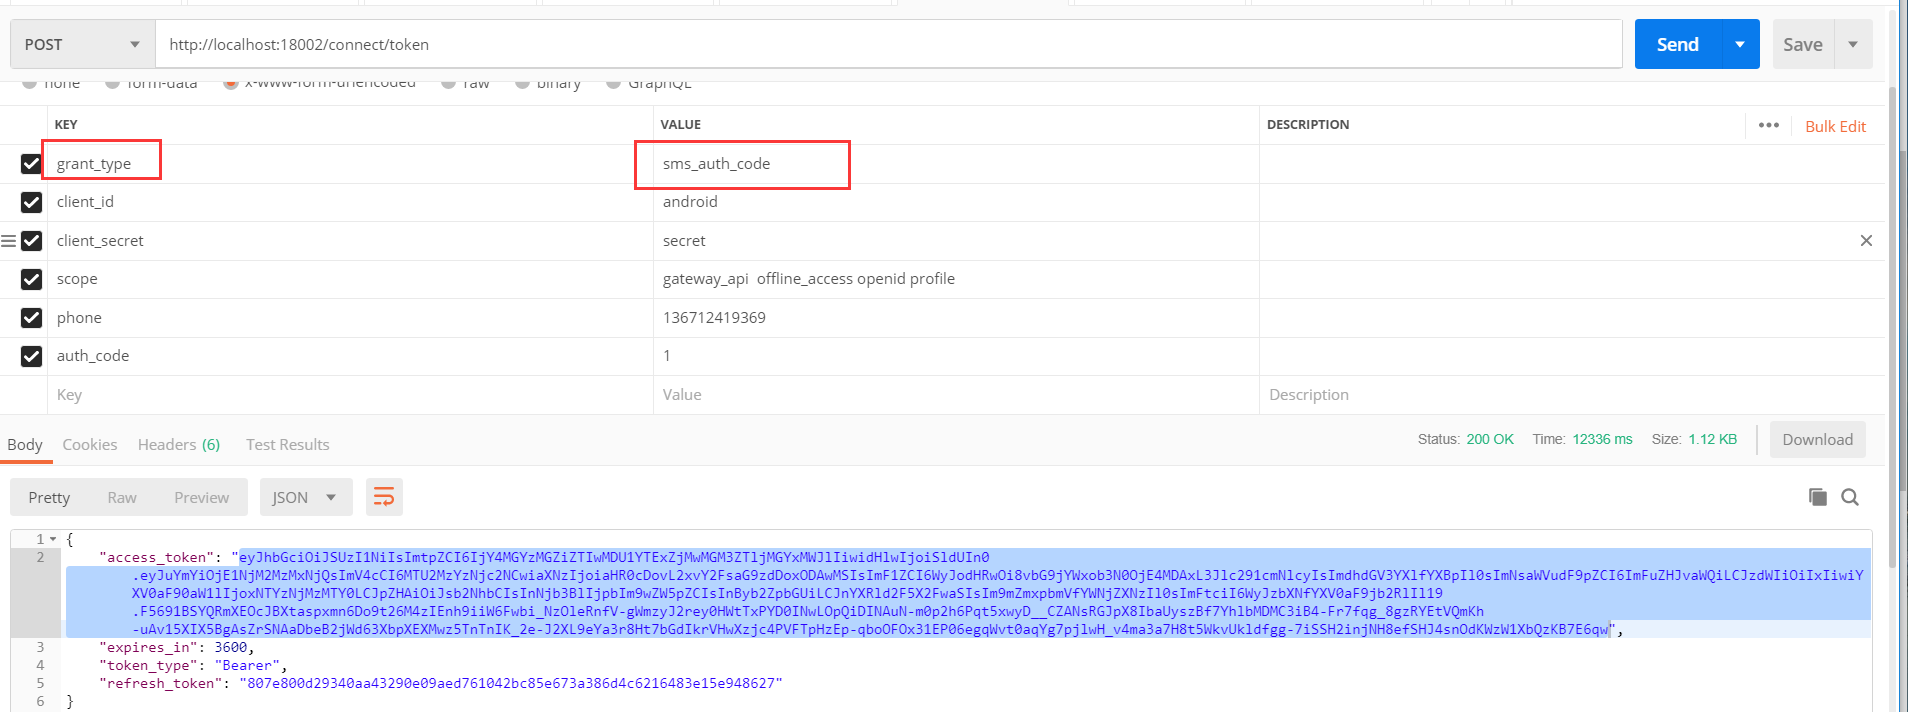
接下来根据获取到的token,请求用户信息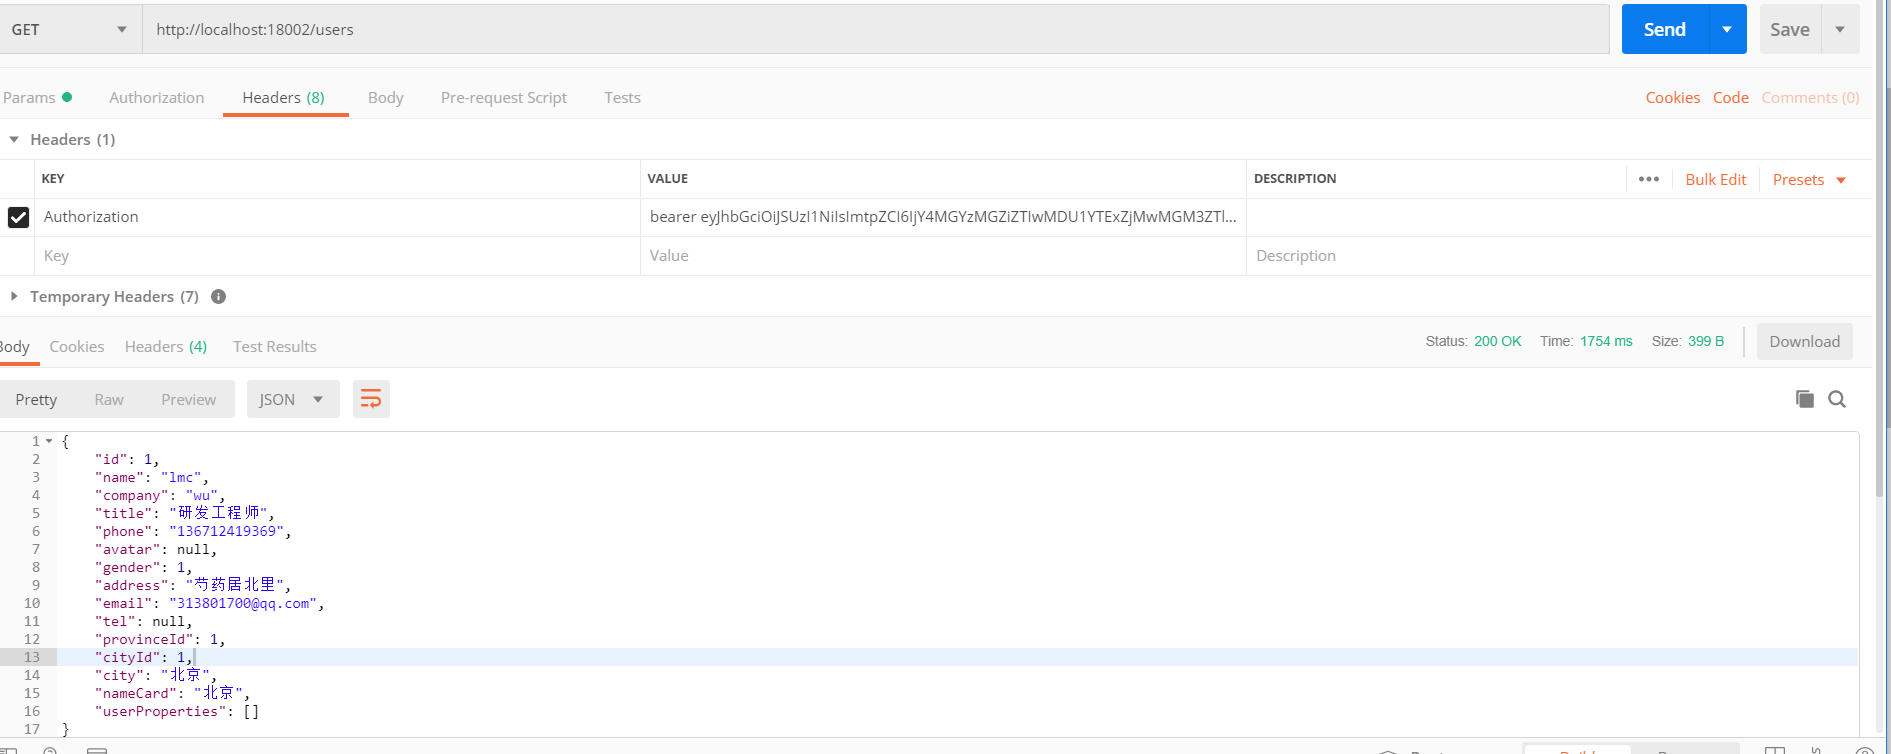
Demo地址=》https://github.com/madeinchinalmc/User.Api
asp.net core网关Ocelot的简单介绍& Ocelot集成Identity认证的更多相关文章
- ASP.NET Core 中的 Razor 页面介绍
标题:ASP.NET Core 中的 Razor 页面介绍 地址:https://docs.microsoft.com/zh-cn/aspnet/core/razor-pages/index?view ...
- ASP.NET Core应用程序容器化、持续集成与Kubernetes集群部署(一)(转载)
本文结构 ASP.NET Core应用程序的构建 ASP.NET Core应用程序容器化所需注意的问题 应用程序的配置信息 端口侦听 ASP.NET Core的容器版本 docker镜像构建上下文(B ...
- asp.net core系列 53 IdentityServer4 (IS4)介绍
一.概述 在物理层之间相互通信必须保护资源,需要实现身份验证和授权,通常针对同一个用户存储.对于资源安全设计包括二个部分,一个是认证,一个是API访问. 1 认证 认证是指:应用程序需要知道当前用户的 ...
- ASP.NET Core身份认证服务框架IdentityServer4 介绍
IdentityServer4是ASP.NET Core 2的OpenID Connect和OAuth 2.0框架.它可以在您的应用程序中提供以下功能: 它使你的应用程序具有如下特点: 认证即服务 适 ...
- Workflow Core + asp.net core 5.0 实现简单审批工作流
我们知道企业业务系统到处都可以审批工作流的,但也很少有像OA系统一样复杂多级多条件的审批工作流需要设计,所以我们需要一个轻量级的容易上手的workflow框架,通过GitHub,我发现danielge ...
- Asp.net core与golang web简单对比测试
最近因为工作需要接触了go语言,又恰好asp.net core发布RC2,就想简单做个对比测试. 下面是测试环境: CPU:E3-1230 v2 内存:16G 电脑有点不给力 操作系统:Centos7 ...
- 在ASP.NET Core MVC中构建简单 Web Api
Getting Started 在 ASP.NET Core MVC 框架中,ASP.NET 团队为我们提供了一整套的用于构建一个 Web 中的各种部分所需的套件,那么有些时候我们只需要做一个简单的 ...
- 基于Asp.Net Core 2.1的简单问答社区系统源代码分享
看见园子里很多人都在分享源代码,我也来凑个热闹. 该项目基于.NET CORE 2.1(其实是从1.1开始开发的),经历过不停的调整终于有个能拿出手的版本了,第一次在博客园发文章. 使用到的技术以及框 ...
- asp.net core系列 72 Exceptionless使用介绍
一.Exceptionless介绍 Exceptionless专注于.net平台提供实时错误和日志报告.主要包括:错误通知.智能分组异常.详细错误报告堆栈跟踪.支持离线.UI查看重要错误和确定优先级. ...
随机推荐
- canvas简单画图板
<!DOCTYPE html> <html lang='en'> <head> <meta charset='UTF-8'> <title> ...
- 2018 ICPC Asia Singapore Regional A. Largest Triangle (计算几何)
题目链接:Kattis - largesttriangle Description Given \(N\) points on a \(2\)-dimensional space, determine ...
- C++异常处理try、catch 没有finally
程序的错误大致可以分为三种,分别是语法错误.逻辑错误和运行时错误: 1) 语法错误在编译和链接阶段就能发现,只有 100% 符合语法规则的代码才能生成可执行程序.语法错误是最容易发现.最容易定位.最容 ...
- Rust <2>:函数、方法与注释的格式
rust 函数定义格式如下: fn function_name(a: i64, b: u32, c: bool) -> (d: f64, e: &str) { ... (1, " ...
- (1.1)学习笔记之mysql体系结构(内存、进程、线程)
关键词:mysql体系结构 参考:https://www.cnblogs.com/zhoubaojian/articles/7866292.html 一.mysql体系架构概述 1.mysql体系结构 ...
- 迭代器,生成器,yield,yield from理解
迭代器 说到迭代器就得想说可迭代对象Iterable,实现了__iter__()方法的对象都是可迭代对象,例如很多容器,list ,set, tuples.使用iter方法可以把一个可迭代对象变成迭代 ...
- Redis Sentinel 高可用方案
redis 主从复制的问题 Redis主从复制可将主节点数据同步给从节点,从节点此时有两个作用: 1,一旦主节点宕机,从节点作为主节点的备份可以随时顶上来. 2,扩展主节点的读能力,分担主节点读压 ...
- 【记录】API Gateway作用? 与过滤器的区别?Nginx与Zuul区别?
网关(gateway)的作用: 网关可以拦截客户端所有请求,对该请求进行权限控制.负载均衡.日志管理.接口调用监控等 过滤器与网关的区别是什么? 过滤器是拦截单个tomcat服务器请求. 网关是拦截整 ...
- 使用vscode搭建本地的websocket
首先在服务器方面,网上都有不同的对websocket支持的服务器: php - http://code.google.com/p/phpwebsocket/ jetty - http://jetty. ...
- windows server 2016 支持多用户远程登录
服务器设置多用户同时远程桌面,可以提高访问效率,避免人多抢登服务器. 1. 首先需要先安装远程桌面服务 配置组策略,运行框输入gpedit.msc,打开计算机配置–>管理模板—>wind ...