Node.js http等模块 笔记05
一、http模块
const http = require('http');

http.createServer((req,res)=>{

    //1 设置响应头

    res.writeHead(200,{'content-type': 'text/html; charset=utf-8'});

    // 2 设置响应内容

    res.write('<h1>there is a way</h1>');

    res.end('<h2>always like this!</h2>')

}).listen(3000,'127.0.0.1');
get 请求:
const http = require('http');

const url = require('url');

const util = require('util');

http.createServer((req,res)=>{

    // 1 设置响应头

    res.writeHead(200,{'content-type': 'text/html; charset=utf-8'});

    // 2. 利用url模块去解析客户端发送过来的URL

    res.write(req.url);

    res.write('--------------------------')

    res.write(util.inspect(url.parse(req.url,true)));

    res.end();

}).listen(3000,'127.0.0.1');

/*

访问:http://localhost:3000/getName&a=123&b=456

结果页面显示:

/getName&a=123&b=456

--------------------------

Url { protocol: null, slashes: null, auth: null, host: null, port: null, hostname: null, hash: null, search: null, query: {}, pathname: '/getName&a=123&b=456', path: '/getName&a=123&b=456', href: '/getName&a=123&b=456' }

* */
post请求:
/*const http = require('http');

http.createServer((req,res)=>{

    //1 设置响应头

    res.writeHead(200,{'content-type': 'text/html; charset=utf-8'});

    // 2 设置响应内容

    res.write('<h1>there is a way</h1>');

    res.end('<h2>always like this!</h2>')

}).listen(3000,'127.0.0.1');*/

/*

const http = require('http');

const url = require('url');

const util = require('util');

http.createServer((req,res)=>{

    // 1 设置响应头

    res.writeHead(200,{'content-type': 'text/html; charset=utf-8'});

    // 2. 利用url模块去解析客户端发送过来的URL

    res.write(req.url);

    res.write('--------------------------')

    res.write(util.inspect(url.parse(req.url,true)));

    res.end();

}).listen(3000,'127.0.0.1');

/!*

访问:http://localhost:3000/getName&a=123&b=456

结果页面显示:

/getName&a=123&b=456

--------------------------

Url { protocol: null, slashes: null, auth: null, host: null, port: null, hostname: null, hash: null, search: null, query: {}, pathname: '/getName&a=123&b=456', path: '/getName&a=123&b=456', href: '/getName&a=123&b=456' }

* *!/*/

const http = require('http');

const url = require('url');

const util = require('util');

const querystring = require('querystring');

http.createServer((req, res)=>{

    let postData = '';

    // 监听post 过来数据,然后存入到 postData 里

    req.on('data', (chunk)=>{

        postData += chunk;

    });

    req.on('end', ()=>{

        console.log(postData);

        // parse这个方法是将一个字符串反序列化为一个对象。

        // 可以将user=gudon&pwd=123456 反序列化为 { user: 'gudon', pwd: '123456' }

        postData = querystring.parse(postData);

        //util.inspect()将任意对象转换为字符串的方法,通常用于调试和错误输出。

        res.end(util.inspect(postData));

    });

}).listen(3000, '127.0.0.1');

// 访问:html端post表单提交  username gudon,password为123456

// 服务端打印:user=gudon&pwd=123456

// 浏览器:{ user: 'gudon', pwd: '123456' }
// path.normalize() 输出规范格式的path字符串。

let path = require('path')

console.log(path.normalize('/foo/bar//baz/file01/file02//..'));

// \foo\bar\baz\file01
// path.extname() 获取扩展名的

// 如果 path 的最后一部分没有 . 或 path 的文件名的第一个字符是 .,则返回一个空字符串。

/*

path.extname('index.html');

// 返回: '.html'

path.extname('/etc/a/index.html');

// 返回: '.html'

path.extname('index.coffee.md');

// 返回: '.md'

path.extname('index.');

// 返回: '.'

path.extname('index');

// 返回: ''

path.extname('.index');

// 返回: ''

*/
访问服务器上文件资源的原理:
let http = require('http');

let fs = require('fs');

let path = require('path');

let url = require('url');

// 1 创建服务器

http.createServer((req,res)=>{

    // 1.1 获取url 路径

    let pathUrl = url.parse(req.url);

    let pathName = pathUrl.pathname;

    // 1.2 处理路径

    if(pathName.lastIndexOf('.') === -1){ // 没有点,就拼接上 index.html

        pathName += '/index.html';

        console.log(111);

        console.log(pathName);

    }

    let fileUrl = './' + path.normalize(pathName);

    // 取出文件的后缀

    let extName = path.extname(fileUrl);

    console.log('扩展名',extName);

    // 1.3 读取文件

    fs.readFile(fileUrl,(err,data)=>{

        // 1.3.1 do not find the file

        if (err){

            res.writeHead(404, {'content-type': 'text/html; charset=utf-8'});

            res.end('<h1>404, 当前页面找不到!</h1>');

        }

        // 1.3.3 find the file

        getContentType(extName,(contentType)=>{

           res.writeHead(200,{'content-type': contentType});

           // res.end(data);

           res.end('111');

        })

    })

}).listen(3000);

/*

 获取 contentType

 就是获取那个文件的类型,返回给浏览器端,浏览器的头部文件里,会对你访问的文件类型有所描述

mime.json 文件,设置了各种 文件对应的类型,如: ".jpg":"image/jpeg" 等。

*/

let getContentType = (extName,callBack)=>{

    // read file

    fs.readFile('./mime.json',(err,data)=>{

        if (err){

            throw err;

            return;

        }

        let mineJson = JSON.parse(data);

        let contentType = mineJson[extName] || 'text/plain';

        callBack(contentType);

    })

};
未完待续。。。
二、ejs模板
"E" 代表 "effective",即【高效】。EJS 是一套简单的模板语言,帮你利用普通的 JavaScript 代码生成 HTML 页面。
EJS是一个JavaScript模板库,用来从JSON数据中生成HTML字符串。
view/data.json
{
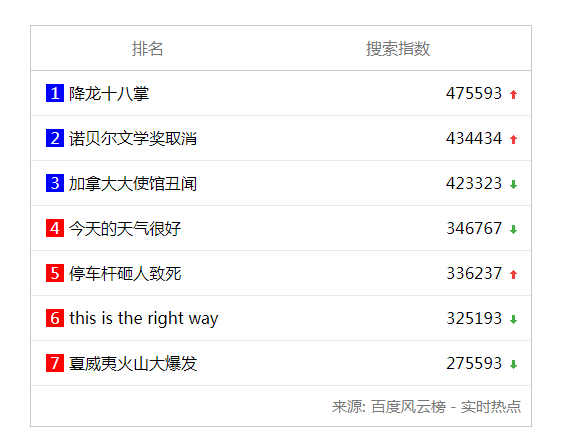
"lists":[
{"title": "降龙十八掌", "count": 475593, "up": 1},
{"title": "诺贝尔文学奖取消", "count": 434434, "up": 1},
{"title": "加拿大大使馆丑闻", "count": 423323, "up": 0},
{"title": "今天的天气很好", "count": 346767, "up": 0},
{"title": "停车杆砸人致死", "count": 336237, "up": 1},
{"title": "this is the right way", "count": 325193, "up": 0},
{"title": "夏威夷火山大爆发", "count": 275593, "up": 0}
],
"source": "百度风云榜 - 实时热点"
}
server.js
let http = require('http');

let fs = require('fs');

let ejs = require('ejs');

// 1 创建服务器

http.createServer((req,res)=>{

    // 1.1 读取数据

    getDataJson((jsonData)=>{

        // 1.2 读取模板信息

        fs.readFile('./view/list.ejs',(err,data)=>{

            let ejsList = data.toString();

            // 1.3 实例化模板

            let tmp = ejs.render(ejsList,jsonData);

            //  1.4 返回界面

            res.writeHead(200, {'Content-Type': 'text/html;charset=utf-8'});

            res.end(tmp);

        })

    });

}).listen(3000);

let getDataJson = (callBack)=>{

    fs.readFile('./model/data.json',(err,data)=>{

        if(!err){

            let jsonData = JSON.parse(data);

            callBack(jsonData);

        }else {

            throw err;

        }

    })

}
list.ejs
<!doctype html>

<html>

<head>

    <meta charset="UTF-8">

    <meta name="viewport"

          content="width=device-width, user-scalable=no, initial-scale=1.0, maximum-scale=1.0, minimum-scale=1.0">

    <meta http-equiv="X-UA-Compatible" content="ie=edge">

    <title>百度风云排行版</title>

    <style>

        * {

            margin: 0;

            padding: 0;

            list-style: none;

        }

        #panel {

            width: 500px;

            border: 1px solid #c6c8ca;

            margin: 100px auto;

        }

        #panel_header {

            display: flex;

            justify-content: space-around;

            border-bottom: 1px solid #ccc;

            line-height: 44px;

            color: #777;

        }

        #panel_body > li {

            display: flex;

            flex-direction: row;

            justify-content: space-between;

            line-height: 44px;

            border-bottom: 1px solid #e8e8e8;

        }

        .c-icon {

            background: url(https://ss1.bdstatic.com/5eN1bjq8AAUYm2zgoY3K/r/www/cache/static/protocol/https/global/img/icons_5859e57.png) no-repeat 0 0;

            display: inline-block;

            width: 14px;

            height: 14px;

            vertical-align: text-bottom;

            font-style: normal;

            overflow: hidden;

        }

        .opr-toplist-st {

            margin-bottom: 2px;

        }

        .c-icon-up {

            background-position: -720px -168px;

        }

        .c-icon-down {

            background-position: -744px -168px;

        }

        .left{

            margin-left: 10px;

            display: flex;

            flex-direction: row;

            align-items: center;

        }

        .left .no{

            display: flex;

            justify-content: center;

            align-items: center;

            width: 18px;

            height: 18px;

            background-color: red;

            color: #fff;

            margin: 5px;

        }

        .right{

            margin-right: 10px;

        }

        #panel_footer{

            display: flex;

            justify-content: flex-end;

            margin: 10px;

            color: #777;

            font-size: 15px;

        }

    </style>

</head>

<body>

<section id="panel">

    <div id="panel_header">

        <span>排名</span>

        <span>搜索指数</span>

    </div>

    <ul id="panel_body">

        <%for(var i=0;i<lists.length;i++){%>

        <li>

            <div class="left">

                <span class="no" style="background-color: <%= i > 2 ? 'red':'blue'%>;"><%=i+1%></span>

                <span><%=lists[i].title%></span>

            </div>

            <div class="right">

                <span><%=lists[i].count%></span>

                <%if(lists[i].up === 1){%>

                <i class="opr-toplist-st c-icon c-icon-up"></i>

                <%}else{%>

                    <i class="opr-toplist-st c-icon c-icon-down"></i>

                <%}%>

            </div>

        </li>

<%}%>

    </ul>

    <div id="panel_footer">

        <span style="margin-right: 5px">来源:</span>

        <span><%=source%></span>

    </div>

</section>

</body>

</html>
结果:
Node.js http等模块 笔记05的更多相关文章
- Node.js高级编程读书笔记Outline
Motivation 世俗一把,看看前端的JavaScript究竟能做什么. 顺便检验一下自己的学习能力. Audience 想看偏后台的Java程序员关于前端JavaScript的认识的职业前端工程 ...
- 利用Node.js的Net模块实现一个命令行多人聊天室
1.net模块基本API 要使用Node.js的net模块实现一个命令行聊天室,就必须先了解NET模块的API使用.NET模块API分为两大类:Server和Socket类.工厂方法. Server类 ...
- Node.js的Formidable模块的使用
今天总结了下Node.js的Formidable模块的使用,下面做一些简要的说明. 1) 创建Formidable.IncomingForm对象 var form = new formidab ...
- Node.js入门:模块机制
CommonJS规范 早在Netscape诞生不久后,JavaScript就一直在探索本地编程的路,Rhino是其代表产物.无奈那时服务端JavaScript走的路均是参考众多服务器端语言来 ...
- Node.js的net模块
net模块提供了一个异步网络包装器,用于TCP网络编程,它包含了创建服务器和客户端的方法 创建TCP服务器 net.createServer方法 创建客户端去连接服务器 net.connect方法 简 ...
- JavaScript、jQuery、HTML5、Node.js实例大全-读书笔记3
技术很多,例子很多,只好慢慢学,慢慢实践!!现在学的这本书是[JavaScript实战----JavaScript.jQuery.HTML5.Node.js实例大全] JavaScript.jQuer ...
- JavaScript、jQuery、HTML5、Node.js实例大全-读书笔记2
技术很多,例子很多,只好慢慢学,慢慢实践!!现在学的这本书是[JavaScript实战----JavaScript.jQuery.HTML5.Node.js实例大全] JavaScript.jQuer ...
- node.js中express模块创建服务器和http模块客户端发请求
首先下载express模块,命令行输入 npm install express 1.node.js中express模块创建服务端 在js代码同文件位置新建一个文件夹(www_root),里面存放网页文 ...
- node.js中ws模块创建服务端和客户端,网页WebSocket客户端
首先下载websocket模块,命令行输入 npm install ws 1.node.js中ws模块创建服务端 // 加载node上websocket模块 ws; var ws = require( ...
随机推荐
- CSS3之 :nth-child(n)语法讲解
语法: E:nth-child(n){ sRules } * 匹配父元素索引为n的子元素E :nth-child(n) 让你匹配到父元素的任一子元素: Figure 1:<section id= ...
- 8、springboot之定时任务
@Configuration @EnableScheduling public class SchedulingConfig { @Scheduled(cron = "0/5 * * * * ...
- html简介(自己理解和老师讲课)
首先讲开发网页三种技术:html,css,javascript.html负责网页的结构,css站在没学角度对网页进行美化,javascript负责网页交互,站在用户体验角度设计网页交互效果 而我们所学 ...
- js和.net后台交互
1.asp.net呼叫js Response.Write("<script language=javascript>"); ...
- canvas合成图片 圣诞节新技能戴帽
<!doctype html><html><head><meta charset="utf-8"><title>Html ...
- AMD,CMD,UMD 三种模块规范 写法格式
一下三块均以 foo.js 为示例文件名,以 jQuery,underscore 为需求组件 ADM:异步模块规范, RequireJs 的支持格式 // 文件名: foo.js define(['j ...
- javascript实现的动态添加表单元素input,button等(appendChild)
写一个小系统时,需要动态添加表单元素,按自己的实现方法写了这篇教程! 我想各位在很多网站上都看到过类似的效果! 1.先用document.createElement方法创建一个input元素! 代码如 ...
- golang 安装 guru vscode 安装失败
1.先从git上复制下来 git clone https://github.com/golang/tools 2.再$GOPATH/bin中安装 go install golang.org/x/too ...
- Thrift学习笔记—IDL基本类型
thrift 采用IDL(Interface Definition Language)来定义通用的服务接口,并通过生成不同的语言代理实现来达到跨语言.平台的功能.在thrift的IDL中可以定义以下一 ...
- 关于NativeEvent的处理
nativeEvent(const QByteArray &eventType, void *message, long *result){ chASSERT(message != NULL) ...