Siki_Unity_2-1_API常用方法和类详细讲解(下)
Unity 2-1 API常用方法和类详细讲解(下)
任务101&102:射线检测
射线origin + direction;
射线检测:射线是否碰撞到物体 (物体需要有碰撞器),碰撞物体的信息,碰撞的具体空间位置,
public static bool Raycast(Vector3 origin, Vector3 direction, float maxDistance = Mathf.Infinity, int layerMask = DefaultRaycastLayers, QueryTriggerInteractionqueryTriggerInteraction = QueryTriggerInteraction.UseGlobal);
基本使用:
Physics.Raycast(Ray ray);
Physics.Raycast(Ray ray, float maxDistance); // 设置射线的长度
Physics.Raycast(Vector3 origin, Vector3 direction); // origin和direction确定了一条Ray
Physics.Raycast(Vector3 origin, Vector3 direction, float maxDistance);
void Update () {

    Ray ray = new Ray(transform.position, transform.forward);

    bool isCollidered = Physics.Raycast(ray);

    Debug.Log(isCollidered);

}
高级使用:
Physics.Raycast(Ray ray, out RaycastHit hitInfo);
Physics.Raycast(Ray ray, out RaycastHit hitInfo, float maxDistance);
Physics.Raycast(Vector3 origin, Vector3 direction, out RaycastHit hitInfo);
Physics.Raycast(Vector3 origin, Vector3 direction, out RaycastHit hitInfo, float maxDistance);
void Update () {

    Ray ray = new Ray(transform.position, transform.forward);

    RaycastHit hit;

    bool isCollidered = Physics.Raycast(ray, out hit);

    Debug.Log(hit.collider);

    Debug.Log(hit.point);  // 碰撞到的点

    Debug.DrawRay(ray.origin, ray.direction,Color.red);

}
Physics.Raycast(Ray ray, float maxDistance, int layerMask);
Physics.Raycast(Ray ray, out Raycasthit hitInfo, float maxDistance, int layerMask);
Physics.Raycast(Vector3 origin, Vector3 direction, int layerMask);
Physics.Raycast(Vector3 origin, Vector3 direction, out Raycasthit hitInfo, float
maxDistance, int layerMask);
// 每个GameObject都属于某一个Layer(默认为Default)
// layerMask指定了只与该layer(s)中的所有GameObject可以发生碰撞
// LayerMask.GetMask("layer1", "layer2, ...) 可以返回多个Layer
void Update () {

    Ray ray = new Ray(transform.position, transform.forward);

    bool isCollidered = Physics.Raycast(ray, Mathf.Infinity,

        LayerMask.GetMask("Enemy1"));

    // 只与Enemy1中的GameObject检测碰撞

    Debug.Log(isCollidered);

}
Physics.Raycast(Ray ray, float maxDistance, int layerMask,
QueryTriggerInteraction queryTriggerInteraction);
Physics.Raycast(Vector3 origin, Vector3 direction, out Raycasthit hitInfo, float maxDistance,
int layerMask, QueryTriggerInteraction queryTriggerInteraction);
// 略
补充:
RaycastAll() -- Raycast()只会检测碰撞到的第一个物体,而RaycastAll()会检测碰撞到的所有物体,返回RaycastHit[]
2D射线检测:
GameObject需要有2d collider组件
Physics2D.Raycast(Vector2 origin, Vector2 direction, ContactFilter2D contactFilter, RaycastHit2D[] results);
Physics2D.Raycast(Ray ray, float distance, int layerMask);
Physics2D.Raycast(Ray ray, float distance, int layerMask, float minDepth);
任务104:UGUI事件监听 - 通过拖拽的方式监听
&105:通过代码添加的方式监听
&106&107:通过事件接口的实现的方式监听
UI - Button按钮/ Slider滑动条/ Dropdown下拉菜单/ Toggle单选开关/ ...
通过Unity Inspector中拖拽的方式进行监听:
Button -- OnClick() 触发某方法
Slider -- OnValueChanged(float) 触发某方法,传入当前值(0~1)
Dropdown -- OnValueChanged(Int32) 触发某方法,传入当前索引
Toggle -- OnValueChanged(Boolean) 触发某方法,传入当前勾选状态
但是,如果都使用拖拽的方式监听,会导致耦合性太高,
-- 使用代码进行监听:
1. 得到游戏物体
public GameObject btnGameObject; -- 拖拽
2. 得到Button组件,添加监听器
btnGameObject.GetComponent<Button>().onClick.AddListener(this.ButtonOnClick);
3. 定义点击方法
void ButtonOnClick() { ... }
public GameObject btnGameObject;

public GameObject sliderGameObject;

public GameObject dropdownGameObject;

public GameObject toggleGameObject;

void Start () {

    btnGameObject.GetComponent<Button>()

        .onClick.AddListener(this.OnButtonClick);

    sliderGameObject.GetComponent<Slider>().

        onValueChanged.AddListener(this.OnSliderChange);

    dropdownGameObject.GetComponent<Dropdown>().

        onValueChanged.AddListener(this.OnDropdownChange);

    toggleGameObject.GetComponent<Toggle>().

        onValueChanged.AddListener(OnToggleChange);

}

void OnButtonClick() {

    Debug.Log("Button On Click");

}

void OnSliderChange(float value) {

    Debug.Log("Slider value: " + value);

}

void OnDropdownChange(Int32 index) {

    Debug.Log("Dropdown value: " + index);

}

void OnToggleChange(bool value) {

    Debug.Log("Toggle value: " + value);

}
通过实现接口的方式进行监听:
特点:脚本是一对一的,即脚本放在哪个UI GameObject上,就只对该UI有监听效果
是通过射线进行监听的
Unity Manual -> Scripting -> Event System -> Supported Events
这里面的每一个接口都对应一个UI Events
如:
Pointer指鼠标光标(均为执行一次)
IPointerClickHandler -- OnPointerClick:鼠标点击(按下后抬起)
IPointerEnterHandler -- OnPointerEnter:鼠标移入
IPointerExitHandler -- OnPointerExit:鼠标移出
IPointerDownHandler -- OnPointerDown:鼠标按下
IPointerUpHandler -- OnPointerUp:鼠标抬起
// OnPointerClick在OnPointerUp之后
Drag指拖拽
IBeginDragHandler -- OnBeginDrag:开始拖拽
IDragHandler -- OnDrag:正在拖拽(一直执行)When draging is occuring it will be called every time the cursor is moved.
IEndDragHandler--OnEndDrag:结束拖拽
IDropHandler -- OnDrop:结束拖拽,且当鼠标释放时仍然在drag的物体上时
其他事件
IScrollHander -- OnScroll:when a mouse wheel scrolls
IUpdateSelectedHandler -- OnUpdateSelected:called on the selected object each tick
ISelectHandler -- OnSelect:when the object becomes the selected object
IDeselectHandler -- OnDeselect:called on the selected object becomes deselected
IMoveHandler -- OnMove:when a move event occurs (left, right, up, down, ect)
ISubmitHandler -- OnSubmit:when the submit button is pressed
ICancelHandler -- OnCancel:when the cancel button is pressed
实例:
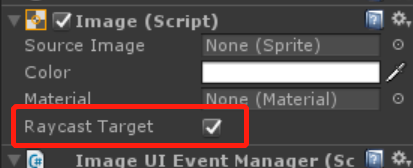
1. new UI->Image -- 因为Image通过上面两种方法是无法进行UI事件的监听的
2. Image->new ImageUIEventManager.cs
3.
using UnityEngine;using UnityEngine.EventSystems;

public class ImageUIEventManager : MonoBehaviour, IPointerDownHandler {

    public void OnPointerDown(PointerEventData eventData) {

        Debug.Log("OnPointerDown");

    }

}
4. 若把Image的Raycast Target取消勾选,则不再进行监听
任务108:如何通过www下载图片
支持协议:http:// https:// file:// (iPhone) ftp:// (anonymous downloads only)
实例:
using UnityEngine;

using System.Collections;

public class WWWTest : MonoBehaviour {

    private string url = "http://i7.download.fd.pchome.net/t_960x600/g1/M00/0B/10/ooYBAFQlOlqIHes-AAYQp3J3sHQAAB9HAJnaqQABhC_539.jpg";

    IEnumerator Start() {

        WWW www = new WWW(url);

        yield return www;  // 等待下载完成

        Renderer renderer = GetComponent<Renderer>();

        renderer.material.mainTexture = www.texture;

    }

}
任务109:Touches触摸事件
触摸事件为触屏提供Input方法
Input.touchCount -- 返回number of touches
Input.touches -- 返回所有触摸Touch[]
GetTouch() -- 返回Touch对象
Debug.Log(Input.touchCount);

Debug.Log(Input.touches);

Debug.Log(Input.touches.Length);

if (Input.touches.Length > ) {

    Touch touch0 = Input.touches[];

    print(touch0.position); // touch所在的位置

    TouchPhase phase = touch0.phase;

    print(phase); // 判断触摸当前的状态

    print(touch0.deltaPosition); // position的变化(pixes)

}
任务110&111:关于Camera组件的作用
Inspector:
Camera的视野深度默认为0.3~1000米,最远深度可以在Clipping Planes->Far设置
Camera的视野为一个上下为小平面的棱锥体
上方与Camera的位置可以再Clipping Planes->Near设置
Filed of View可以设置椎体的夹角大小
Clear Flags:每一帧渲染出来之后,需要使用背景色将之前的画面clear掉
默认值为Skybox,此时Background无效;
值为Solid Color时,背景为单一色调
值为Don't Clear时,不进行clear
出现问题:如果物体移动,会重影而不会有背景色将之前渲染的素材clear掉
值为Depth Only:多个相机时,用来控制相机的渲染顺序(在Depth中设置)
Background:当Clear Flags为Solid Color时的色调
Depth:Clear Flags为Depth Only时,相机的Depth表示渲染顺序

Camera类:
main -- The first enabled camera tagged "MainCamera"
一般而言,只设置一个Camera的tag为"MainCamera" -- 方便
比如FPS游戏,人物视角的Camera即为main
直接在代码中使用Camera.main进行操作,会浪费性能,因此一般这么使用:
private Camera mainCam;
mainCam = Camera.main;
...
ScreenPointToRay() -- 将屏幕坐标转换为一条射线
射线的origin为camera,射线指向屏幕上的点
void Update () {

    Ray ray = mainCamera.ScreenPointToRay(Input.mousePosition);

    // Debug.DrawRay(ray.origin, ray.direction); // 长度较短的射线

    Debug.DrawLine(ray.origin, ray.origin + ray.direction * ); // 100m的射线

    // 鼠标射线与物体的碰撞检测

    RaycastHit hitInfo;

    bool isCollidered = Physics.Raycast(ray, out hitInfo);

    Debug.Log(hitInfo.collider);

}
任务112:CharacterController 角色控制器
CharacterController类:
center -- character的capsule的中点
height -- character的capsule的高度
isGrounded -- 在last move中,CharacterController是否接触了地面
Move() -- 传入一个向量absolute movement deltas,按照向量(方向和大小)运动
因此需要*Time.deltaTime
Does not apply any gravity.
The Vector3 motion will only be contrained by collisions.
SimpleMove() -- 传入一个运动速度(方向和大小)即可.
Moves the character with Vector3 speed.
Velocity along the y-axis is ignored. Speed is in meters/s.
Gravity is automatically applied.
Recommended that making only one call to Move/SimpleMove per frame.
OnControllerColliderHit(ControllerColliderHit hit) -- Message
-- is called when the controller hits a collider while performing a move.
注意:前提是while performing a move.
当碰撞到其他collider时会被调用
如果Character在碰到Collider后还在向其移动,则会一直被调用,若是碰到了Collider
后就不输入移动了,则不会被调用。
实例:
1. new Plane
2. new Capsule, add Character Controller
3. remove CapsuleCollider -- CharacterController本身具有碰撞器的功能
3. add PlayerController.cs
4. SimpleMove()
void Update () {

    // 通过SimpleMove控制

    float h = Input.GetAxis("Horizontal");

    float v = Input.GetAxis("Vertical");

    cc.SimpleMove(new Vector3(h, , v) * speed);

}
5. Move()
cc.Move(new Vector3(h, 0, v) * speed * Time.deltaTime);
6. OnControllerColliderHit(ControllerColliderHit hit)
private void OnControllerColliderHit(ControllerColliderHit hit) {

    Debug.Log(hit.collider);

}
任务113:Mesh的设置
Mesh是网格,用来控制模型的外观 -- 外形
对应Mesh Filter组件
系统内置的Mesh只有几个:Cube, Capsule, Cylinder, Plane, Sphere, Quad
如果想要其他Mesh,需要找美工/模型师
MeshFilter.mesh -- Returns the instantiated Mesh assigned to the mesh filter
If no mesh is assigned to the mesh filter, a new mesh will be created and assigned.
If a mesh is assigned to the mesh filter already, then first query of mesh property will create a duplicate of it, and this copy will be returned. Further queries of mesh property will return this duplicated mesh instance. Once mesh property is queried, link to the original shared mesh is lost and MeshFilter.sharedMesh property becomes an alias to mesh.
If you want to avoid this automatic mesh duplication, use MeshFilter.sharedMesh instead.
It is your responsibility to destroy the auto instantiated mesh when the game object is being destroyed.
Resources.UnloadUnusedAssets also destroys the mesh but it's usually one called when loading a new level.
MeshFilter.sharedMesh -- Returns the shared mesh of the mesh filter.
Recommended to use it only for reading mesh data and not for writing.
Since you may modify imported assets and all objects that use this mesh will be affected.
任务114:Material材质类
Material是材质,用来贴到Mesh指定的网格上 -- 皮肤
对应Mesh Renderer组件中的Materials
在没有指定材质的时候,系统会默认赋值一个Default Material,为全白色
如果Default Material被删除,则会出现材质丢失的情况,在Scene和game中显示为紫色
color -- 修改主颜色
shader -- 所使用的shader
mainTexture -- 修改主材质
实例:颜色渐变动画
public Texture texture;

private Material material;

void Start () {

    material = GetComponent<MeshRenderer>().material;

    material.mainTexture = texture; // 修改主材质

}

void Update () {

    material.color = Color.Lerp(material.color, Color.red, Time.deltaTime);

    // 修改颜色

}
任务115:Animator简介
Animator动画状态机 -- 用来控制the Mecanim动画状态系统
speed -- 整个动画状态机的播放速度,normal speed = 1
还有很多的Getter和Setter
任务116&117&118:Unity API方法变更
Unity 4.x ~ Unity 5.x ~ Unity 2017
1. Rigidbody
本来rigidbody/ rigidbody2d是可以直接使用的,现在不行了
this.rigidbody; // X
--> GetComponent<Rigidbody>();
GetComponent<Rigidbody2D>();
Audio Source
本来audio是可以直接使用的,现在不行了
audio; // X
--> GetComponent<AudioSource>();
Renderer
本来renderer是可以直接使用的,现在不行了
renderer; // X
--> GetComponent<Renderer>();
等等
原因:原本可以直接获得的原因是系统帮我们自动获取了这些组件
但是并不是每一个脚本中都会用到它们,因此会耗费过多的性能
Tips:在Start中得到组件,而不要每一次都使用GetComponent<...>
2. 粒子系统变更
原来把粒子系统信息相关设置的直接放在ParticleSystem里
ParticleSystem main = GetComponent<ParticleSystem>();
main.startColor等可以直接访问
--> 5.5之后,把粒子系统信息相关设置的都放到了ParticleSystem.MainModule里
ParticleSystem.MainModule main = GetComponent<ParticleSystem>().main;
main现在是MainModule类的对象,startColor需要通过main.startColor访问
3. 场景切换变更
原来通过Application.LoadLevel("Level2");来加载新场景
由于场景加载本不属于Application类
Application中一般都是与游戏的运行退出等控制整个应用的相关操作
--> using UnityEngine.SceneManagemeng;
SceneManager.LoadScene(int index/string sceneName);
SceneManager.LoadScene(SceneManager.GetActiveScene().buildIndex); // 重载当前场景
Event事件private void OnLevelWasLoaded(int level) { }被弃用了
--> 使用SceneManager中的sceneLoaded()事件
void Start() {

    SceneManager.sceneLoaded += this.OnSceneLoaded;

}

private void OnSceneLoaded(Scene scene, LoadSceneMode mode) {

    Debug.Log("OnSceneLoaded");

}
4. 2d/3d声音
之前是可以直接设置声音为2d或是3d的
--> Spatial Blend = 0为2D;Spatial Blend = 1为3D;
2d声音表示声音不随距离而变化
Spatial Blend在0~1之间的值表示有一部分基础的2d声音,加上部分3d声音的混合
Siki_Unity_2-1_API常用方法和类详细讲解(下)的更多相关文章
- Siki_Unity_2-1_API常用方法和类详细讲解(上)
Unity 2-1 API常用方法和类详细讲解(上) 任务1&2:课程前言.学习方法 && 开发环境.查API文档 API: Application Programming I ...
- dart类详细讲解
dart 是一个面向对象的语言;面向对象有 (1)继承 (2)封装 (3)多态 dart的所有东西都是对象,所有的对象都是继承与object类 一个类通常是由属性和方法组成的哈: 在dart中如果你要 ...
- sencha touch 入门系列 (八)sencha touch类系统讲解(下)
接着上一讲,我们通过一组代码来讲解一下st的类的一些属性: Ext.define("MyConfig",{ config:{ website:"http://127.0. ...
- 第八节:详细讲解Java中的异常处理情况与I/O流的介绍以及类集合框架
前言 大家好,给大家带来详细讲解Java中的异常处理情况与I/O流的介绍以及类集合框架的概述,希望你们喜欢 JAVA 异常 try...catch...finally结构的使用方法 class Tes ...
- [VC++]用CTime类得到当前日期、时间、星期,格式化(详细讲解)
用CTime类得到当前日期.时间.星期,格式化(详细讲解)2009/05/12 09:48 A.M.① 定义一个CTime类对象 CTime time; ② 得到当前时间 time = CTime:: ...
- 第四节:详细讲解Java中的类和面向对象思想
前言 大家好,给大家带来详细讲解Java中的类和面向对象思想的概述,希望你们喜欢 类和面向对象 在Java中怎样理解对象,创建对象和引用:什么是引用,对于基础学习的同学,要深入了解引用.示例:Stri ...
- 05-- C++ 类的静态成员详细讲解
C++ 类的静态成员详细讲解 在C++中,静态成员是属于整个类的而不是某个对象,静态成员变量只存储一份供所有对象共用.所以在所有对象中都可以共享它.使用静态成员变量实现多个对象之间的数据共享不 ...
- 详细讲解nodejs中使用socket的私聊的方式
详细讲解nodejs中使用socket的私聊的方式 在上一次我使用nodejs+express+socketio+mysql搭建聊天室,这基本上就是从socket.io的官网上的一份教程式复制学习,然 ...
- Android webservice的用法详细讲解
Android webservice的用法详细讲解 看到有很多朋友对WebService还不是很了解,在此就详细的讲讲WebService,争取说得明白吧.此文章采用的项目是我毕业设计的webserv ...
随机推荐
- Spring知识概括梳理
1. Spring 容器 http://blog.csdn.net/chenssy/article/details/8188570 2. Spring 注解 1)@Autowired http://b ...
- iOS开发之GCD总结
直接贴出常用的函数,方便要用的时候直接使用. ------------- type 1 ---------------- 说明 : 创建一个dispatch_group_t,每次网络请求前先 ...
- 智能门锁超低功耗:SI522(13.56芯片)替代MFRC522\FM17522
SI522(超低功耗13.56M芯片)替代RC522 完全兼容 PIN对PIN,同时也替代FM17522. MF RC522 是应用于13.56MHz 非接触式通信中高集成度读写卡系列芯片中的一员.是 ...
- 【题解】洛谷P2704 [NOI2001] 炮兵阵地(状压DP)
洛谷P2704:https://www.luogu.org/problemnew/show/P2704 思路 这道题一开始以为是什么基于状压的高端算法 没想到只是一道加了一行状态判断的状压DP而已 与 ...
- 手机站全局的html+css加载等待效果
本文只提供思路,CSS神马的自己定制吧,JS是可以优化的,比如,输出图片的JS也可以放到showdiv()里面,我没有做优化,只是实现,别笑话我,我比较懒... 基本思路:由于Html的解析是从上到下 ...
- 如何设置ASP.NET页面的运行超时时间 (转载)
全局超时时间 服务器上如果有多个网站,希望统一设置一下超时时间,则需要设置 Machine.config 文件中的 ExecutionTimeout 属性值.Machine.config 文件位于 % ...
- Objective-C 中的 assign, copy,retain,strong,weak 详解
在IOS开发中,经常会使用 @property(nonatomic,copy)NSString * name; 语句来快速设置set get 方法,在此依次说明atomic .nonatomi ...
- 840. Magic Squares In Grid (5月27日)
开头 这是每周比赛中的第一道题,博主试了好几次坑后才勉强做对了,第二道题写的差不多结果去试时结果比赛已经已经结束了(尴尬),所以今天只记录第一道题吧 题目原文 Magic Squares In Gri ...
- 安装mysql zip 安装包 Navicat连接
笔者在安装mysql时一直出现各种问题,今天难得成功一次,决定记录一下,留作纪念与参考 安装第一步,下载mysql https://dev.mysql.com/downloads/mysql/ 以在w ...
- sql 复杂查询 以teacher student course多对多关系为例
数据库表和值 /* SQLyog Ultimate v8.32 MySQL - 5.7.17-log : Database - course_dbms ************************ ...