vue小案例--简易评论区
一、小案例(评论区)
1、流程
(1)分析静态页面。(vue项目创建参考https://www.cnblogs.com/l-y-h/p/11241503.html)
(2)拆分静态页面,变成一个个组件。
(3)对组件编码,生成动态页面。
2、静态页面
参考来源:https://www.bilibili.com/video/av49099807/?p=22&t=1223
【举例:】

<!DOCTYPE html>

<html>

    <head>

        <meta charset="utf-8">

        <meta name="viewport" content="width=device-width,initial-scale=1.0">

        <!--此处如果bootstrap选用 4.3.1的版本,样式会无效(没去研究)-->

        <link href="https://cdn.bootcss.com/twitter-bootstrap/3.3.7/css/bootstrap.css" rel="stylesheet">

        <script src="https://cdn.bootcss.com/twitter-bootstrap/3.3.7/js/bootstrap.js"></script>

        <title>vue_demo</title>

    </head>

    <body>

        <div id="app">

            <div>

                <!--头部-->

                <header class="site-header jumbotron">

                    <div class="container">

                        <div class="row">

                            <div class="col-xs-12">

                                <h1>欢迎来到吐槽大厅</h1>

                            </div>

                        </div>

                    </div>

                </header>

                <!--主体部分-->

                <!--bootstrap将页面分为12格,此处拆分为左4格,右8格-->

                <div class="container">

                    <div class="col-md-4">

                        <form action="form-horizontal">

                            <div class="form-group">

                                <label>用户名</label>

                                <input type="text" class="form-control" placeholder="用户名">

                            </div>

                            <div class="form-group">

                                <label>吐槽内容</label>

                                <textarea type="text" class="form-control" placeholder="吐槽内容"></textarea>

                            </div>

                            <div class="form-group">

                                <div class="col-sm-offset-2 col-sm-10">

                                    <button type="button" class="btn btn-default pull-right">提交</button>

                                </div>

                            </div>

                        </form>

                    </div>

                    <!--md4 for Add end    -->

                    <div class="col-md-8">

                        <h3 class="reply">吐槽回复:</h3>

                        <h2>暂无吐槽,点击左侧添加吐槽吧!</h2>

                        <ul class="list-group">

                            <li class="list-group-item">

                                <div class="handle col-sm-offset-2 col-sm-10">

                                    <a class="pull-right">删除</a>

                                </div>

                                <p class="user"><span>Tom</span><span>说:</span></p>

                            </li>

                        </ul>

                    </div>

                    <!--md8 for List end -->

                </div>

            </div>

        </div>

        <!--app -->

    </body>

</html>
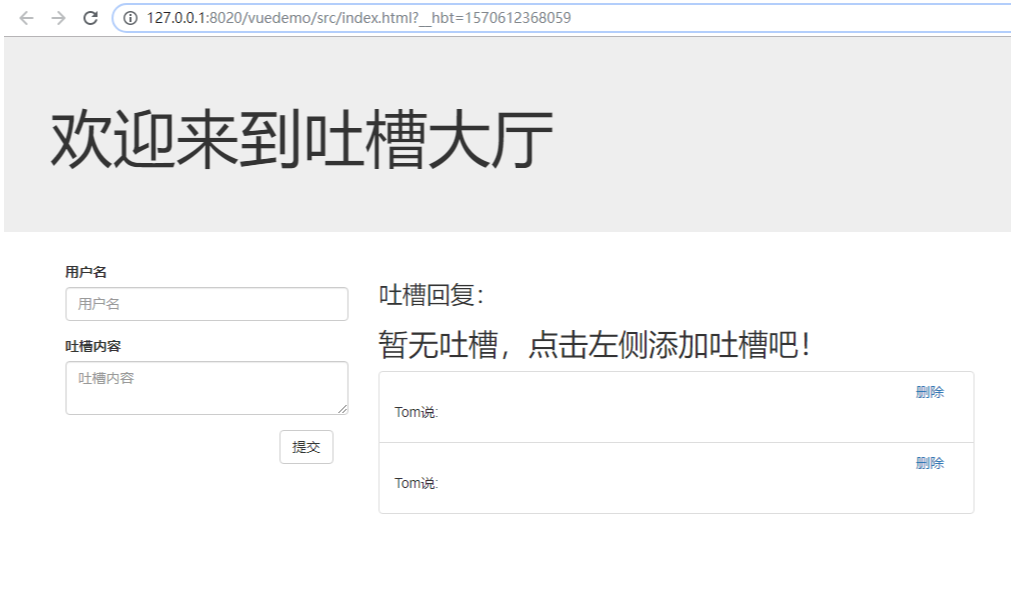
页面截图:
3、拆分静态页面,
拆分静态页面,使其变成一个个静态组件。
Step1:是一个大的组件(App),里面包含各种组件。
Step2:页面内容可以拆分成 提交吐槽组件(Comment),吐槽回复组件(Comments)。
Step3:吐槽回复组件里面 可以对 每一条吐槽进行拆分,即每个吐槽为一个组件(Item)。

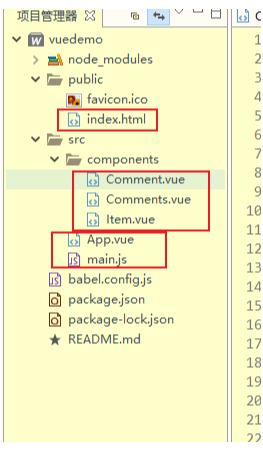
文件结构如下:
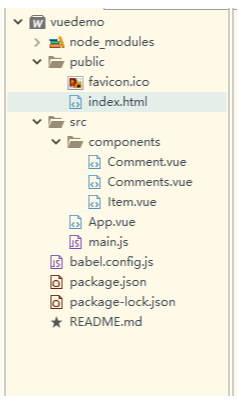
【主要文件与文件夹:】

index.html    主页面,所有组件操作均为其服务,在此处引入css、js文件

main.js       vue入口文件,从此处启动vue

App.vue       App.vue组件,项目的入口组件

components      里面保存各个小组件

【index.html】

<!DOCTYPE html>

<html lang="en">

  <head>

    <meta charset="utf-8">

    <meta http-equiv="X-UA-Compatible" content="IE=edge">

    <meta name="viewport" content="width=device-width,initial-scale=1.0">

    <link rel="icon" href="<%= BASE_URL %>favicon.ico">

    <!--所有组件都是为index.html服务的,所以在此处引入css、js文件-->

    <link href="https://cdn.bootcss.com/twitter-bootstrap/3.3.7/css/bootstrap.css" rel="stylesheet">

    <title>vuedemo</title>

  </head>

  <body>

    <noscript>

      <strong>We're sorry but vuedemo doesn't work properly without JavaScript enabled. Please enable it to continue.</strong>

    </noscript>

    <div id="app"></div>

    <!-- built files will be auto injected -->

  </body>

</html>

【main.js】

import Vue from 'vue'

import App from './App.vue'

Vue.config.productionTip = false

new Vue({

  render: h => h(App),

}).$mount('#app')

【App.vue】

<template>

    <div>

        <!--头部-->

        <header class="site-header jumbotron">

            <div class="container">

                <div class="row">

                    <div class="col-xs-12">

                        <h1>欢迎来到吐槽大厅</h1>

                    </div>

                </div>

            </div>

        </header>

        <!--主体部分-->

        <!--bootstrap将页面分为12格,此处拆分为左4格,右8格-->

        <div class="container">

            <!--使用各组件-->

            <Comment></Comment>

            <Comments></Comments>

        </div>

    </div>

    <!--App -->

</template>

<script>

    // 引入各组件

    import Comment from './components/Comment.vue'

    import Comments from './components/Comments.vue'

    export default {

        name: 'app',

        // 注册各组件

        components: {

            Comment,

            Comments

        }

    }

</script>

<style>

</style>

【Comment.vue】

<template>

    <div class="col-md-4">

        <form action="form-horizontal">

            <div class="form-group">

                <label>用户名</label>

                <input type="text" class="form-control" placeholder="用户名">

            </div>

            <div class="form-group">

                <label>吐槽内容</label>

                <textarea type="text" class="form-control" placeholder="吐槽内容"></textarea>

            </div>

            <div class="form-group">

                <div class="col-sm-offset-2 col-sm-10">

                    <button type="button" class="btn btn-default pull-right">提交</button>

                </div>

            </div>

        </form>

    </div>

    <!--Comment -->

</template>

<script>

    export default{

        name: 'comment'

    }

</script>

<style>

</style>

【Comments.vue】

<template>

    <div class="col-md-8">

        <h3 class="reply">吐槽回复:</h3>

        <h2>暂无吐槽,点击左侧添加吐槽吧!</h2>

        <ul class="list-group">

            <Item></Item>

        </ul>

    </div>

    <!--md8 for List end -->

</template>

<script>

    import Item from './Item.vue'

    export default{

        name: 'comments',

        components: {

            Item

        }

    }

</script>

<style>

</style>

【Item.vue】

<template>

    <!--注意,需要使用div包裹,否则会报错-->

    <div>

        <li class="list-group-item">

            <div class="handle col-sm-offset-2 col-sm-10">

                <a class="pull-right">删除</a>

            </div>

            <p class="user"><span>Tom</span><span>说:</span></p>

        </li>

        <li class="list-group-item">

            <div class="handle col-sm-offset-2 col-sm-10">

                <a class="pull-right">删除</a>

            </div>

            <p class="user"><span>Tom</span><span>说:</span></p>

        </li>

    </div>

</template>

<script>

    export default{

        name: 'item'

    }

</script>

<style>

</style>
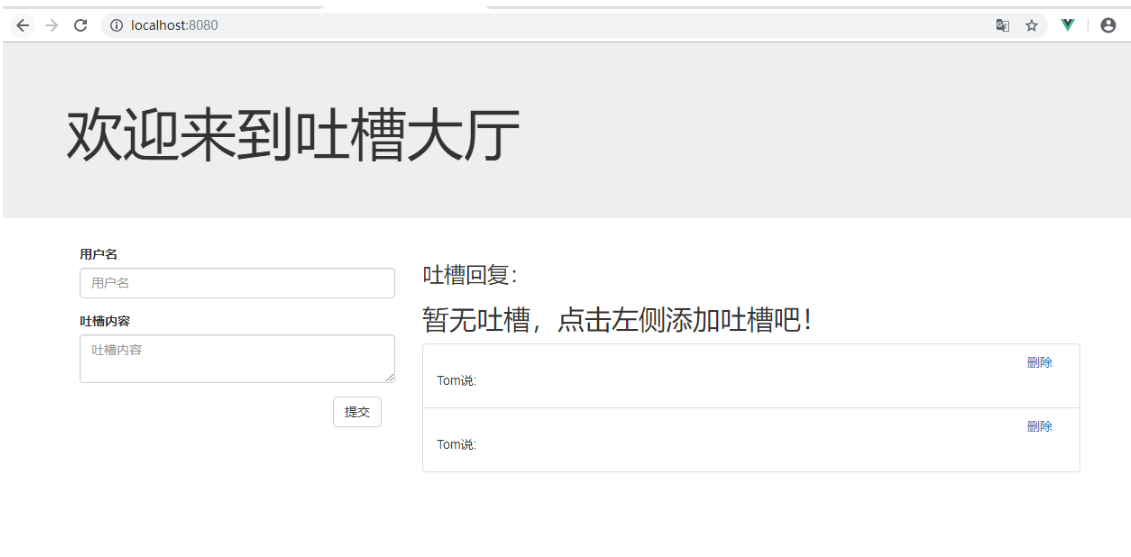
拆分后效果与原静态页面一致。
4、组件间值的传递(组件间通信)
静态页面上吐槽区的内容不会是写好的,是动态生成的,那么如何生成,就涉及到组件间的值的传递。通过props 来声明属性,使用data来传递数据(属性值),使用 v-bind 绑定属性。
【对上面代码进行修改】
App.vue 获取数据,将数据往吐槽区(Comments.vue)传
Comments.vue 接收App.vue传来的数据,将每条数据往Item.vue传
Item.vue 接收Comments.vue传来的数据并显示 要是一眼看不出来,可以下载个Bcompare软件,自行比较一下代码间的区别。 【App.vue】
<template>
<div>
<!--头部-->
<header class="site-header jumbotron">
<div class="container">
<div class="row">
<div class="col-xs-12">
<h1>欢迎来到吐槽大厅</h1>
</div>
</div>
</div>
</header> <!--主体部分-->
<!--bootstrap将页面分为12格,此处拆分为左4格,右8格-->
<div class="container">
<!--使用各组件-->
<Comment></Comment>
<!--需使用v-bind绑定属性-->
<Comments :contents="contents"></Comments>
</div>
</div>
<!--App -->
</template> <script>
// 引入各组件
import Comment from './components/Comment.vue'
import Comments from './components/Comments.vue' export default {
name: 'app',
// 注册各组件
components: {
Comment,
Comments
}, // 传递数据
data(){
return {
contents:[
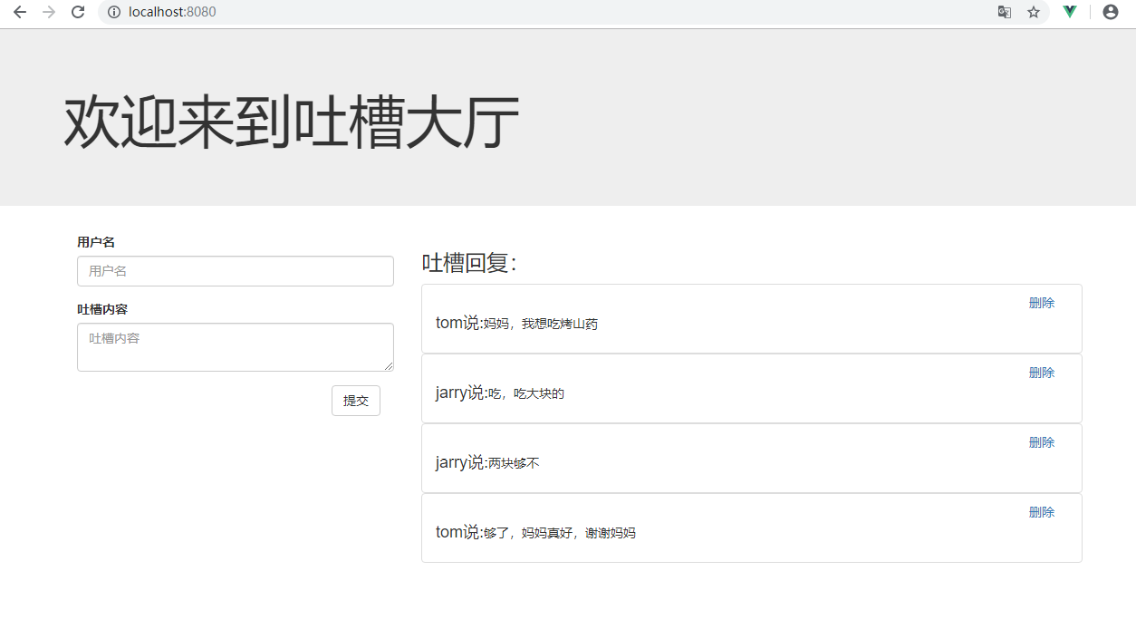
{name: 'tom', content: '妈妈,我想吃烤山药'},
{name: 'jarry', content: '吃,吃大块的'},
{name: 'jarry', content: '两块够不'},
{name: 'tom', content: '够了,妈妈真好,谢谢妈妈'},
]
}
}
}
</script> <style>
</style> 【Comments.vue】
<template>
<div class="col-md-8">
<h3 class="reply">吐槽回复:</h3>
<ul class="list-group">
<Item v-for="(content, index) in contents" :key="index" :content="content"></Item>
</ul>
</div>
<!--md8 for List end -->
</template> <script>
import Item from './Item.vue' export default{
name: 'comments',
// 声明接收属性,此属性可以在该组件中使用
props: ['contents'], // 只指定属性名 // 注册组件
components: {
Item
}
}
</script> <style> </style> 【Item.vue】
<template>
<!--注意,需要使用div包裹,否则会报错-->
<div>
<li class="list-group-item">
<div class="handle col-sm-offset-2 col-sm-10">
<a class="pull-right">删除</a>
</div>
<p class="user"><span style="font-size: 18px;">{{content.name}}</span><span style="font-size: 18px;">说:</span>{{content.content}}</p>
</li>
</div>
</template> <script>
export default{
name: 'item',
props: {
// 指定属性名以及属性值的类型
content : Object
}
}
</script> <style> </style>
效果如下图:
5、动态交互--添加
实现添加吐槽操作。
使用v-on 绑定事件,使用v-model 实现数据的双向绑定,方法也可以使用 v-bind 绑定 并进行组件通信。
【对上面代码进行修改】
App.vue 定义增加吐槽的方法,并作为属性传递给Comment.vue组件
Comment.vue 接收属性,并定义添加数据的事件 【App.vue】
<template>
<div>
<!--头部-->
<header class="site-header jumbotron">
<div class="container">
<div class="row">
<div class="col-xs-12">
<h1>欢迎来到吐槽大厅</h1>
</div>
</div>
</div>
</header> <!--主体部分-->
<!--bootstrap将页面分为12格,此处拆分为左4格,右8格-->
<div class="container">
<!--使用各组件-->
<Comment :addComment="addComment"></Comment>
<!--需使用v-bind绑定属性-->
<Comments :contents="contents"></Comments>
</div>
</div>
<!--App -->
</template> <script>
// 引入各组件
import Comment from './components/Comment.vue'
import Comments from './components/Comments.vue' export default {
name: 'app',
// 注册各组件
components: {
Comment,
Comments
}, // 传递数据
data(){
return {
contents:[
{name: 'tom', content: '妈妈,我想吃烤山药'},
{name: 'jarry', content: '吃,吃大块的'},
{name: 'jarry', content: '两块够不'},
{name: 'tom', content: '够了,妈妈真好,谢谢妈妈'},
]
}
}, // 操作数据的方法
methods: {
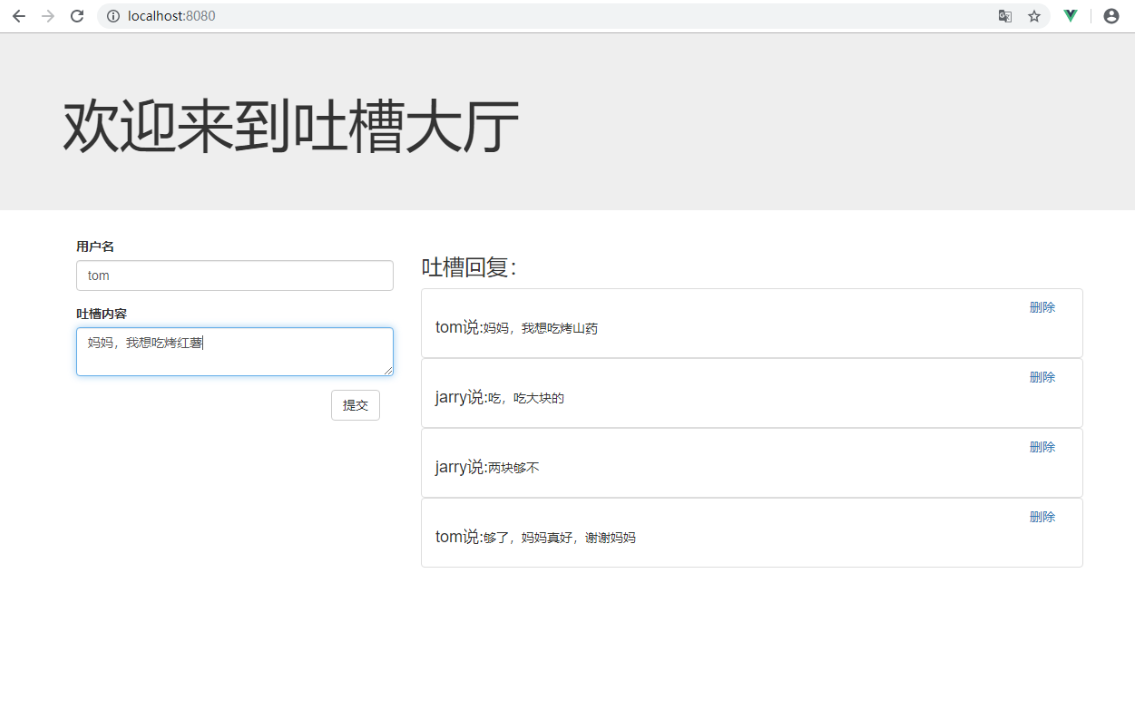
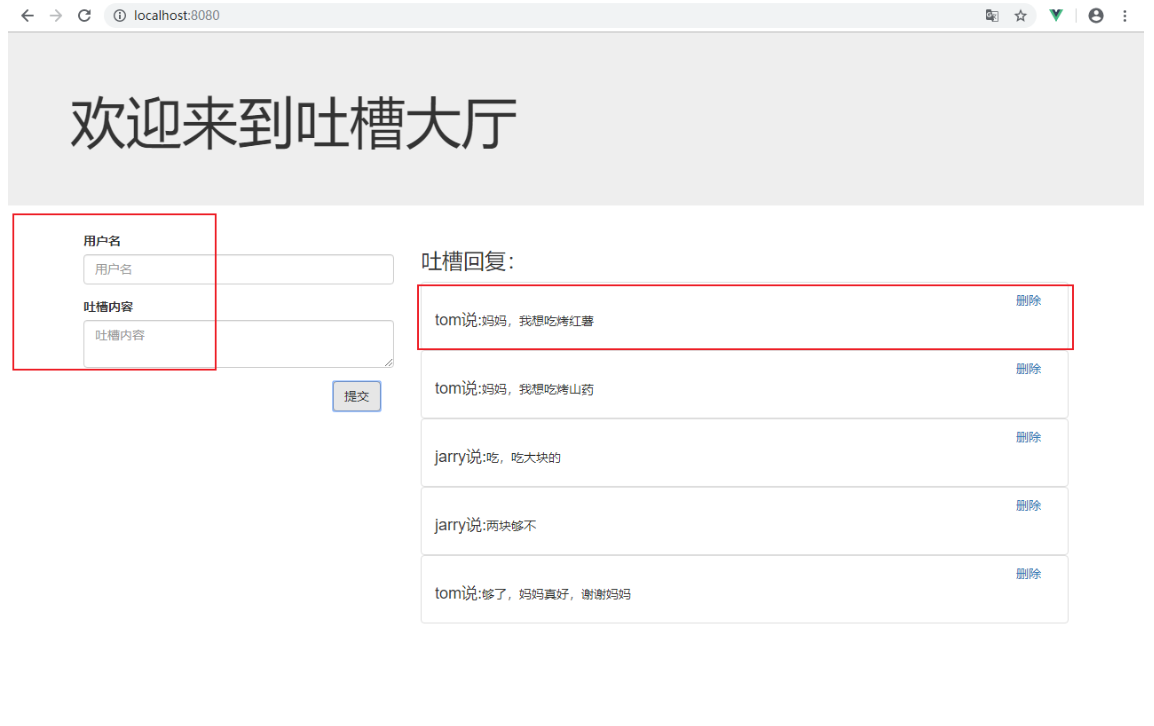
addComment(comment){
// 在数组头部插入数据
this.contents.unshift(comment);
}
}
}
</script> <style>
</style> 【Comment.vue】
<template>
<div class="col-md-4">
<form action="form-horizontal">
<div class="form-group">
<label>用户名</label>
<input type="text" class="form-control" placeholder="用户名" v-model="name">
</div>
<div class="form-group">
<label>吐槽内容</label>
<textarea type="text" class="form-control" placeholder="吐槽内容" v-model="content"></textarea>
</div>
<div class="form-group">
<div class="col-sm-offset-2 col-sm-10">
<button type="button" class="btn btn-default pull-right" @click="add">提交</button>
</div>
</div>
</form>
</div>
<!--Comment -->
</template> <script>
export default{
name: 'comment',
data(){
return {
name : '',
content : ''
}
},
props:{
// 定义属性类型、属性值类型、必须性
addComment: {
type: Function,
required: true
}
},
methods: {
add(){
// step1:进行合法性检验
const name = this.name.trim();
const content = this.content.trim();
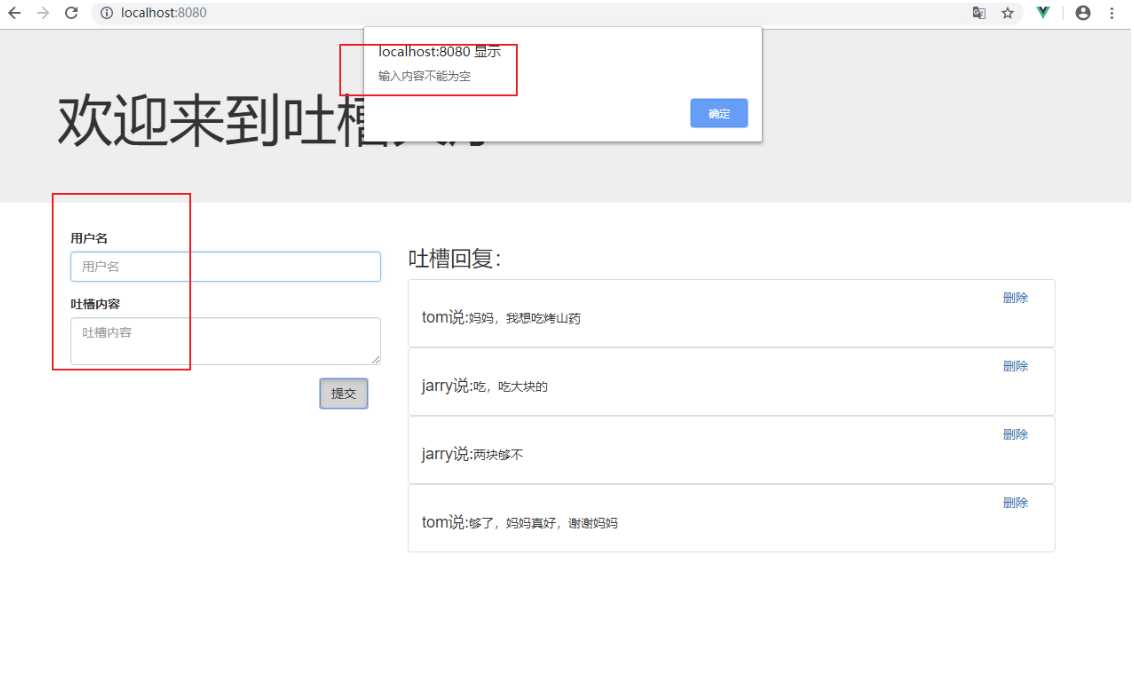
if(!name || !content){
alert("输入内容不能为空");
return;
} // step2:将name,content封装成一个comment(吐槽)对象
const comment = {name, content}; console.log(comment);
// step3: 将comment 加入到 comments(吐槽区)
this.addComment(comment); // step4:清空输入框
this.name = '';
this.content = '';
}
}
}
</script> <style> </style>
效果:
6、动态交互--删除
进行删除操作。
类似于添加操作。
【对上面文件进行修改】
App.vue 定义删除数据的方法,并将其作为属性传递给Comments.vue
Comments.vue 作为一个中间的组件,传递index以及删除方法
Item.vue 接收Comments.vue传递的属性,并定义删除事件 【App.vue】
<template>
<div>
<!--头部-->
<header class="site-header jumbotron">
<div class="container">
<div class="row">
<div class="col-xs-12">
<h1>欢迎来到吐槽大厅</h1>
</div>
</div>
</div>
</header> <!--主体部分-->
<!--bootstrap将页面分为12格,此处拆分为左4格,右8格-->
<div class="container">
<!--使用各组件-->
<Comment :addComment="addComment"></Comment>
<!--需使用v-bind绑定属性-->
<Comments :contents="contents" :deleteComment="deleteComment"></Comments>
</div>
</div>
<!--App -->
</template> <script>
// 引入各组件
import Comment from './components/Comment.vue'
import Comments from './components/Comments.vue' export default {
name: 'app',
// 注册各组件
components: {
Comment,
Comments
}, // 传递数据
data(){
return {
contents:[
{name: 'tom', content: '妈妈,我想吃烤山药'},
{name: 'jarry', content: '吃,吃大块的'},
{name: 'jarry', content: '两块够不'},
{name: 'tom', content: '够了,妈妈真好,谢谢妈妈'},
]
}
}, // 操作数据的方法
methods: {
addComment(comment){
// 在数组头部插入数据
this.contents.unshift(comment);
},
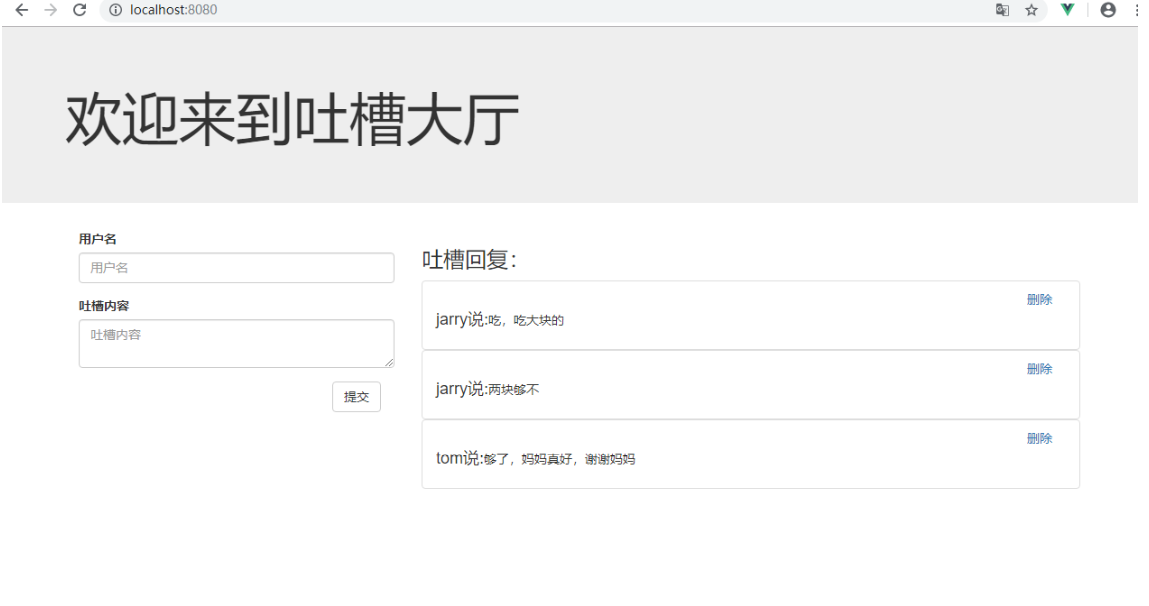
deleteComment(index){
// 删除指定下标的数据
this.contents.splice(index, 1);
}
}
}
</script> <style>
</style> 【Comments.vue】
<template>
<div class="col-md-8">
<h3 class="reply">吐槽回复:</h3>
<h3 v-show="contents.length === 0">暂无吐槽,点击左侧提交吐槽!!!</h3>
<ul class="list-group">
<Item v-for="(content, index) in contents" :key="index" :content="content" :deleteComment="deleteComment" :index="index"></Item>
</ul>
</div>
<!--md8 for List end -->
</template> <script>
import Item from './Item.vue' export default {
name: 'comments',
// 声明接收属性,此属性可以在该组件中使用
props: ['contents', 'deleteComment'], // 只指定属性名 // 注册组件
components: {
Item
}
}
</script> <style> </style> 【Item.vue】
<template>
<!--注意,需要使用div包裹,否则会报错-->
<div>
<li class="list-group-item">
<div class="handle col-sm-offset-2 col-sm-10">
<a class="pull-right" @click="deleteItem">删除</a>
</div>
<p class="user"><span style="font-size: 18px;">{{content.name}}</span><span style="font-size: 18px;">说:</span>{{content.content}}</p>
</li>
</div>
</template> <script>
export default{
name: 'item',
props: {
// 指定属性名以及属性值的类型
content : Object,
deleteComment : Function,
index : Number
},
methods: {
deleteItem() {
const {content, deleteComment, index} = this;
// 使用 反引号 + ${}, ES6模板字符串
if(window.confirm(`确定删除${content.name}的评论吗?`)){
deleteComment(index);
}
}
}
}
</script> <style> </style>
运行结果:


7、完整代码
(1)项目结构以及修改的文件
(2)代码
【index.html】

<!DOCTYPE html>

<html lang="en">

  <head>

    <meta charset="utf-8">

    <meta http-equiv="X-UA-Compatible" content="IE=edge">

    <meta name="viewport" content="width=device-width,initial-scale=1.0">

    <link rel="icon" href="<%= BASE_URL %>favicon.ico">

    <!--所有组件都是为index.html服务的,所以在此处引入css、js文件-->

    <link href="https://cdn.bootcss.com/twitter-bootstrap/3.3.7/css/bootstrap.css" rel="stylesheet">

    <title>vuedemo</title>

  </head>

  <body>

    <noscript>

      <strong>We're sorry but vuedemo doesn't work properly without JavaScript enabled. Please enable it to continue.</strong>

    </noscript>

    <div id="app"></div>

    <!-- built files will be auto injected -->

  </body>

</html>

【main.js】

import Vue from 'vue'

import App from './App.vue'

Vue.config.productionTip = false

new Vue({

  render: h => h(App),

}).$mount('#app')

【App.vue】

<template>

    <div>

        <!--头部-->

        <header class="site-header jumbotron">

            <div class="container">

                <div class="row">

                    <div class="col-xs-12">

                        <h1>欢迎来到吐槽大厅</h1>

                    </div>

                </div>

            </div>

        </header>

        <!--主体部分-->

        <!--bootstrap将页面分为12格,此处拆分为左4格,右8格-->

        <div class="container">

            <!--使用各组件-->

            <Comment :addComment="addComment"></Comment>

            <!--需使用v-bind绑定属性-->

            <Comments :contents="contents" :deleteComment="deleteComment"></Comments>

        </div>

    </div>

    <!--App -->

</template>

<script>

    // 引入各组件

    import Comment from './components/Comment.vue'

    import Comments from './components/Comments.vue'

    export default {

        name: 'app',

        // 注册各组件

        components: {

            Comment,

            Comments

        },

        // 传递数据

        data(){

            return {

                contents:[

                    {name: 'tom', content: '妈妈,我想吃烤山药'},

                    {name: 'jarry', content: '吃,吃大块的'},

                    {name: 'jarry', content: '两块够不'},

                    {name: 'tom', content: '够了,妈妈真好,谢谢妈妈'},

                ]

            }

        },

        // 操作数据的方法

        methods: {

            addComment(comment){

                // 在数组头部插入数据

                this.contents.unshift(comment);

            },

            deleteComment(index){

                // 删除指定下标的数据

                this.contents.splice(index, 1);

            }

        }

    }

</script>

<style>

</style>

【Comment.vue】

<template>

    <div class="col-md-4">

        <form action="form-horizontal">

            <div class="form-group">

                <label>用户名</label>

                <input type="text" class="form-control" placeholder="用户名" v-model="name">

            </div>

            <div class="form-group">

                <label>吐槽内容</label>

                <textarea type="text" class="form-control" placeholder="吐槽内容" v-model="content"></textarea>

            </div>

            <div class="form-group">

                <div class="col-sm-offset-2 col-sm-10">

                    <button type="button" class="btn btn-default pull-right" @click="add">提交</button>

                </div>

            </div>

        </form>

    </div>

    <!--Comment -->

</template>

<script>

    export default{

        name: 'comment',

        data(){

            return {

                name : '',

                content : ''

            }

        },

        props:{

            // 定义属性类型、属性值类型、必须性

            addComment: {

                type: Function,

                required: true

            }

        },

        methods: {

            add(){

                // step1:进行合法性检验

                const name = this.name.trim();

                const content = this.content.trim();

                if(!name || !content){

                    alert("输入内容不能为空");

                    return;

                }

                // step2:将name,content封装成一个comment(吐槽)对象

                const comment = {name, content};

                console.log(comment);

                // step3: 将comment 加入到 comments(吐槽区)

                this.addComment(comment);

                // step4:清空输入框

                this.name = '';

                this.content = '';

            }

        }

    }

</script>

<style>

</style>

【Comments.vue】

<template>

    <div class="col-md-8">

        <h3 class="reply">吐槽回复:</h3>

        <h3 v-show="contents.length === 0">暂无吐槽,点击左侧提交吐槽!!!</h3>

        <ul class="list-group">

            <Item v-for="(content, index) in contents" :key="index" :content="content" :deleteComment="deleteComment" :index="index"></Item>

        </ul>

    </div>

    <!--md8 for List end -->

</template>

<script>

    import Item from './Item.vue'

    export default {

        name: 'comments',

        // 声明接收属性,此属性可以在该组件中使用

        props: ['contents', 'deleteComment'], // 只指定属性名

        // 注册组件

        components: {

            Item

        }

    }

</script>

<style>

</style>

【Item.vue】

<template>

    <!--注意,需要使用div包裹,否则会报错-->

    <div>

        <li class="list-group-item">

            <div class="handle col-sm-offset-2 col-sm-10">

                <a class="pull-right" @click="deleteItem">删除</a>

            </div>

            <p class="user"><span style="font-size: 18px;">{{content.name}}</span><span style="font-size: 18px;">说:</span>{{content.content}}</p>

        </li>

    </div>

</template>

<script>

    export default{

        name: 'item',

        props: {

            // 指定属性名以及属性值的类型

            content : Object,

            deleteComment : Function,

            index : Number

         },

         methods: {

             deleteItem() {

                 const {content, deleteComment, index} = this;

                 // 使用  反引号 + ${}, ES6模板字符串

                 if(window.confirm(`确定删除${content.name}的评论吗?`)){

                     deleteComment(index);

                 }

             }

         }

    }

</script>

<style>

</style>
运行结果此处不再重复截图,与上述截图相同。
vue小案例--简易评论区的更多相关文章
- VUE小案例--简易计算器
这个小案例主要时练习v-model的使用,功能并不完善 <!DOCTYPE html> <html lang="zh-CN"> <head> & ...
- Vue小案例 之 商品管理------学习过滤器 使用过滤器处理日期的格式
代码学习过滤器 过滤器介绍:过滤模型数据,在数据显示前做预处理操作: 内置过滤器:在1.x中,Vue提供了内置过滤器,但是在2.x中已经完全废除: 解决办法: (1)使用第三方库来替代1.x中的内置过 ...
- Vue小案例(一)
案例需求: 创建一个品牌展示表格,表头有编号(id),品牌名称(name),创建时间(time)和操作,需要实现的功能是对数据的增删操作,和时间的格式化. 思路分析:在开发之前需要想清楚要用到Vue中 ...
- VUE小案例--跑马灯效果
自学Vue课程中学到的一个小案例,跑马灯效果 <!DOCTYPE html> <html lang="zh-CN"> <head> <me ...
- Vue(小案例_vue+axios仿手机app)_实现用户评论
一.前言 1.渲染评论列表 2.点击加载按钮,加载更多 3.提交评论 二.主要内容 1.评论列表一般是注册到一个全局的公共组件中 2.请求后台数据,渲染评论列表 (1)数据格式如下 地址 /ap ...
- Vue(小案例_vue+axios仿手机app)_Vuex优化购物车功能
一.前言 1.用vuex实现加入购物车操作 2.购物车详情页面 3.点击删除按钮,删除购物详情页面里的对应商品 二.主要内容 1.用vuex加入购物车 (1)在src ...
- Vue(小案例_vue+axios仿手机app)_go实现退回上一个路由
一.前言 this.$router.go(-1)返回上级路由 二.主要内容 1.小功能演示: 2.组件之间的嵌套关系为: 3.具体实现 (1)由于这种返回按钮在每个页面中的结构都是一样的,只是里面的数 ...
- 微信小程序 - 实战小案例 - 简易记事本
多项技能,好像也不错.学习一下微信小程序. 教程:https://mp.weixin.qq.com/debug/wxadoc/dev/ 简介:一套用来开发在手机微信上运行的app框架,不用安装 组成: ...
- Vue(小案例_vue+axios仿手机app)_购物车(二模拟淘宝购物车页面,点击加减做出相应变化)
一.前言 在上篇购物车中,如果用户刷新了当前的页面,底部导航中的数据又会恢复为原来的: 1.解决刷新,购物车上数值不变 ...
随机推荐
- C# dictionary to bytes and bytes convert to dictionary
static byte[] GetBytesFromDic(Dictionary<string,string> dic) { if(dic==null || !dic.Any()) { r ...
- JS---封装getScroll函数 & 案例:固定导航栏
封装getScroll函数 1. 获取页面向上或者向左卷曲出去的距离的值 2. 浏览器的滚动事件 function getScroll() { return { left: window.pageXO ...
- asp.net core react 项目实战(一)
asp.net-core-react asp.net core react 简介 开发依赖环境 .NET Core SDK (reflecting any global.json): Version: ...
- 初级模拟电路:4-3 BJT晶体管的交流建模
回到目录 1. 四种BJT模型概述 对BJT晶体管建模的基本思路就是,用电路原理中的五大基本元件(电阻.电容.电感.电源.受控源)构建一个电路,使其在一定工作条件下能等效非线性半导体器件的实际工作.一 ...
- 记录MyBatis text类型 查询 更新 数据是null
数据库表里面存在text或者blob字段.逆向工程自动生成的MyBatis的xml中会多出几个以withBlobs结尾的方法和resultMap 此时查询数据或者更新数据的使用仍然使用selectBy ...
- RabbitMQ 离线安装(带视频)
疯狂创客圈 Java 高并发[ 亿级流量聊天室实战]实战系列 [博客园总入口 ] 架构师成长+面试必备之 高并发基础书籍 [Netty Zookeeper Redis 高并发实战 ] 疯狂创客圈 高并 ...
- IT兄弟连 HTML5教程 DIV+CSS的兼容性问题
使用DIV+CSS布局网页其实是很容易的事情,但各种浏览器之间的不兼容性问题,加大了页面布局的难度,给程序员带来很多不便,于是需要花费更多的时间在调试各种浏览器的兼容性上.因为部分CSS属性在不同的浏 ...
- C# Task 多任务 限制Task并发数量
LimitedTaskScheduler: using System; using System.Collections.Concurrent; using System.Collections.Ge ...
- com.alibaba.fastjson和net.sf.json的区别
JSON有两种结构 json简单说就是javascript中的对象和数组,所以这两种结构就是对象和数组两种结构,通过这两种结构可以表示各种复杂的结构 1.对象:对象在js中表示为“{}”括起来的内容, ...
- 熔断器Hystrix及服务监控Dashboard
服务雪崩效应 当一个请求依赖多个服务的时候: 正常情况下的访问 : 但是,当请求的服务中出现无法访问.异常.超时等问题时(图中的I),那么用户的请求将会被阻塞. 如果多个用户的请求中,都存在无法访问的 ...