Centos7下安装配置elasticsearch 6.3.1
1)下载
Elasticsearch 6.3.1 地址:https://artifacts.elastic.co/downloads/elasticsearch/elasticsearch-6.3.1.tar.gz
2)拷贝
拷贝到服务器上,解压:tar -xvzf elasticsearch-6.3.1.tar.gz 。解压后路径:/home/elasticsearch-6.3.1
3)创建用户
创建用户,创建esdata目录,并赋予权限
[root@bogon home]# adduser esuser

[root@bogon home]# cd /home

[root@bogon home]# mkdir -p esdata/data

[root@bogon home]# mkdir -p esdata/log

[root@bogon home]# chown -R esuser elasticsearch-6.3.

[root@bogon home]# chown -R esuser esdata
4)配置es
[root@bogon esdata]# cat /home/elasticsearch-6.3./config/elasticsearch.yml

# ======================== Elasticsearch Configuration =========================

#

# NOTE: Elasticsearch comes with reasonable defaults for most settings.

#       Before you set out to tweak and tune the configuration, make sure you

#       understand what are you trying to accomplish and the consequences.

#

# The primary way of configuring a node is via this file. This template lists

# the most important settings you may want to configure for a production cluster.

#

# Please consult the documentation for further information on configuration options:

# https://www.elastic.co/guide/en/elasticsearch/reference/index.html

#

# ---------------------------------- Cluster -----------------------------------

#

# Use a descriptive name for your cluster:

#

cluster.name: my-application

#

# ------------------------------------ Node ------------------------------------

#

# Use a descriptive name for the node:

#

node.name: node-

#

# Add custom attributes to the node:

#

node.attr.rack: r1

#

# ----------------------------------- Paths ------------------------------------

#

# Path to directory where to store the data (separate multiple locations by comma):

#

path.data: /home/esdata/data

#

# Path to log files:

#

path.logs: /home/esdata/log

#

# ----------------------------------- Memory -----------------------------------

#

# Lock the memory on startup:

#

bootstrap.memory_lock: true

#

# Make sure that the heap size is set to about half the memory available

# on the system and that the owner of the process is allowed to use this

# limit.

#

# Elasticsearch performs poorly when the system is swapping the memory.

#

# ---------------------------------- Network -----------------------------------

#

# Set the bind address to a specific IP (IPv4 or IPv6):

#

network.host: 0.0.0.0

#

# Set a custom port for HTTP:

#

http.port:

#

# For more information, consult the network module documentation.

#

# --------------------------------- Discovery ----------------------------------

#

# Pass an initial list of hosts to perform discovery when new node is started:

# The default list of hosts is ["127.0.0.1", "[::1]"]

#

discovery.zen.ping.unicast.hosts: ["host1", "host2"]

#

# Prevent the "split brain" by configuring the majority of nodes (total number of master-eligible nodes /  + ):

#

#discovery.zen.minimum_master_nodes:

#

# For more information, consult the zen discovery module documentation.

#

# ---------------------------------- Gateway -----------------------------------

#

# Block initial recovery after a full cluster restart until N nodes are started:

#

gateway.recover_after_nodes:

#

# For more information, consult the gateway module documentation.

#

# ---------------------------------- Various -----------------------------------

#

# Require explicit names when deleting indices:

#

action.destructive_requires_name: true
5)配置系统
[root@bogon bin]#  vim /etc/security/limits.conf(在文件最后添加)

esuser hard nofile

esuser soft nofile

esuser soft memlock unlimited

esuser hard memlock unlimited
以上配置解决问题:
max file descriptors [] for elasticsearch process is too low, increase to at least []

memory locking requested for elasticsearch process but memory is not locked
[root@bogon bin]# sysctl -w vm.max_map_count=

vm.max_map_count =

[root@bogon bin]# more /proc/sys/vm/max_map_count
以上配置解决问题:
max virtual memory areas vm.max_map_count [] is too low, increase to at least []
[root@bogon logs]# visudo

。。。。。。。。

## Allow root to run any commands anywhere

root    ALL=(ALL)       ALL

esuser  ALL=(ALL)       ALL

。。。。。。。。
以上配置解决某些情况下无法读写的问题
6)启动
[root@bogon ~]# cd /home/elasticsearch-6.3./bin/

[root@bogon bin]# su esuser

[esuser@bogon bin]$ ./elasticsearch

[--17T10::,][INFO ][o.e.n.Node               ] [node-] initializing ...

[--17T10::,][INFO ][o.e.e.NodeEnvironment    ] [node-] using [] data paths, mounts [[/ (rootfs)]], net usable_space [.1gb], net total_space [.6gb], types [rootfs]

[--17T10::,][INFO ][o.e.e.NodeEnvironment    ] [node-] heap size [.3mb], compressed ordinary object pointers [true]

[--17T10::,][INFO ][o.e.n.Node               ] [node-] node name [node-], node ID [cb69e4JjSBKeHJ9y-q-hNA]

[--17T10::,][INFO ][o.e.n.Node               ] [node-] version[6.3.], pid[], build[default/tar/eb782d0/--29T21::.107521Z], OS[Linux/3.10.-514.6..el7.x86_64/amd64], JVM[Oracle Corporation/Java HotSpot(TM) -Bit Server VM/1.8.0_92/25.92-b14]

[--17T10::,][INFO ][o.e.n.Node               ] [node-] JVM arguments [-Xms1g, -Xmx1g, -XX:+UseConcMarkSweepGC, -XX:CMSInitiatingOccupancyFraction=, -XX:+UseCMSInitiatingOccupancyOnly, -XX:+AlwaysPreTouch, -Xss1m, -Djava.awt.headless=true, -Dfile.encoding=UTF-, -Djna.nosys=true, -XX:-OmitStackTraceInFastThrow, -Dio.netty.noUnsafe=true, -Dio.netty.noKeySetOptimization=true, -Dio.netty.recycler.maxCapacityPerThread=, -Dlog4j.shutdownHookEnabled=false, -Dlog4j2.disable.jmx=true, -Djava.io.tmpdir=/tmp/elasticsearch.F1Jh0AOB, -XX:+HeapDumpOnOutOfMemoryError, -XX:HeapDumpPath=data, -XX:ErrorFile=logs/hs_err_pid%p.log, -XX:+PrintGCDetails, -XX:+PrintGCDateStamps, -XX:+PrintTenuringDistribution, -XX:+PrintGCApplicationStoppedTime, -Xloggc:logs/gc.log, -XX:+UseGCLogFileRotation, -XX:NumberOfGCLogFiles=, -XX:GCLogFileSize=64m, -Des.path.home=/home/elasticsearch-6.3., -Des.path.conf=/home/elasticsearch-6.3./config, -Des.distribution.flavor=default, -Des.distribution.type=tar]

[--17T10::,][INFO ][o.e.p.PluginsService     ] [node-] loaded module [aggs-matrix-stats]

[--17T10::,][INFO ][o.e.p.PluginsService     ] [node-] loaded module [analysis-common]

[--17T10::,][INFO ][o.e.p.PluginsService     ] [node-] loaded module [ingest-common]

。。。。。。
7)验证
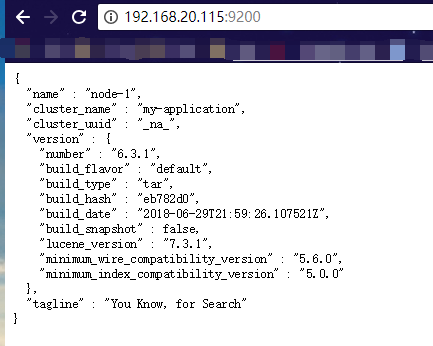
浏览器访问:http://192.168.20.115:9200/ (192.168.20.115是es服务器的IP,另外请确保9200端口能够被外部访问),返回:
{

  "name" : "node-1",

  "cluster_name" : "my-application",

  "cluster_uuid" : "_na_",

  "version" : {

    "number" : "6.3.1",

    "build_flavor" : "default",

    "build_type" : "tar",

    "build_hash" : "eb782d0",

    "build_date" : "2018-06-29T21:59:26.107521Z",

    "build_snapshot" : false,

    "lucene_version" : "7.3.1",

    "minimum_wire_compatibility_version" : "5.6.0",

    "minimum_index_compatibility_version" : "5.0.0"

  },

  "tagline" : "You Know, for Search"

}

当然最方便的安装方法还是下载docker镜像,官方安装手册:https://www.elastic.co/guide/en/elasticsearch/reference/current/docker.html 步骤:
1)下载镜像:docker pull docker.elastic.co/elasticsearch/elasticsearch:6.3.1
2)运行容器:docker run -p 9200:9200 -p 9300:9300 -e "discovery.type=single-node" docker.elastic.co/elasticsearch/elasticsearch:6.3.1
ElasticSearch Head安装
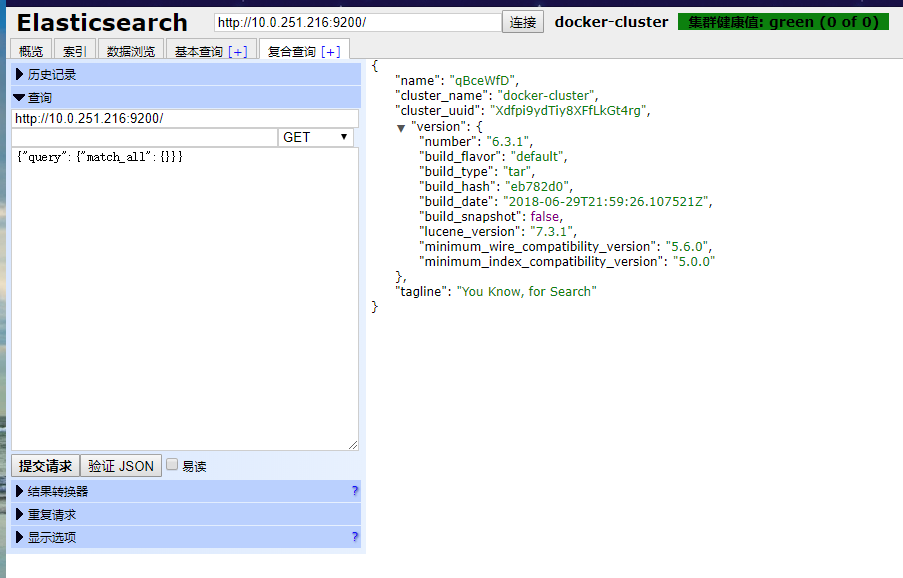
官方的模拟工具是控制台的curl,不是很直观,可以在chrome浏览器中安装head插件来作为请求的工具:head插件的地址:https://chrome.google.com/webstore/detail/elasticsearch-head/ffmkiejjmecolpfloofpjologoblkegm/

Centos7下安装配置elasticsearch 6.3.1的更多相关文章
- Centos7下安装配置Redsocks
Redsocks是一个开源的网络程序,代码依赖开源的libevent网络库.Redsocks允许你将所有TCP连接重定向到SOCKS或HTTPS代理,比如Shadowsocks(Centos7下安装配 ...
- Centos7 下安装配置tomcat7
首先下载压缩包 wget http://mirrors.tuna.tsinghua.edu.cn/apache/tomcat/tomcat-7/v7.0.78/bin/apache-tomcat-7. ...
- centos7下安装配置prometheus
prometheus官网:https://prometheus.io/download/ 搭建环境参考:https://blog.csdn.net/baidu_36943075/article/det ...
- centos7下安装配置jenkins+git+maven+jdk
环境 centos7 jdk1.8 maven3 git 在安装jenkins之前,先安装jdk1.8.maven.git 一. 安装jdk1.8 第一步:下载 jdk-8u131-linux-x64 ...
- CentOS7下安装配置vncserver
之前试了xmanager,不过好像和在centos6有很大不同,居然没成功,然后找到了vncserver,试了下,成了 参考:http://blog.csdn.net/jiangliqing1234/ ...
- Linux centos7下安装配置redis及Redis desktop Manager工具连接注意事项
基本工具:VMware12.CentOS-7-x86_64-Everything-1611.iso.redis-desktop-manager-0.8.0.3841 废话不多说,首先,关于什么是Red ...
- centos7下安装配置redis3.0.4
安装redis 1.进入redis官网(redis.io)下载redis稳定版安装包,目前稳定版本为3.0.4 2.在linux /usr文件夹下新建redis文件夹,拷贝安装包redis-3.0. ...
- CentOS7下安装配置Nginx
一:安装依赖项 1.pcre:2.openssl:3.zlib:4.gcc:可直接通过yum安装 二:创建nginx账户(可以配置nginx.conf的user为此账户) useradd nginx ...
- centos7下安装配置redis
1.1. Redis下载安装(linux) 1.1.1. 下载: 下载地址:https://redis.io/download 选择合适的版本下载,如下图: 1.1.2. 安装: (1)把下载好的re ...
随机推荐
- js实现数组去重的几种方法
1.简单结构的数组,例如[1,2,3,3,4],使用es6提供的Set和Array.from Set:是一种新的数据结构,可以接收一个数组或者是类数组对象,自动去重其中的重复项目. 类数组对象:只包含 ...
- vue学习:vue+webpack的快速使用指南(新手向)
一.vue有两种使用方式: 1.下载vue.js <script src="vue.js"></script> 2.使用npm npm install vu ...
- laravel之ORM增删改查数据
1.首先在控制器中添加方法,然后添加路由,接着在模型中操作: 以下是模型 2.以下是控制器中的操作 一下是通过ORM进行更新 删除数据
- Python函数中的列表
在看21天的Python书中写出了一个陷阱,但没给出解释,以下为代码陷阱
- 获取node异步执行结果的方式
拿数据库操作举例: var connection = mysql.createConnection(); connection.query(sql,function(err,rows){xxx} ); ...
- Ubuntu16.04更新python3.5到python3.7
下载wget https://www.python.org/ftp/python/3.7.1/Python-3.7.1rc2.tgz 解压tar zxvf Python-3.7.1rc2.tgzcd ...
- MacBookPro磁盘空间不够
256G的SSD还是快被占满了,剩余12G,本来一切运行正常. 要往U盘里拷点资料,突然电脑就罢工了,cleanMyMac 显示磁盘容量剩余 1.8G. finder 罢工,无法重启,无法强退. 无法 ...
- python基础4 input()函数
input()函数 赋值输出: name=input('请求输入你喜欢的电影名:')print(name+'是我最喜欢的电影!') 输入:大话西游 输出:大话西游是我最喜欢的电影! print('那么 ...
- PDM:Training Models of Shape from Sets of Examples
这篇论文介绍了一种创建柔性形状模型(Flexible Shape Models)的方法--点分布模型(Point Distribution Model).该方法使用一系列标记点来表示形状,重要的是根据 ...
- delphi odbc远程连接sqlserver
ip设置格式xx.xx.xx.xx,port ip和端口号之间是逗号
