『TensorFlow』TFR数据预处理探究以及框架搭建
一、TFRecord文件书写效率对比(单线程和多线程对比)
1、准备工作
# Author : Hellcat

# Time   : 18-1-15

'''

import os

os.environ["CUDA_VISIBLE_DEVICES"]="-1"

'''

import os

import glob

import numpy as np

import tensorflow as tf

import matplotlib.pyplot as plt

np.set_printoptions(threshold=np.inf)

config = tf.ConfigProto()

config.gpu_options.allow_growth = True

sess = tf.Session(config=config)

def _int64_feature(value):

    """生成整数数据属性"""

    return tf.train.Feature(int64_list=tf.train.Int64List(value=[value]))

def _bytes_feature(value):

    """生成字符型数据属性"""

    return tf.train.Feature(bytes_list=tf.train.BytesList(value=[value]))
2、单线程TFR文件写入
def image2TFR_single_thread(path='./Data_Set/cartoon_faces',with_label=False):

    # 获取图片名称以及数量

    # 等价于image_names = glob.glob(path+'/*')

    # 使用next可以直接取出迭代器中的元素

    image_names = next(os.walk(path))[2]

    num_file = len(image_names)

    # 定义每个文件中放入多少数据

    instances_per_shard = 10000

    # 定义写多少个文件(数据量大时可以写入多个文件加速)

    num_shards = num_file // instances_per_shard + 1

    for file_i in range(num_shards):

        # 文件名命名规则

        file_name = './TFRecord_Output/{0}.tfrecords_{1}_of_{2}_st'\

            .format(path.split('/')[-1], file_i+1, num_shards)

        # 书写器初始化

        writer = tf.python_io.TFRecordWriter(file_name)

        for index, image_name in enumerate(

                image_names[file_i*instances_per_shard:(file_i+1)*instances_per_shard]):

            image_data = plt.imread(os.path.join(path, image_name))

            if with_label == True:

                pass

                # TODO

                # 如果有标签,则在这里添加确定标签的规则,注意非one_hot

                # label = ……

            image_raw = image_data.tostring()

            example = tf.train.Example(features=tf.train.Features(feature={

                'image': _bytes_feature(image_raw),

                # 'label': _int64_feature(label)

            }))

            writer.write(example.SerializeToString())

        # 书写器关闭

        writer.close()
3、多线程TFR文件写入
def image2TFR_multiple_threads(path='./Data_Set/cartoon_faces',with_label=False):

    # 获取图片名称以及数量

    # 等价于image_names = glob.glob(path+'/*')

    # 使用next可以直接取出迭代器中的元素

    image_names = next(os.walk(path))[2]

    num_file = len(image_names)

    # 定义每个文件中放入多少数据

    instances_per_shard = 10000

    # 定义写多少个文件(数据量大时可以写入多个文件加速)

    num_shards = num_file // instances_per_shard + 1

    file_names = ['./TFRecord_Output/{0}.tfrecords_{1}_of_{2}_mt'

                      .format(path.split('/')[-1], file_i+1, num_shards) for file_i in range(num_shards)]

    def _TFR_write():

        for file_name in file_names:

            file_names.remove(file_name)

            writer = tf.python_io.TFRecordWriter(file_name)

            num = 0

            for image_name in image_names:

                num += 1

                if num > instances_per_shard:

                    break

                image_names.remove(image_name)

                image_data = plt.imread(os.path.join(path, image_name))

                if with_label == True:

                    pass

                    # TODO

                    # 如果有标签,则在这里添加确定标签的规则,注意非one_hot

                    # label = ……

                image_raw = image_data.tostring()

                example = tf.train.Example(features=tf.train.Features(feature={

                    'image': _bytes_feature(image_raw),

                    # 'label': _int64_feature(label)

                }))

                writer.write(example.SerializeToString())

            writer.close()

    threads = []

    t1 = threading.Thread(target=_TFR_write, name='resize_img_thread:0')

    threads.append(t1)

    t2 = threading.Thread(target=_TFR_write, name='resize_img_thread:1')

    threads.append(t2)

    for t in threads:

        t.start()

    for t in threads:

        t.join()
4、测试部分
if __name__=='__main__':

    import datetime

    import threading

    for i in range(15):

        time1 = datetime.datetime.now()

        image2TFR_multiple_threads()

        time2 = datetime.datetime.now()

        image2TFR_single_thread()

        time3 = datetime.datetime.now()

        print('mul:', time2-time1)

        print('sin:', time3-time2)

        print('_*_'*10)
5、部分输出
mul: 0:00:25.779139
sin: 0:00:26.312438
_*__*__*__*__*__*__*__*__*__*_
mul: 0:00:27.203649
sin: 0:00:27.982487
_*__*__*__*__*__*__*__*__*__*_
mul: 0:00:31.193418
sin: 0:00:28.735610
_*__*__*__*__*__*__*__*__*__*_
mul: 0:00:28.414592
sin: 0:00:30.207631
_*__*__*__*__*__*__*__*__*__*_
mul: 0:00:27.999488
sin: 0:00:29.683136
_*__*__*__*__*__*__*__*__*__*_
mul: 0:00:28.659919
sin: 0:00:28.534984
_*__*__*__*__*__*__*__*__*__*_
mul: 0:00:30.366691
sin: 0:00:31.014559
_*__*__*__*__*__*__*__*__*__*_
mul: 0:00:28.288918
sin: 0:00:29.142247
_*__*__*__*__*__*__*__*__*__*_
mul: 0:00:29.861579
sin: 0:00:29.329732
_*__*__*__*__*__*__*__*__*__*_
mul: 0:00:28.854213
sin: 0:00:33.794422
_*__*__*__*__*__*__*__*__*__*_
mul: 0:00:28.010327
sin: 0:00:29.163616
_*__*__*__*__*__*__*__*__*__*_
mul: 0:00:27.773299
sin: 0:00:29.312738
_*__*__*__*__*__*__*__*__*__*_
mul: 0:00:27.815851
sin: 0:00:28.715579
_*__*__*__*__*__*__*__*__*__*_
mul: 0:00:27.889409
sin: 0:00:28.157235
_*__*__*__*__*__*__*__*__*__*_
mul: 0:00:28.143782
sin: 0:00:28.988136
_*__*__*__*__*__*__*__*__*__*_
mul: 0:00:27.533430
sin: 0:00:30.000925
_*__*__*__*__*__*__*__*__*__*_
mul: 0:00:28.158601
sin: 0:00:29.448665
_*__*__*__*__*__*__*__*__*__*_
mul: 0:00:27.839638
sin: 0:00:28.908899
_*__*__*__*__*__*__*__*__*__*_
mul: 0:00:27.922513
sin: 0:00:28.757721
_*__*__*__*__*__*__*__*__*__*_
mul: 0:00:31.227687
sin: 0:00:29.576041
_*__*__*__*__*__*__*__*__*__*_
可能是数据量不够大的原因,多线程没有明显的优势,可能写入文件数增加会更好,但个人感觉由于涉及到写入文件句柄操作这不是个适合使用多线程加速的任务。
二、TFRecord实际使用框架
总的原则,把可以修改的超参数啊、路径啊什么的单独提出来,不要放在程序中,那样使用时想要修改会及其繁琐,且易出错
1、包导入以及超参数设定
# Author : Hellcat

# Time   : 18-1-15

"""

import os

os.environ["CUDA_VISIBLE_DEVICES"]="-1"

"""

import os

import glob

import numpy as np

import tensorflow as tf

from scipy.misc import imread, imresize

np.set_printoptions(threshold=np.inf)

config = tf.ConfigProto()

config.gpu_options.allow_growth = True

sess = tf.Session(config=config)

# 读取数据文件的轮数

NUM_EPOCHS = 1

# TFR保存图像尺寸

IMAGE_HEIGHT = 227

IMAGE_WIDTH = 227

IMAGE_DEPTH = 3

# 训练batch尺寸

BATCH_SIZE = 2

# 定义每个TFR文件中放入多少条数据

INSTANCES_PER_SHARD = 10000

# 图片文件存放路径

IMAGE_PATH = './Data_Set/cartoon_faces'

# 图片文件和标签清单保存文件

IMAGE_LABEL_LIST = 'images_&_labels.txt'

# TFR文件保存路径

TFR_PATH = './TFRecord_Output'
2、文件清单生成
def filename_list(path=IMAGE_PATH):

    """

    文件清单生成

    :param path:图像路径,path下直接是图片

    :return: txt文件,每一行内容是:路径图片名+若干空格+类别标签数字+\n

    """

    # 获取图片名称以及数量

    # 等价于image_names = glob.glob(path+'/*')

    # 使用next可以直接取出迭代器中的元素

    file_names = next(os.walk(path))[2]

    with open(IMAGE_LABEL_LIST, 'w') as f:

        for file_name in file_names:

            f.write(path+'/'+file_name+' '+'1'+'\n')
3、TFR文件生成
def image_to_TFR(image_and_label=IMAGE_LABEL_LIST,

                 image_height=IMAGE_HEIGHT,

                 image_width=IMAGE_WIDTH):

    """

    从清单读取图片并生成TFR文件

    :param image_and_label: txt图片清单

    :param image_height: 保存如TFR文件的图片高度

    :param image_width: 保存TFR文件的图片宽度

    """

    def _int64_feature(value):

        """生成整数数据属性"""

        return tf.train.Feature(int64_list=tf.train.Int64List(value=[value]))

    def _bytes_feature(value):

        """生成字符型数据属性"""

        return tf.train.Feature(bytes_list=tf.train.BytesList(value=[value]))

    with open(image_and_label, 'r') as f:

        lines = f.readlines()

        image_paths = [image_path.strip('\n').split(' ')[0] for image_path in lines]

        labels = [image_path.strip('\n').split(' ')[-1] for image_path in lines]

        # 如下操作会报错,因为忽略了指针问题,第一次readlines后指针到达文件末尾,第二次readlines什么都read不到

        # image_paths = [image_path.strip('\n').split(' ')[0] for image_path in f.readlines()]

        # labels = [image_path.strip('\n').split(' ')[-1] for image_path in f.readlines()]

    num_file = len(image_paths)

    # 定义写多少个文件(数据量大时可以写入多个文件加速)

    num_shards = num_file // INSTANCES_PER_SHARD + 1

    for file_i in range(num_shards):

        # 文件名命名规则

        file_name = os.path.join(TFR_PATH, '{0}.tfrecords_{1}_of_{2}')\

            .format(image_paths[0].split('/')[-2], file_i+1, num_shards)

        print('正在生成文件: ', file_name)

        # 书写器初始化

        writer = tf.python_io.TFRecordWriter(file_name)

        for index, image_path in enumerate(

                image_paths[file_i*INSTANCES_PER_SHARD:(file_i+1)*INSTANCES_PER_SHARD]):

            image_data = imread(os.path.join(image_path))

            image_data = imresize(image_data, (image_height, image_width))

            image_raw = image_data.tostring()

            example = tf.train.Example(features=tf.train.Features(feature={

                'image': _bytes_feature(image_raw),

                'label': _int64_feature(int(labels[index]))

            }))

            writer.write(example.SerializeToString())

        # 书写器关闭

        writer.close()
4、读取TFR文件并生成batch数据
本函数最后的images和labels可以作为return,直接送入网络参与训练
def batch_from_TFR(image_height=IMAGE_HEIGHT,

                   image_width=IMAGE_WIDTH,

                   image_depth=IMAGE_DEPTH):

    """从TFR文件读取batch数据"""

    if not os.path.exists(TFR_PATH):

        os.makedirs(TFR_PATH)

    '''读取TFR数据并还原为uint8的图片'''

    file_names = glob.glob(os.path.join(TFR_PATH, '{0}.tfrecords_*_of_*')

                           .format(IMAGE_PATH.split('/')[-1]))

    filename_queue = tf.train.string_input_producer(file_names, num_epochs=NUM_EPOCHS, shuffle=True)

    reader = tf.TFRecordReader()

    _, serialized_example = reader.read(filename_queue)

    features = tf.parse_single_example(

        serialized_example,

        features={

            'image': tf.FixedLenFeature([], tf.string),

            'label': tf.FixedLenFeature([], tf.int64)

        })

    image = features['image']

    image_decode = tf.decode_raw(image, tf.uint8)

    # 解码会变为一维数组,所以这里设定shape时需要设定为一维数组

    image_decode.set_shape([image_height*image_width*image_depth])

    image_decode = tf.reshape(image_decode, [image_height, image_width, image_depth])

    label = tf.cast(features['label'], tf.int32)

    '''图像预处理'''

    '''生成batch图像'''

    # 随机获得batch_size大小的图像和label

    images, labels = tf.train.shuffle_batch([image_decode, label],

                                            batch_size=BATCH_SIZE,

                                            num_threads=1,

                                            capacity=1000 + 3 * BATCH_SIZE,  # 队列最大容量

                                            min_after_dequeue=1000)
5、包含在上面batch函数中的测试模块
    # 测试部分

    print(images)

    sess.run(tf.global_variables_initializer())

    sess.run(tf.local_variables_initializer())

    coord = tf.train.Coordinator()

    threads = tf.train.start_queue_runners(sess=sess, coord=coord)

    img = sess.run(images)[0]

    import matplotlib.pyplot as plt

    plt.imshow(img)

    coord.request_stop()

    coord.join(threads)
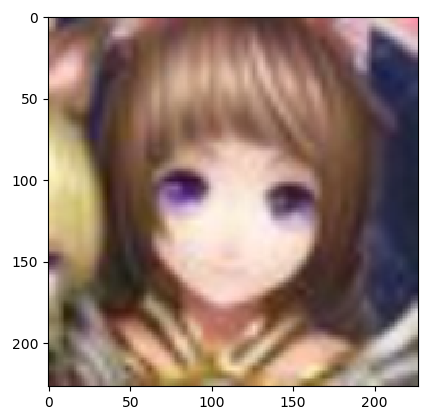
测试结果,
6、启动部分
if __name__ == '__main__':

    import datetime

    time1 = datetime.datetime.now()

    # filename_list()

    # image_to_TFR()

    batch_from_TFR()

    time2 = datetime.datetime.now()

    print(time2-time1)
从测试部分的运行注意到设计tf的队列操作时,局部变量初始化sess.run(tf.global_variables_initializer())是必须的,否则会报错(『TensorFlow』问题整理)。
『TensorFlow』TFR数据预处理探究以及框架搭建的更多相关文章
- 『TensorFlow』0.x_&_1.x版本框架改动汇总
基本数值运算 除法和模运算符(/,//,%)现在匹配 Python(flooring)语义.这也适用于 [tf.div] 和 [tf.mod].要获取基于强制整数截断的行为,可以使用 [tf.trun ...
- 『TensorFlow』第三弹_可视化框架介绍_悄悄问圣僧
添加记录节点 -> 汇总记录节点 -> run汇总节点 -> [书写器生成]书写入文件 [-> 刷新缓冲区] 可视化关键点: 注意, 1.with tf.name_scope( ...
- 『TensorFlow』专题汇总
TensorFlow:官方文档 TensorFlow:项目地址 本篇列出文章对于全零新手不太合适,可以尝试TensorFlow入门系列博客,搭配其他资料进行学习. Keras使用tf.Session训 ...
- 『TensorFlow』SSD源码学习_其五:TFR数据读取&数据预处理
Fork版本项目地址:SSD 一.TFR数据读取 创建slim.dataset.Dataset对象 在train_ssd_network.py获取数据操作如下,首先需要slim.dataset.Dat ...
- 『TensorFlow』SSD源码学习_其一:论文及开源项目文档介绍
一.论文介绍 读论文系列:Object Detection ECCV2016 SSD 一句话概括:SSD就是关于类别的多尺度RPN网络 基本思路: 基础网络后接多层feature map 多层feat ...
- 『TensorFlow』读书笔记_降噪自编码器
『TensorFlow』降噪自编码器设计 之前学习过的代码,又敲了一遍,新的收获也还是有的,因为这次注释写的比较详尽,所以再次记录一下,具体的相关知识查阅之前写的文章即可(见上面链接). # Aut ...
- 『TensorFlow』模型保存和载入方法汇总
『TensorFlow』第七弹_保存&载入会话_霸王回马 一.TensorFlow常规模型加载方法 保存模型 tf.train.Saver()类,.save(sess, ckpt文件目录)方法 ...
- 『TensorFlow』滑动平均
滑动平均会为目标变量维护一个影子变量,影子变量不影响原变量的更新维护,但是在测试或者实际预测过程中(非训练时),使用影子变量代替原变量. 1.滑动平均求解对象初始化 ema = tf.train.Ex ...
- 『TensorFlow』流程控制
『PyTorch』第六弹_最小二乘法对比PyTorch和TensorFlow TensorFlow 控制流程操作 TensorFlow 提供了几个操作和类,您可以使用它们来控制操作的执行并向图中添加条 ...
随机推荐
- 关于for循环
1.普通for循环 (遍历数组的索引值(下标),边界可以自己划定) var arr = [10, 20, 30];for(var i=0; i<arr.length; i++) console. ...
- Jenkins+Jmeter持续集成笔记(二:ANT执行Jmeter脚本)
Jmeter接口测试脚本运行后生成的是jtl(xml)格式的文件,这些文件不具备可读性,所以我们要把他转化为可以阅读的html格式报告. Ant是一个功能强大的打包编译工具.我们使用他的目的是将xml ...
- openshift 容器云从入门到崩溃之四《配置用户验证》
1.配置本地用户 之前安装的时候选择了htpasswd验证方式 先创建用户 # htpasswd -c /etc/origin/master/htpasswd admin 授权为集群管理员 # oc ...
- 关于mysql处理百万级以上的数据时如何提高其查询速度的方法
1.应尽量避免在 where 子句中使用!=或<>操作符,否则将引擎放弃使用索引而进行全表扫描. 2.对查询进行优化,应尽量避免全表扫描,首先应考虑在 where 及 order by 涉 ...
- VC++运行库 集32位/64位整合版
运行程序时,win7/win10(x86和x64)常会遇到缺少什么缺少msvc***.dll问题 安装下面链接提供的程序,安装后,便可解决. [2016-10-10]Microsoft Visual ...
- 第三章 jQuery事件和动画
1.什么是事件:事件指的是用于对网页操作的时候,网页做出的一个回应. 2.JQuery中的事件:JQuery事件是对JavaScript事件的封装,常用事件的分类如下:(1)基础事件:window事件 ...
- CentOS 7 源码搭建LNMP环境
搭建 LNMP 环境 源码包版本 : CentOS Linux 7 nginx-1.15.1.tar.gz mysql-boost-5.7.21.tar.gz php-7.2.7.tar.gz ...
- Python 第五阶段 学习记录之----ORM
ORM: orm英文全称object relational mapping,就是对象映射关系程序,简单来说我们类似python这种面向对象的程序来说一切皆对象,但是我们使用的数据库却都是关系型的,为了 ...
- 微信小程序 地图地址解析
1.微信小程序提供了几个方式,引入地图, wx.getLocation(OBJECT) 获取当前的地理位置.速度.当用户离开小程序后,此接口无法调用:当用户点击“显示在聊天顶部”时,此接口可继续调用 ...
- 复习-css常用伪类别属性
css常用伪类别属性 对<a>标签可制动态效果的css a:link:超链接的普通样式 a:visited:被点击过的超链接样式 a:hover:鼠标指针经过超链接上时的样式 a:acti ...