python webdriver 测试框架-数据驱动json文件驱动的方式
数据驱动json文件的方式
test_data_list.json:
[
"邓肯||蒂姆",
"乔丹||迈克尔",
"库里||斯蒂芬",
"杜兰特||凯文",
"詹姆斯||勒布朗"
]
ReportTemplate.py:
#encoding=utf-8
def htmlTemplate(trData):
htmlStr = u'''<!DOCTYPE HTML>
<html>
<head>
<title>单元测试报告</title>
<style>
body {
width: 80%; /*整个body区域占浏览器的宽度百分比*/
margin: 40px auto; /*整个body区域相对浏览器窗口摆放位置(左右,上下)*/
font-weight: bold; /*整个body区域的字体加粗*/
font-family: 'trebuchet MS', 'Lucida sans', SimSun; /*表格中文字的字体类型*/
font-size: 18px; /*表格中文字字体大小*/
color: #000; /*整个body区域字体的颜色*/
}
table {
*border-collapse: collapse; /*合并表格边框*/
border-spacing: 0; /*表格的边框宽度*/
width: 100%; /*整个表格相对父元素的宽度*/
}
.tableStyle {
/*border: solid #ggg 1px;*/
border-style: outset; /*整个表格外边框样式*/
border-width: 2px; /*整个表格外边框宽度*/
/*border: 2px;*/
border-color: blue; /*整个表格外边框颜色*/
}
.tableStyle tr:hover {
background: rgb(173,216,230); /*鼠标滑过一行时,动态显示的颜色146,208,80*/
}
.tableStyle td,.tableStyle th {
border-left: solid 1px rgb(146,208,80); /*表格的竖线颜色*/
border-top: 1px solid rgb(146,208,80); /*表格的横线颜色 */
padding: 15px; /*表格内边框尺寸*/
text-align: center; /*表格内容显示位置*/
}
.tableStyle th {
padding: 15px; /*表格标题栏,字体的尺寸*/
background-color: rgb(146,208,80); /*表格标题栏背景颜色*/
/*表格标题栏设置渐变颜色*/
background-image: -webkit-gradient(linear, left top, left bottom, from(#92D050), to(#A2D668));
/*rgb(146,208,80)*/
}
</style>
</head>
<body>
<center><h1>测试报告</h1></center><br />
<table class="tableStyle">
<thead>
<tr>
<th>Search Words</th>
<th>Assert Words</th>
<th>Start Time</th>
<th>Waste Time(s)</th>
<th>Status</th>
</tr>
</thead>'''
endStr = u'''
</table>
</body>
</html>'''
# 拼接完整的测试报告HTML页面代码
html = htmlStr + trData + endStr
print html
# 生成.html文件
with open(u"d:\\test\\testTemplate.html", "w") as fp:
fp.write(html.encode("gbk"))
data_drivern_by_file.py:
# encoding=utf-8
from selenium import webdriver
import unittest, time
import logging, traceback
import ddt
from ReportTemplate import htmlTemplate
from selenium.common.exceptions import NoSuchElementException
#如果有no json的报错信息,请将json文件存储为utf-8,with Bom
# 初始化日志对象
logging.basicConfig(
# 日志级别
level = logging.INFO,
# 日志格式
# 时间、代码所在文件名、代码行号、日志级别名字、日志信息
format = '%(asctime)s %(filename)s[line:%(lineno)d] %(levelname)s %(message)s',
# 打印日志的时间
datefmt = '%a, %Y-%m-%d %H:%M:%S',
# 日志文件存放的目录(目录必须存在)及日志文件名
filename = 'd:/report.log',#’d:\\report.log’也可以
# 打开日志文件的方式
filemode = 'w'
)
@ddt.ddt
class TestDemo(unittest.TestCase):
@classmethod
def setUpClass(cls):
# 整个测试过程只被调用一次
TestDemo.trStr = ""
def setUp(self):
self.driver=webdriver.Firefox(executable_path="c:\\geckodriver")
status = None # 用于存放测试结果状态,失败'fail',成功'pass'
flag = 0 # 数据驱动测试结果的标志,失败置0,成功置1
@ddt.file_data("test_data_list.json")
def test_dataDrivenByFile(self, value):
# 决定测试报告中状态单元格中内容的颜色
flagDict = {0: 'red', 1: '#00AC4E'}
url = "http://www.baidu.com"
# 访问百度首页
self.driver.get(url)
# 将浏览器窗口最大化
self.driver.maximize_window()
print value
# 将从.json文件中读取出的数据用“||”进行分隔成测试数据
# 和期望数据
testdata, expectdata = tuple(value.strip().split("||"))
# 设置隐式等待时间为10秒
self.driver.implicitly_wait(10)
try:
# 获取当前的时间戳,用于后面计算查询耗时用
start = time.time()
# 获取当前时间的字符串,表示测试开始时间
startTime = time.strftime("%Y-%m-%d %H:%M:%S", time.localtime())
# 找到搜索输入框,并输入测试数据
self.driver.find_element_by_id("kw").send_keys(testdata)
# 找到搜索按钮,并点击
self.driver.find_element_by_id("su").click()
time.sleep(3)
# 断言期望结果是否出现在页面源代码中
self.assertTrue(expectdata in self.driver.page_source)
except NoSuchElementException, e:
logging.error(u"查找的页面元素不存在,异常堆栈信息:" \
+ str(traceback.format_exc()))
status = 'fail'
flag = 0
except AssertionError, e:
logging.info(u"搜索“%s”,期望“%s”,失败" %(testdata, expectdata))
status = 'fail'
flag = 0
except Exception, e:
logging.error(u"未知错误,错误信息:" + str(traceback.format_exc()))
status = 'fail'
flag = 0
else:
logging.info(u"搜索“%s”,期望“%s”通过" %(testdata, expectdata))
status = 'pass'
flag = 1
# 计算耗时,从将测试数据输入到输入框中到断言期望结果之间所耗时
wasteTime = time.time() - start - 3 # 减去强制等待的3秒
# 每一组数据测试结束后,都将其测试结果信息插入表格行
# 的HTML代码中,并将这些行HTML代码拼接到变量trStr变量中,
# 等所有测试数据都被测试结束后,传入htmlTemplate()函数中
# 生成完整测试报告的HTML代码
TestDemo.trStr += u'''
#这段儿会被多次拼接,每搜索一次就会把模板字符串后边的字符拼接上
<tr>
<td>%s</td>
<td>%s</td>
<td>%s</td>
<td>%.2f</td>
<td style="color:%s">%s</td>
</tr><br />''' % (testdata, expectdata,startTime, wasteTime, flagDict[flag], status)
def tearDown(self):
self.driver.quit()
@classmethod
def tearDownClass(cls):
# 写自定义的html测试报告
# 整个测试过程只被调用一次
htmlTemplate(TestDemo.trStr)
if __name__ == '__main__':
unittest.main()
结果:
D:\test>python test.py
邓肯||蒂姆
testdata,expectdata: 邓肯 蒂姆
.乔丹||迈克尔
testdata,expectdata: 乔丹 迈克尔
.库里||斯蒂芬
testdata,expectdata: 库里 斯蒂芬
.杜兰特||凯文
testdata,expectdata: 杜兰特 凯文
.詹姆斯||勒布朗
testdata,expectdata: 詹姆斯 勒布朗
.<!DOCTYPE HTML>
<html>
<head>
<title>单元测试报告</title>
<style>
body{
width:80%;/*整个body区域占浏览器的宽度百分比*/
margin:40px auto;/*整个body区域相对浏览器窗口摆放位置(左右,上下)*/
font-weight:bold;/*整个body区域的字体加粗*/
font-family:'trebuchet MS','Lucida sans',SimSun;/*表格中文字的字体类型*/
font-size:18px;/*表格中文字字体大小*/
color:#000;/*整个body区域字体的颜色*/
}
table{
*border-collapse:collapse;/*合并表格边框*/
border-spacing:0;/*表格的边框宽度*/
width:100%;
}
.tableStyle{
/*border:solid #ggg 1px;*/
border-style:outset;/*整个表格外边框样式*/
border-width:2px;/*整个表格外边框宽度*/
/*border:2px*/
border-color:blue;/*整个表格外边框颜色*/
}
.tableStyle tr:hover{
background:rgb(173,216,230);/*鼠标滑过一行时,动态显示的颜色*/
}
.tableStyle td,.tableStyle th{
border-left:solid 1px rgb(146,208,80);/*表格的竖线颜色*/
border-top:1px solid rgb(146,208,80);/*表格的横线颜色*/
padding:15px;/*表格内边框尺寸*/
text-align:center;/*表格内容显示位置*/
}
.tableStyle th{
padding:15px;/*表格标题栏,字体的尺寸*/
background-color:rgb(146,208,80);/*表格标题栏背景颜色*/
/*表格标题栏设置渐变颜色*/
background-image:-webkit-gradient(linear,left top,left bottom,from(#92D050) to(#A2D668));/*rgb(14,208,80)*/
}
</style>
</head>
<body>
<center><h1>测试报告</h1></center><br/>
<table class='tableStyle'>
<thead>
<tr>
<th>Search Words</th>
<th>Assert Words</th>
<th>Start Time</th>
<th>Waste Time(s)</th>
<th>Status</th>
</tr>
</thead>
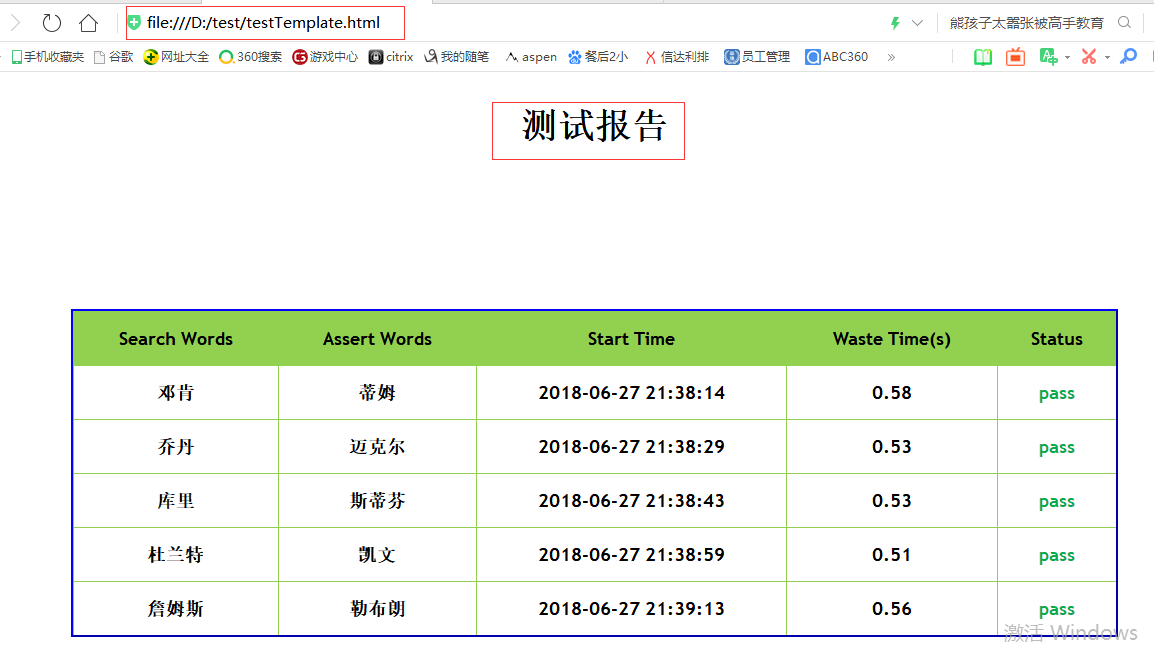
<tr>
<td>邓肯</td>
<td>蒂姆</td>
<td>2018-06-27 21:38:14</td>
<td>0.58</td>
<td style="color:#00AC4E">pass</td>
</tr><br/>
<tr>
<td>乔丹</td>
<td>迈克尔</td>
<td>2018-06-27 21:38:29</td>
<td>0.53</td>
<td style="color:#00AC4E">pass</td>
</tr><br/>
<tr>
<td>库里</td>
<td>斯蒂芬</td>
<td>2018-06-27 21:38:43</td>
<td>0.53</td>
<td style="color:#00AC4E">pass</td>
</tr><br/>
<tr>
<td>杜兰特</td>
<td>凯文</td>
<td>2018-06-27 21:38:59</td>
<td>0.51</td>
<td style="color:#00AC4E">pass</td>
</tr><br/>
<tr>
<td>詹姆斯</td>
<td>勒布朗</td>
<td>2018-06-27 21:39:13</td>
<td>0.56</td>
<td style="color:#00AC4E">pass</td>
</tr><br/>
</table>
</body>
</html>
----------------------------------------------------------------------
Ran 5 tests in 74.468s
OK
html报告:
report0627.log:
Wed,2018-06-27 21:38:18 test.py[line:110] INFO 搜索"邓肯",期望"蒂姆"通过
Wed,2018-06-27 21:38:33 test.py[line:110] INFO 搜索"乔丹",期望"迈克尔"通过
Wed,2018-06-27 21:38:47 test.py[line:110] INFO 搜索"库里",期望"斯蒂芬"通过
Wed,2018-06-27 21:39:03 test.py[line:110] INFO 搜索"杜兰特",期望"凯文"通过
Wed,2018-06-27 21:39:17 test.py[line:110] INFO 搜索"詹姆斯",期望"勒布朗"通过
python webdriver 测试框架-数据驱动json文件驱动的方式的更多相关文章
- python webdriver 测试框架-数据驱动txt文件驱动,带报告的例子
数据驱动txt文件驱动的方式,带报告 data.txt: gloryroad test||光荣之路 摔跤爸爸||阿米尔 超人||电影 data_driven_by_txt_file.py: #enco ...
- python webdriver 测试框架-数据驱动xml驱动方式
数据驱动xml驱动的方式 存数据的xml文件:TestData.xml: <?xml version="1.0" encoding="utf-8"?> ...
- python webdriver 测试框架-数据驱动excel驱动的方式
简介: 数据驱动excel驱动方式,就是数据配置在excel里面,主程序调用的时候每次用从excel里取出的数据作为参数,进行操作, 需要掌握的地方是对excel的操作,要灵活的找到目标数据 测试数据 ...
- python webdriver 测试框架-数据驱动exce驱动,不用ddt的方式
data.xlsx: 脚本: #encoding=utf-8from selenium import webdriverimport timeimport datetimefrom openpyxl ...
- python webdriver 测试框架-数据驱动DDT的例子
先在cmd环境 运行 pip install ddt 安装数据驱动ddt模块 脚本: #encoding=utf-8 from selenium import webdriver import un ...
- python webdriver 测试框架-行为驱动例子
安装行为驱动模块lettuce(卷心菜)模块 pip install lettuce Successfully installed argparse-1.4.0 colorama-0.3.9 extr ...
- python nose测试框架全面介绍七--日志相关
引: 之前使用nose框架时,一直使用--logging-config的log文件来生成日志,具体的log配置可见之前python nose测试框架全面介绍四. 但使用一段时间后,发出一个问题,生成的 ...
- python nose测试框架全面介绍十---用例的跳过
又来写nose了,这次主要介绍nose中的用例跳过应用,之前也有介绍,见python nose测试框架全面介绍四,但介绍的不详细.下面详细解析下 nose自带的SkipTest 先看看nose自带的S ...
- python nose测试框架全面介绍六--框架函数别名
之前python nose测试框架全面介绍二中介绍了nose框架的基本构成,但在实际应该中我们也会到setup_function等一系列的名字,查看管网后,我们罗列下nose框架中函数的别名 1.pa ...
随机推荐
- docker n2n安装与调试
docker n2n安装与调试 yum install -y docker docker pull pahud/n2n-docker cd / 10 mkdir data 11 cd data 12 ...
- java生成webservice方法
参考: https://note.youdao.com/ynoteshare1/index.html?id=c10324bb3b794baece3d2ae9faadc5c1&type=note
- 罗云彬win32汇编教程笔记 子函数的声明, 定义与调用
在主程序中用call指令来调用子程序. Win32汇编中的子程序也采用堆栈来传递参数,这样就可以用invoke伪指令来进行调用和语法检查工作. 一. 子程序的定义 子程序的定义方式如下所示. 子程序名 ...
- 什么是SQL注入式攻击和如何防范?
什么是SQL注入式攻击? 所谓SQL注入式攻击,就是攻击者把SQL命令插入到Web表单的输入域或页面请求的查询字符串,欺骗服务器执行恶意的SQL命令.在某些表单中,用户输入的内容直接用来构造(或者影响 ...
- hdu4028 The time of a day[map优化dp]
The time of a day Time Limit: 2000/1000 MS (Java/Others) Memory Limit: 65768/65768 K (Java/Others ...
- [SQL] SQL 修复命令
You should run the repair from the original installation media, using the following command line ...
- 【office2010】office2010安装问题的解决方案。
今天想在公司电脑上按上一个office2010,结果出现一个问题,导致研究了一下午才解决:现总结解决方案: 安装office 2010,提示需要安装MSXML版本6.10.1129.0组件.但是在网上 ...
- javaWeb中的文件上传下载
在Web应用系统开发中,文件上传和下载功能是非常常用的功能,今天来讲一下JavaWeb中的文件上传和下载功能的实现. 对于文件上传,浏览器在上传的过程中是将文件以流的形式提交到服务器端的,如果直接使用 ...
- Ext学习系列(1)初识Ext
Ext 基础页设置: <!-- 最好不要设置的文件头,避免IE的问题 --><html> <!-- 每份有效的HTML应符合标准,为此head标签不能少 -->&l ...
- python环境杂谈
最近发现集群里的服务器上有多个python环境,版本相同的python也有多个,主要区别是site-packages里安装的模块不同,这样配置的好处是不同类型的项目可以使用自己的python环境,不会 ...