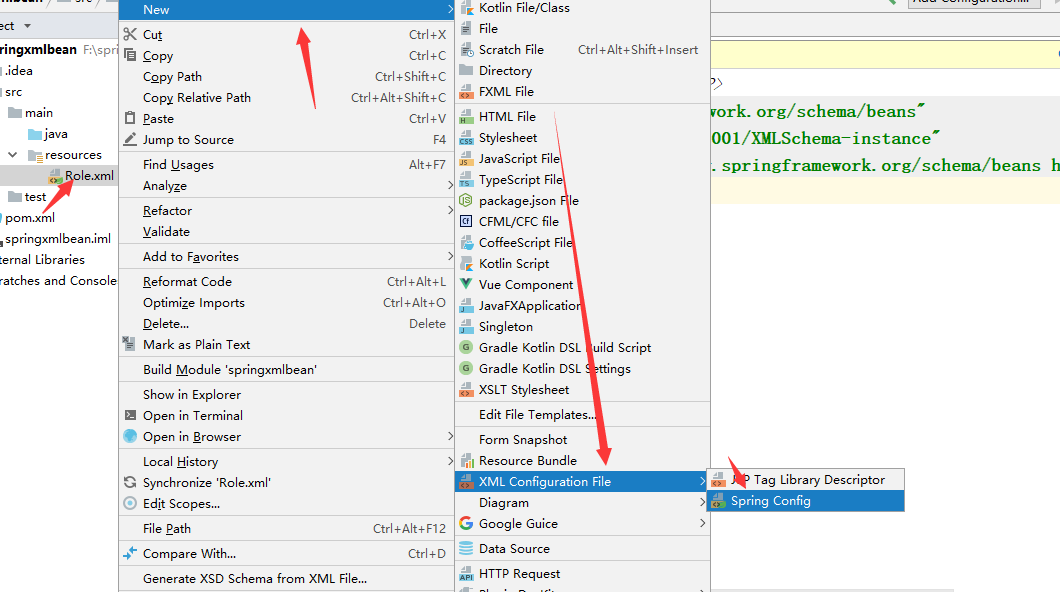
Spring 通过XML配置装配Bean
使用XML装配Bean需要定义对于的XML,需要引入对应的XML模式(XSD)文件,这些文件会定义配置Spring Bean的一些元素,简单的配置如下:
<?xml version="1.0" encoding="UTF-8"?>

<beans xmlns="http://www.springframework.org/schema/beans"

       xmlns:xsi="http://www.w3.org/2001/XMLSchema-instance"

       xsi:schemaLocation="http://www.springframework.org/schema/beans http://www.springframework.org/schema/beans/spring-beans.xsd">

</beans>
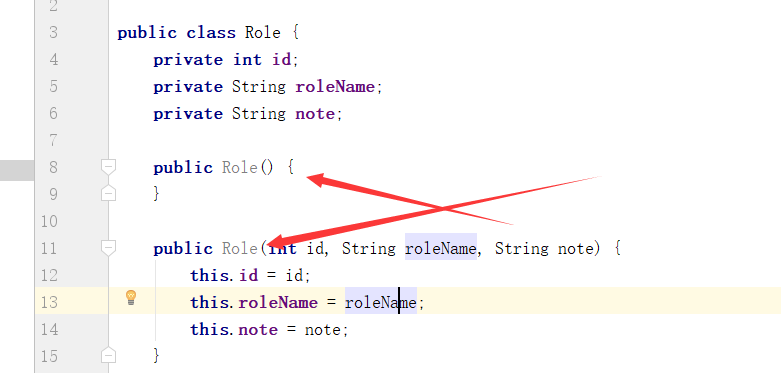
创建角色类Role
类构造器有参与无参
代码:
Role:
package com.wbg.springxmlbean.entity;

public class Role {

    private int id;

    private String roleName;

    private String note;

    @Override

    public String toString() {

        return "Role{" +

                "id=" + id +

                ", roleName='" + roleName + '\'' +

                ", note='" + note + '\'' +

                '}';

    }

    public Role() {

    }

    public Role(int id, String roleName, String note) {

        this.id = id;

        this.roleName = roleName;

        this.note = note;

    }

    public int getId() {

        return id;

    }

    public void setId(int id) {

        this.id = id;

    }

    public String getRoleName() {

        return roleName;

    }

    public void setRoleName(String roleName) {

        this.roleName = roleName;

    }

    public String getNote() {

        return note;

    }

    public void setNote(String note) {

        this.note = note;

    }

}
User:
package com.wbg.springxmlbean.entity;

public class User {

    private int id;

    private Role role;

    @Override

    public String toString() {

        return "User{" +

                "id=" + id +

                ", role=" + role +

                ", name='" + name + '\'' +

                ", age=" + age +

                '}';

    }

    public Role getRole() {

        return role;

    }

    public void setRole(Role role) {

        this.role = role;

    }

    public int getId() {

        return id;

    }

    public void setId(int id) {

        this.id = id;

    }

    public String getName() {

        return name;

    }

    public void setName(String name) {

        this.name = name;

    }

    public int getAge() {

        return age;

    }

    public void setAge(int age) {

        this.age = age;

    }

    private String name;

    private int age;

}
xml进行配置:
1、装备简易值
  <!--

    id:属性是Spring找到的这个Bean的编号,不是必须的,如果没有Spring会采用:

        "全限定名#{number}"的格式生成编号

        列如: <bean class="com.wbg.springxmlbean.entity.Role">

         Spring会生成编号为:"com.wbg.springxmlbean.entity.Role#1"

    class:是一个类的全限定名

         -->

    <bean id="role1" class="com.wbg.springxmlbean.entity.Role">

       <!-- property元素是定义类的属性,name属性定义的是属性名称 value是值

        相当于:

        Role role=new Role();

        role.setId(1);

        role.setRoleName("高级工程师");

        role.setNote("重要人员");-->

        <property name="id" value="1"/>

        <property name="roleName" value="高级工程师"/>

        <property name="note" value="重要人员"/>

    </bean>

    <bean id="rolew" class="com.wbg.springxmlbean.entity.Role">

     <!--   constructor-arg元素,index代表参数索引, value是值

         相当于:

        Role role=new Role(1,"高级工程师","重要人员");-->

       <constructor-arg index="0" value="1"/>

        <constructor-arg index="1" value="高级工程师"/>

        <constructor-arg index="2" value="重要人员"/>

    </bean>
<bean id="user" class="com.wbg.springxmlbean.entity.User">

        <property name="id" value="1"/>

        <property name="age" value="18"/>

        <property name="name" value="韦邦杠"/>

        <!--name是属性名称 ref是对应的Bean-->

        <property name="role" ref="role1"/>

    </bean>
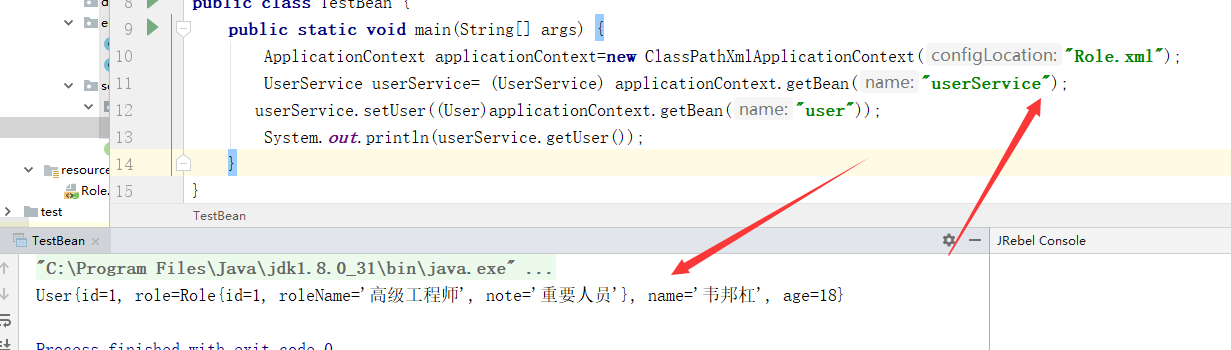
测试:
public static void main(String[] args) {

        ApplicationContext applicationContext=new ClassPathXmlApplicationContext("Role.xml");

        UserService userService= (UserService) applicationContext.getBean("userService");

       userService.setUser((User)applicationContext.getBean("user"));

        System.out.println(userService.getUser());

    }
2、装配集合
定义类:
package com.wbg.springxmlbean.entity;

import java.util.*;

public class ComplexAssembly {

    private Long id;

    private List<String> list;

    private Map<String,String> map;

    private Properties properties;

    private Set<String> set;

    private String[] array;

    @Override

    public String toString() {

        return "ComplexAssembly{" +

                "id=" + id +

                ", list=" + list +

                ", map=" + map +

                ", properties=" + properties +

                ", set=" + set +

                ", array=" + Arrays.toString(array) +

                '}';

    }

    public Long getId() {

        return id;

    }

    public void setId(Long id) {

        this.id = id;

    }

    public List<String> getList() {

        return list;

    }

    public void setList(List<String> list) {

        this.list = list;

    }

    public Map<String, String> getMap() {

        return map;

    }

    public void setMap(Map<String, String> map) {

        this.map = map;

    }

    public Properties getProperties() {

        return properties;

    }

    public void setProperties(Properties properties) {

        this.properties = properties;

    }

    public Set<String> getSet() {

        return set;

    }

    public void setSet(Set<String> set) {

        this.set = set;

    }

    public String[] getArray() {

        return array;

    }

    public void setArray(String[] array) {

        this.array = array;

    }

}
xml:
<bean id="complexAssembly" class="com.wbg.springxmlbean.entity.ComplexAssembly">

        <property name="id" value="1"/>

        <property name="list">

            <!--List属性对应list元素进行装配,然后通过多个value设值-->

            <list>

                <value>value-list-1</value>

                <value>value-list-2</value>

                <value>value-list-3</value>

                <value>value-list-4</value>

            </list>

        </property>

        <property name="map">

            <!--Map属性对应map元素进行装配,然后通过多个entry设值,只是entry包含有key和value值设值-->

            <map>

                <entry key="key1" value="value1"/>

                <entry key="key2" value="value2"/>

                <entry key="key3" value="value3"/>

                <entry key="key4" value="value4"/>

            </map>

        </property>

        <property name="properties">

            <!--Properties属性,对应props进行装配,然后通过prop元素数值,只是prop有一个必填的key,然后设值-->

            <props>

                <prop key="prop1">value-prop-1</prop>

                <prop key="prop2">value-prop-2</prop>

                <prop key="prop3">value-prop-3</prop>

                <prop key="prop4">value-prop-4</prop>

            </props>

        </property>

        <property name="set">

            <!--Set属性对应set元素进行装配,然后通过多个value设值-->

            <set>

                <value>value-set-1</value>

                <value>value-set-2</value>

                <value>value-set-3</value>

                <value>value-set-4</value>

            </set>

        </property>

        <property name="array">

            <!--Array属性对应array元素进行装配,然后通过多个value设值-->

            <array>

                <value>value-array-1</value>

                <value>value-array-2</value>

                <value>value-array-3</value>

                <value>value-array-4</value>

            </array>

        </property>

    </bean>
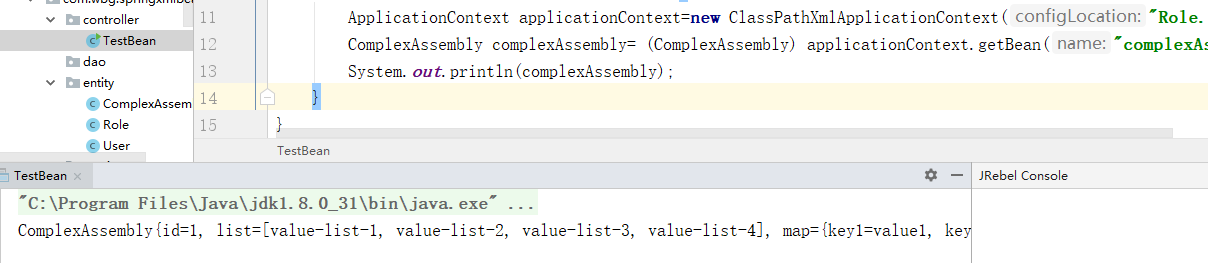
测试:
  ApplicationContext applicationContext=new ClassPathXmlApplicationContext("Role.xml");

        ComplexAssembly complexAssembly= (ComplexAssembly) applicationContext.getBean("complexAssembly");

        System.out.println(complexAssembly);
3、装配用户和角色
类:MapUserRole
package com.wbg.springxmlbean.entity;

import java.util.Map;

public class MapUserRole {

    private Map<User,Role> map;

    @Override

    public String toString() {

        return "MapUserRole{" +

                "map=" + map +

                '}';

    }

    public Map<User, Role> getMap() {

        return map;

    }

    public void setMap(Map<User, Role> map) {

        this.map = map;

    }

}
xml:
 <bean id="u2" class="com.wbg.springxmlbean.entity.User">

        <property name="id" value="1"/>

        <property name="name" value="小邦哥"/>

        <property name="age" value="20"/>

    </bean>

    <bean id="u1" class="com.wbg.springxmlbean.entity.User">

        <property name="id" value="2"/>

        <property name="name" value="邦杠"/>

        <property name="age" value="21"/>

    </bean>

    <bean id="r1" class="com.wbg.springxmlbean.entity.Role">

        <constructor-arg index="0" value="1"/>

        <constructor-arg index="1" value="中级工程师"/>

        <constructor-arg index="2" value="普通人员"/>

    </bean>

    <bean id="r2" class="com.wbg.springxmlbean.entity.Role">

        <constructor-arg index="0" value="2"/>

        <constructor-arg index="1" value="高级工程师"/>

        <constructor-arg index="2" value="重要人员"/>

    </bean>

    <bean id="mapUserRole" class="com.wbg.springxmlbean.entity.MapUserRole">

        <property name="map">

            <map>

                <entry key-ref="u1" value-ref="r1"/>

                <entry key-ref="u2" value-ref="r2"/>

            </map>

        </property>

    </bean>
测试:

demo:https://github.com/weibanggang/springXmlBean
Spring 通过XML配置装配Bean的更多相关文章
- Spring基础篇——通过Java注解和XML配置装配bean
自动化装配的确有很大的便利性,但是却并不能适用在所有的应用场景,比如需要装配的组件类不是由自己的应用程序维护,而是引用了第三方的类库,这个时候自动装配便无法实现,Spring对此也提供了相应的解决方案 ...
- Spring基础篇——通过Java注解和XML配置装配bean(转载)
作者:陈本布衣 出处:http://www.cnblogs.com/chenbenbuyi 本文版权归作者和博客园共有,欢迎转载分享,但必须保留此段声明,且在文章页面明显位置给出原文链接,否则保留 ...
- Spring实战3:装配bean的进阶知识
主要内容: Environments and profiles Conditional bean declaration 处理自动装配的歧义 bean的作用域 The Spring Expressio ...
- Spring实战2:装配bean—依赖注入的本质
主要内容 Spring的配置方法概览 自动装配bean 基于Java配置文件装配bean 控制bean的创建和销毁 任何一个成功的应用都是由多个为了实现某个业务目标而相互协作的组件构成的,这些组件必须 ...
- Spring框架(3)---IOC装配Bean(注解方式)
IOC装配Bean(注解方式) 上面一遍文章讲了通过xml来装配Bean,那么这篇来讲注解方式来讲装配Bean对象 注解方式需要在原先的基础上重新配置环境: (1)Component标签举例 1:导入 ...
- spring+mybaits xml配置解析----转
一.项目中spring+mybaits xml配置解析 一般我们会在datasource.xml中进行如下配置,但是其中每个配置项原理和用途是什么,并不是那么清楚,如果不清楚的话,在使用时候就很有可能 ...
- spring的xml配置声明以及相应的问题处理
spring的xml配置声明: xml配置声明 Code 问题处理 问题1 xml报错: cvc-elt.1: Cannot find the declaration of element 'bea ...
- spring中用xml配置构造注入的心得
spring中用xml配置构造注入时,如果 <constructor-arg> 属性都是 ref ,则不用理会参数顺序 <constructor-arg ref="kill ...
- Spring框架(2)---IOC装配Bean(xml配置方式)
IOC装配Bean (1)Spring框架Bean实例化的方式提供了三种方式实例化Bean 构造方法实例化(默认无参数,用的最多) 静态工厂实例化 实例工厂实例化 下面先写这三种方法的applicat ...
随机推荐
- Oracle查询表名超过长度限制的表
SELECT T.table_name, LENGTH(TRIM(T.table_name)) FROM user_tables t ORDER BY LENGTH(TRIM(t.table_name ...
- 获取路径path
request 的常用方法 request.getSchema() 返回当前页面使用的协议,http 或是 https; request.getServerName() 返回当前页面所在的服务器的名字 ...
- 关于sql优化整理一下
1.where 子句中可以对字段进行 null 值判断吗? 可以,比如 select id from t where num is null 这样的 sql 也是可以的.但是最好不要给数 ...
- JavaScript之parseInt()数值转换常被忽略的问题
使用parseInt()你可以从字符串中获取数值,该方法接受另一个基数参数,这经常省略,但不应该.当字符串以”0″开头的时候就有可能会出问题,例如,部分时间进入表单域,在ECMAScript 3中,开 ...
- C Primer Plus 读后感
<C Primer Plus>中文版 第六版 从网站上搜索到这本书适合初学者而且是自学者可以看的C语言书籍,于是上网买了一本. 真是物有所值,通过本书我很系统的学习了一遍C语言,书中代码很 ...
- laravel验证码
登录验证码 1.首先,进入https://github.com/mewebstudio/captcha,根据captcha上的使用方法一步步来实现验证码的安装,因为是laravel5.7,所以选择了c ...
- jquery对象与核心函数
原生js入口函数与jQuery入口函数的区别 1.window.onload与document.ready在加载时间上的差异 document.ready会先触发,其次才是window.onload ...
- Hadoop生态体系
Hadoop路线 HDFS 分布式文件系统 MapReduce 分布式编程框架 ZooKeeper 分布式协调框架 Hive 非关系型数据仓库 Flume 日志采集框架
- Postman安装及入门实践(以百度搜索为例)
一.Postman安装 可以FQ的小伙伴可以直接去官网下载:https://www.getpostman.com 如果不能,可以用我的安装包,版本找最新的:链接:https://pan.baidu.c ...
- Web前端面试指导(十一):样式导入有哪些方式?
样式导入方式 link import 使用方式 link的使用 <link href="index.css" rel="stylesheet"> i ...