go语言使用go-sciter创建桌面应用(七) view对象常用方法,文件选择,窗口弹出,请求
view对象的详细文档请看:
https://sciter.com/docs/content/sciter/View.htm
demo9.html代码如下:
<!DOCTYPE html>

<html lang="en">

<head>

    <meta charset="UTF-8">

    <title>view对象学习</title>

    <style>

        .br {

            width: 100%;

            border: 1px solid #ccc;

            margin: 10px auto;

        }

    </style>

</head>

<body>

<div class="br">

    <button id="selFile">选择文件</button>

    <span id="filePath"></span>

    <br>

    <button id="selFolder">选择目录</button>

    <span id="folderPath"></span>

    <br>

    <button id="moveFile">移动</button>

    <span id="moveRet"></span>

</div>

<div class="br">

    <button id="msgbox1">消息框</button>

    <br>

    <button id="msgbox2">信息框</button>

    <br>

    <button id="msgbox3">问题框</button>

    <br>

    <button id="msgbox4">警告框</button>

    <br>

    <button id="msgbox5">错误框</button>

</div>

<div class="br">

    <button id="dlg1">对话框</button>

</div>

<div class="br">

    <button id="win1">窗口</button>

    <br>

</div>

<div class="br">

    <button id="state1">全屏</button>

    <button id="state2">默认</button>

    <button id="state3">关闭</button>

</div>

<div class="br">

    <button id="req">请求</button>

    结果:

    <iframe id="reqRet"></iframe>

</div>

<script type="text/tiscript">

    self.ready = function() {

        var file = "";

        var folder = "";

        //选择文件

        $(#selFile).on("click", function() {

            //文件筛选项

            const filter = "Image Files (*.jpg,*.jpeg,*.gif,*.png)|*.jpg;*.jpeg;*.gif;*.png|All Files (*.*)|*.*";

            //默认后缀

            const defaultExt = "jpg";

            //初始化路径,就是文件选择窗打开时所在路径

            const initialPath = System.path(#USER_DOCUMENTS);

            //标题

            const caption = "选择图片";

            file = view.selectFile(#open, filter, defaultExt, initialPath, caption );

            $(#filePath).text = file;

            return true;

        });

        //选择文件夹

        $(#selFolder).on("click", function() {

            folder = view.selectFolder("选择你的文件夹");

            $(#folderPath).text = folder;

        });

        //移动文件

        $(#moveFile).on("click", function() {

            if(file && folder) {

                //调用go中定义的函数进行移动文件处理

                var ret = view.moveFile(file, folder);

                $(#moveRet).text = ret;

            }

        });

        //消息框

        $(#msgbox1).on("click", function() {

            view.msgbox(#alert, "我是消息框");

        });

        //信息框

        $(#msgbox2).on("click", function() {

            view.msgbox(#information, "我是信息框", "信息框");

        });

        //问题框

        $(#msgbox3).on("click", function() {

            view.msgbox(#question,

                        "请选择是或否",

                        "问题框",

                        //按钮组

                        [{id:#yes,text:"是"},{id:#no,text:"否"}],

                        //onLoad,窗口加载时调用

                        function(root) {

                        },

                        //onClose,窗口关闭时调用

                        function(root, id) {

                            //id表示你选择按钮的ID

                            if(id == "yes") {

                                view.msgbox(#alert, "你选择的yes");

                            } else {

                                view.msgbox(#alert, "你选择的no");

                            }

                        });

        });

        //警告框

        $(#msgbox4).on("click", function() {

            view.msgbox(#warning, "我是警告框");

        });

        //错误框

        $(#msgbox5).on("click", function() {

            view.msgbox(#error, "我是错误框");

        });

        //新对话框

        $(#dlg1).on("click", function() {

            var dlg = view.dialog({

                //加载到对话框中的URL,可加载本地文件

                url: self.url("simple.html"),

                //对话框的x,y坐标

                x: 50,

                y: 50,

                //窗口的宽度,高度

                width: 200,

                height: 200,

                //是否是客户区,如果为真,那么x,y,width,height作为客户区坐标,而不是窗口

                client: false,

                //对话框参数

                parameters: {"test":"test"},

                //对话框标题

                caption: "新对话框",

                //相对于屏幕窗口对齐

                alignment: 3,

            });

        });

        //新窗口

        $(#win1).on("click", function() {

            var win = view.window({

                //窗口类型

                //View.FRAME_WINDOW 框架窗口

                //View.TOOL_WINDOW 工具窗口

                //View.POPUP_WINDOW 弹出窗口

                type: View.TOOL_WINDOW,

                //加载到窗口中的URL,可加载本地文件

                url: self.url("simple.html"),

                //窗口的x,y坐标

                x: 200,

                y: 200,

                //窗口的宽度,高度

                width: 400,

                height: 400,

                //是否是客户区,如果为真,那么x,y,width,height作为客户区坐标,而不是窗口

                client: false,

                //窗口状态

                //View.WINDOW_SHOWN 显示

                //View.WINDOW_HIDDEN 隐藏

                //View.WINDOW_MINIMIZED 最小化

                //View.WINDOW_MAXIMIZED 最大化

                //View.WINDOW_FULL_SCREEN 全屏

                state: View.WINDOW_SHOWN,

                //窗口参数

                parameters: {"test":"test"},

                //窗口标题

                caption: "新窗口",

                //相对于屏幕窗口对齐

                alignment: 3,

            });

            //访问窗口中设置的参数

            stdout.println(win.parameters["test"]);

        });

        //修改当前窗口的状态

        $(#state1).on("click", function() {

            //全屏

            view.state = View.WINDOW_FULL_SCREEN;

        });

        $(#state2).on("click", function() {

            //默认

            view.state = View.WINDOW_SHOWN;

        });

        $(#state3).on("click", function() {

            //关闭

            view.close();

        });

        //view的事件响应

        //视图窗口大小发生改变时

        view.on("sizing", function(sizingParams) {

            view.dump("大小改变", sizingParams.x, sizingParams.y, sizingParams.width, sizingParams.height);

        });

        //视图窗口移动时

        view.on("moving", function(movingParams) {

            view.dump("移动改变", movingParams.x, movingParams.y, movingParams.width, movingParams.height);

        });

        //视图窗口状态改变时

        view.on("statechange", function() {

            view.dump(view.state);

        });

        //请求方法类似jquery中的ajax

        $(#req).on("click", function() {

            view.request({

                //请求类型(#get, #post, #put, #delete)

                type: #get,

                //请求url

                url: "http://www.163.com",

                //协议(#basic, #multipart, #json)

                protocol: #basic,

                params: {

                    "test": "test"

                },

                //成功回调函数

                success: function(data,status) {

                    $(#reqRet).html = data;

                },

                //失败回调函数

                error: function(err,status) {

                }

            });

        });

    };

</script>

</body>

</html>
demo9.go代码如下:
package main;

import (

	"github.com/sciter-sdk/go-sciter/window"

	"github.com/sciter-sdk/go-sciter"

	"log"

	"os"

	"strings"

	"path/filepath"

	"io/ioutil"

	"fmt"

)

func defFunc(w *window.Window) {

	//注册dump函数方便在tis脚本中打印数据

	w.DefineFunction("dump", func(args ...*sciter.Value) *sciter.Value {

		for _, v := range args {

			fmt.Print(v.String() + " ");

		}

		fmt.Println();

		return sciter.NullValue();

	});

	//处理文件移动

	w.DefineFunction("moveFile", func(args ...*sciter.Value) *sciter.Value {

		file := args[0].String();

		folder := args[1].String();

		//去掉路径左边的file://

		file = strings.TrimLeft(file, "file://");

		//获取文件名

		fileName := filepath.Base(file);

		//读取文件数据

		data, err := ioutil.ReadFile(file);

		if err != nil {

			return sciter.NewValue(err.Error());

		}

		//写入文件数据

		err = ioutil.WriteFile(filepath.Join(folder, fileName), data, os.ModePerm);

		if err == nil {

			//删除原文件

			os.Remove(file);

			return sciter.NewValue("移动成功");

		} else {

			return sciter.NewValue("移动失败");

		}

	});

}

func main() {

	w, err := window.New(sciter.DefaultWindowCreateFlag, sciter.DefaultRect);

	if err != nil {

		log.Fatal(err);

	}

	//注意这个地方,sciter较新的版默认的情况下禁用了非安全脚本功能

	//需要设置下配置,开启此功能,不然tiscript中打开文件或目录将无法使用。

	w.SetOption(sciter.SCITER_SET_SCRIPT_RUNTIME_FEATURES,

				sciter.ALLOW_FILE_IO |

				sciter.ALLOW_SOCKET_IO |

				sciter.ALLOW_SYSINFO);

	w.LoadFile("demo9.html");

	w.SetTitle("view对象学习");

	defFunc(w);

	w.Show();

	w.Run();

}
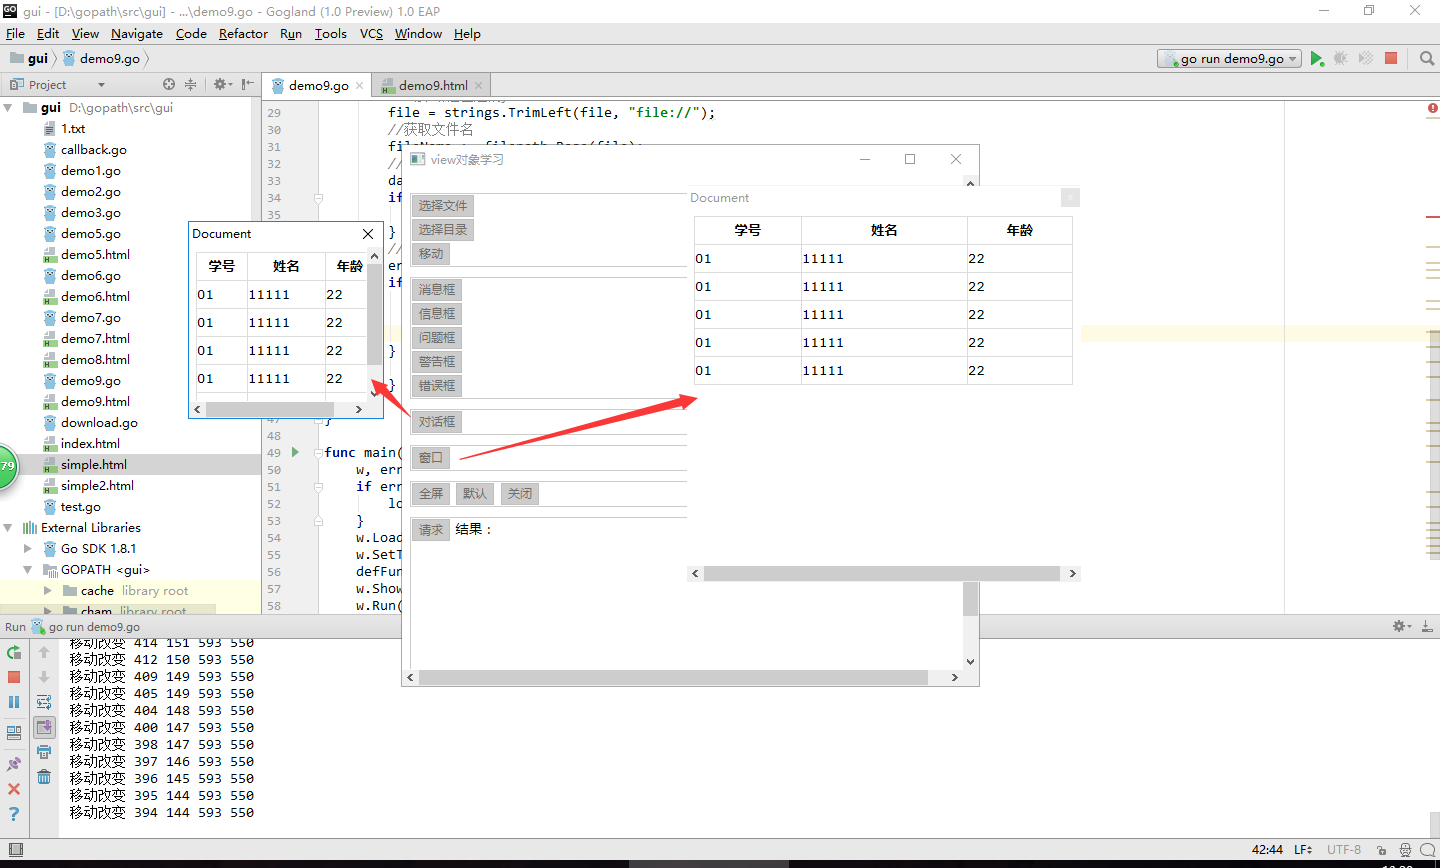
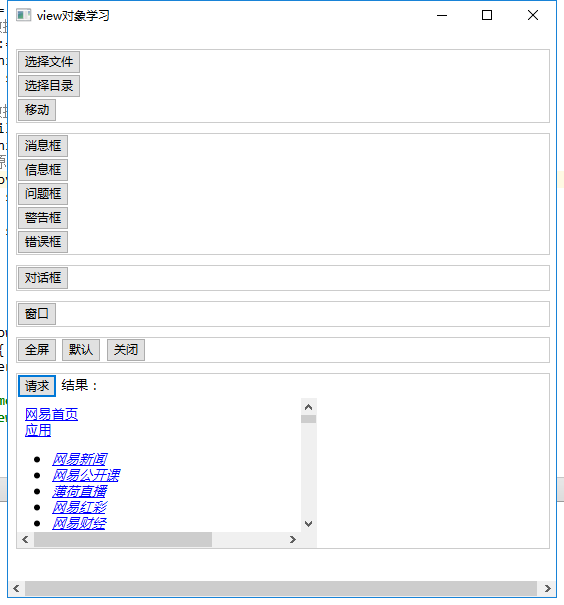
显示结果如下:


关于选择文件,选择目录,无法使用的说明。
由于sciter的更新,默认情况下已禁用非安全脚本功能。

go语言使用go-sciter创建桌面应用(七) view对象常用方法,文件选择,窗口弹出,请求的更多相关文章
- 创建一个弹出DIV窗口
创建一个弹出DIV窗口 摘自: http://www.cnblogs.com/TivonStone/archive/2012/03/20/2407919.html 创建一个弹出DIV窗口可能是现在 ...
- go语言使用go-sciter创建桌面应用(六) Element元素操作和Event事件响应
详细的文档请看下面两个链接: https://sciter.com/docs/content/sciter/Element.htm https://sciter.com/docs/content/sc ...
- go语言使用go-sciter创建桌面应用(四) 固定窗口大小
有些时候我们需要创建的应用窗口大小不可改变. demo5.go代码如下: package main; import ( "github.com/sciter-sdk/go-sciter/wi ...
- go语言使用go-sciter创建桌面应用(三) 事件处理,函数与方法定义,go与tiscript之间相互调用
sciter处理脚本tiscript,用于处理UI交互中的一些逻辑,跟js很像,但又有点区别,对前端熟悉的人应该能很快上手. tiscrip脚本文档 https://sciter.com/develo ...
- Ubuntu创建桌面快捷方式
默认情况下,ubuntu会将自动安装的软件快捷方式保存在/usr/share/applications目录下,如果我们要创建桌面快捷方式,只需要右键-复制-桌面 就Ok,如图: 上面的方法是通过系统自 ...
- Windows中创建桌面快捷方式
Windows中创建桌面快捷方式 -------------- -------------- -------------- --------------
- robot创建桌面图标(转载)
桌面ride图标,安装之后会自动创建(偶尔也会创建失败),创建桌面图标方法如下: 1. 新建快捷方式 在桌面右击鼠标,弹出的菜单选择 新建-快捷方式 ,然后在"请键入对象"的位置输 ...
- Qt之创建桌面和开始菜单快捷方式
将安装好的酷狗拷贝到C:\data目录中 1.创建桌面快捷方式 QFile::link("C:/data/KuGou.exe", QStandardPaths::writableL ...
- Swift3.0语言教程使用编码创建和初始化字符串
Swift3.0语言教程使用编码创建和初始化字符串 使用编码创建和初始化字符串 创建和初始化字符串除了可以使用上文中提到的方法外,还可以使用init(coder:)方法,此方法一般不常使用,其语法形式 ...
随机推荐
- Grafana+Zabbix使用配置
官方提供的网友分享的图形面板,可以自行选择使用下载--- https://grafana.com/dashboards Grafana 是 Graphite 和 InfluxDB 仪表盘和图形编 ...
- CrazySNS has on line - And you'll see why 1984 won't be like "1984."
On May 10th, CrazySNS has on line , And you will see why 1984 won’t be like "1984."
- 30.SSH配置文件模板和类库.md
目录 1.struts2 4.类库 1.struts2 1.<?xml version="1.0" encoding="UTF-8"?>2.< ...
- HTTP状态码汇总
- 文字在线转图片二维码的公用API接口
在线生成网址二维码的API接口: 1.百度网盘(可使用https) http://pan.baidu.com/share/qrcode?w=150&h=150&url=ht ...
- 2017面向对象程序设计(JAVA)课程总结
以下就课程结束之后的问题进行简单小结:1. 关于课程教学方法 课程在部分章节的学习中采用了翻转课堂教学,目的是促进同学们借助方便获取的线上线下学习资源进行课前自学,以便于老师留出课堂时间进 ...
- pip安装插件库
升级:python -m pip install --upgrade pip 读excel:pip install xlrd 写入excel:pip install xlwt
- FLAG_ACTIVITY_CLEAR_TASK | FLAG_ACTIVITY_NEW_TASK
[FLAG_ACTIVITY_CLEAR_TASK | FLAG_ACTIVITY_NEW_TASK] 1.FLAG_ACTIVITY_NEW_TASK 2.FLAG_ACTIVITY_CLEAR_T ...
- 搭建php渗透测试环境
php服务器下载地址 http://vdisk.weibo.com/s/D9I4jIIfNddvh 在C盘下创建一个www文件夹 安装phpstudy 下一步安装 修改配置文件 将端口改成8080 保 ...
- python 常用模块(一): random , time , sys , os模块部分知识.
1.常用模块:(1)collectiaons模块 (2)与时间相关 time模块 (3)random模块 (4)os模块 (5)sys模块 (6) 序列化模块: json , pickle 2 ...
