底部导航栏实现一 Fragment-replace
【效果】(这里下载的软件收费的试用有水印)

【推荐】这里推荐一个图标网http://iconfont.cn/。以上图标来自此图标网
【项目结构】

【步骤】
①创建布局文件,写底部导航栏
 <?xml version="1.0" encoding="utf-8"?>

 <LinearLayout xmlns:android="http://schemas.android.com/apk/res/android"

     xmlns:app="http://schemas.android.com/apk/res-auto"

     xmlns:tools="http://schemas.android.com/tools"

     android:layout_width="match_parent"

     android:layout_height="match_parent"

     tools:context=".MainActivity"

     android:orientation="vertical">

     <RelativeLayout

         android:id="@+id/rl_content"

         android:layout_width="match_parent"

         android:layout_height="0dp"

         android:layout_weight="1">

        <!--这里设置权重weight为1, 下面不设置权重。-->

         <!--意思是,剩余的位置全都是RelativeLayout的-->

     </RelativeLayout>

     <TextView

         android:layout_width="match_parent"

         android:layout_height="1dp"

         android:background="#797878"/>

     <LinearLayout

         android:layout_width="match_parent"

         android:layout_height="80dp"

         android:orientation="horizontal">

         <LinearLayout

             android:id="@+id/item1"

             android:layout_width="0dp"

             android:layout_weight="1"

             android:layout_height="match_parent"

             android:orientation="vertical">

             <ImageView

                 android:id="@+id/item1_iv"

                 android:layout_width="match_parent"

                 android:layout_height="0dp"

                 android:layout_weight="3"

                 android:layout_margin="3dp"

                 android:scaleType="fitCenter"

                 android:src="@drawable/wxb"

                 android:padding="1dp"/>

             <TextView

                 android:id="@+id/item1_tv"

                 android:text="女王"

                 android:textSize="16sp"

                 android:layout_width="match_parent"

                 android:layout_height="0dp"

                 android:layout_weight="1"

                 android:gravity="center"/>

         </LinearLayout>

         <LinearLayout

             android:id="@+id/item2"

             android:layout_width="0dp"

             android:layout_weight="1"

             android:layout_height="match_parent"

             android:orientation="vertical">

             <ImageView

                 android:id="@+id/item2_iv"

                 android:layout_width="match_parent"

                 android:layout_height="0dp"

                 android:layout_weight="3"

                 android:layout_margin="3dp"

                 android:scaleType="fitCenter"

                 android:src="@drawable/meizhuang"

                 android:padding="4dp"/>

             <TextView

                 android:id="@+id/item2_tv"

                 android:text="美妆"

                 android:textSize="16sp"

                 android:layout_width="match_parent"

                 android:layout_height="0dp"

                 android:layout_weight="1"

                 android:gravity="center"/>

         </LinearLayout>

         <LinearLayout

             android:id="@+id/item3"

             android:layout_width="0dp"

             android:layout_weight="1"

             android:layout_height="match_parent"

             android:orientation="vertical">

             <ImageView

                 android:id="@+id/item3_iv"

                 android:layout_width="match_parent"

                 android:layout_height="0dp"

                 android:layout_weight="3"

                 android:layout_margin="3dp"

                 android:scaleType="fitCenter"

                 android:src="@drawable/fuzhuang"

                 android:padding="5dp"/>

             <TextView

                 android:id="@+id/item3_tv"

                 android:text="衣帽"

                 android:textSize="16sp"

                 android:layout_width="match_parent"

                 android:layout_height="0dp"

                 android:layout_weight="1"

                 android:gravity="center" />

         </LinearLayout>

         <LinearLayout

             android:id="@+id/item4"

             android:layout_width="0dp"

             android:layout_weight="1"

             android:layout_height="match_parent"

             android:orientation="vertical">

             <ImageView

                 android:id="@+id/item4_iv"

                 android:layout_width="match_parent"

                 android:layout_height="0dp"

                 android:layout_weight="3"

                 android:layout_margin="3dp"

                 android:scaleType="fitCenter"

                 android:src="@drawable/xiebaopeishi"

                 android:padding="3dp"/>

             <TextView

                 android:id="@+id/item4_tv"

                 android:text="鞋包"

                 android:textSize="16sp"

                 android:layout_width="match_parent"

                 android:layout_height="0dp"

                 android:layout_weight="1"

                 android:gravity="center" />

         </LinearLayout>

     </LinearLayout>

 </LinearLayout>
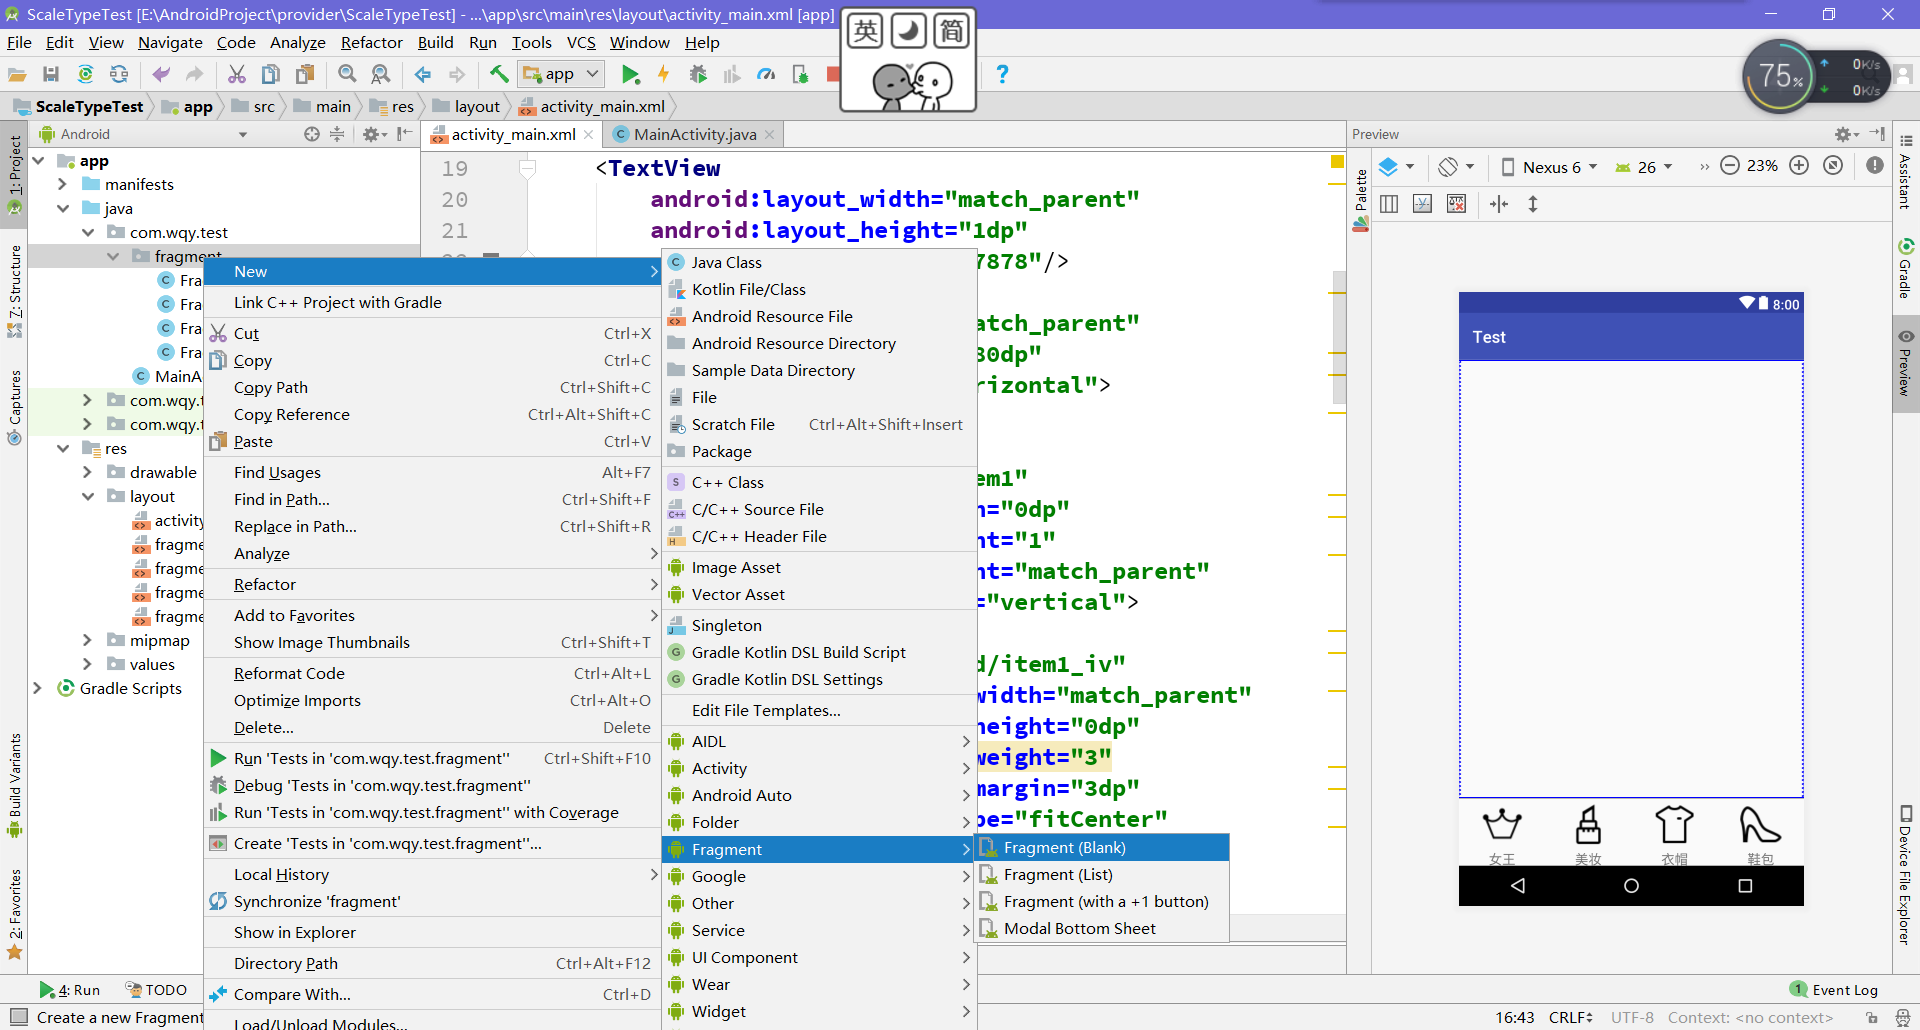
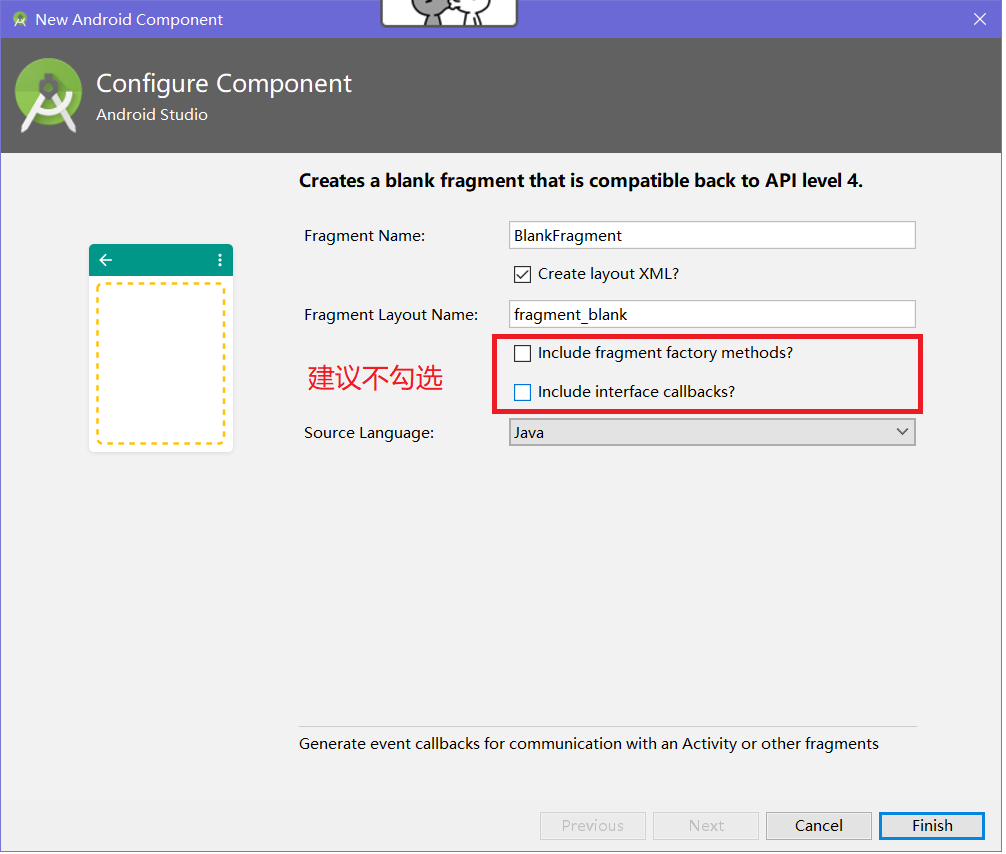
②定义Fragment
【提示】可以通过下图方式创建
 public class FragmentA extends Fragment {

     public FragmentA() {

         // Required empty public constructor

     }

     @Override

     public View onCreateView(LayoutInflater inflater, ViewGroup container,

                              Bundle savedInstanceState) {

         // Inflate the layout for this fragment

         return inflater.inflate(R.layout.fragment_a, container, false);

     }

 }
对于生成的Fragment不用作修改,对应的布局中设置一个背景颜色便于观察。
③MainActivity代码的编写
 public class MainActivity extends AppCompatActivity implements View.OnClickListener{

     private FragmentManager fragmentManager;

     private RelativeLayout rl_content;

     private ImageView item1_iv,item2_iv,item3_iv,item4_iv;

     private TextView item1_tv,item2_tv,item3_tv,item4_tv;

     private LinearLayout item1,item2,item3,item4;

     private ImageView[] ivs;

     private TextView[] tvs;

     @Override

     protected void onCreate(Bundle savedInstanceState) {

         super.onCreate(savedInstanceState);

         setContentView(R.layout.activity_main);

         initView();

         fragmentManager = getSupportFragmentManager();

         initListener();

     }

     private void initListener() {

         item1.setOnClickListener(this);

         item2.setOnClickListener(this);

         item3.setOnClickListener(this);

         item4.setOnClickListener(this);

     }

     private void initView() {

         rl_content = (RelativeLayout) findViewById(R.id.rl_content);

         item1_iv = (ImageView) findViewById(R.id.item1_iv);

         item1_tv = (TextView) findViewById(R.id.item1_tv);

         item1 = (LinearLayout) findViewById(R.id.item1);

         item2_iv = (ImageView) findViewById(R.id.item2_iv);

         item2_tv = (TextView) findViewById(R.id.item2_tv);

         item2 = (LinearLayout) findViewById(R.id.item2);

         item3_iv = (ImageView) findViewById(R.id.item3_iv);

         item3_tv = (TextView) findViewById(R.id.item3_tv);

         item3 = (LinearLayout) findViewById(R.id.item3);

         item4_iv = (ImageView) findViewById(R.id.item4_iv);

         item4_tv = (TextView) findViewById(R.id.item4_tv);

         item4 = (LinearLayout) findViewById(R.id.item4);

         ivs = new ImageView[]{item1_iv,item2_iv,item3_iv,item4_iv};

         tvs = new TextView[]{item1_tv,item2_tv,item3_tv,item4_tv};

     }

     @Override

     public void onClick(View view) {

         switch (view.getId()){

             case R.id.item1: {

                 FragmentTransaction transaction = fragmentManager.beginTransaction();//创建一个事务

                 transaction.replace(R.id.rl_content,new FragmentA());

                 transaction.commit();//事务一定要提交,replace才会有效

                 setCheck(0);//自定义方法

                 break;

             }

             case R.id.item2: {

                 FragmentTransaction transaction = fragmentManager.beginTransaction();

                 transaction.replace(R.id.rl_content,new FragmentB());

                 transaction.commit();

                 setCheck(1);

                 break;

             }

             case R.id.item3: {

                 FragmentTransaction transaction = fragmentManager.beginTransaction();

                 transaction.replace(R.id.rl_content,new FragmentC());

                 transaction.commit();

                 setCheck(2);

                 break;

             }

             case R.id.item4: {

                 FragmentTransaction transaction = fragmentManager.beginTransaction();

                 transaction.replace(R.id.rl_content,new FragmentD());

                 transaction.commit();

                 setCheck(3);

                 break;

             }

             default:break;

         }

     }

     public void setCheck(int itemId){

         //这个方法设置底部导航栏选中时的效果

         for (int i = 0; i < 4; i++) {

             ivs[i].setColorFilter(Color.parseColor("#0f0f0f"));

             tvs[i].setTextColor(Color.parseColor("#0f0f0f"));

         }

         ivs[itemId].setColorFilter(Color.GREEN);

         tvs[itemId].setTextColor(Color.GREEN);

     }

 }
【提示】①这里的点击事件是通过Activity实现Onclick接口的方式
②getSupportFragmentManager()是v4包中的,兼容效果好,如果用getFragmentManager()可能会崩掉
③FragmentManager只需要获取一次,但是事务FragmentTransaction要重新开启。最后事务一定要提交commit。
④方法setCheck是为了设置导航的被选中效果。
底部导航栏实现一 Fragment-replace的更多相关文章
- AndroidStudio制作底部导航栏以及用Fragment实现切换功能
前言 大家好,给大家带来AndroidStudio制作底部导航栏以及用Fragment实现切换功能的概述,希望你们喜欢 学习目标 AndroidStudio制作底部导航栏以及用Fragment实现切换 ...
- TextView+Fragment实现底部导航栏
前言:项目第二版刚上线没多久,产品又对需求进行了大改动,以前用的是左滑菜单,现在又要换成底部导航栏,于是今天又苦逼加班了.花了几个小时实现了一个底部导航栏的demo,然后总结一下.写一篇博客.供自己以 ...
- 二、Fragment+RadioButton实现底部导航栏
在App中经常看到这样的tab底部导航栏 那么这种效果是如何实现,实现的方式有很多种,最常见的就是使用Fragment+RadioButton去实现.下面我们来写一个例子 首先我们先在activi ...
- Android学习笔记- Fragment实例 底部导航栏的实现
1.要实现的效果图以及工程目录结构: 先看看效果图吧: 接着看看我们的工程的目录结构: 2.实现流程: Step 1:写下底部选项的一些资源文件 我们从图上可以看到,我们底部的每一项点击的时候都有不同 ...
- [置顶]
xamarin android Fragment实现底部导航栏
前段时间写了篇关于Fragment的文章,介绍了基础的概念,用静态和动态的方式加载Fragment Xamarin Android Fragment的两种加载方式.下面的这个例子介绍xamarin ...
- Android商城开发系列(三)——使用Fragment+RadioButton实现商城底部导航栏
在商城第一篇的开篇当中,我们看到商城的效果图里面有一个底部导航栏效果,如下图所示: 今天我们就来实现商城底部导航栏,最终效果图如下所示: 那么这种效果是如何实现,实现的方式有很多种,最常见的就是使 ...
- Android_ViewPager+Fragment实现页面滑动和底部导航栏
1.Xml中底部导航栏由一个RadioGroup组成,其上是ViewPager. <?xml version="1.0" encoding="utf-8" ...
- Android底部导航栏——FrameLayout + RadioGroup
原创文章,转载请注明出处http://www.cnblogs.com/baipengzhan/p/6285881.html Android底部导航栏有多种实现方式,本文详细介绍FrameLayout ...
- Android 底部导航栏实现一 Fragment-replace
[效果](这里下载的软件收费的试用有水印) [推荐]这里推荐一个图标网http://iconfont.cn/.以上图标来自此图标网 [项目结构] [步骤] ①创建布局文件,写底部导航栏 <?xm ...
随机推荐
- python入门(5)使用文件编辑器编写代码并保存执行
python入门(5)使用文件编辑器编写代码并保存执行 两款文本编辑器: 一个是Sublime Text,免费使用,但是不付费会弹出提示框: 一个是Notepad++,免费使用,有中文界面: 请注意, ...
- python实现 多叉树 寻找最短路径
完全原创,能力有限,欢迎参考,未经允许,请勿转载 ! 完全原创,能力有限,欢迎参考,未经允许,请勿转载 ! 完全原创,能力有限,欢迎参考,未经允许,请勿转载 ! 完全原创,能力有限,欢迎参考,未经允许 ...
- python/零起点(一、字典)
python/零起点(一.字典) dict( )字典 dict()强型转换成字典类型的数据类型: 字典的键(Key)必须是唯一不可变的 字典是无序,字典可变数据类型,且是可迭代的对象 字典清空操作案例 ...
- jq中的表单验证插件------jquery.validate
今天我们来说一下表单验证,有人说我们在进行表单验证的时候使用正则来验证是非常麻烦的,现在我来给大家介绍一下表单验证的插件:jquery.validate.min.js 它是与jquery一起结合用来使 ...
- javascript数组去重的3种方法
前言:这是笔者学习之后自己的理解与整理.如果有错误或者疑问的地方,请大家指正,我会持续更新! javascript数组去重 <!DOCTYPE html> <html> < ...
- .Net Core 通过依赖注入和动态加载程序集实现宿程序和接口实现类库完全解构
网上很多.Net Core依赖注入的例子代码,例如再宿主程序中要这样写: services.AddTransient<Interface1, Class1>(); 其中Interface1 ...
- 使用YOLOv2进行图像检测
基本配置信息 tensorflow (1.4.0) tensorflow-tensorboard (0.4.0) Keras (2.1.5) Python (3.6.0) Anaconda 4.3.1 ...
- C#之转换两个不同类型但是成员相同的对象
/// <summary> /// 转换两个不同类型但是成员相同的对象 /// </summary> /// <typeparam name="T"& ...
- [LeetCode] Toeplitz Matrix 托普利兹矩阵
A matrix is Toeplitz if every diagonal from top-left to bottom-right has the same element. Now given ...
- MySQL的安全机制
MySQL的安全机制: 1.MySQL登录 mysql -u账户 -p密码 -h127.0.0.1 -P端口 数据库名 mysql -h hostname|hostIP -p port -u user ...