Linux集群部署自定义时间同步服务器(ntpd)
Linux集群部署自定义时间同步服务器(ntpd)
作者:尹正杰
版权声明:原创作品,谢绝转载!否则将追究法律责任。
身为一名运维人员,在搭建集群的时候,第一步需要做的就是同步每个机器的时间,尤其是在部署类似VPN这种服务,你不同步时间是会遇到坑的,我之前在部署openVPN是就遇到过类似的问题,我们通常对时间同步的方式:找一个机器(当然这个服务器可以是局域网的也可以是广域网的哟),作为时间服务器,所有的机器与这台集群时间进行定时的同步,比如,每隔十分钟,同步一次时间。
一.安装ntp软件
1>.操作平台
[yinzhengjie@node101 ~]$ free -m

              total        used        free      shared  buff/cache   available

Mem:

Swap:

[yinzhengjie@node101 ~]$

[yinzhengjie@node101 ~]$ uname -r

3.10.-.el7.x86_64

[yinzhengjie@node101 ~]$

[yinzhengjie@node101 ~]$ uname -m

x86_64

[yinzhengjie@node101 ~]$

[yinzhengjie@node101 ~]$ hostname -i

172.30.1.101

[yinzhengjie@node101 ~]$

[yinzhengjie@node101 ~]$ cat /etc/hosts | grep yinzhengjie

172.30.1.101 node101.yinzhengjie.org.cn

172.30.1.102 node102.yinzhengjie.org.cn

172.30.1.103 node103.yinzhengjie.org.cn

[yinzhengjie@node101 ~]$
2>.检查ntp软件是否安装
[yinzhengjie@s101 ~]$ rpm -qa | grep ntp #如果没有内容输出,则说明没有按照ntp服务
3>.使用root权限安装ntp软件
[yinzhengjie@s101 ~]$ sudo yum -y install ntp

[sudo] password for yinzhengjie:

Loaded plugins: fastestmirror

base                                                                                                                                                            | 3.6 kB  ::

extras                                                                                                                                                          | 3.4 kB  ::

updates                                                                                                                                                         | 3.4 kB  ::

(/): extras//x86_64/primary_db                                                                                                                               |  kB  ::

(/): updates//x86_64/primary_db                                                                                                                              | 5.2 MB  ::

Loading mirror speeds from cached hostfile

 * base: mirrors.aliyun.com

 * extras: mirrors.aliyun.com

 * updates: ftp.sjtu.edu.cn

Resolving Dependencies

--> Running transaction check

---> Package ntp.x86_64 :4.2.6p5-.el7.centos will be installed

--> Processing Dependency: ntpdate = 4.2.6p5-.el7.centos for package: ntp-4.2.6p5-.el7.centos.x86_64

--> Processing Dependency: libcrypto.so.(OPENSSL_1.0.2)(64bit) for package: ntp-4.2.6p5-.el7.centos.x86_64

--> Processing Dependency: libopts.so.()(64bit) for package: ntp-4.2.6p5-.el7.centos.x86_64

--> Running transaction check

---> Package autogen-libopts.x86_64 :5.18-.el7 will be installed

---> Package ntpdate.x86_64 :4.2.6p5-.el7.centos will be installed

---> Package openssl-libs.x86_64 :1.0.1e-.el7. will be updated

--> Processing Dependency: openssl-libs(x86-) = :1.0.1e-.el7. for package: :openssl-1.0.1e-.el7..x86_64

---> Package openssl-libs.x86_64 :1.0.2k-.el7 will be an update

--> Running transaction check

---> Package openssl.x86_64 :1.0.1e-.el7. will be updated

---> Package openssl.x86_64 :1.0.2k-.el7 will be an update

--> Finished Dependency Resolution

Dependencies Resolved

=======================================================================================================================================================================================

 Package                                        Arch                                  Version                                                Repository                           Size

=======================================================================================================================================================================================

Installing:

 ntp                                            x86_64                                4.2.6p5-.el7.centos                                  base                                 k

Installing for dependencies:

 autogen-libopts                                x86_64                                5.18-.el7                                             base                                  k

 ntpdate                                        x86_64                                4.2.6p5-.el7.centos                                  base                                  k

Updating for dependencies:

 openssl                                        x86_64                                :1.0.2k-.el7                                        base                                 k

 openssl-libs                                   x86_64                                :1.0.2k-.el7                                        base                                1.2 M

Transaction Summary

=======================================================================================================================================================================================

Install   Package  (+ Dependent packages)

Upgrade             (  Dependent packages)

Total download size: 2.4 M

Downloading packages:

Delta RPMs disabled because /usr/bin/applydeltarpm not installed.

(/): ntpdate-4.2.6p5-.el7.centos.x86_64.rpm                                                                                                                 |   kB  ::

(/): autogen-libopts-5.18-.el7.x86_64.rpm                                                                                                                    |   kB  ::

(/): openssl-1.0.2k-.el7.x86_64.rpm                                                                                                                         |  kB  ::

(/): ntp-4.2.6p5-.el7.centos.x86_64.rpm                                                                                                                     |  kB  ::

(/): openssl-libs-1.0.2k-.el7.x86_64.rpm                                                                                                                    | 1.2 MB  ::

---------------------------------------------------------------------------------------------------------------------------------------------------------------------------------------

Total                                                                                                                                                  1.6 MB/s | 2.4 MB  ::

Running transaction check

Running transaction test

Transaction test succeeded

Running transaction

  Updating   : :openssl-libs-1.0.2k-.el7.x86_64                                                                                                                                 /

  Installing : ntpdate-4.2.6p5-.el7.centos.x86_64                                                                                                                                /

  Installing : autogen-libopts-5.18-.el7.x86_64                                                                                                                                   /

  Installing : ntp-4.2.6p5-.el7.centos.x86_64                                                                                                                                    /

  Updating   : :openssl-1.0.2k-.el7.x86_64                                                                                                                                      /

  Cleanup    : :openssl-1.0.1e-.el7..x86_64                                                                                                                                    /

  Cleanup    : :openssl-libs-1.0.1e-.el7..x86_64                                                                                                                               /

  Verifying  : ntpdate-4.2.6p5-.el7.centos.x86_64                                                                                                                                /

  Verifying  : ntp-4.2.6p5-.el7.centos.x86_64                                                                                                                                    /

  Verifying  : autogen-libopts-5.18-.el7.x86_64                                                                                                                                   /

  Verifying  : :openssl-1.0.2k-.el7.x86_64                                                                                                                                      /

  Verifying  : :openssl-libs-1.0.2k-.el7.x86_64                                                                                                                                 /

  Verifying  : :openssl-libs-1.0.1e-.el7..x86_64                                                                                                                               /

  Verifying  : :openssl-1.0.1e-.el7..x86_64                                                                                                                                    /

Installed:

  ntp.x86_64 :4.2.6p5-.el7.centos

Dependency Installed:

  autogen-libopts.x86_64 :5.18-.el7                                                      ntpdate.x86_64 :4.2.6p5-.el7.centos

Dependency Updated:

  openssl.x86_64 :1.0.2k-.el7                                                          openssl-libs.x86_64 :1.0.2k-.el7

Complete!

[yinzhengjie@s101 ~]$
[yinzhengjie@s101 ~]$ sudo yum -y install ntp
4>.检查是否安装成功
[yinzhengjie@s101 ~]$ rpm -qa | grep ntp      #有内容输出,则说明安装成功,安装完毕会有以下出输出内容

ntpdate-4.2.6p5-.el7.centos.x86_64

ntp-4.2.6p5-.el7.centos.x86_64

[yinzhengjie@s101 ~]$
[yinzhengjie@s101 ~]$ rpm -qa | grep ntp #有内容输出,则说明安装成功,安装完毕会有以下出输出内容
二.集群中时间服务器配置(需要root权限)
1>.设置本地网络上的主机不受限制
[yinzhengjie@node101 ~]$ grep \#restrict  /etc/ntp.conf                             #查看修改前的内容

#restrict 192.168.1.0 mask 255.255.255.0 nomodify notrap

[yinzhengjie@node101 ~]$

[yinzhengjie@node101 ~]$ sudo sed -i 's@\#restrict@restrict@' /etc/ntp.conf                 #编辑配置文件,将注释去掉,表示启用授权功能

[sudo] password for yinzhengjie:

[yinzhengjie@node101 ~]$

[yinzhengjie@node101 ~]$ grep 192.168.1.0 /etc/ntp.conf                             #查看修改后的内容

restrict 192.168.1.0 mask 255.255.255.0 nomodify notrap

[yinzhengjie@node101 ~]$

[yinzhengjie@node101 ~]$ su root

Password:

[root@node101 yinzhengjie]#

[root@node101 yinzhengjie]# sed -i 's#192.168.1.0#172.30.1.0#' /etc/ntp.conf                #授权只有172.30.1.0网段的服务器可以来同步时间,其实我发现不修改咱能也能通过ntpdate来进行时间同步.

[root@node101 yinzhengjie]#
2>.注释默认的时间服务器(设置为不采用公共的服务器)
[yinzhengjie@s101 ~]$ grep ^server  /etc/ntp.conf                   #查看官方默认的时间服务器

server .centos.pool.ntp.org iburst

server .centos.pool.ntp.org iburst

server .centos.pool.ntp.org iburst

server .centos.pool.ntp.org iburst

[yinzhengjie@s101 ~]$

[yinzhengjie@s101 ~]$ sudo sed -i 's@^server@#server@' /etc/ntp.conf       #编辑配置文件,将官方的配置注释掉

[sudo] password for yinzhengjie:

[yinzhengjie@s101 ~]$

[yinzhengjie@s101 ~]$ grep ^#server  /etc/ntp.conf                  #再次查看,检验是否修改成功

#server .centos.pool.ntp.org iburst

#server .centos.pool.ntp.org iburst

#server .centos.pool.ntp.org iburst

#server .centos.pool.ntp.org iburst

[yinzhengjie@s101 ~]$
3>.设置自定义时间服务器(添加默认的一个内部时钟数据,使用它为局域网用户提供服务)
[yinzhengjie@s101 ~]$ su root

Password:

[root@s101 yinzhengjie]# echo "#Add by yinzhengjie" >> /etc/ntp.conf

[root@s101 yinzhengjie]# echo "server 127.127.1.0" >> /etc/ntp.conf                 #将本地时间作为时间同步源

[root@s101 yinzhengjie]# echo "fudge 127.127.1.0 stratum 10" >> /etc/ntp.conf           #指定间隔更新时间,我这里指定的是10分钟。stratum(层级)的值不能太大,如果要向上级NTP更新可以设成2.

[root@s101 yinzhengjie]#

[root@s101 yinzhengjie]# tail -  /etc/ntp.conf

#Add by yinzhengjie

server 127.127.1.0

fudge 127.127.1.0 stratum

[root@s101 yinzhengjie]#

[root@s101 yinzhengjie]# exit

exit

[yinzhengjie@s101 ~]$
4>.修改/etc/sysconfig/ntpd 文件
[yinzhengjie@s101 ~]$ su root

Password:

[root@s101 yinzhengjie]# cat /etc/sysconfig/ntpd

# Command line options for ntpd

OPTIONS="-g"

[root@s101 yinzhengjie]# echo SYNC_HWCLOCK=yes >> /etc/sysconfig/ntpd    #让硬件时间和系统时间一起同步

[root@s101 yinzhengjie]#

[root@s101 yinzhengjie]# cat /etc/sysconfig/ntpd

# Command line options for ntpd

OPTIONS="-g"

SYNC_HWCLOCK=yes

[root@s101 yinzhengjie]# exit

exit

[yinzhengjie@s101 ~]$
5>.启动ntpd
[root@node101 yinzhengjie]# systemctl start ntpd                        #启动ntp服务

[root@node101 yinzhengjie]#

[root@node101 yinzhengjie]# systemctl enable ntpd                    #设置开机自启

Created symlink from /etc/systemd/system/multi-user.target.wants/ntpd.service to /usr/lib/systemd/system/ntpd.service.

[root@node101 yinzhengjie]#

[root@node101 yinzhengjie]# systemctl status ntpd

● ntpd.service - Network Time Service

   Loaded: loaded (/usr/lib/systemd/system/ntpd.service; enabled; vendor preset: disabled)

   Active: active (running) since Mon -- :: CST; 9min ago

 Main PID:  (ntpd)

   CGroup: /system.slice/ntpd.service

           └─ /usr/sbin/ntpd -u ntp:ntp -g

Oct  :: node101.yinzhengjie.org.cn ntpd[]: ntp_io: estimated max descriptors: , initial socket boundary:

Oct  :: node101.yinzhengjie.org.cn ntpd[]: Listen and drop on  v4wildcard 0.0.0.0 UDP

Oct  :: node101.yinzhengjie.org.cn ntpd[]: Listen and drop on  v6wildcard :: UDP

Oct  :: node101.yinzhengjie.org.cn ntpd[]: Listen normally on  lo 127.0.0.1 UDP

Oct  :: node101.yinzhengjie.org.cn ntpd[]: Listen normally on  ens33 172.30.1.101 UDP

Oct  :: node101.yinzhengjie.org.cn ntpd[]: Listening on routing socket on fd # for interface updates

Oct  :: node101.yinzhengjie.org.cn ntpd[]: 0.0.0.0 c016  restart

Oct  :: node101.yinzhengjie.org.cn ntpd[]: 0.0.0.0 c012  freq_set kernel 0.000 PPM

Oct  :: node101.yinzhengjie.org.cn ntpd[]: 0.0.0.0 c011  freq_not_set

Oct  :: node101.yinzhengjie.org.cn ntpd[]: 0.0.0.0 c614  freq_mode

[root@node101 yinzhengjie]#
[root@node101 yinzhengjie]# systemctl start ntpd #启动ntp服务
三.集群中其它节点(ntpd客户端)配置(安装后需要启动ntpd)
1>.安装ntp服务
[yinzhengjie@s102 ~]$ sudo yum -y install ntp

We trust you have received the usual lecture from the local System

Administrator. It usually boils down to these three things:

    #) Respect the privacy of others.

    #) Think before you type.

    #) With great power comes great responsibility.

[sudo] password for yinzhengjie:

Loaded plugins: fastestmirror

base                                                                                                                                                            | 3.6 kB  ::

extras                                                                                                                                                          | 3.4 kB  ::

updates                                                                                                                                                         | 3.4 kB  ::

(/): extras//x86_64/primary_db                                                                                                                               |  kB  ::

(/): updates//x86_64/primary_db                                                                                                                              | 5.2 MB  ::

Loading mirror speeds from cached hostfile

 * base: mirrors.aliyun.com

 * extras: mirrors.aliyun.com

 * updates: ftp.sjtu.edu.cn

Resolving Dependencies

--> Running transaction check

---> Package ntp.x86_64 :4.2.6p5-.el7.centos will be installed

--> Processing Dependency: ntpdate = 4.2.6p5-.el7.centos for package: ntp-4.2.6p5-.el7.centos.x86_64

--> Processing Dependency: libcrypto.so.(OPENSSL_1.0.2)(64bit) for package: ntp-4.2.6p5-.el7.centos.x86_64

--> Processing Dependency: libopts.so.()(64bit) for package: ntp-4.2.6p5-.el7.centos.x86_64

--> Running transaction check

---> Package autogen-libopts.x86_64 :5.18-.el7 will be installed

---> Package ntpdate.x86_64 :4.2.6p5-.el7.centos will be installed

---> Package openssl-libs.x86_64 :1.0.1e-.el7. will be updated

--> Processing Dependency: openssl-libs(x86-) = :1.0.1e-.el7. for package: :openssl-1.0.1e-.el7..x86_64

---> Package openssl-libs.x86_64 :1.0.2k-.el7 will be an update

--> Running transaction check

---> Package openssl.x86_64 :1.0.1e-.el7. will be updated

---> Package openssl.x86_64 :1.0.2k-.el7 will be an update

--> Finished Dependency Resolution

Dependencies Resolved

=======================================================================================================================================================================================

 Package                                        Arch                                  Version                                                Repository                           Size

=======================================================================================================================================================================================

Installing:

 ntp                                            x86_64                                4.2.6p5-.el7.centos                                  base                                 k

Installing for dependencies:

 autogen-libopts                                x86_64                                5.18-.el7                                             base                                  k

 ntpdate                                        x86_64                                4.2.6p5-.el7.centos                                  base                                  k

Updating for dependencies:

 openssl                                        x86_64                                :1.0.2k-.el7                                        base                                 k

 openssl-libs                                   x86_64                                :1.0.2k-.el7                                        base                                1.2 M

Transaction Summary

=======================================================================================================================================================================================

Install   Package  (+ Dependent packages)

Upgrade             (  Dependent packages)

Total download size: 2.4 M

Downloading packages:

Delta RPMs disabled because /usr/bin/applydeltarpm not installed.

(/): autogen-libopts-5.18-.el7.x86_64.rpm                                                                                                                    |   kB  ::

(/): ntpdate-4.2.6p5-.el7.centos.x86_64.rpm                                                                                                                 |   kB  ::

(/): openssl-1.0.2k-.el7.x86_64.rpm                                                                                                                         |  kB  ::

(/): ntp-4.2.6p5-.el7.centos.x86_64.rpm                                                                                                                     |  kB  ::

(/): openssl-libs-1.0.2k-.el7.x86_64.rpm                                                                                                                    | 1.2 MB  ::

---------------------------------------------------------------------------------------------------------------------------------------------------------------------------------------

Total                                                                                                                                                  1.0 MB/s | 2.4 MB  ::

Running transaction check

Running transaction test

Transaction test succeeded

Running transaction

  Updating   : :openssl-libs-1.0.2k-.el7.x86_64                                                                                                                                 /

  Installing : ntpdate-4.2.6p5-.el7.centos.x86_64                                                                                                                                /

  Installing : autogen-libopts-5.18-.el7.x86_64                                                                                                                                   /

  Installing : ntp-4.2.6p5-.el7.centos.x86_64                                                                                                                                    /

  Updating   : :openssl-1.0.2k-.el7.x86_64                                                                                                                                      /

  Cleanup    : :openssl-1.0.1e-.el7..x86_64                                                                                                                                    /

  Cleanup    : :openssl-libs-1.0.1e-.el7..x86_64                                                                                                                               /

  Verifying  : ntpdate-4.2.6p5-.el7.centos.x86_64                                                                                                                                /

  Verifying  : ntp-4.2.6p5-.el7.centos.x86_64                                                                                                                                    /

  Verifying  : autogen-libopts-5.18-.el7.x86_64                                                                                                                                   /

  Verifying  : :openssl-1.0.2k-.el7.x86_64                                                                                                                                      /

  Verifying  : :openssl-libs-1.0.2k-.el7.x86_64                                                                                                                                 /

  Verifying  : :openssl-libs-1.0.1e-.el7..x86_64                                                                                                                               /

  Verifying  : :openssl-1.0.1e-.el7..x86_64                                                                                                                                    /

Installed:

  ntp.x86_64 :4.2.6p5-.el7.centos

Dependency Installed:

  autogen-libopts.x86_64 :5.18-.el7                                                      ntpdate.x86_64 :4.2.6p5-.el7.centos

Dependency Updated:

  openssl.x86_64 :1.0.2k-.el7                                                          openssl-libs.x86_64 :1.0.2k-.el7

Complete!

[yinzhengjie@s102 ~]$
[yinzhengjie@s102 ~]$ sudo yum -y install ntp
2>.编写时间同步脚本(在其他机器配置1分钟与时间服务器同步一次)
[yinzhengjie@s102 ~]$ sudo crontab -e            #编辑同步脚本

We trust you have received the usual lecture from the local System

Administrator. It usually boils down to these three things:

    #) Respect the privacy of others.

    #) Think before you type.

    #) With great power comes great responsibility.

[sudo] password for yinzhengjie:

no crontab for root - using an empty one

crontab: installing new crontab

[yinzhengjie@s102 ~]$ sudo crontab -l            #查看已经编辑的周期执行任务

*/ * * * * /usr/sbin/ntpdate s101                #注意,在crontab中的命令必须得写绝对路径,否则会抛异常说命令找不到哟!

[yinzhengjie@s102 ~]$
3>.其它节点配置重复以上操作
注意需要使用root 权限,如果你没有root权限,如果你在公司没有root权限的话,可以请求运维帮你提供相关命令的sudo权限哟,其它机器的配置只需要安装ntp服务和编写周期性任务脚本即可。我上面就配置了一个节点,其它节点我也做了类似的调整。
四.验证各节点是否与时间服务器同步
1>.编写管理集群的"xcall.sh"脚本
以下脚本的执行需要配置无秘钥登录,关于如何配置无秘钥登录可以参考我之前的笔记:https://www.cnblogs.com/yinzhengjie/p/9065191.html。
[yinzhengjie@s101 ~]$ more `which xcall.sh`

#!/bin/bash

#@author :yinzhengjie

#blog:http://www.cnblogs.com/yinzhengjie

#EMAIL:y1053419035@qq.com

#判断用户是否传参

if [ $# -lt  ];then

        echo "请输入参数"

        exit

fi

#获取用户输入的命令

cmd=$@

for (( i=;i<=;i++ ))

do

        #使终端变绿色

        tput setaf

        echo ============= s$i $cmd ============

        #使终端变回原来的颜色,即白灰色

        tput setaf

        #远程执行命令

        ssh s$i $cmd

        #判断命令是否执行成功

        if [ $? ==  ];then

                echo "命令执行成功"

        fi

done

[yinzhengjie@s101 ~]$
[yinzhengjie@s101 ~]$ more `which xcall.sh`
2>.检查各个节点配置
[yinzhengjie@s101 ~]$ sudo xcall.sh crontab -l

sudo: timestamp too far in the future: Aug  ::

We trust you have received the usual lecture from the local System

Administrator. It usually boils down to these three things:

    #) Respect the privacy of others.

    #) Think before you type.

    #) With great power comes great responsibility.

[sudo] password for yinzhengjie:

[root@s101 yinzhengjie]# xcall.sh crontab -l

============= s101 crontab -l ============

no crontab for root

============= s102 crontab -l ============

*/ * * * * /usr/sbin/ntpdate s101

命令执行成功

============= s103 crontab -l ============

*/ * * * * /usr/sbin/ntpdate s101

命令执行成功

============= s104 crontab -l ============

*/ * * * * /usr/sbin/ntpdate s101

命令执行成功

============= s105 crontab -l ============

*/ * * * * /usr/sbin/ntpdate s101

命令执行成功

[root@s101 yinzhengjie]#

[root@s101 yinzhengjie]# exit

exit

[yinzhengjie@s101 ~]$

[yinzhengjie@s101 ~]$
[yinzhengjie@s101 ~]$ sudo xcall.sh crontab -l
3>.检查集群当前服务器时间
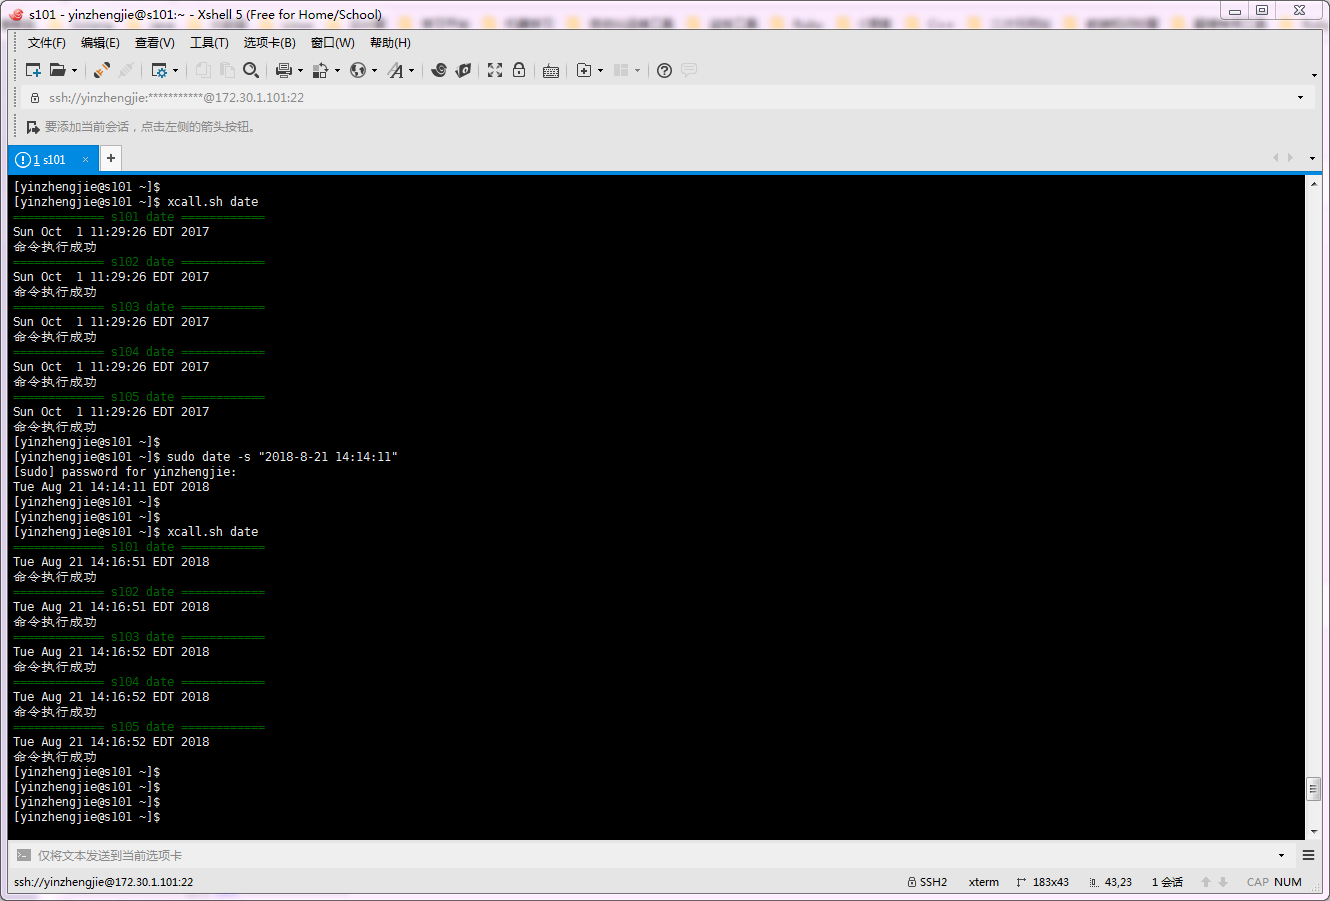
[yinzhengjie@s101 ~]$ xcall.sh date

============= s101 date ============

Sun Oct   :: EDT

命令执行成功

============= s102 date ============

Sun Oct   :: EDT

命令执行成功

============= s103 date ============

Sun Oct   :: EDT

命令执行成功

============= s104 date ============

Sun Oct   :: EDT

命令执行成功

============= s105 date ============

Sun Oct   :: EDT

命令执行成功

[yinzhengjie@s101 ~]$
[yinzhengjie@s101 ~]$ xcall.sh date
4>.修改服务器时间,并查看其它节点是否跟随时间服务器的修改而修改
[yinzhengjie@s101 ~]$ sudo date -s "2018-8-21 14:14:11"

[sudo] password for yinzhengjie:

Tue Aug  :: EDT

[yinzhengjie@s101 ~]$

[yinzhengjie@s101 ~]$

[yinzhengjie@s101 ~]$ xcall.sh date

============= s101 date ============

Tue Aug  :: EDT

命令执行成功

============= s102 date ============

Tue Aug  :: EDT

命令执行成功

============= s103 date ============

Tue Aug  :: EDT

命令执行成功

============= s104 date ============

Tue Aug  :: EDT

命令执行成功

============= s105 date ============

Tue Aug  :: EDT

命令执行成功

[yinzhengjie@s101 ~]$
[yinzhengjie@s101 ~]$ sudo date -s "2018-8-21 14:14:11"
五.将系统时间和服务器硬件时间同步
[root@node101.yinzhengjie.org.cn ~]#

[root@node101.yinzhengjie.org.cn ~]# hwclock                             #注意,这是查看硬件时间

Mon  Jun  :: PM CST  -0.694751 seconds

[root@node101.yinzhengjie.org.cn ~]#

[root@node101.yinzhengjie.org.cn ~]#

[root@node101.yinzhengjie.org.cn ~]# date                               #查看系统时间

Mon Jun  :: CST

[root@node101.yinzhengjie.org.cn ~]#

[root@node101.yinzhengjie.org.cn ~]#

[root@node101.yinzhengjie.org.cn ~]# date -s "2019-06-10 14:44:00"               #我们修改了系统时间

Mon Jun  :: CST

[root@node101.yinzhengjie.org.cn ~]#

[root@node101.yinzhengjie.org.cn ~]#

[root@node101.yinzhengjie.org.cn ~]# date                             #系统时间的确是发生了修改

Mon Jun  :: CST

[root@node101.yinzhengjie.org.cn ~]#

[root@node101.yinzhengjie.org.cn ~]#

[root@node101.yinzhengjie.org.cn ~]# hwclock                            #硬件时间却没有跟着变化

Mon  Jun  :: PM CST  -0.803342 seconds

[root@node101.yinzhengjie.org.cn ~]#

[root@node101.yinzhengjie.org.cn ~]#

[root@node101.yinzhengjie.org.cn ~]# date

Mon Jun  :: CST

[root@node101.yinzhengjie.org.cn ~]#

[root@node101.yinzhengjie.org.cn ~]# hwclock -w                        #于是我们把系统时间和硬件时间进行同步

[root@node101.yinzhengjie.org.cn ~]#

[root@node101.yinzhengjie.org.cn ~]# hwclock                           #再次查看硬件时间

Mon  Jun  :: PM CST  -0.600744 seconds

[root@node101.yinzhengjie.org.cn ~]#

[root@node101.yinzhengjie.org.cn ~]# date

Mon Jun  :: CST

[root@node101.yinzhengjie.org.cn ~]#
Linux集群部署自定义时间同步服务器(ntpd)的更多相关文章
- Linux集群配置ntp时间同步服务
集群中时间不同步有可能会让大数据的应用程序运行混乱,造成不可预知的问题,比如Hbase,当时间差别过大时就会挂掉,所以在大数据集群中,ntp服务,应该作为一种基础的服务,以下在演示在CentOS 7. ...
- Linux集群环境下NTP服务器时间同步
NTP介绍 NTP(Network Time Protocol,网络时间协议)是用来使网络中的各个计算机时间同步的一种协议.它的用途是把计算机的时钟同步到世界协调时UTC(Universal Time ...
- Fastdfs集群部署以及基本操作
FastDFS引言 本地存储与分布式文件系统 本地存储的缺点: 是否有备份? 没有 成本角度? 贵 服务器 :用于计算 ---- cpu/内存 用于存储 ---- 硬盘大 存储瓶颈? 容量有限 ...
- 大数据项目之_15_帮助文档_NTP 配置时间服务器+Linux 集群服务群起脚本+CentOS6.8 升级到 python 到 2.7
一.NTP 配置时间服务器1.1.检查当前系统时区1.2.同步时间1.3.检查软件包1.4.修改 ntp 配置文件1.5.重启 ntp 服务1.6.设置定时同步任务二.Linux 集群服务群起脚本2. ...
- Linux集群配置离线ntp时间同步服务
集群中时间不同步有可能会让大数据的应用程序运行混乱,造成不可预知的问题,比如Hbase.mongodb副本集等,Hbase当时间差别过大时就会挂掉,mongodb如果副本时间过快,会出现时间栈帧溢出提 ...
- HP DL160 Gen9服务器集群部署文档
HP DL160 Gen9服务器集群部署文档 硬件配置=======================================================Server Memo ...
- Linux之FineBI集群部署
在企业应用中,通常单个计算机的配置是有限的,而企业应用又是高并发的需求,这个时候会通过计算机集群的方式来提高并发数,从而提高整体应用服务的性能.集群是将多台计算机作为一个整体来提供相关应用的服务.Fi ...
- Linux 集群概念 , wsgi , Nginx负载均衡实验 , 部署CRM(Django+uwsgi+nginx), 部署学城项目(vue+uwsgi+nginx)
Linux 集群概念 , wsgi , Nginx负载均衡实验 , 部署CRM(Django+uwsgi+nginx), 部署学城项目(vue+uwsgi+nginx) 一丶集群和Nginx反向代理 ...
- linux运维、架构之路-Kubernetes离线集群部署-无坑
一.部署环境介绍 1.服务器规划 系统 IP地址 主机名 CPU 内存 CentOS 7.5 192.168.56.11 k8s-node1 2C 2G CentOS 7.5 192.168.56 ...
随机推荐
- 网络:OSPF理解
OSPF(开放最短路径优先)协议使用Dijkstra算法,常见的版本有:OSPFv2.OSPFv3等.以下主要介绍OSPFv2,OSPFv3是面向IPv6的且不兼容IPv4. 1.工作过程: 1)每台 ...
- Leetcode 279. 完全平方数
题目描述: https://leetcode-cn.com/problems/perfect-squares/ 解题思路: 同样是dp,一开始的想法是,对于每个数i做拆分为j和(i-j),利用动态转移 ...
- atcoder A - Frog 1(DP)
A - Frog 1 Time Limit: 2 sec / Memory Limit: 1024 MB Score : 100100 points Problem Statement There a ...
- HDU 2029 Palindromes _easy version
http://acm.hdu.edu.cn/showproblem.php?pid=2029 Problem Description “回文串”是一个正读和反读都一样的字符串,比如“level”或者“ ...
- Jenkins Git Changelog Plugin
https://wiki.jenkins.io/display/JENKINS/Git+Changelog+Plugin
- centos7 服务操作命令
systemctl list-unit-files --type service --all 操作防火墙: https://www.jianshu.com/p/411274f96492 操作VNC: ...
- [转帖]什么是安全散列算法SHA256?
什么是安全散列算法SHA256? http://8btc.com/article-136-1.html 发布者: 无主之地 发表于: 2013-10-1 01:31 78152 2 分享 安全散列 ...
- 【工具技巧】:sublime notepad++ 多行编辑
1. 多行编辑 sublime 最简单的多行编辑实现方法 1. 鼠标选中文件 然后按 ctrl+D 自动选中相同的进行同时编辑 2.选中shift按键+鼠标右键进行选择,可以同时选中多行进行编辑. n ...
- Smarty 变量修饰器
为了更方便的实现 功能与显示分离,通常会用 smarty 将功能代码中的数据 assign 到页面中,在页面中合理使用 smarty 的修饰方法,会使页面显示更美观! 一个数据可同时使用多个修饰函数, ...
- Metaspace 之一:Metaspace整体介绍(永久代被替换原因、元空间特点、元空间内存查看分析方法)
回顾 根据JVM内存区域的划分,简单的画了下方的这个示意图.区域主要分为两大块,一块是堆区(Heap),我们所New出的对象都会在堆区进行分配,在C语言中的malloc所分配的方法就是从Heap区获取 ...