Android的Fragment中的互相通信-桥梁activity
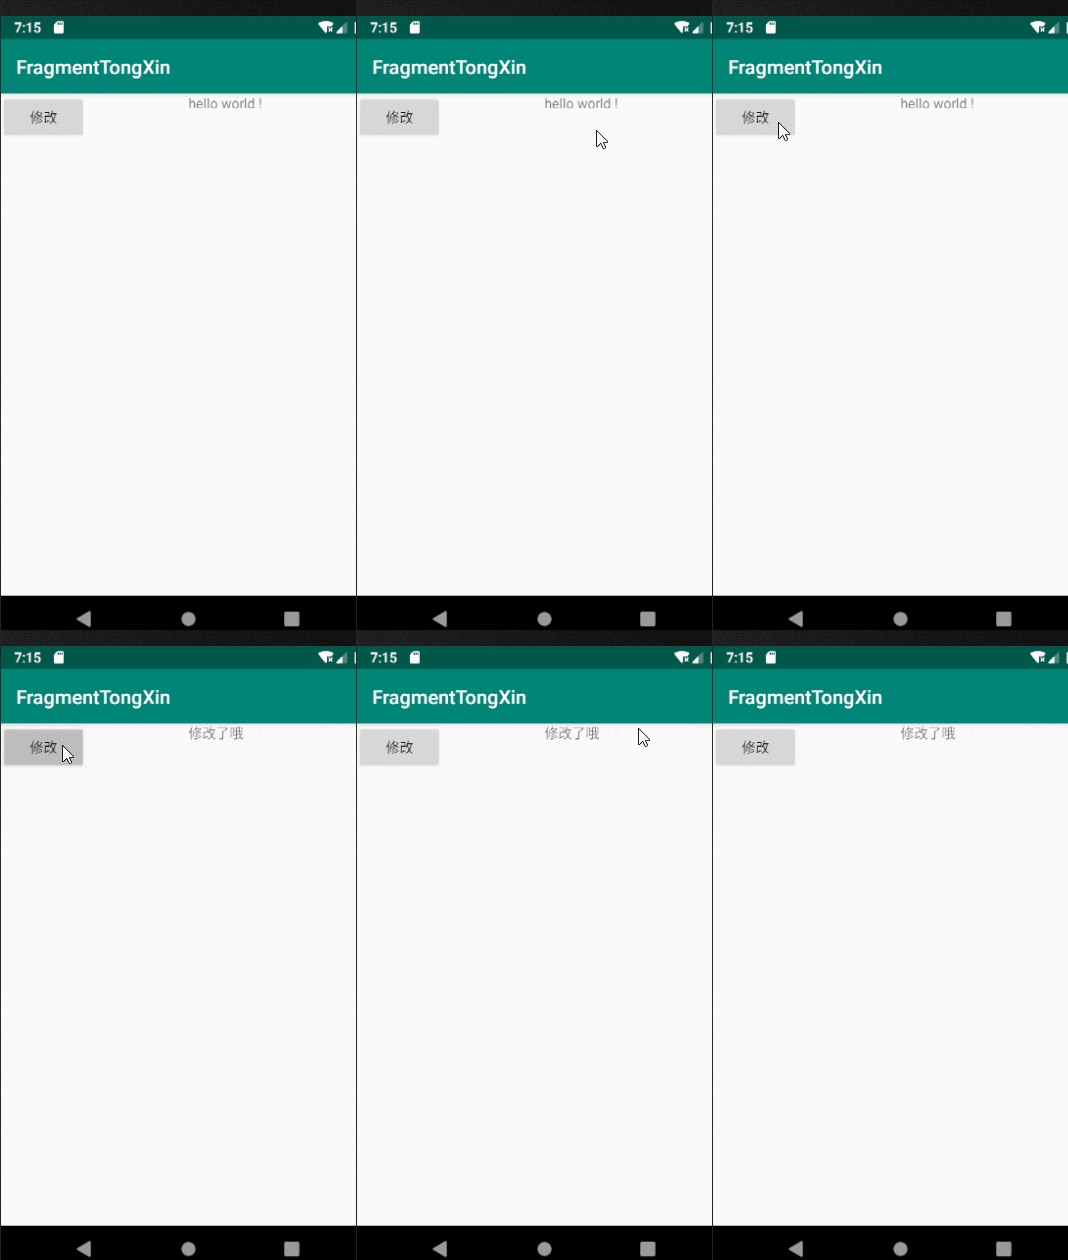
效果图如下:

项目结构图如下:

Fragment1:
package com.demo.fragmenttongxin;import android.app.Activity;import android.app.Fragment;import android.os.Bundle;import android.view.LayoutInflater;import android.view.View;import android.view.ViewGroup;import android.widget.Button;public class Fragment1 extends Fragment {@Overridepublic View onCreateView(LayoutInflater inflater, ViewGroup container, Bundle savedInstanceState) {final View view = inflater.inflate(R.layout.fragment1, null);//找到按钮Button updBtn = view.findViewById(R.id.btn_update);updBtn.setOnClickListener(new View.OnClickListener() {@Overridepublic void onClick(View v) {Fragment2 fragment2 = (Fragment2) getActivity().getFragmentManager().findFragmentByTag("f2");//修改2fragment2.updateText("修改了哦");}});return view;}}
Fragment2:
package com.demo.fragmenttongxin;import android.app.Fragment;import android.os.Bundle;import android.view.LayoutInflater;import android.view.View;import android.view.ViewGroup;import android.widget.TextView;public class Fragment2 extends Fragment {TextView tv_content;@Overridepublic View onCreateView(LayoutInflater inflater,ViewGroup container, Bundle savedInstanceState) {View view = inflater.inflate(R.layout.fragment2, null);//找到tvtv_content = view.findViewById(R.id.tv_content);return view;}//修改textView的内容public void updateText(String content){tv_content.setText(content);}}
MainActivity:
package com.demo.fragmenttongxin;import android.app.FragmentManager;import android.app.FragmentTransaction;import android.support.v7.app.AppCompatActivity;import android.os.Bundle;public class MainActivity extends AppCompatActivity {@Overrideprotected void onCreate(Bundle savedInstanceState) {super.onCreate(savedInstanceState);setContentView(R.layout.activity_main);//获取fragment管理者FragmentManager fragmentManager = getFragmentManager();//2.开启一个事务FragmentTransaction beginTransaction = fragmentManager.beginTransaction();beginTransaction.replace(R.id.ll1,new Fragment1(),"f1");beginTransaction.replace(R.id.ll2,new Fragment2(),"f2");//3.开启事务beginTransaction.commit();}}
activity_main.xml:
<?xml version="1.0" encoding="utf-8"?><LinearLayout xmlns:android="http://schemas.android.com/apk/res/android"xmlns:tools="http://schemas.android.com/tools"android:layout_width="match_parent"android:layout_height="match_parent"android:orientation="horizontal"tools:context=".MainActivity"><LinearLayoutandroid:id="@+id/ll1"android:layout_width="0dp"android:layout_weight="1"android:layout_height="match_parent"></LinearLayout><LinearLayoutandroid:id="@+id/ll2"android:layout_width="0dp"android:layout_weight="1"android:layout_height="match_parent"></LinearLayout></LinearLayout>
fragment1.xml:
<?xml version="1.0" encoding="utf-8"?><LinearLayout xmlns:android="http://schemas.android.com/apk/res/android"android:layout_width="match_parent"android:layout_height="match_parent"android:orientation="vertical"><Buttonandroid:id="@+id/btn_update"android:layout_width="wrap_content"android:layout_height="wrap_content"android:text="修改"/></LinearLayout>
fragment2.xml:
<?xml version="1.0" encoding="utf-8"?><LinearLayout xmlns:android="http://schemas.android.com/apk/res/android"android:layout_width="match_parent"android:layout_height="match_parent"><TextViewandroid:id="@+id/tv_content"android:layout_width="wrap_content"android:layout_height="wrap_content"android:text="hello world !"/></LinearLayout>
Android的Fragment中的互相通信-桥梁activity的更多相关文章
- android,在fragment中使用listview,不使用listfragment
public class LeftFragment extends Fragment{ private ListView listView; @Override public View onCreat ...
- Android 在Fragment中执行onActivityResult不被调用的简单解决方法
在Android开发中,我们经常会用到FragmentActivity下嵌套多个Fragment,但是在开发过程中会发现在嵌套的Fragment中使用onActivityResult回调方法没有被执行 ...
- Android 在 Fragment 中使用 getActivity() NullPointException 的思考和解决办法
问题: 使用 AS 在 Fragment 中调用 getActivity() 方法的时候会出现可能为空指针的提醒 使用 monkey 多次十万次测试,会出现 getActivity() NullPoi ...
- Android的Fragment中onActivityResult不被调用的解决方案
常见的,我们会在FragmentActivity中嵌套一层Fragment使用,甚至两次或多层Fragment嵌套使用.这个时候,在第二级或者更深级别的Fragment调用startActivityF ...
- Android的Fragment中onActivityResult不被调用
1.检查该Fragment所属的Activity中,是否重写了onActivityResult方法. 2.检查Fragment中的startActivityForResult的调用方式. 请确保不要使 ...
- Android 在fragment中实现返回键单击提醒 双击退出
尝试用mvp架构加dagger2来重写了一下,大致功能都实现了,还没有全部完成. 项目地址 接近完成的时候,想在天气信息页面实现一个很常见的功能,也就是点击屏幕下方的返回键的时候不是返回到上一个act ...
- Android 在Fragment中修改Activity中的控件
在当前的Fragment中调用getActivity方法获取依附着的那个Activity,然后再用获取到的Activity去findViewById拿到你需要的控件对其操作就行了.
- Fragment中启动一个新的Activity
最近遇到一个小问题,就是我在主界面中用的是Fragment,其中四个Fragment,然后打算在其中一个里边,写一个TextView(准确地说是Linearout)的单击事件,然后跳转到另外一个Act ...
- android开发—Fragment中onCreateView()和onActivityCreated()的区别
在编写Fragment时,在onCreateView()方法中启动了一个初始化自定义View的方法 initView(),但是调试时就崩溃,打印日志发现是这里出了问题,就将这个方法放到了onActiv ...
随机推荐
- C#删除文件夹以及删除文件
public static void DelectDir(string srcPath) { try { DirectoryInfo dir = new DirectoryInfo(srcPath); ...
- mybatis中查询使用#{}和${}的区别
${}中的变量什么值,就会简单的替代变量,不会做处理 比如delete * from tb_label where name=${labelname} 如果labelname的值是 something ...
- map与forEach区别
1. forEach()返回的是undefined 不可以链式调用 return没有用 2. map()返回一个新数组 原数组不会改 3. 没办法终止或者跳过forEach()和map循环 除非抛 ...
- PHP开发——变量
变量的概念 l 变量是临时存储数据的容器: l 变量是存储内存当中: l 我们现实中有很多数据:姓名.性别.年龄.学历等: l 在计算机中,用变量来代替一个一个的数据: l 我们可以把计算机 ...
- py2和py3的区别总结
1.编码 python2默认编码方式ASCII码(不能识别中文,要在文件头部加上 #-*- encoding:utf-8 -*- 指定编码方式) python3默认编码方式unicode(可识别中 ...
- 《JAVA程序设计》第四周总结
第四周作业总结 学习内容: 1.根据教材视频学习第五章:子类和继承 2.调试代码和解决问题 3.上周错题 4.代码托管 知识总结 子类:在类的声明中,通过使用关键字extends来定义一个类的子类. ...
- vscode快捷键的中文版
自己整理了一份vscode快捷键的中文版本
- leveldb 学习记录(一) skiplist
leveldb LevelDb是一个持久化存储的KV系统,并非完全将数据放置于内存中,部分数据也会存储到磁盘上. 想了解这个由谷歌大神编写的经典项目. 可以从数据结构以及数据结构的处理下手,也可以从示 ...
- 第二阶段第二次spring会议
昨天我对39个组发表了建议以及总结了改进意见和改进方案. 今天我对便签加上了清空回收站功能 private void 清空回收站ToolStripMenuItem_Click(object sende ...
- Java集合:HashSet的源码分析
Java集合---HashSet的源码分析 一. HashSet概述: HashSet实现Set接口,由哈希表(实际上是一个HashMap实例)支持.它不保证set 的迭代顺序:特别是它不保证该 ...
