lamp分离部署
lamp分离部署
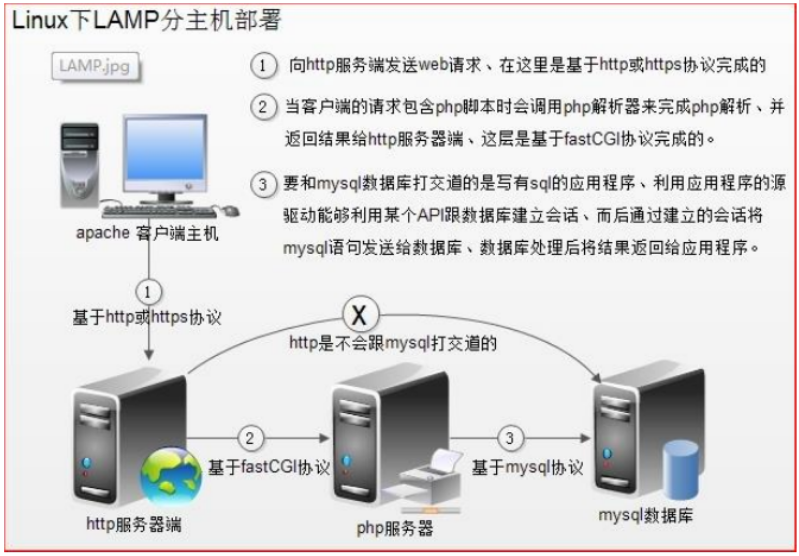
很多人在搭建的时候都是使用的一台机器来部署LAMP环境,但是我们在实际的工作中一般都是分离部署的。也就是说apache、mysql、php都在单独的一台服务器伤,分离部署自己跑自己的服务,提高效率!
环境说明
| 系统 | 服务 | IP地址 |
|---|---|---|
| centos7 | Apache | 192.168.32.125 |
| centos7 | Mysql | 192.168.32.130 |
| centos7 | PHP | 192.168.32.135 |
三台服务器均已关闭防火墙和selinux
1. 安装httpd
//配置YUM源

[root@node-1 ~]# curl -o /etc/yum.repos.d/CentOS-Base.repo https://mirrors.aliyun.com/repo/Centos-7.repo

[root@node-1 ~]# sed -i -e '/mirrors.cloud.aliyuncs.com/d' -e '/mirrors.aliyuncs.com/d' /etc/yum.repos.d/CentOS-Base.repo

[root@node-1 ~]# sed -i 's/\$releasever/7/g' /etc/yum.repos.d/CentOS-Base.repo

[root@node-1 ~]# yum -y install epel-release wget vim

//安装开发工具包

[root@node-1 ~]# yum groups mark install 'Development Tools'

//[root@node-1 ~]# useradd -r -M -s /sbin/nologin apache

[root@node-1 ~]# id apache

uid=998(apache) gid=996(apache) groups=996(apache)

//安装依赖包

[root@node-1 ~]# yum -y install openssl-devel pcre-devel expat-devel libtool gcc gcc-c++

//下载和安装apr以及apr-util

[root@node-1 ~]# wget http://mirror.bit.edu.cn/apache/apr/apr-1.7.0.tar.gz

[root@node-1 ~]# wget http://mirror.bit.edu.cn/apache/apr/apr-util-1.6.1.tar.gz

[root@node-1 ~]# ls

anaconda-ks.cfg  apr-1.7.0.tar.gz  apr-util-1.6.1.tar.gz

[root@node-1 ~]# tar xf apr-1.7.0.tar.gz

[root@node-1 ~]# tar xf apr-util-1.6.1.tar.gz

[root@node-1 ~]# cd apr-1.7.0

[root@node-1 apr-1.7.0]# ./configure --prefix=/usr/local/apr

......

[root@node-1 apr-1.7.0]# make && make install

......

[root@node-1 apr-1.7.0]# cd ../apr-util-1.6.1

[root@node-1 apr-util-1.6.1]# ./configure --prefix=/usr/local/apr-util --with-apr=/usr/local/apr

......

[root@node-1 apr-util-1.6.1]# make && make install

......

//编译安装httpd

[root@node-1 ~]# cd

[root@node-1 ~]# wget http://mirror.bit.edu.cn/apache/httpd/httpd-2.4.43.tar.gz

[root@node-1 ~]# tar xf httpd-2.4.43.tar.gz

[root@node-1 ~]# ls

anaconda-ks.cfg  apr-1.7.0  apr-1.7.0.tar.gz  apr-util-1.6.1  apr-util-1.6.1.tar.gz  httpd-2.4.43  httpd-2.4.43.tar.gz

[root@node-1 ~]# cd httpd-2.4.43

[root@node-1 httpd-2.4.43]# ./configure --prefix=/usr/local/apache \

--sysconfdir=/etc/httpd24 \

--enable-so \

--enable-ssl \

--enable-cgi \

--enable-rewrite \

--with-zlib \

--with-pcre \

--with-apr=/usr/local/apr \

--with-apr-util=/usr/local/apr-util/ \

--enable-modules=most \

--enable-mpms-shared=all \

--with-mpm=prefork

[root@node-1 httpd-2.4.43]# make && make install

......

//安装后配置

[root@node-1 httpd-2.4.43]# echo 'export PATH=/usr/local/apache/bin:$PATH' > /etc/profile.d/httpd.sh

[root@node-1 httpd-2.4.43]# source /etc/profile.d/httpd.sh

[root@node-1 httpd-2.4.43]# ln -s /usr/local/apache/include/ /usr/include/httpd

[root@node-1 httpd-2.4.43]# echo 'MANPATH /usr/local/apache/man' >> /etc/man_db.conf

//取消ServerName前面的注释

[root@node-1 httpd-2.4.43]# sed -i '/#ServerName/s/#//g' /etc/httpd24/httpd.conf

//启动apache

[root@node-1 httpd-2.4.43]# apachectl start

[root@node-1 httpd-2.4.43]# ss -tanl

State       Recv-Q Send-Q                              Local Address:Port                                             Peer Address:Port

LISTEN      0      100                                     127.0.0.1:25                                                          *:*

LISTEN      0      128                                             *:22                                                          *:*

LISTEN      0      100                                         [::1]:25                                                       [::]:*

LISTEN      0      128                                          [::]:80                                                       [::]:*

LISTEN      0      128                                          [::]:22

//开机自启

[root@node-1 httpd-2.4.43]# echo '/usr/local/apache/bin/apachectl start' >> /etc/rc.d/rc.local

[root@node-1 httpd-2.4.43]# chmod +x /etc/rc.d/rc.local
2. 安装mysql
//配置yum源

[root@node-2 ~]# curl -o /etc/yum.repos.d/CentOS-Base.repo https://mirrors.aliyun.com/repo/Centos-7.repo

[root@node-2 ~]# sed -i -e '/mirrors.cloud.aliyuncs.com/d' -e '/mirrors.aliyuncs.com/d' /etc/yum.repos.d/CentOS-Base.repo

[root@node-2 ~]# sed -i 's/\$releasever/7/g' /etc/yum.repos.d/CentOS-Base.repo

[root@node-2 ~]# yum -y install epel-release wget vim

//安装依赖包

[root@node-2 ~]# yum -y install libaio ncurses-devel openssl-devel openssl cmake mariadb-devel

//创建用户和组

[root@node-2 ~]# useradd -r -M -s /sbin/nologin -u 306 mysql

[root@node-2 ~]# id mysql

uid=306(mysql) gid=306(mysql) groups=306(mysql)

//下载二进制格式的mysql软件包

[root@node-2 ~]# wget https://dev.mysql.com/get/Downloads/MySQL-5.7/mysql-5.7.30-linux-glibc2.12-x86_64.tar.gz

[root@node-2 ~]# tar xf mysql-5.7.30-linux-glibc2.12-x86_64.tar.gz

[root@node-2 ~]# mv mysql-5.7.30-linux-glibc2.12-x86_64 /usr/local/mysql

[root@node-2 ~]# ls /usr/local/

bin  etc  games  include  lib  lib64  libexec  mysql  sbin  share  src

//修改目录/usr/local/mysql的属主属组

[root@node-2 ~]# chown -R mysql.mysql /usr/local/mysql

[root@node-2 ~]# ll /usr/local/mysql -d

drwxr-xr-x. 9 mysql mysql 129 Jul 12 06:13 /usr/local/mysql

//添加环境变量

[root@node-2 ~]# ls /usr/local/mysql

bin  docs  include  lib  LICENSE  man  README  share  support-files

[root@node-2 ~]# echo 'export PATH=/usr/local/mysql/bin:$PATH' > /etc/profile.d/mysql.sh

[root@node-2 ~]# . /etc/profile.d/mysql.sh

[root@node-2 ~]# echo $PATH

/usr/local/mysql/bin:/usr/local/sbin:/usr/local/bin:/usr/sbin:/usr/bin:/root/bin

//建立数据存放目录

[root@node-2 ~]# mkdir /opt/data

[root@node-2 ~]# chown -R mysql.mysql /opt/data/

[root@node-2 ~]# ll /opt/

total 0

drwxr-xr-x. 2 mysql mysql 6 Jul 12 06:17 data

//初始化数据库

[root@node-2 ~]# /usr/local/mysql/bin/mysqld --initialize-insecure --user=mysql --datadir=/opt/data/

2020-07-12T10:19:29.467353Z 0 [Warning] TIMESTAMP with implicit DEFAULT value is deprecated. Please use --explicit_defaults_for_timestamp server option (see documentation for more details).

2020-07-12T10:19:29.712488Z 0 [Warning] InnoDB: New log files created, LSN=45790

2020-07-12T10:19:29.747790Z 0 [Warning] InnoDB: Creating foreign key constraint system tables.

2020-07-12T10:19:29.802550Z 0 [Warning] No existing UUID has been found, so we assume that this is the first time that this server has been started. Generating a new UUID: 2bef4383-c429-11ea-bf7a-000c29d7d941.

2020-07-12T10:19:29.803178Z 0 [Warning] Gtid table is not ready to be used. Table 'mysql.gtid_executed' cannot be opened.

2020-07-12T10:19:30.727678Z 0 [Warning] CA certificate ca.pem is self signed.

2020-07-12T10:19:30.992055Z 1 [Warning] root@localhost is created with an empty password ! Please consider switching off the --initialize-insecure option.

//配置mysql

[root@node-2 ~]#  ln -sv /usr/local/mysql/include/ /usr/local/include/mysql

‘/usr/local/include/mysql’ -> ‘/usr/local/mysql/include/’

[root@node-2 ~]# echo '/usr/local/mysql/lib' > /etc/ld.so.conf.d/mysql.conf

[root@node-2 ~]# ldconfig

//生成配置文件

[root@node-2 ~]# cat > /etc/my.cnf <<EOF

[mysqld]

basedir = /usr/local/mysql

datadir = /opt/data

socket = /tmp/mysql.sock

port = 3306

pid-file = /opt/data/mysql.pid

user = mysql

skip-name-resolve

bind-address=0.0.0.0

EOF

//配置服务启动脚本

[root@node-2 ~]# cp -a /usr/local/mysql/support-files/mysql.server /etc/init.d/mysqld

[root@node-2 ~]# sed -ri 's#^(basedir=).*#\1/usr/local/mysql#g' /etc/init.d/mysqld

[root@node-2 ~]# sed -ri 's#^(datadir=).*#\1/opt/data#g' /etc/init.d/mysqld

//配置开机自启

[root@node-2 ~]# chkconfig --add mysqld

[root@node-2 ~]# chkconfig --list

Note: This output shows SysV services only and does not include native

      systemd services. SysV configuration data might be overridden by native

      systemd configuration.

      If you want to list systemd services use 'systemctl list-unit-files'.

      To see services enabled on particular target use

      'systemctl list-dependencies [target]'.

mysqld         	0:off	1:off	2:on	3:on	4:on	5:on	6:off

netconsole     	0:off	1:off	2:off	3:off	4:off	5:off	6:off

network        	0:off	1:off	2:on	3:on	4:on	5:on	6:off

//启动mysql

[root@node-2 ~]# service mysqld start

Starting MySQL. SUCCESS!

[root@node-2 ~]# ss -tanl

State       Recv-Q Send-Q                              Local Address:Port                                             Peer Address:Port

LISTEN      0      100                                     127.0.0.1:25                                                          *:*

LISTEN      0      80                                              *:3306                                                        *:*

LISTEN      0      128                                             *:22                                                          *:*

LISTEN      0      100                                         [::1]:25                                                       [::]:*

LISTEN      0      128                                          [::]:22

//修改密码

[root@node-2 ~]# mysql

Welcome to the MySQL monitor.  Commands end with ; or \g.

Your MySQL connection id is 2

Server version: 5.7.30 MySQL Community Server (GPL)

Copyright (c) 2000, 2020, Oracle and/or its affiliates. All rights reserved.

Oracle is a registered trademark of Oracle Corporation and/or its

affiliates. Other names may be trademarks of their respective

owners.

Type 'help;' or '\h' for help. Type '\c' to clear the current input statement.

mysql> set password=password('123456');

Query OK, 0 rows affected, 1 warning (0.00 sec)

mysql> flush privileges;

Query OK, 0 rows affected (0.00 sec)

mysql> quit

Bye
3. 安装php
//配置Yum源

[root@node-3 ~]# curl -o /etc/yum.repos.d/CentOS-Base.repo https://mirrors.aliyun.com/repo/Centos-7.repo

[root@node-3 ~]# sed -i -e '/mirrors.cloud.aliyuncs.com/d' -e '/mirrors.aliyuncs.com/d' /etc/yum.repos.d/CentOS-Base.repo

[root@node-3 ~]# sed -i 's/\$releasever/7/g' /etc/yum.repos.d/CentOS-Base.repo

[root@node-3 ~]# yum -y install epel-release wget vim

//配置php的源

[root@node-3 ~]# wget http://rpms.remirepo.net/enterprise/remi-release-7.rpm

[root@node-3 ~]# rpm -Uvh remi-release-7.rpm

[root@node-3 ~]# yum makecache --enablerepo=remi-php74

//安装依赖包

[root@node-3 ~]# yum -y install libxml2 libxml2-devel openssl openssl-devel bzip2 bzip2-devel libcurl libcurl-devel libicu-devel libjpeg libjpeg-devel libpng libpng-devel openldap-devel  pcre-devel freetype freetype-devel gmp gmp-devel libmcrypt libmcrypt-devel readline readline-devel libxslt libxslt-devel mhash mhash-devel gcc gcc-c++ sqlite-devel oniguruma-devel php74-php-mysqlnd

//下载php

[root@node-3 ~]# wget https://www.php.net/distributions/php-7.4.7.tar.xz

//编译安装php

[root@node-3 ~]# tar xf php-7.4.7.tar.xz

[root@node-3 ~]# cd php-7.4.7

[root@node-3 php-7.4.7]# ./configure --prefix=/usr/local/php7  \

--with-config-file-path=/etc \

--enable-fpm \

--enable-inline-optimization \

--disable-debug \

--disable-rpath \

--enable-shared \

--enable-soap \

--with-openssl \

--enable-bcmath \

--with-iconv \

--with-bz2 \

--enable-calendar \

--with-curl \

--enable-exif  \

--enable-ftp \

--enable-gd \

--with-jpeg \

--with-png-dir \

--with-zlib-dir \

--with-freetype \

--with-gettext \

--enable-json \

--enable-mbstring \

--enable-pdo \

--with-mysqli=mysqlnd \

--with-pdo-mysql=mysqlnd \

--with-readline \

--enable-shmop \

--enable-simplexml \

--enable-sockets \

--enable-zip \

--enable-mysqlnd-compression-support \

--with-pear \

--enable-pcntl \

--enable-posix

[root@node-3 php-7.4.7]# make -j $(cat /proc/cpuinfo |grep processor|wc -l)

编译过程略

[root@node-3 php-7.4.7]# make install

安装过程略

//安装后配置环境变量

[root@node-3 php-7.4.7]# echo 'export PATH=/usr/local/php7/bin:$PATH' > /etc/profile.d/php7.sh

[root@node-3 php-7.4.7]# source /etc/profile.d/php7.sh

[root@node-3 php-7.4.7]# which php

/usr/local/php7/bin/php

[root@node-3 php-7.4.7]# php -v

PHP 7.4.7 (cli) (built: Jul 12 2020 18:47:17) ( NTS )

Copyright (c) The PHP Group

Zend Engine v3.4.0, Copyright (c) Zend Technologies

//配置php-fpm

[root@node-3 php-7.4.7]# cp php.ini-production /etc/php.ini

[root@node-3 php-7.4.7]# cp sapi/fpm/init.d.php-fpm /etc/init.d/php-fpm

[root@node-3 php-7.4.7]# chmod +x /etc/rc.d/init.d/php-fpm

[root@node-3 php-7.4.7]# cp /usr/local/php7/etc/php-fpm.conf.default /usr/local/php7/etc/php-fpm.conf

[root@node-3 php-7.4.7]# cp /usr/local/php7/etc/php-fpm.d/www.conf.default /usr/local/php7/etc/php-fpm.d/www.conf

//编辑php-fpm的配置文件(/usr/local/php7/etc/php-fpm.conf):

//配置fpm的相关选项为你所需要的值:

[root@node-3 php-7.4.7]# vim /usr/local/php7/etc/php-fpm.conf

.....

.....

pm.max_children = 50    ;最多同时提供50个进程提供50个并发服务

pm.start_servers = 5    ;启动时启动5个进程

pm.min_spare_servers = 2    ;最小空闲进程数

pm.max_spare_servers = 8    ;最大空闲进程数

//启动php-fpm,设置开机自启

[root@node-3 php-7.4.7]#  service php-fpm start

Starting php-fpm  done

[root@node-3 php-7.4.7]# chkconfig --add php-fpm

[root@node-3 php-7.4.7]# chkconfig --list

注:该输出结果只显示 SysV 服务,并不包含

原生 systemd 服务。SysV 配置数据

可能被原生 systemd 配置覆盖。

      要列出 systemd 服务,请执行 'systemctl list-unit-files'。

      查看在具体 target 启用的服务请执行

      'systemctl list-dependencies [target]'。

netconsole     	0:关	1:关	2:关	3:关	4:关	5:关	6:关

network        	0:关	1:关	2:开	3:开	4:开	5:开	6:关

php-fpm        	0:关	1:关	2:开	3:开	4:开	5:开	6:关

//修改监听的端口

[root@node-3 php-7.4.7]# vim /usr/local/php7/etc/php-fpm.d/www.conf

#修改listen = 127.0.0.1:9000为listen = 0.0.0.0:9000

[root@node-3 php-7.4.7]#  service php-fpm restart

Gracefully shutting down php-fpm . done

Starting php-fpm  done

[root@node-3 php-7.4.7]# ss -tanl

State       Recv-Q Send-Q                              Local Address:Port                                             Peer Address:Port

LISTEN      0      100                                     127.0.0.1:25                                                          *:*

LISTEN      0      128                                             *:9000                                                        *:*

LISTEN      0      128                                             *:22                                                          *:*

LISTEN      0      100                                         [::1]:25                                                       [::]:*

LISTEN      0      128                                          [::]:22                                                       [::]:*
4. 配置apache并部署项目
4.1 启用代理模块
在apache httpd 2.4以后已经专门有一个模块针对FastCGI的实现,此模块为mod_proxy_fcgi.so,它其实是作为mod_proxy.so模块的扩展,因此,这两个模块都要加载,编辑httpd.conf文件,取消以下两行内容的注释:
- LoadModule proxy_module modules/mod_proxy.so
- LoadModule proxy_fcgi_module modules/mod_proxy_fcgi.so
//启用httpd的相关模块

[root@node-1 ~]# sed -i '/proxy_module/s/#//g' /etc/httpd24/httpd.conf

[root@node-1 ~]# sed -i '/proxy_fcgi_module/s/#//g' /etc/httpd24/httpd.conf
4.2 配置虚拟主机
//创建网站存放目录的属主

[root@node-1 ~]# chown -R apache.apache /usr/local/apache/htdocs/

[root@node-1 ~]# ll -d /usr/local/apache/htdocs/

drwxr-xr-x. 2 apache apache 24 Jul 12 05:55 /usr/local/apache/htdocs/

//配置虚拟主机

[root@node-1 ~]# vim /etc/httpd24/httpd.conf

//在配置文件的最后加入以下内容

<VirtualHost *:80>

    DocumentRoot "/usr/local/apache/htdocs"

    ServerName www.test.com

    ProxyRequests Off

    ProxyPassMatch ^/(.*\.php)$ fcgi://192.168.32.135:9000/project/$1

    <Directory "/usr/local/apache/htdocs">

        Options none

        AllowOverride none

        Require all granted

    </Directory>

</VirtualHost>

[root@node-1 ~]# vim /etc/httpd24/httpd.conf

//搜索AddType,添加以下内容

    # If the AddEncoding directives above are commented-out, then you

    # probably should define those extensions to indicate media types:

    #

    AddType application/x-compress .Z

    AddType application/x-gzip .gz .tgz

    AddType application/x-httpd-php .php        #添加此行

    AddType application/x-httpd-php-source .phps        #添加此行

//优先解析php

[root@node-1 ~]# sed -i '/    DirectoryIndex/s/index.html/index.php index.html/g' /etc/httpd24/httpd.conf

//重启apache服务

[root@node-1 ~]# apachectl -t

Syntax OK

[root@node-1 ~]# apachectl restart

[root@node-1 ~]# ss -tanl

State       Recv-Q Send-Q                              Local Address:Port                                             Peer Address:Port

LISTEN      0      100                                     127.0.0.1:25                                                          *:*

LISTEN      0      128                                             *:22                                                          *:*

LISTEN      0      100                                         [::1]:25                                                       [::]:*

LISTEN      0      128                                          [::]:80                                                       [::]:*

LISTEN      0      128                                          [::]:22           											  [::]:*
4.3 部署PbootCMSPHP企业网站开发建设管理系统
在gitee上找的的排行首位的php网站,依次为例
部署PbootCMSPHP企业网站开发建设管理系统
https://gitee.com/hnaoyun/PbootCMS?_from=gitee_search
如果需要启用Mysql版本,请导入目录下数据库文件/static/backup/sql/xxx.sql,同时请注意使用最新日期名字的脚本文件,并修改config/database数据库连接文件信息。
系统后台默认访问路径:http://ip/admin.php 账号:admin 密码:123456,
//gitee上下载软件包(可能需要验证码,请在网页上下载后上传至PHP服务器)

[root@node-3 ~]# mkdir tmp

[root@node-3 ~]# cd tmp/

[root@node-3 tmp]# wget https://gitee.com/hnaoyun/PbootCMS/repository/archive/3.X.zip?ref=3.X&sha=4b8a380276b44bcc37510babea72f1fb7e5e97f6&format=zip&captcha_type=captcha&captcha=msmyaj

[root@node-3 tmp]# ls

hnaoyun-PbootCMS-3.X.zip

[root@node-3 tmp]# unzip hnaoyun-PbootCMS-3.X.zip

hnaoyun-PbootCMS-3.X.zip  PbootCMS

[root@node-3 tmp]# cd PbootCMS/

[root@node-3 PbootCMS]# ls

admin.php  api.php  apps  config  core  data  doc  favicon.ico  index.php  LICENSE  README.md  rewrite  robots.txt  static  template

//将文件移动到虚拟主机配置的访问目录中

[root@node-3 PbootCMS]# mkdir /project

[root@node-3 PbootCMS]# chmod 777 /project   #尽量不要给777

[root@node-3 PbootCMS]# mv * /project/

[root@node-3 PbootCMS]# ls /project/

admin.php  api.php  apps  config  core  data  doc  favicon.ico  index.php  LICENSE  README.md  rewrite  robots.txt  static  template

//将静态目录上传到apache服务器的访问目录

[root@node-3 PbootCMS]# cd /project/

[root@node-3 project]# scp -r static/ 192.168.32.125:/usr/local/apache/htdocs/

The authenticity of host '192.168.32.125 (192.168.32.125)' can't be established.

ECDSA key fingerprint is SHA256:jIyeHFElG0AZhhfDgIPwju+oKhffoopGo6SKfQU+RzY.

ECDSA key fingerprint is MD5:f1:63:f9:6e:9d:e5:4f:33:07:5a:25:40:ee:aa:77:9e.

Are you sure you want to continue connecting (yes/no)? yes

Warning: Permanently added '192.168.32.125' (ECDSA) to the list of known hosts.

root@192.168.32.125's password:

0cb2353f8ea80b398754308f15d1121e_20200705235534_pbootcms.sql                                                         100%  114KB  20.0MB/s   00:00

logo.png                                                                                                             100% 8240    12.8MB/s   00:00

nopic.png                                                                                                            100% 8209    16.3MB/s   00:00

1523439379569611.png                                                                                                 100%  107KB  13.2MB/s   00:00

1523498765110892.jpeg                                                                                                100%   20KB  24.9MB/s   00:00

1523498882600766.jpg                                                                                                 100%   16KB  23.5MB/s   00:00

1523498883237191.png                                                                                                 100%  144KB  45.2MB/s   00:00

......

[root@node-3 project]# scp -r template/ 192.168.32.125:/usr/local/apache/htdocs/

root@192.168.32.125's password:

swiper.css                                                                                                           100%   22KB  20.4MB/s   00:00

swiper.min.css                                                                                                       100%   19KB  20.8MB/s   00:00

swiper.esm.bundle.js                                                                                                 100%  209KB  58.9MB/s   00:00

swiper.esm.js                                                                                                        100%  210KB  69.9MB/s   00:00

swiper.js                                                                                                            100%  257KB  45.4MB/s   00:00

swiper.min.js                                                                                                        100%  118KB  23.0MB/s   00:00

swiper.min.js.map

......

[root@node-3 project]# scp -r apps/ 192.168.32.125:/usr/local/apache/htdocs/

root@192.168.32.125's password:

......

jquery.js                                                                                                            100%   95KB  51.7MB/s   00:00

laydate.js                                                                                                           100%   27KB  26.2MB/s   00:00

layedit.js                                                                                                           100%   12KB   8.1MB/s   00:00

layer.js                                                                                                             100%   22KB  24.3MB/s   00:00

laypage.js                                                                                                           100% 4472     7.3MB/s   00:00

laytpl.js                                                                                                            100% 1836     3.7MB/s   00:00

mobile.js                                                                                                            100%   31KB  37.5MB/s   00:00

......省略.....

//将数据库文件上传的数据库服务器

[root@node-3 project]# scp static/backup/sql/0cb2353f8ea80b398754308f15d1121e_20200705235534_pbootcms.sql 192.168.32.130:/root/

root@192.168.32.130's password:

0cb2353f8ea80b398754308f15d1121e_20200705235534_pbootcms.sql                                                         100%  114KB  42.4MB/s   00:00
4.4.1 数据库服务器授权
关于数据库的官方说明:
如果需要启用Mysql版本,请导入目录下数据库文件/static/backup/sql/xxx.sql,同时请注意使用最新日期名字的脚本文件,并修改config/database数据库连接文件信息
修改config/database数据库连接文件信息

vim查看文件原版配置

[root@node-3 project]# vim config/database.php

<?php

/**

 * 主数据库连接参数,未配置的参数使用框架惯性配置

 * 如果修改为mysql数据库,请同时修改type和dbname两个参数

 */

return array(

    'database' => array(

        'type' => 'sqlite', // 数据库连接驱动类型: mysqli,sqlite,pdo_mysql,pdo_sqlite

        'host' => '127.0.0.1', // 数据库服务器

        'user' => 'pboot', // 数据库连接用户名

        'passwd' => '123456', // 数据库连接密码

        'port' => '3306', // 数据库端口

        // 'dbname' => 'pbootcms' // 去掉注释,启用mysql数据库,注意修改前面的连接信息及type为mysqli

        'dbname' => '/data/pbootcms.db' // 去掉注释,启用Sqlite数据库,注意修改type为sqlite

    )

);

###修改后的配置

<?php

/**

 * 主数据库连接参数,未配置的参数使用框架惯性配置

 * 如果修改为mysql数据库,请同时修改type和dbname两个参数

 */

return array(

    'database' => array(

        'type' => 'mysqli', // 数据库连接驱动类型: mysqli,sqlite,pdo_mysql,pdo_sqlite

        'host' => '192.168.32.130', // 数据库服务器

        'user' => 'pboot', // 数据库连接用户名

        'passwd' => '123456', // 数据库连接密码

        'port' => '3306', // 数据库端口

        'dbname' => 'pbootcms' // 去掉注释,启用mysql数据库,注意修改前面的连接信息及type为mysqli

        'dbname' => '/data/pbootcms.db' // 去掉注释,启用Sqlite数据库,注意修改type为sqlite

    )

);

//查看数据库文件,找到数据库名,数据库名字为pbootcms

-- Online Database Management SQL Dump

-- 数据库名: pbootcms

-- 生成日期: 2020-07-05 23:55:34

-- PHP 版本: 5.6.33

SET SQL_MODE = "NO_AUTO_VALUE_ON_ZERO";

SET time_zone = "+08:00";

SET NAMES utf8;

-- --------------------------------------------------------

--

-- 表的结构 `ay_area`

--

DROP TABLE IF EXISTS `ay_area`;

CREATE TABLE `ay_area` (

  `id` int(10) unsigned NOT NULL AUTO_INCREMENT COMMENT '区域编号',

  `acode` varchar(20) NOT NULL COMMENT '区域编码',

.........以下省略..........

//在数据库服务器上授权用户

[root@node-2 ~]# mysql -uroot -p123456

mysql: [Warning] Using a password on the command line interface can be insecure.

Welcome to the MySQL monitor.  Commands end with ; or \g.

Your MySQL connection id is 7

Server version: 5.7.30 MySQL Community Server (GPL)

Copyright (c) 2000, 2020, Oracle and/or its affiliates. All rights reserved.

Oracle is a registered trademark of Oracle Corporation and/or its

affiliates. Other names may be trademarks of their respective

owners.

Type 'help;' or '\h' for help. Type '\c' to clear the current input statement.

mysql> create database pbootcms;

Query OK, 1 row affected (0.02 sec)

mysql> grant all on pbootcms.* to 'pboot'@'192.168.32.135' identified by '123456';

Query OK, 0 rows affected, 1 warning (0.00 sec)

mysql> flush privileges;

Query OK, 0 rows affected (0.00 sec)

mysql> use pbootcms

Database changed

mysql> source 0cb2353f8ea80b398754308f15d1121e_20200705235534_pbootcms.sql

......

......

......

Query OK, 5 rows affected (0.00 sec)

Records: 5  Duplicates: 0  Warnings: 0

Query OK, 0 rows affected, 1 warning (0.00 sec)

Query OK, 0 rows affected (0.00 sec)

Query OK, 1 row affected (0.00 sec)

Query OK, 0 rows affected, 1 warning (0.00 sec)

Query OK, 0 rows affected (0.00 sec)

Query OK, 1 row affected (0.00 sec)

mysql> quit

Bye

#重启各服务

[root@node-1 ~]# apachectl restart

[root@node-1 ~]# ss -tanl

State       Recv-Q Send-Q                              Local Address:Port                                             Peer Address:Port

LISTEN      0      100                                     127.0.0.1:25                                                          *:*

LISTEN      0      128                                             *:22                                                          *:*

LISTEN      0      100                                         [::1]:25                                                       [::]:*

LISTEN      0      128                                          [::]:80                                                       [::]:*

LISTEN      0      128                                          [::]:22                                                       [::]:*

[root@node-2 ~]# service mysqld restart

Shutting down MySQL.. SUCCESS!

Starting MySQL. SUCCESS!

[root@node-2 ~]# ss -tanl

State       Recv-Q Send-Q                              Local Address:Port                                             Peer Address:Port

LISTEN      0      100                                     127.0.0.1:25                                                          *:*

LISTEN      0      80                                              *:3306                                                        *:*

LISTEN      0      128                                             *:22                                                          *:*

LISTEN      0      100                                         [::1]:25                                                       [::]:*

LISTEN      0      128                                          [::]:22                                                       [::]:*

[root@node-3 project]# service php-fpm restart

Gracefully shutting down php-fpm . done

Starting php-fpm  done

[root@node-3 project]# ss -tanl

State       Recv-Q Send-Q                              Local Address:Port                                             Peer Address:Port

LISTEN      0      100                                     127.0.0.1:25                                                          *:*

LISTEN      0      128                                             *:9000                                                        *:*

LISTEN      0      128                                             *:22                                                          *:*

LISTEN      0      100                                         [::1]:25                                                       [::]:*

LISTEN      0      128                                          [::]:22                                                       [::]:*
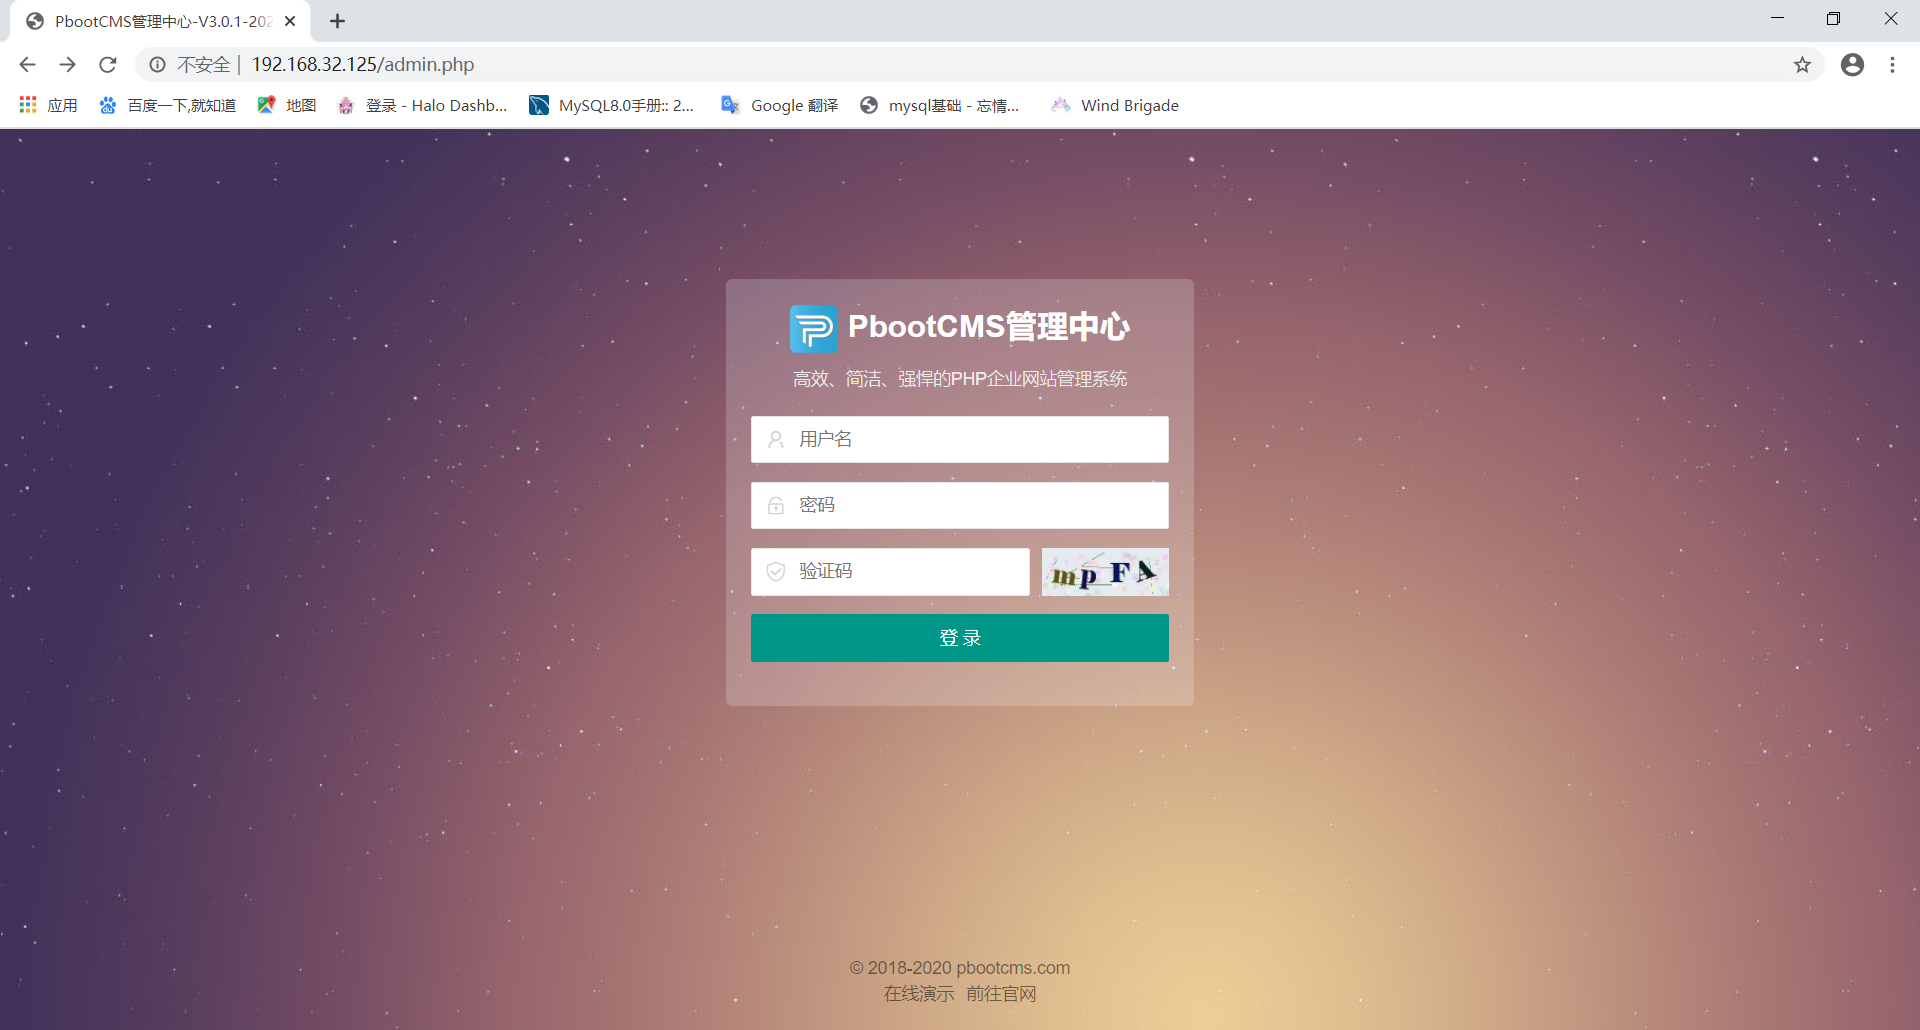
4.4.2 访问网站


4.4.3 登录网站后台
访问后台地址,用户名:admin ,密码:123456
http://192.168.32.125/admin.php

按要求修改密码
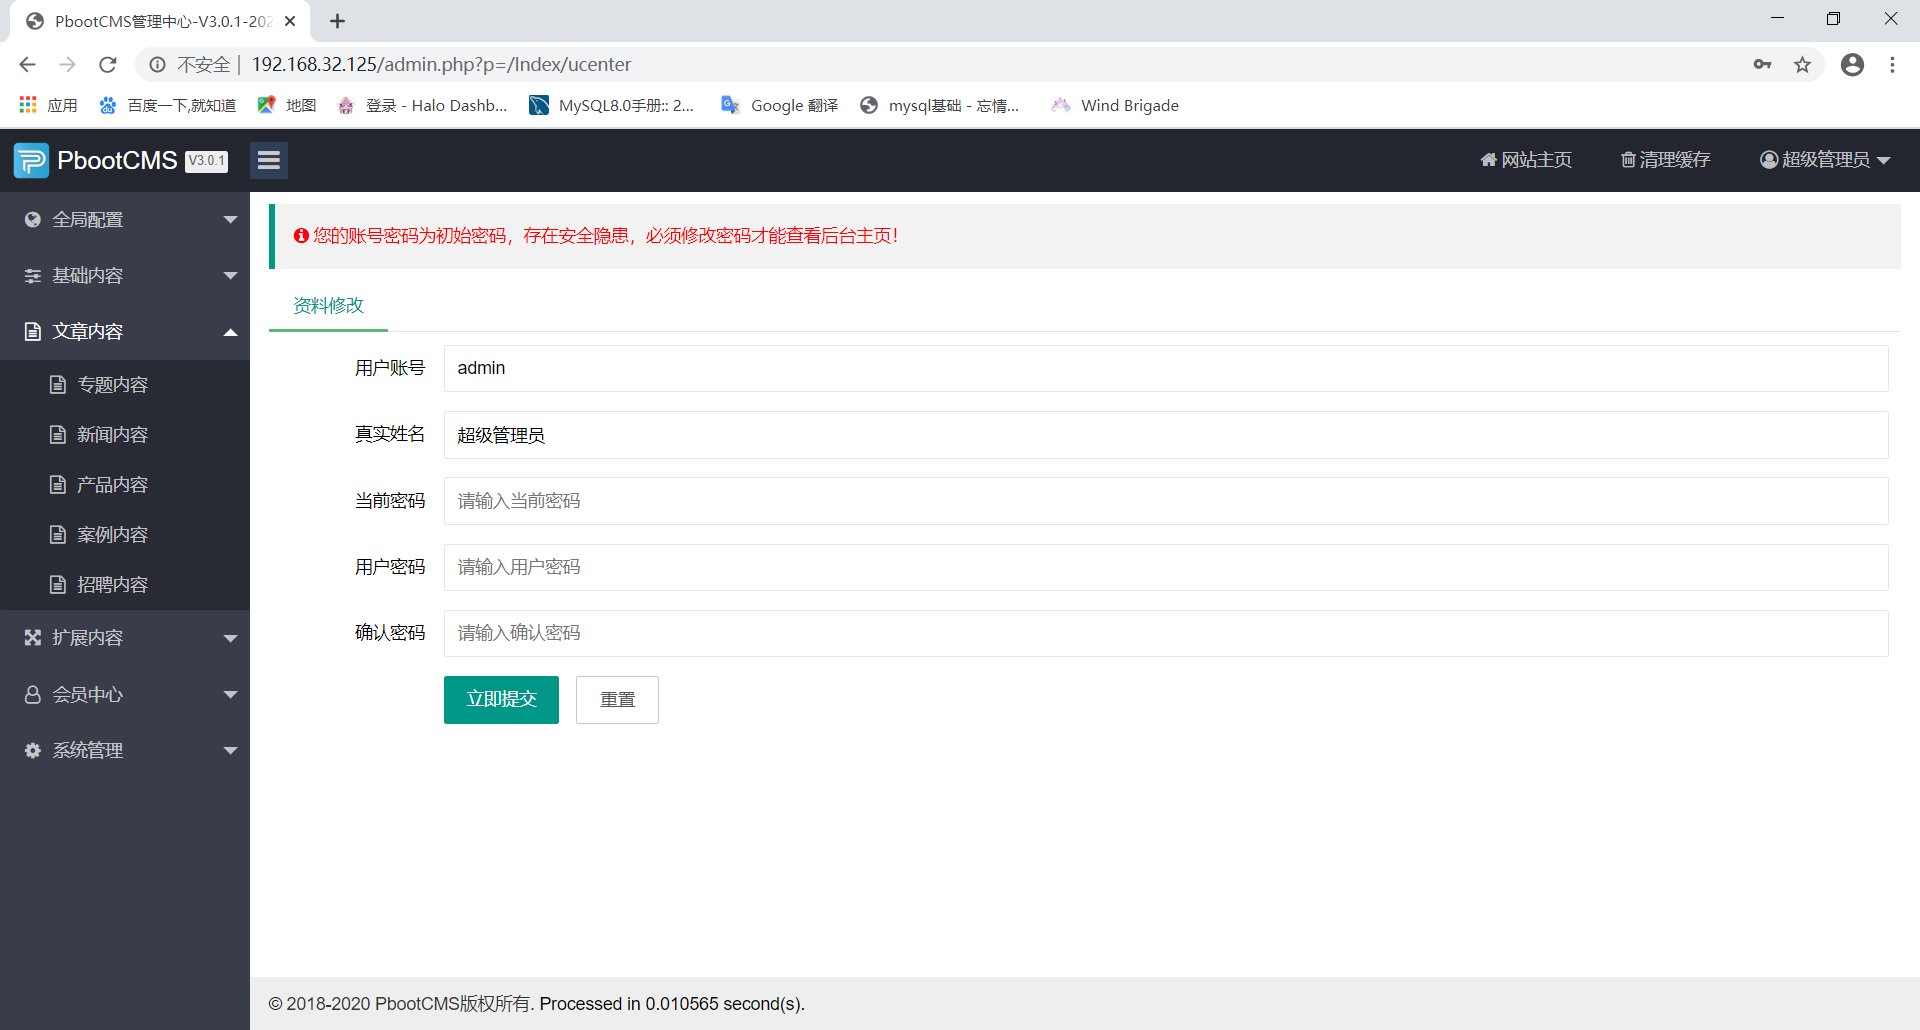
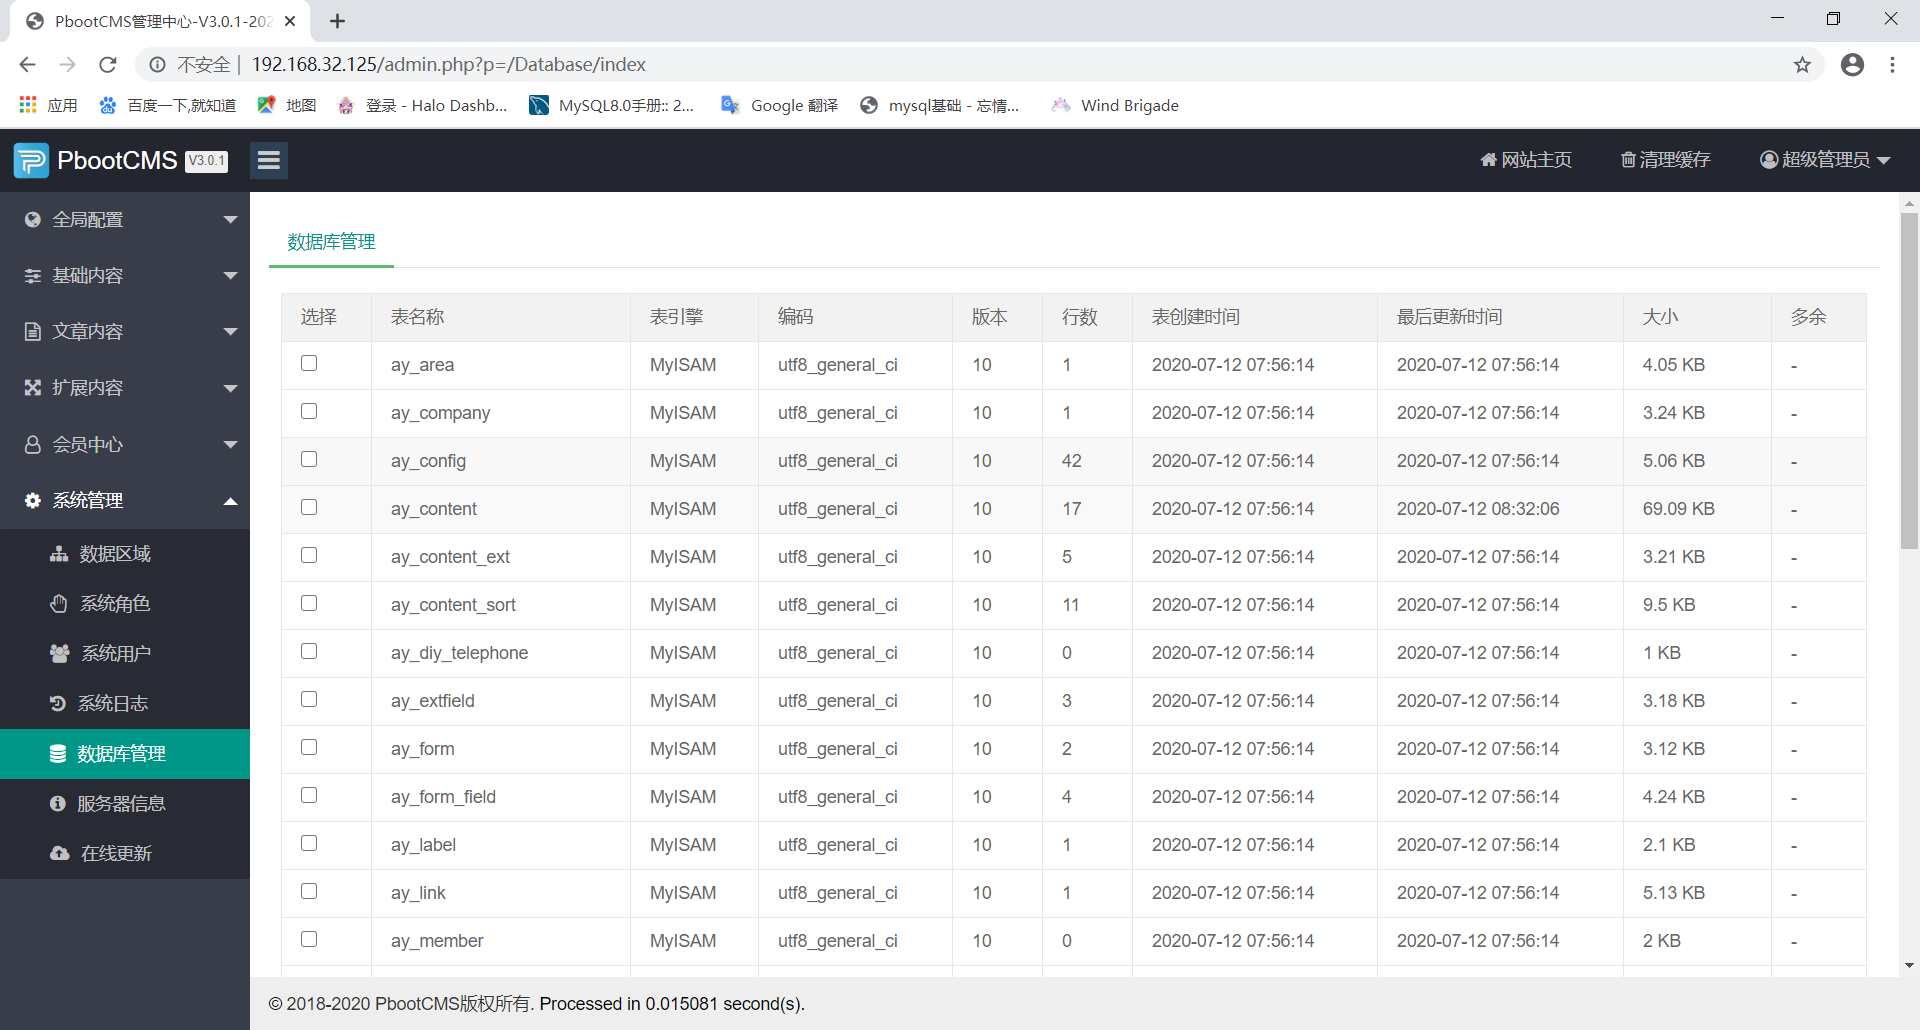
修改密码后就可以在后台进行各种调整了
lamp分离部署的更多相关文章
- lamp的动静分离部署
一.lamp分离部署工作图 二.LAMP的安装与配置 1.环境准备 2.对 PHP 服务器进行部署 #以下为安装PHP及其依赖 [root@php ~ ]# .tar.gz -C /usr/src [ ...
- 【转】Nginx+php-fpm+MySQL分离部署详解
转:http://www.linuxidc.com/Linux/2015-07/120580.htm Nginx+php-fpm+MySQL分离部署详解 [日期:2015-07-26] 来源:Linu ...
- LAMP应用部署
LAMP+wordpress 部署博客 软件安装 yum -y install httpd yum -y install php yum -y install php-mysql yum -y ins ...
- 001.Amoeba读写分离部署
一 Amoeba简介 Amoeba(变形虫)项目,该开源框架于2008年 开始发布一款 Amoeba forMysql软件.这个软件致力于MySQL的分布式数据库前端代理层,它主要在应用层访问MySQ ...
- LNMP下动静分离部署phpmyadmin软件包
LNMP环境肯定是先要配置好的.可以参考我之前的博客.那我们直接进行配置,我这里使用了三台机器进行动静分离部署,第一台负责nginx反向代理,第二台负责php-fpm应用程序以及mariadb的服务器 ...
- HHvm建站环境搭建方法:Nginx,Mariadb,hhvm及lnmp/lamp安装部署
HHVM起源于Facebook公司,是一个开源的PHP虚拟机,使用JIT的编译方式以及其他技术,让PHP代码的执行性能大幅提升.HHVM提升PHP性能的途径,采用的方式就是替代Zend引擎来生成和执行 ...
- LAMP 一键部署
LAMP 一键部署 部署http #!/bin/bash ### global variables export lamp_repo=http://192.168.1.5/lamp/ export l ...
- windows下Redis 主从读写分离部署
原文:windows下Redis 主从读写分离部署 1.可直接下载window下的运行文件(下面这个链接) 也可以浏览github 查看相应的版本说明文档 https://github.com/Ser ...
- nginx实现前后台分离部署
2.1 前后台分离部署 (一) 组网图 (二) 简要说明: 如标题所示,至于为什么要前后台分离部署,个人理解的原因有三 (一) 便于部署 前台代码由ngin ...
随机推荐
- Spring-Validation(数据校验) 你值得拥有
前言 最近看到很多童鞋在项目中的对请求参数的校验都用的if来判断各参数的属性,如: if(StringUtils.isBlank(username)){ return RR.exception(&qu ...
- labelImg安装及使用(YOLO标签为例)
安装: 非常简单. 第一步: cmd中执行 pip install labelImg 我一般会用下面这个 pip install -i https://pypi.tuna.tsinghua.edu.c ...
- day44 初识数据库
目录 一.数据的演变 二.数据库 三.MySQL 1 基本原理 2 重要概念介绍 3 安装 4 启动 5 sql基本语句 6 环境变量的配置及系统服务制作 7 关于密码 8 统一编码 9 基本sql语 ...
- HTB::Postman
实验环境 渗透过程 0x01 信息搜集 masscan扫描 扫描结果目标服务开放了22(ssh),80(http),6379(redis),10000(webmin)端口 nmap扫描 nmap -s ...
- 爬虫03 /代理、cookie处理、模拟登录、提升爬虫效率
爬虫03 /代理.cookie处理.模拟登录.提升爬虫效率 目录 爬虫03 /代理.cookie处理.模拟登录.提升爬虫效率 1. 代理 2. cookie处理 3. 模拟登录 4. 如何提升爬取数据 ...
- redis(四):Redis 键(key)
Redis 键命令用于管理 redis 的键. 语法 Redis 键命令的基本语法如下: redis 127.0.0.1:6379> COMMAND KEY_NAME 实例 redis 127. ...
- 数据可视化之PowerQuery篇(八)利用PowerQuery,进行更加灵活的数据分列
https://zhuanlan.zhihu.com/p/66540160 常规分列 我们最常见的就是有固定分隔符的规范数据,这种直接就按照分隔符拆分就可以了, 如果没有分割符怎么办?依然是上面的数据 ...
- Django框架10 /sweetalert插件、django事务和锁、中间件、django请求生命周期
Django框架10 /sweetalert插件.django事务和锁.中间件.django请求生命周期 目录 Django框架10 /sweetalert插件.django事务和锁.中间件.djan ...
- Python基础最难知识点:正则表达式(使用步骤)
前言 本文的文字及图片来源于网络,仅供学习.交流使用,不具有任何商业用途,版权归原作者所有,如有问题请及时联系我们以作处理. 正则表达式,简称regex,是文本模式的描述方法.你可以在google上搜 ...
- 抛出这8个问题,检验一下你到底会不会ThreadLocal,来摸个底~
0.问题 和Synchronized的区别 存储在jvm的哪个区域 真的只是当前线程可见吗 会导致内存泄漏么 为什么用Entry数组而不是Entry对象 你学习的开源框架哪些用到了ThreadLoca ...