pytest-conftest.py作用范围
1.conftest.py解释
conftest.py是pytest框架里面一个很重要的东西,它可以在这个文件里面编写fixture,而这个fixture的作用就相当于我们unittest框架里面的setup()和teardown(),虽然pytest框架也有setup()和teardown()但是没必要写在用例里面,直接写在conftests.py里面就好了,这样更灵活,然后pytest框架会自动去找conftest.py这个文件里面的东西。
conftest.py
1 import pytest

 @pytest.fixture()

 def login():

     print("用例开始执行")

     yield   #如果有返回值,可以在yield后面直接写返回值就好了,如果有多个直接用(返回值1,返回值2)

     print("用例执行完成")
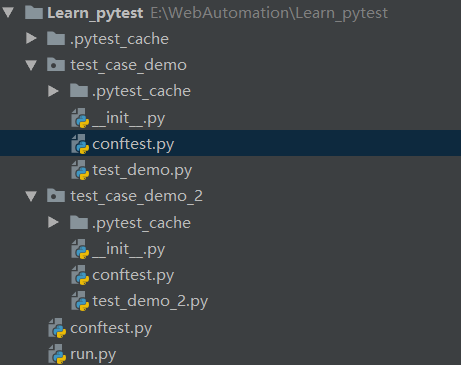
2.目录结构
调用fixture有两种写法: 1.装饰器@pytest.mark.usefixtures("start") ; 2.直接在用例里面调用fixture装饰的方法当作参数输入def test_demo(self,start);3.设置fixture参数autouse=True
3.用例传fixture参数
1.项目跟目录下面的全局conftest.py
 import pytest

 @pytest.fixture()

 def start():

     print("\n全局conftest")
2.test_case_demo/conftest.py 和 test_demo.py
conftest.py 代码

1 import pytest

 @pytest.fixture()

 def start_1():

     print("\n局部test_case_demo")
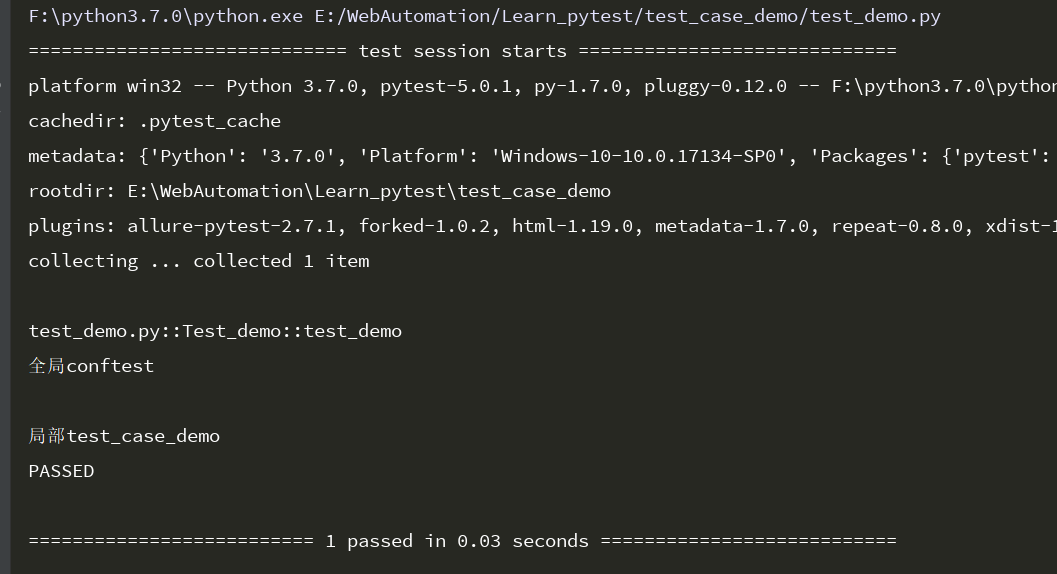
test_demo.py 代码

1 import pytest
2 class Test_demo():

     def test_demo(self,start,start_1):  #标记代码

         assert 1==1

 if __name__ == '__main__':

     pytest.main(["-s","-v","test_demo.py"])
运行结果:
3.test_case_demo_2/conftest.py 和 test_demo_2.py
conftest.py 代码

1 import pytest

 @pytest.fixture()

 def start_2():

     print("\n局部test_case_demo_2")
test_demo_2.py 代码
1 import pytest
class Test_demo_2():
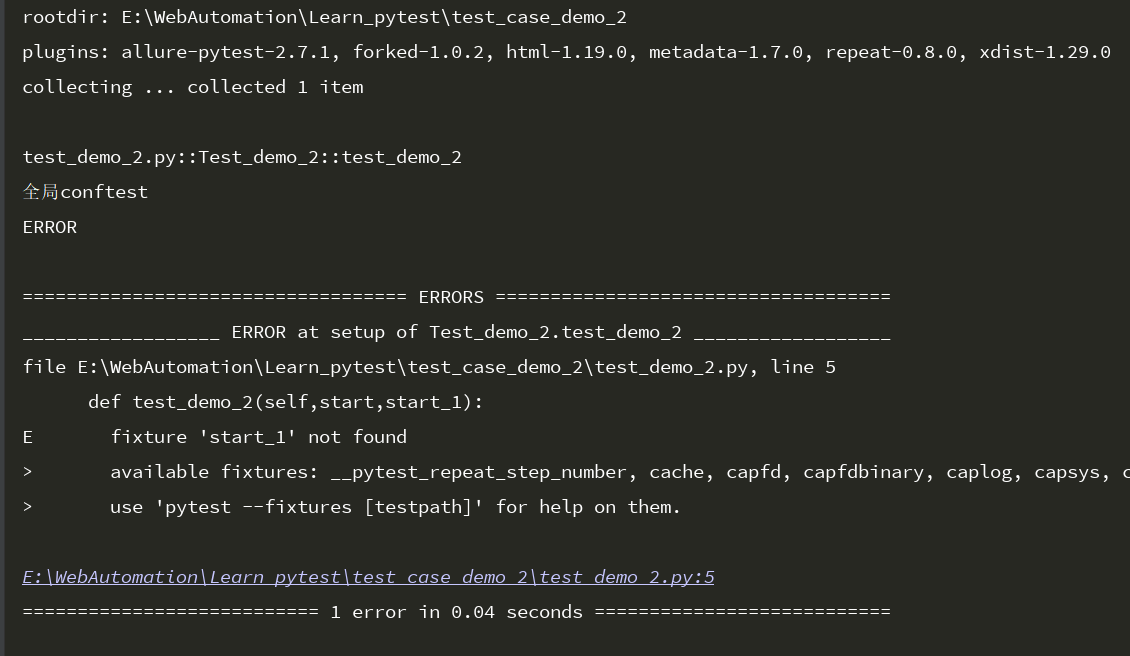
def test_demo_2(self,start,start_1): #标记代码
assert 1==1 if __name__ == '__main__':
pytest.main(["-s","test_demo_2.py","-v"])
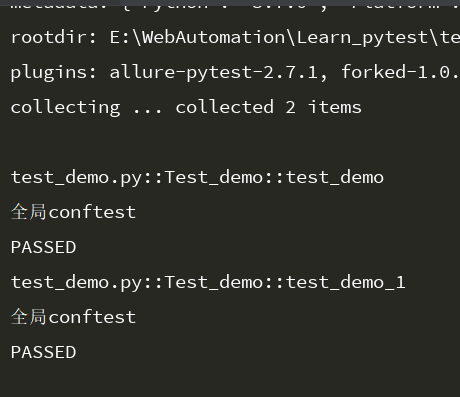
运行结果可以看出,start起到全局作用,test_case_demo目录下的start_1不管它的运行级别是什么,也只能在test_case_demo下面被调用。
test_demo_2用例不能跨模块调用test_case_demo模块下的start_1,所以test_demo_2用例会运行失败
4.装饰器usefixtures
fixture有 function(默认选),class,module,session,四个级别
一.只有一个.py用例文件
1)定义为@pytest.fixture(scope="function")
跟目录下的conftest.py 代码
1 import pytest

 @pytest.fixture(scope="function")

 def start():

     print("\n全局conftest")

 @pytest.fixture()

 def iniv():

     print("\n全局iniv")
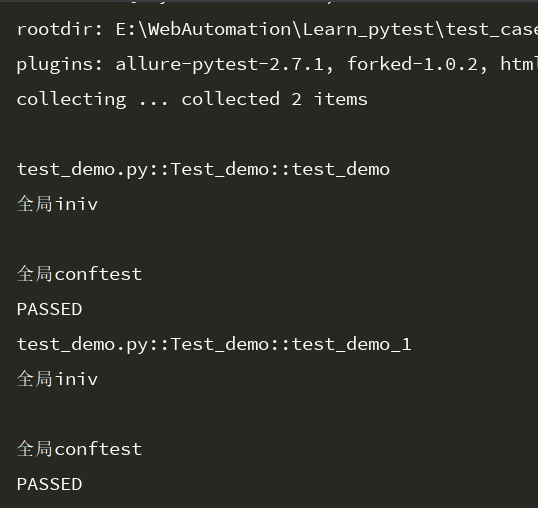
test_demo.py 代码
 import pytest

 @pytest.mark.usefixtures("start")  # 因为他们级别都是function,所以先运行iniv在运行start

 @pytest.mark.usefixtures("iniv")

 class Test_demo():

     def test_demo(self):

         assert 1==1

     def test_demo_1(self):

         assert 1==1

 if __name__ == '__main__':

     pytest.main(["-s","-v","test_demo.py"])
运行结果:start和iniv两个fixture都打印了
2)定义为@pytest.fixture(scope="class")
 #跟目录下的conftest.py 代码

 import pytest

 @pytest.fixture(scope="class")     #这个是装饰类

 def start():

     print("\n我是一个装饰class的start")

 @pytest.fixture(scope="function")   #这个是装饰用例

 def iniv():

     print("\n我是一个装饰function的iniv")
 import pytest

 @pytest.mark.usefixtures("start")

 @pytest.mark.usefixtures("iniv")

 class Test_demo():

     def test_demo(self):

         assert 1==1

     def test_demo_1(self):

         assert 1==1

 if __name__ == '__main__':

     pytest.main(["-s","-v","test_demo.py"])
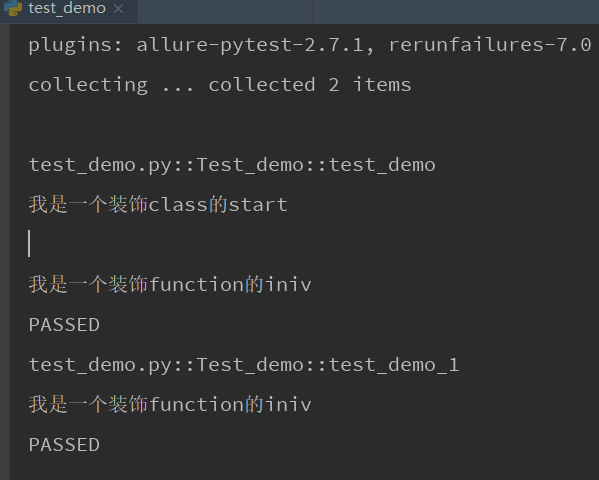
运行结果:他会先运行start的在运行iniv的。因为start只是作用于class级别,而iniv是作用于function级别,所以start只需要执行一次,而iniv会有多少用例就运行多少次
3)定义为@pytest.fixture(scope="module")
 #跟目录下的conftest.py 代码

 import pytest

 @pytest.fixture(scope="module")

 def start():

     print("\n我是一个装饰module的start")

 @pytest.fixture(scope="function")

 def iniv():

     print("\n我是一个装饰function的iniv")
 #test_demo.py代码

 import pytest

 @pytest.mark.usefixtures("start")

 @pytest.mark.usefixtures("iniv")

 class Test_demo():

     def test_demo(self):

         assert 1==1

     def test_demo_1(self):

         assert 1==1

 @pytest.mark.usefixtures("start")

 @pytest.mark.usefixtures("iniv")

 class Test_demo_1():

     def test_demo(self):

         assert 1==1

     def test_demo_1(self):

         assert 1==1

 if __name__ == '__main__':

     pytest.main(["-s","-v","test_demo.py"])
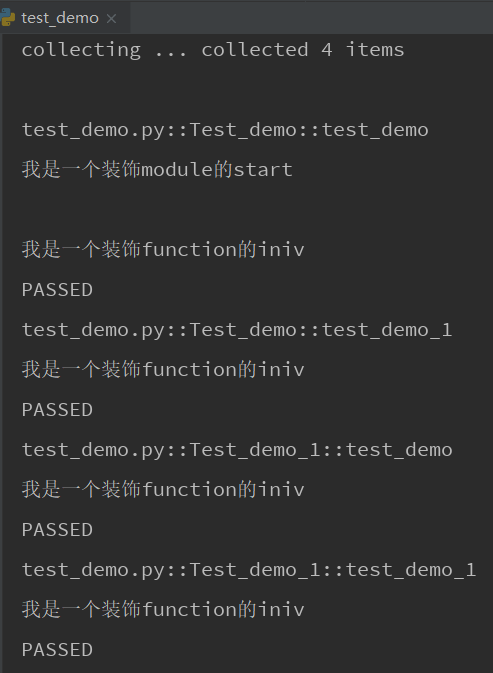
运行结果:他会先运行start的在运行iniv的。因为start只是作用于module级别,而iniv是作用于function级别,虽然我们在test_demo.py里面装饰了两次start,但是因为它是装饰模块的,并且也只有test_demo.py这个一个模块,所以start只需要执行一次,而iniv会有多少用例就运行多少次
4)定义为@pytest.fixture(scope="session")
 #跟目录下的conftest.py 代码

 import pytest

 @pytest.fixture(scope="session",autouse=True)  #居然你是会话级别了,那么直接默认autouse=True就行了,不用调用就自动执行,或者不写autouse=True,直接在随便的,py用例文件里面调用以下就行了

 def start():

     print("\n我是一个装饰session的start")

 @pytest.fixture(scope="function")

 def iniv():

     print("\n我是一个装饰function的iniv")
 #test_demo.py代码

 import pytest

 @pytest.mark.usefixtures("iniv")

 class Test_demo():

     def test_demo(self):

         assert 1==1

     def test_demo_1(self):

         assert 1==1

 if __name__ == '__main__':

     pytest.main(["-s","-v","test_demo.py"])
运行结果:他会先运行start的在运行iniv的。因为start只是作用于session级别,而iniv是作用于function级别,而且我们直接autouse=True,所以不用调用也会执行,而且start只需要执行一次,而iniv会有多少用例就运行多少次

二.多个.py用例文件(这里不展示代码,自己去实践吧)
多个.py用例文件,其实运行结果:
1)function级别:有多少用例就运行多少次。
2)class级别:装饰多少个类上面的,那么一个就运行多少次,例如一个.py用例里面有两个类,都装饰了class级别的,那么就运行两次,如果有两个.py用例文件都有两个类,都装饰了class级别,那么就运行四次。
3)module级别:如果有一个.py用例文件,那么就运行一次module级别,如果有两个.py用例文件,那么就运行两次。
4)session级别:不管有多少个.py用例文件,始终就运行一次
5.设置autouse=True (这种不建议,因为你不调用它,它始终就会运行)
fixture默认autouse=False
跟目录下的conftest.py 代码
 import pytest

 @pytest.fixture(autouse=True)   #启用

 def start():

     print("\n全局conftest")

 @pytest.fixture(autouse=False)  #不启用

 def iniv():

     print("\n全局iniv")
 import pytest

 #@pytest.mark.usefixtures("start")   这里注释掉了

 class Test_demo():

     def test_demo(self):

         assert 1==1

     def test_demo_1(self):

         assert 1==1

 if __name__ == '__main__':

     pytest.main(["-s","-v","test_demo.py"])
运行结果:结果还是调用了start
pytest-conftest.py作用范围的更多相关文章
- conftest.py作用范围
前言 一个测试工程下是可以有多个conftest.py的文件,一般在工程根目录放一个conftest.py起到全局作用.在不同的测试子目录也可以放conftest.py,作用范围只在该层级以及以下目录 ...
- pytest进阶之conftest.py
前言 前面几篇随笔基本上已经了解了pytest 命令使用,收集用例,finxture使用及作用范围,今天简单介绍一下conftest.py文件的作用和实际项目中如是使用此文件! 实例场景 首先们思考这 ...
- pytest文档25-conftest.py作用范围
前言 一个测试工程下是可以有多个conftest.py的文件,一般在工程根目录放一个conftest.py起到全局作用. 在不同的测试子目录也可以放conftest.py,作用范围只在该层级以及以下目 ...
- pytest框架: fixture之conftest.py
原文地址:https://blog.csdn.net/BearStarX/article/details/101000516 一.fixture优势1.fixture相对于setup和teardown ...
- 『德不孤』Pytest框架 — 14、Pytest中的conftest.py文件
目录 1.conftest.py文件介绍 2.conftest.py的注意事项 3.conftest.py的使用 4.不同位置conftest.py文件的优先级 5.conftest.py中Fixtu ...
- pytest自动化3:fixture之conftest.py实现setup
出处:https://www.cnblogs.com/yoyoketang/p/9390073.html 前言: 前面一篇讲到用例加setup和teardown可以实现在测试用例之前或之后加入一些操作 ...
- pytest 3.fixture介绍一 conftest.py
前言: 前面一篇pytest2 讲到用例加setup和teardown可以实现在测试用例之前或之后加入一些操作,但这种是整个脚本全局生效的,如果我想实现以下场景: 用例1需要先登录,用例2不需要登录, ...
- pytest文档5-fixture之conftest.py
前言 前面一篇讲到用例加setup和teardown可以实现在测试用例之前或之后加入一些操作,但这种是整个脚本全局生效的,如果我想实现以下场景: 用例1需要先登录,用例2不需要登录,用例3需要先登录. ...
- pytest执行用例时从conftest.py抛出ModuleNotFoundError:No module named 'XXX'异常的解决办法
一.问题描述 在项目根目录下执行整个测试用例,直接从conftest.py模块中抛出了ModuleNotFoundError:No module named 'TestDatas'的异常: 二.解决方 ...
- Pytest系列(6) - conftest.py的详细讲解
如果你还想从头学起Pytest,可以看看这个系列的文章哦! https://www.cnblogs.com/poloyy/category/1690628.html 什么是conftest.py 可以 ...
随机推荐
- 使用ResponseBodyAdvice统一包装响应返回String的时候出现java.lang.ClassCastException: com.xxx.dto.common.ResponseResult cannot be cast to java.lang.String
代码如下: @Override public ResponseResult<Object> beforeBodyWrite(Object returnValue, MethodParame ...
- LED Decorative Light Manufacturer - Led Wall Lamp Performance Characteristics
LED Decorative Light Manufacturer introduction: LED wall lamp is a light-emitting diode as a ligh ...
- SFSA
#include<stdio.h> #include<string.h> #include<math.h> #include<iostream> #in ...
- c#项目调用Python模块的方法
将Python模块用pyinstaller打包成exe程序 下载安装UPX((http://upx.sourceforge.net/)) ,并把路径加到环境变量中. UPX是开源的加壳和压缩exe的程 ...
- IDEA 运行项目、模块的多个实例
IDEA默认只能运行同一项目|模块的一个实例. 运行多个实例: 比如springcloud的端口设置: --server.port=9001 . 当然,也可以在项目的配置文件中修改参数. 命令行.ID ...
- 【资源分享】RPG Maker 2000/2003 简体中文版
*----------------------------------------------[下载区]----------------------------------------------* ...
- Java查询数据库
创建数据库 创建 user 数据库 创建 teacher 数据库 teacher表的user_id列与user表的id列建立一对多连接,user_id作为外键. Java编程查询数据库 向user数据 ...
- 【Node.js安装步骤】
"Node.js是一个Javascript运行环境(runtime environment),发布于2009年5月,由Ryan Dahl开发,实质是对Chrome V8引擎进行了封装.本文详 ...
- etc/hosts文件详解
Linux 修改 etc/hosts文件 hosts文件 hosts —— the static table lookup for host name(主机名查询静态表). hosts文件是Linux ...
- app内区域截图利用html2Canvals保存到手机 截屏 (html2Canvals2版本1.0.0)
html2canvas($(], {scale:,logging:false,useCORS:true}).then(function(canvas) { var dataUrl = canvas.t ...