ssh框架整合笔记
1.建立普通的Javaweb项目,导入项目所必须的jar包。
2.配置web.xml文件。
<?xml version="1.0" encoding="UTF-8"?>

<web-app xmlns:xsi="http://www.w3.org/2001/XMLSchema-instance" xmlns="http://xmlns.jcp.org/xml/ns/javaee" xsi:schemaLocation="http://xmlns.jcp.org/xml/ns/javaee http://xmlns.jcp.org/xml/ns/javaee/web-app_3_1.xsd" id="WebApp_ID" version="3.1">

  <display-name>market</display-name>

  <!-- 让spring随web启动而创建的监听器 -->

    <listener>

        <listener-class>org.springframework.web.context.ContextLoaderListener</listener-class>

      </listener>

    <!-- 配置spring配置文件位置参数 -->

    <context-param>

        <param-name>contextConfigLocation</param-name>

        <param-value>classpath:applicationContext.xml</param-value>

      </context-param>

    <!-- 扩大session作用范围 -->

    <filter>

          <filter-name>openSessionInView</filter-name>

          <filter-class>org.springframework.orm.hibernate5.support.OpenSessionInViewFilter</filter-class>

      </filter>

    <!-- struts2核心过滤器 -->

    <filter>

          <filter-name>struts2</filter-name>

          <filter-class>org.apache.struts2.dispatcher.ng.filter.StrutsPrepareAndExecuteFilter</filter-class>

      </filter>

      <filter-mapping>

          <filter-name>openSessionInView</filter-name>

          <url-pattern>/*</url-pattern>

      </filter-mapping>

      <filter-mapping>

          <filter-name>struts2</filter-name>

          <url-pattern>/*</url-pattern>

      </filter-mapping>

    <welcome-file-list>

        <welcome-file>index.html</welcome-file>

        <welcome-file>index.htm</welcome-file>

        <welcome-file>index.jsp</welcome-file>

        <welcome-file>default.html</welcome-file>

        <welcome-file>default.htm</welcome-file>

        <welcome-file>default.jsp</welcome-file>

    </welcome-file-list>

</web-app>
3.在src下建立struts.xml。
<?xml version="1.0" encoding="UTF-8"?>

<!DOCTYPE struts PUBLIC

    "-//Apache Software Foundation//DTD Struts Configuration 2.3//EN"

    "http://struts.apache.org/dtds/struts-2.3.dtd">

<struts>

    <constant name="struts.devMode" value="false" />

    <package name="basicstruts2" extends="struts-default" namespace="/">

<!--自定义拦截器可以====不配置  begin-->

        <interceptors>

            <!-- 自定义拦截器 -->

            <interceptor name="myIntercetor" class="com.market.web.interceptor.MyInterceptor">

                <!-- 指定方法不拦截 -->

                <param name="excludeMethods">login</param>

            </interceptor>

            <!-- 定义拦截器栈 -->

            <interceptor-stack name="myStack">

                <interceptor-ref name="myIntercetor"></interceptor-ref>

                <interceptor-ref name="defaultStack"></interceptor-ref>

            </interceptor-stack>

        </interceptors>

        <!-- 设置默认拦截器栈 -->

        <default-interceptor-ref name="myStack"/>

<!--自定义拦截器可以====不配置 end-->

        <!-- 配置全局结果集 -->

        <global-results>

            <result name="login">/返回的页面</result>

        </global-results>

        <!-- 用户管理 -->

        <action name="userAction_*" class="userAction" method="{1}">

            <result name="home">/返回的页面</result>

        </action>

    </package>

</struts>
4.在实体包下配置 实体名.hbm.xml
<?xml version="1.0" encoding="utf-8"?>

<!DOCTYPE hibernate-mapping PUBLIC "-//Hibernate/Hibernate Mapping DTD 3.0//EN"

"http://www.hibernate.org/dtd/hibernate-mapping-3.0.dtd">

<hibernate-mapping>

    <class name="com.market.entity.Product" table="t_product">

        <id name="列名">

            <column name="属性名" length="长度值" />

            <generator class="native" />

        </id>

        <property name="属性名">

            <column name="列名" length="长度值"/>

        </property>

    </class>

</hibernate-mapping>
5.在src下建立applicationContext.xml。
<?xml version="1.0" encoding="UTF-8"?>

<beans xmlns:xsi="http://www.w3.org/2001/XMLSchema-instance"

    xmlns="http://www.springframework.org/schema/beans" xmlns:context="http://www.springframework.org/schema/context"

    xmlns:aop="http://www.springframework.org/schema/aop" xmlns:tx="http://www.springframework.org/schema/tx"

    xmlns:jaxws="http://cxf.apache.org/jaxws" xmlns:soap="http://cxf.apache.org/bindings/soap"

    xsi:schemaLocation="http://www.springframework.org/schema/beans http://www.springframework.org/schema/beans/spring-beans-4.2.xsd

                            http://www.springframework.org/schema/context http://www.springframework.org/schema/context/spring-context-4.2.xsd

                            http://www.springframework.org/schema/aop http://www.springframework.org/schema/aop/spring-aop-4.2.xsd

                            http://www.springframework.org/schema/tx http://www.springframework.org/schema/tx/spring-tx-4.2.xsd

                            http://cxf.apache.org/bindings/soap http://cxf.apache.org/schemas/configuration/soap.xsd

                            http://cxf.apache.org/jaxws http://cxf.apache.org/schemas/jaxws.xsd">

    <!-- 读取db.properties -->

    <context:property-placeholder location="classpath:db.properties" />

    <!-- 配置c3p0连接池 -->

    <bean name="dataSource" class="com.mchange.v2.c3p0.ComboPooledDataSource">

        <property name="jdbcUrl" value="${jdbc.jdbcUrl}"></property>

        <property name="driverClass" value="${jdbc.driverClass}"></property>

        <property name="user" value="${jdbc.user}"></property>

        <property name="password" value="${jdbc.password}"></property>

    </bean>

    <!-- 将SessionFactory配置到spring的容器中 -->

    <bean name="sessionFactory" class="org.springframework.orm.hibernate5.LocalSessionFactoryBean">

        <!-- 将连接池注入到sessionFactory,hibernate通过连接池获取连接 -->

        <property name="dataSource" ref="dataSource"></property>

        <!-- 配置hibernate基本信息 -->

        <property name="hibernateProperties">

            <props>

                <prop key="hibernate.dialect">org.hibernate.dialect.MySQLDialect</prop>

                <!-- 将hibernate生成的sql语句打印到控制台 -->

                <prop key="hibernate.show_sql">true</prop>

                <!-- 将hibernate生成的sql语句格式化(语法缩进) -->

                <prop key="hibernate.format_sql">true</prop>

                <!-- 自动建表 -->

                <prop key="hibernate.hbm2ddl.auto">update</prop>

            </props>

        </property>

        <!-- 引入orm元数据 -->

        <property name="mappingLocations">

            <list>

                <value>classpath:com/market/entity/*.xml</value>

            </list>

        </property>

    </bean>

    <!-- 配置核心事物管理器 -->

    <bean name="transactionManager" class="org.springframework.orm.hibernate5.HibernateTransactionManager">

        <property name="sessionFactory" ref="sessionFactory"></property>

    </bean>

    <!-- 开启spring组件扫描 -->

    <context:component-scan base-package="com.market"/>

    <!-- 支持spring注解 -->

    <context:annotation-config/>

    <!-- 开启注解事物 -->

    <tx:annotation-driven/>

</beans>
6.在src下建立数据库的相关配置信息db.properties。
jdbc.driverClass=com.mysql.jdbc.Driver

jdbc.jdbcUrl=jdbc:mysql:///数据库名称

jdbc.user=用户名

jdbc.password=密码
7.建立一个log4j.properties记录日志信息。
### direct log messages to stdout ###

log4j.appender.stdout=org.apache.log4j.ConsoleAppender

log4j.appender.stdout.Target=System.err

log4j.appender.stdout.layout=org.apache.log4j.PatternLayout

log4j.appender.stdout.layout.ConversionPattern=%d{ABSOLUTE} %5p %c{1}:%L - %m%n

### direct messages to file mylog.log ###

log4j.appender.file=org.apache.log4j.FileAppender

log4j.appender.file.File=e:\\mylog.log

log4j.appender.file.layout=org.apache.log4j.PatternLayout

log4j.appender.file.layout.ConversionPattern=%d{ABSOLUTE} %5p %c{1}:%L - %m%n

### set log levels - for more verbose logging change 'info' to 'debug' ###

### fatal error warn info debug trace

log4j.rootLogger=error, stdout
8.开发中使用注解@Controller,@Service,@Repository,@Transactional 等注入属性。
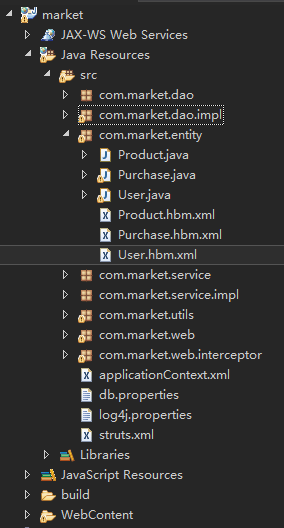
9.我的目录结构如下
ssh框架整合笔记的更多相关文章
- 【SSH】---【Struts2、Hibernate5、Spring4集成开发】【SSH框架整合笔记】
Struts2.Hibernate5.Spring4集成开发步骤: 一.导入Jar包(基本的大致有41个,根据实际项目的需求自己添加) antlr-2.7.7.jar aopalliance.jar ...
- 【SSH】---【Struts2、Hibernate5、Spring4】【SSH框架整合笔记 】
一.为什么要使用接口? 三层体系架构上层调用下层的时候最好使用接口,比如action层调用service的时候,private IUserDAO userDAO;这里将属性定义为接口,调用DAO的时候 ...
- SSH框架整合
SSH框架整合 一.原理图 action:(struts2) 1.获取表单的数据 2.表单的验证,例如非空验证,email验证等 3.调用service,并把数据传递给service Service: ...
- dwr与ssh框架整合教程
(1)dwr与ssh框架整合教程dwr框架介绍. DWR(Direct Web Remoting)是一个用于改善web页面与Java类交互的远程服务器端Ajax开源框架,可以帮助开 发人员开发包含AJ ...
- ssh框架整合之登录以及增删改查
1.首先阐述一下我用得开发工具,myeclipse2017+oracle,所以我的基本配置步骤可能不一样,下面我用几张图来详解我的开发步骤. ---1先配置structs (Target 选择apac ...
- Spring+Hibernate+Struts(SSH)框架整合
SSH框架整合 前言:有人说,现在还是流行主流框架,SSM都出来很久了,更不要说SSH.我不以为然.现在许多公司所用的老项目还是ssh,如果改成流行框架,需要成本.比如金融IT这一块,数据库dao层还 ...
- J2EE进阶(十)SSH框架整合常见问题汇总(一)
SSH框架整合常见问题汇总(一) 前言 以下所列问题具有针对性,但是遇到同类型问题时均可按照此思路进行解决. HTTP Status 404 - No result defined for actio ...
- MVC+Spring.NET+NHibernate .NET SSH框架整合 C# 委托异步 和 async /await 两种实现的异步 如何消除点击按钮时周围出现的白线? Linq中 AsQueryable(), AsEnumerable()和ToList()的区别和用法
MVC+Spring.NET+NHibernate .NET SSH框架整合 在JAVA中,SSH框架可谓是无人不晓,就和.NET中的MVC框架一样普及.作为一个初学者,可以感受到.NET出了MV ...
- SSH框架整合的其它方式
--------------------siwuxie095 SSH 框架整合的其它方式 1.主要是整合 Spring 框架和 Hibernate 框架时,可以不写 Hibernate 核心配置文件: ...
随机推荐
- arcgis api for flex 除去 esri map控件中的logo标志
在程序的applicationComplete方法中添加下列代码 private function reallyHideESRILogo(map : Map) : void { for(var i : ...
- JavaScript(二、BOM 浏览器对象模型)
一.BOM是什么 BOM是browser object model的缩写,简称浏览器对象模型 BOM提供了独立于内容而与浏览器窗口进行交互的对象 由于BOM主要用于管理窗口与窗口之间的通讯,因此其核心 ...
- Java动态代理(一)
好久没有动笔了,最近想巩固一下自己的基础知识,最近听到一同事问为什么JDK动态代理不能代理类,一听感觉懵逼呀!自己好像也不能很好的描述出来,所以想用2篇文章来复习一下动态代理知识: 一.什么是静态代理 ...
- spring boot之从零开始开发自己的网站
概述 首先要感谢两位大神,该项目的想法来源自tale和MyBlog,本项目的想法. 做了一些改造,增加了一些功能和一些代码的重构,并且更换了博客主题. 关于项目,对于开发的练手项目,能够工程化,严谨一 ...
- The JRE_HOME environment variable is not defined correctly
启动Tomcat后startup.bat脚本调用了catalina.bat,然后catalina.bat调用了setclasspath.bat,setclasspath.bat的头部定义了JAVA_H ...
- VC++中字符串编码处理的一些相关问题
前言 什么是tchar? 百度百科对其的定义如下": 因为C++支持两种字符串,即常规的ANSI编码(使用""包裹)和Unicode编码(使用L""包 ...
- Cookie与 Session使用详解
Cookie概念 在浏览某些 网站 时,这些网站会把 一些数据存在 客户端 , 用于使用网站 等跟踪用户,实现用户自定义 功能. 是否设置过期时间: 如果不设置 过期时间,则表示这个 Cookie生命 ...
- Spring Boot 1.4测试的简单理解
首先maven要引入spring-boot-starter-test这个包. 先看一段代码 @RunWith(SpringRunner.class) @SpringBootTest(webEnviro ...
- div布局之面向对象
栗子之导航条(navbar) http://www.runoob.com/try/try2.php?filename=bootstrap-using-glyphicons-navbar <!DO ...
- Flask开发微电影网站(一)
1.用到的Flask知识 1.使用整形,浮点型,路径型,字符串型下正则表达式路由转化器 2.使用GET与POST请求,上传文件,cookie获取与响应,404处理 3.使用模板自动转义,定义过滤器,定 ...