centos7配置国内yum源
1、什么是yum仓库?
yum仓库就是使用yum命令下载软件的镜像地址。
我们通常使用 yum install 命令来在线安装 linux系统的软件, 这种方式可以自动处理依赖性关系,并且一次安装所有依赖的软体包,但是经常会遇到从国外镜像下载速度慢,无法下载的情况。那么此时我们就需要把我们的yum 源改为国内的镜像。
yum的配置文件
yum 的配置文件在 /etc/yum.repos.d 目录下, 其中有多个配置文件,每一个配置文件中都可以配置一个或多个repository, 但是最终会被合并为一个交给系统,所以多个文件只是为了方便管理。
2、yum仓库配置
下面提供了多个镜像仓库配置说明,实际使用时,选择其中一个配置即可。
2.1、阿里镜像仓库配置
进入阿里镜像仓库网站 https://opsx.alibaba.com/mirror

找到centos,点击右边的 帮助 ,看到阿里镜像仓库给出的yum的配置说明。
2.1.1、配置步骤
根据官网的说明,我们详细说说每步骤的意思。
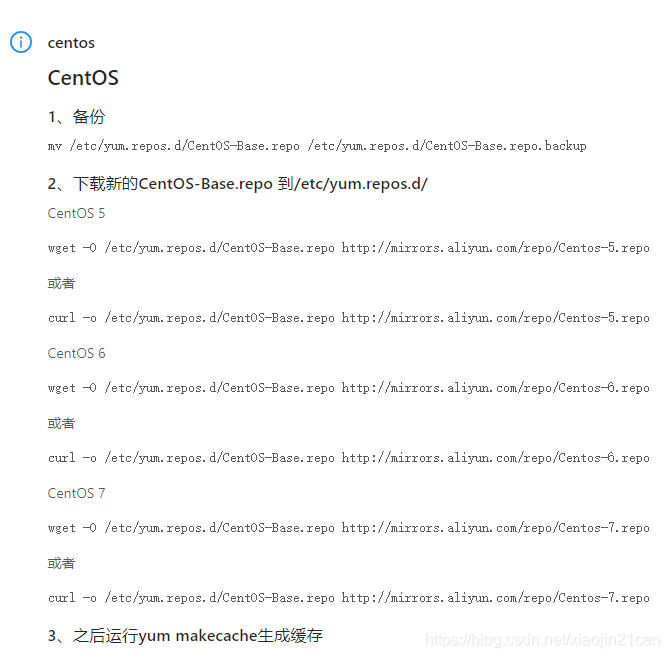
(1)、备份,将 CentOS-Base.repo 为CentOS-Base.repo.backup
mv /etc/yum.repos.d/CentOS-Base.repo /etc/yum.repos.d/CentOS-Base.repo.backup
(2)、下载新的 http://mirrors.aliyun.com/repo/Centos-7.repo,并命名为CentOS-Base.repo
wget -O /etc/yum.repos.d/CentOS-Base.repo http://mirrors.aliyun.com/repo/Centos-7.repo

或者

curl -o /etc/yum.repos.d/CentOS-Base.repo http://mirrors.aliyun.com/repo/Centos-7.repo
(3)、清除缓存
yum clean all     # 清除系统所有的yum缓存

yum makecache     # 生成yum缓存

yum update
2.1.2、epel源 安装和配置
(1)、查看可用的epel源
[java@localhost yum.repos.d]$ yum list | grep epel-release

epel-release.noarch                         7-11                       extras

[java@localhost yum.repos.d]$
(2)、安装 epel
[java@localhost yum.repos.d]$ yum install -y epel-release

......省略.....
(3)、配置阿里镜像提供的epel源
wget -O /etc/yum.repos.d/epel-7.repo http://mirrors.aliyun.com/repo/epel-7.repo
4、清除缓存
yum clean all     # 清除系统所有的yum缓存

yum makecache     # 生成yum缓存

yum update
2.1.3、查看yum源
查看所有的yum源:
yum repolist all
查看可用的yum源:
yum repolist enabled
2.2、配置 清华大学镜像仓库
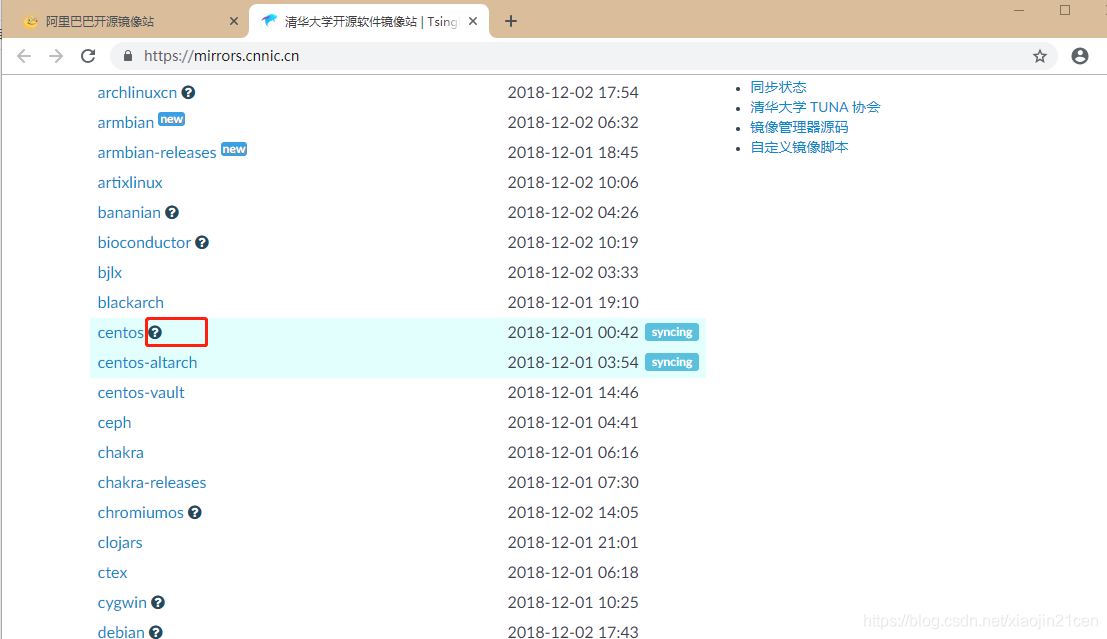
点击 ? 进入帮助说明页面 https://mirrors.cnnic.cn/help/centos/。
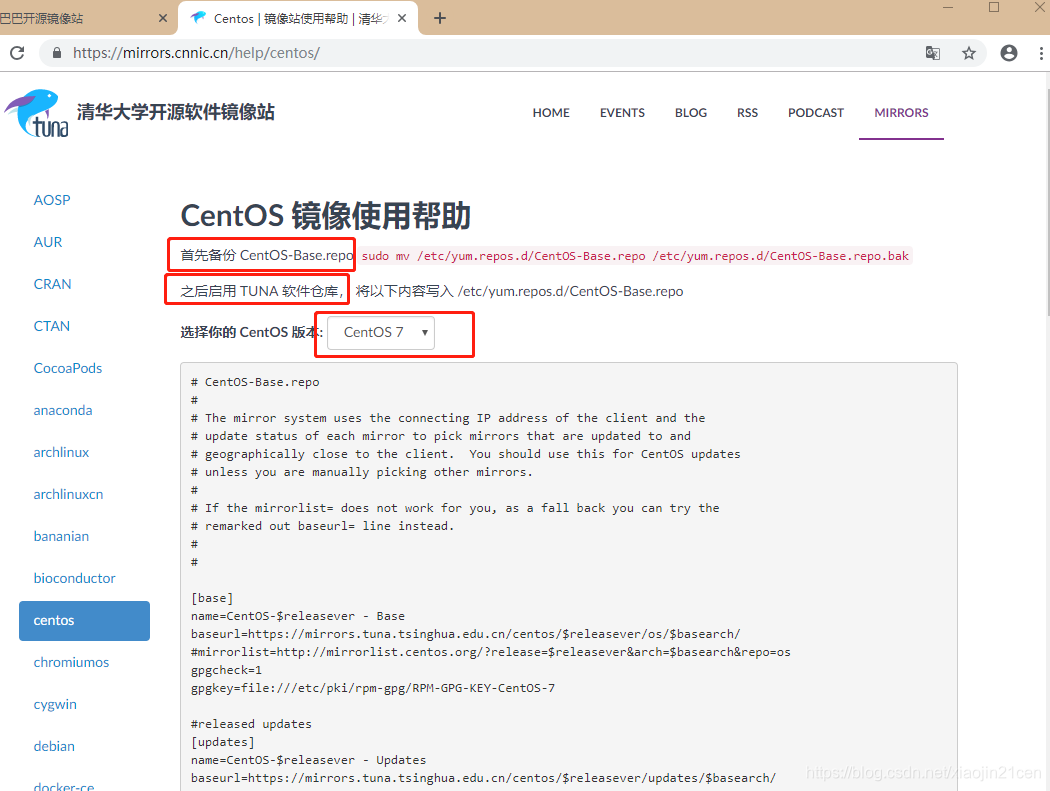
页面提供了 CentOS5,CentOS6、CentOS7 的镜像仓库配置,下面列出的是CentOS7的配置。
(1)、首先备份 CentOS-Base.repo
mv /etc/yum.repos.d/CentOS-Base.repo /etc/yum.repos.d/CentOS-Base.repo.bak
(2)、之后启用 TUNA 软件仓库, 将清华大学镜像仓库信息写入 /etc/yum.repos.d/CentOS-Base.repo
# CentOS-Base.repo

#

# The mirror system uses the connecting IP address of the client and the

# update status of each mirror to pick mirrors that are updated to and

# geographically close to the client.  You should use this for CentOS updates

# unless you are manually picking other mirrors.

#

# If the mirrorlist= does not work for you, as a fall back you can try the

# remarked out baseurl= line instead.

#

#

[base]


name=CentOS-$releasever - Base


baseurl=https://mirrors.tuna.tsinghua.edu.cn/centos/$releasever/os/$basearch/
mirrorlist=http://mirrorlist.centos.org/?release=$releasever&arch=$basearch&repo=os

gpgcheck=1


gpgkey=file:///etc/pki/rpm-gpg/RPM-GPG-KEY-CentOS-7
released updates

[updates]


name=CentOS-$releasever - Updates


baseurl=https://mirrors.tuna.tsinghua.edu.cn/centos/$releasever/updates/$basearch/
mirrorlist=http://mirrorlist.centos.org/?release=$releasever&arch=$basearch&repo=updates

gpgcheck=1


gpgkey=file:///etc/pki/rpm-gpg/RPM-GPG-KEY-CentOS-7
additional packages that may be useful

[extras]


name=CentOS-$releasever - Extras


baseurl=https://mirrors.tuna.tsinghua.edu.cn/centos/$releasever/extras/$basearch/
mirrorlist=http://mirrorlist.centos.org/?release=$releasever&arch=$basearch&repo=extras

gpgcheck=1


gpgkey=file:///etc/pki/rpm-gpg/RPM-GPG-KEY-CentOS-7
additional packages that extend functionality of existing packages

[centosplus]


name=CentOS-$releasever - Plus


baseurl=https://mirrors.tuna.tsinghua.edu.cn/centos/$releasever/centosplus/$basearch/
mirrorlist=http://mirrorlist.centos.org/?release=$releasever&arch=$basearch&repo=centosplus

gpgcheck=1


enabled=0


gpgkey=file:///etc/pki/rpm-gpg/RPM-GPG-KEY-CentOS-7
(3)、清除缓存
yum clean all     # 清除系统所有的yum缓存

yum makecache     # 生成yum缓存

yum update
</div>
原文地址:https://blog.csdn.net/xiaojin21cen/article/details/84726193
centos7配置国内yum源的更多相关文章
- centos7 配置国内yum源
配置清华大学镜像仓库 URL:https://mirrors.cnnic.cn/ CentOS 镜像使用帮助 https://mirrors.cnnic.cn/help/centos/ 建议先备份 C ...
- contos 配置国内yum源
contos配置国内yum源 前言 rpm管理软件包的命令,很难用,需要手动解决以来关系,所以最好用 yum 的理念是使用一个中心仓库(repository)管理一部分甚至一个distribution ...
- contos配置国内yum源
contos配置国内yum源 前言 rpm管理软件包的命令,很难用,需要手动解决以来关系,所以最好用 yum 的理念是使用一个中心仓库(repository)管理一部分甚至一个distribution ...
- CentOS7 配置163 yum源(详细步骤)
CentOS7 配置163 yum源 1)下载repo文件 wget http://mirrors.163.com/.help/CentOS7-Base-163.repo 2)备份并替换系统的r ...
- linux 配置本地yum源,配置国内yum源,配置epel源
目录 一.配置本地yum源 二.配置国内yum源和epel源 一.配置本地yum源 1.挂载ISO镜像 mount -o loop /mnt/yum-iso/CentOS-7-x86_64-DVD-1 ...
- 虚拟机centos7配置本地yum源
在虚拟机中要使用yum命令,就要先配置一下yum源,下面就分享一下这个过程: 1. 挂载iso到vmware,首先得确保CD/DVD连接到镜像.可以这样操作 2. 执行下面的命令 # mkdir /m ...
- CentOS6配置国内yum源
在安装完CentOS后为了加快安装.更新rpm包的速度.需要将yum源改为国内源,国内比较快的源有中科大.163.sohu源.下面修改为163源为例子: 首先进入源的配置目录:执行 cd /etc/y ...
- Centos配置国内yum源
网易(163)yum源是国内最好的yum源之一 ,无论是速度还是软件版本,都非常的不错,将yum源设置为163yum,可以提升软件包安装和更新的速度,同时避免一些常见软件版本无法找到.具体设置方法如下 ...
- [转]Centos配置国内yum源
原文地址:http://blog.chinaunix.net/uid-23683795-id-3477603.html 网易(163)yum源是国内最好的yum源之一 ,无论是速度还是软件版本,都非常 ...
随机推荐
- 119. Pascal's Triangle II@python
Given a non-negative index k where k ≤ 33, return the kth index row of the Pascal's triangle. Note t ...
- 配置基于Vim的Python开发环境
配置基于Vim的Python开发环境插件 Vundle YouCompleteMe NERDTree Vim-Jinja2-Syntax set nocompatible " be iMpr ...
- 【Redis】DENIED Redis is running in protected mode
.修改redis服务器的配置文件 vi redis.conf 注释以下绑定的主机地址 # bind 127.0.0.1 .修改redis服务器的参数配置 修改redis的守护进程为no ,不启用 &g ...
- http客户端与浏览器的区别
两者区别:浏览器对http响应头会进行特定处理(如自动读取本地缓存.设置cookie等),而http客户端(如crul)可能没有像浏览器那样的处理,某些封装程度高的http客户端,可能会有. 同一个文 ...
- 4.layhm框架初始化准备Init
hm\core\Boot 里 Boot 里run() 自动开起session 设置时区 <?php /** * Created by Haima. * Author:Haima * QQ:228 ...
- HashMap存储原理
1. HashMap概述 HashMap是基于哈希表的Map接口的非同步实现.此实现提供所有可选的映射操作,并允许使用null值和null键.此类不保证映射的顺序,特别是它不保证该顺序恒久不变. ...
- 剑指Offer(书):不用四则运算做加法
题目:写一个函数,求两个整数之和,不得使用四则运算位运算. package com.gjjun.jzoffer; /** * 写一个函数,求两个整数之和,不得使用四则运算 * * @author gj ...
- LeetCode(201) Bitwise AND of Numbers Range
题目 Given a range [m, n] where 0 <= m <= n <= 2147483647, return the bitwise AND of all numb ...
- 关于51单片机IO引脚的驱动能力与上拉电阻
单片机的引脚,可以用程序来控制,输出高.低电平,这些可算是单片机的输出电压.但是,程序控制不了单片机的输出电流. 单片机的输出电流,很大程度上是取决于引脚上的外接器件. 单片机输出低电平时,将允许外部 ...
- 哪里是Maven的中央存储库?
当你建立了一个Maven工程,Maven会检查你的pom.xml文件,确定要下载的依赖.首先,Maven将从您的本地库Maven查找,如果没有找到,Maven会从中央存储库-http://repo1. ...