Spring整合CXF发布及调用WebService
这几天终于把webService搞定,下面给大家分享一下发布webService和调用webService的方法
- 添加jar包 (官方下载地址:http://cxf.apache.org/download.html 为了方便扩展我把所有的jar包都加了)
- 在web.xml中配置spirng以及CXF
<?xml version="1.0" encoding="UTF-8"?>

<web-app version="2.5"

    xmlns="http://java.sun.com/xml/ns/javaee"

    xmlns:xsi="http://www.w3.org/2001/XMLSchema-instance"

    xsi:schemaLocation="http://java.sun.com/xml/ns/javaee

    http://java.sun.com/xml/ns/javaee/web-app_2_5.xsd">

  <display-name></display-name>

  <welcome-file-list>

    <welcome-file>index.jsp</welcome-file>

  </welcome-file-list>

  <!-- spring -->

  <context-param>

      <param-name>contextConfigLocation</param-name>

      <param-value>classpath:applicationContext.xml</param-value>

  </context-param>

  <listener>

    <listener-class>org.springframework.web.context.ContextLoaderListener</listener-class>

  </listener>

  <listener>

      <listener-class>org.springframework.web.util.IntrospectorCleanupListener</listener-class>

  </listener>

    <!-- CXFService -->

    <servlet>

        <servlet-name>CXFService</servlet-name>

        <servlet-class>org.apache.cxf.transport.servlet.CXFServlet</servlet-class>

    </servlet>

    <servlet-mapping>

        <servlet-name>CXFService</servlet-name>

        <url-pattern>/*</url-pattern>

    </servlet-mapping>

</web-app>
3.写接口实现类 要发布webService的类及要被调用的接口
package cn.com.lrl.service.impl;

import javax.jws.WebParam;

import javax.jws.WebResult;

import javax.jws.WebService;

import cn.com.lrl.service.JAXService;

@WebService

public class JAXServiceImpl implements JAXService {

    @Override

    public @WebResult(name="news")String sayHello(@WebParam(name="name") String name) {

        return name +"   hello!";

    }
4.配置spirng配置文件,发布webService jaxws:server 标签中的address 中的路径 就是访问webService的路径 实际路径是http://localhost:8080/ws/Users?wsdl(ws是项目名)
<?xml version="1.0" encoding="UTF-8"?>

<beans xmlns="http://www.springframework.org/schema/beans"

        xmlns:xsi="http://www.w3.org/2001/XMLSchema-instance"

         xmlns:jaxws="http://cxf.apache.org/jaxws"

        xsi:schemaLocation="

            http://www.springframework.org/schema/beans http://www.springframework.org/schema/beans/spring-beans-3.2.xsd

            http://cxf.apache.org/jaxws http://cxf.apache.org/schemas/jaxws.xsd"

            >

        <!-- 发布的webService类 -->

        <bean id="userServiceBean" class="cn.com.lrl.service.impl.JAXServiceImpl"/>

        <!-- 注意下面的address,这里的address的名称就是访问的WebService的name -->

        <jaxws:server id="userService" serviceClass="cn.com.lrl.service.JAXService" address="/Users">

            <jaxws:serviceBean>

                <!-- 要暴露的 bean 的引用 -->

                <ref bean="userServiceBean"/>

            </jaxws:serviceBean>

            <!-- 添加请求日志 -->

            <jaxws:inInterceptors>

                <bean class="org.apache.cxf.interceptor.LoggingInInterceptor"/>

            </jaxws:inInterceptors>

               <!-- 添加响应 日志 -->

            <jaxws:outInterceptors>

                <bean class="org.apache.cxf.interceptor.LoggingOutInterceptor"/>

               </jaxws:outInterceptors>

        </jaxws:server>

</beans>
5.启动tomcat发布webService 访问你的webService 如果是这样就代表成功了
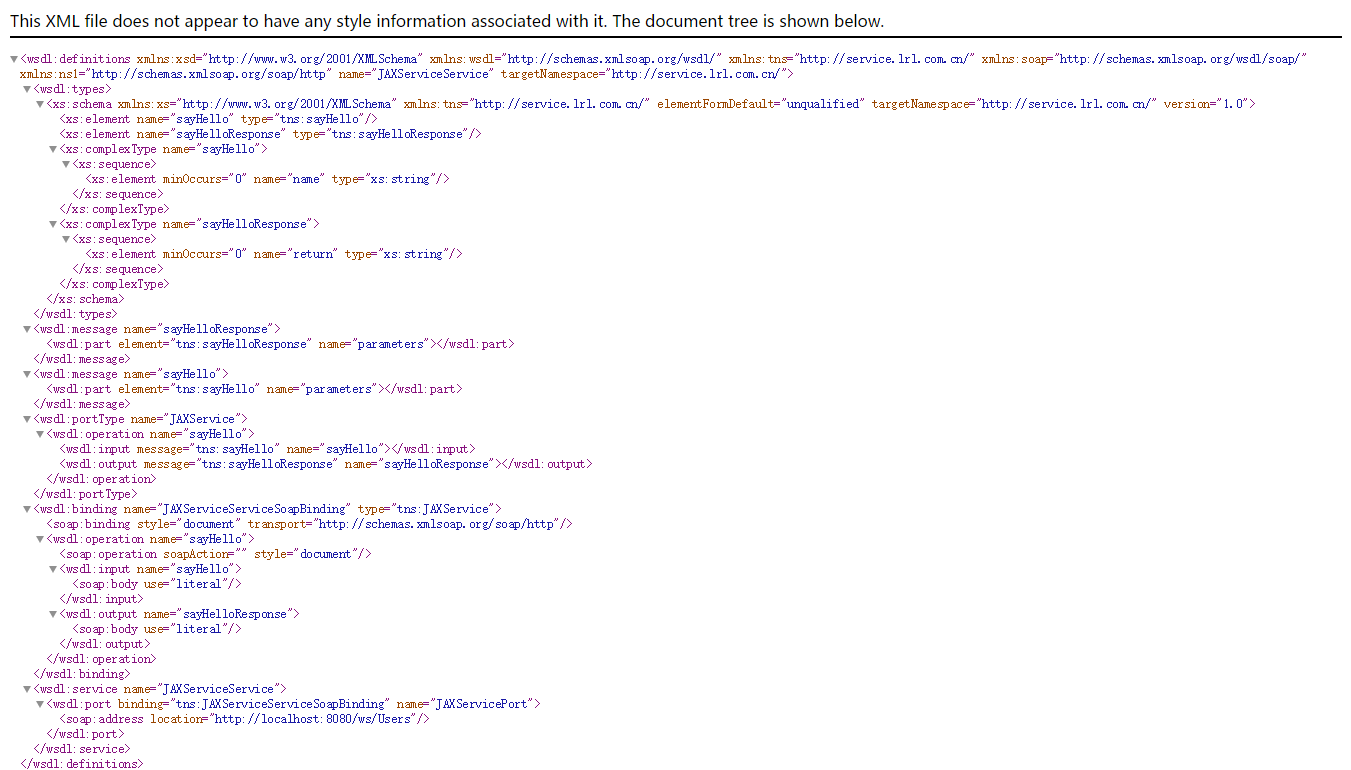 6.通过wsimport解析wsdl文件
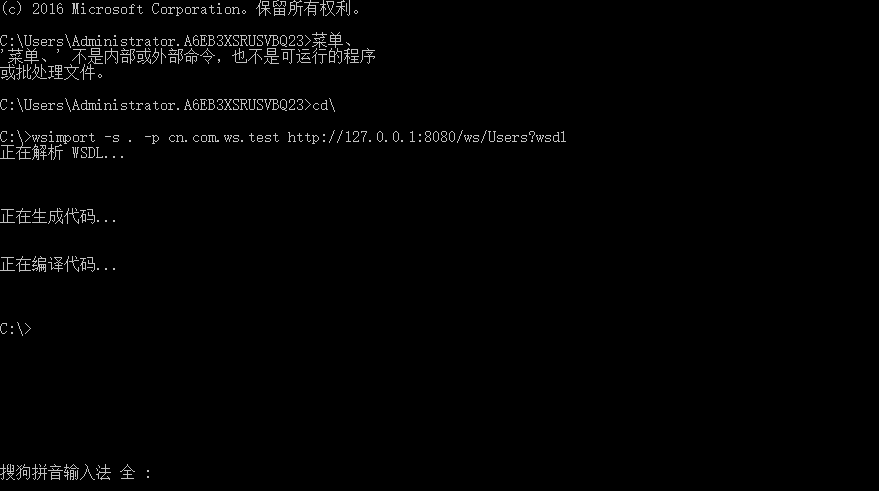
7.将生成的代码复制到要调用webService的项目
8.测试接口是否可以使用
public class Test {

    public static void main(String[] args) {

        JAXServiceService jaxServiceService =new JAXServiceService();

        JAXService jaxService=jaxServiceService.getJAXServicePort();

        //调用方法输出

        System.out.println(jaxService.sayHello("lrl"));

    }

}
9.调用成功 控制台输出

Spring整合CXF发布及调用WebService的更多相关文章
- 使用CXF发布和调用webservice之HelloWorld入门
依赖的JAR cxf-2.2.10.jar jetty-6.1.21.jar jetty-util-6.1.21.jar servlet-2_5-api.jar ...
- So easy Webservice 8.spring整合CXF 发布WS
1.添加jar包(cxf的jar包中包含了spring的jar包),添加spring配置文件 2.web.xml中配置CXFServlet,过滤WS服务的地址 <!-- 配置CXFServlet ...
- Spring整合CXF,发布RSETful 风格WebService(转)
Spring整合CXF,发布RSETful 风格WebService 这篇文章是承接之前CXF整合Spring的这个项目示例的延伸,所以有很大一部分都是一样的.关于发布CXF WebServer和Sp ...
- Spring整合CXF,发布RSETful 风格WebService
原文地址:http://www.cnblogs.com/hoojo/archive/2012/07/23/2605219.html 这篇文章是承接之前CXF整合Spring的这个项目示例的延伸,所以有 ...
- Spring整合CXF之发布WebService服务
今天我们来讲下如何用Spring来整合CXF,来发布WebService服务: 给下官方文档地址:http://cxf.apache.org/docs/writing-a-service-with-s ...
- Spring集成CXF发布WebService并在客户端调用
Spring集成CXF发布WebService 1.导入jar包 因为官方下载的包里面有其他版本的sprring包,全导入会产生版本冲突,所以去掉spring的部分,然后在项目根目录下新建了一个CXF ...
- SpringMVC4整合CXF发布WebService
SpringMVC4整合CXF发布WebService版本:SpringMVC 4.1.6,CXF 3.1.0项目管理:apache-maven-3.3.3 pom.xml <project x ...
- Spring整合CXF步骤,Spring实现webService,spring整合WebService
Spring整合CXF步骤 Spring实现webService, spring整合WebService >>>>>>>>>>>> ...
- Java WebService 教程系列之 Spring 整合 CXF
Java WebService 教程系列之 Spring 整合 CXF 一.引入 jar 包 <dependency> <groupId>org.apache.cxf</ ...
随机推荐
- python中统计计数的几种方法
以下实例展示了 count() 方法的使用方法: 1 2 3 4 5 6 # !/usr/bin/python3 T = (123, 'Google', 'Runoob', 'Taobao', 1 ...
- 使用C++11实现一个半同步半异步线程池
前言 C++11之前我们使用线程需要系统提供API.posix线程库或者使用boost提供的线程库,C++11后就加入了跨平台的线程类std::thread,线程同步相关类std::mutex.std ...
- 将std::array转换成std::tuple
template<typename Array, std::size_t... Index> decltype(auto) array2tuple_impl(const Array& ...
- windows忘记密码
方法一 在开机时,按下F8进入”带命令提示符的安全”模式 输入”NET USER+用户名+123456/ADD”可把某用户的密码强行设置为”123456″ 方法二 如用户忘记登入密码可按下列方法解决 ...
- 20145328 《Java程序设计》第3周学习总结
20145328 <Java程序设计>第3周学习总结 教材学习内容总结 第四章 对象Object:存在的具体实体,具有明确的状态和行为 类Class:具有相同属性和行为的一组对象的集合,用 ...
- python3执行js之pyexecjs
执行js的三种方法:1.阅读js代码,将之转成python2.找到js代码,用python第三方库执行相关代码 python2-pyv8 python3-pyexecjs3.用selenium驱动浏览 ...
- Codeforces - 828E DNA Evolution —— 很多棵树状数组
题目链接:http://codeforces.com/contest/828/problem/E E. DNA Evolution time limit per test 2 seconds memo ...
- LeetCode——Sort List
Question Sort a linked list in O(n log n) time using constant space complexity. Solution 分析,时间复杂度要求为 ...
- 【Semantic segmentation Overview】一文概览主要语义分割网络(转)
文章来源:https://www.tinymind.cn/articles/410 本文来自 CSDN 网站,译者蓝三金 图像的语义分割是将输入图像中的每个像素分配一个语义类别,以得到像素化的密集分类 ...
- windows向github提交代码
随便写的,留给自己看. 一.在github上注册并建立自己的仓库http://www.cnblogs.com/keZhenxu94/p/5288488.html 二.安装windows版本git界面工 ...