实验七:基于REST API的SDN北向应用实践
(一)基本要求
编写Python程序,调用OpenDaylight的北向接口实现以下功能
(1) 利用Mininet平台搭建下图所示网络拓扑,并连接OpenDaylight;
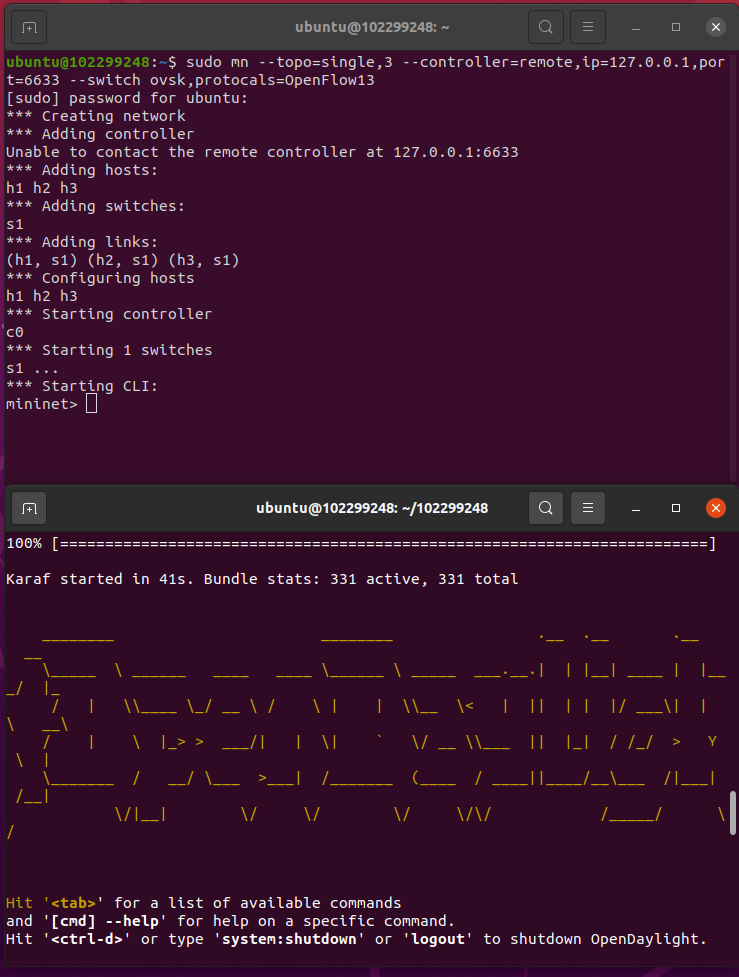
(2) 下发指令删除s1上的流表数据。
delete.py的代码
点击查看代码
#!/usr/bin/python

import requests

from requests.auth import HTTPBasicAuth

if __name__ == "__main__":

    url = 'http://127.0.0.1:8181/restconf/config/opendaylight-inventory:nodes/node/openflow:1/'

    headers = {'Content-Type': 'application/json'}

    res = requests.delete(url, headers=headers, auth=HTTPBasicAuth('admin', 'admin'))

    print (res.content)

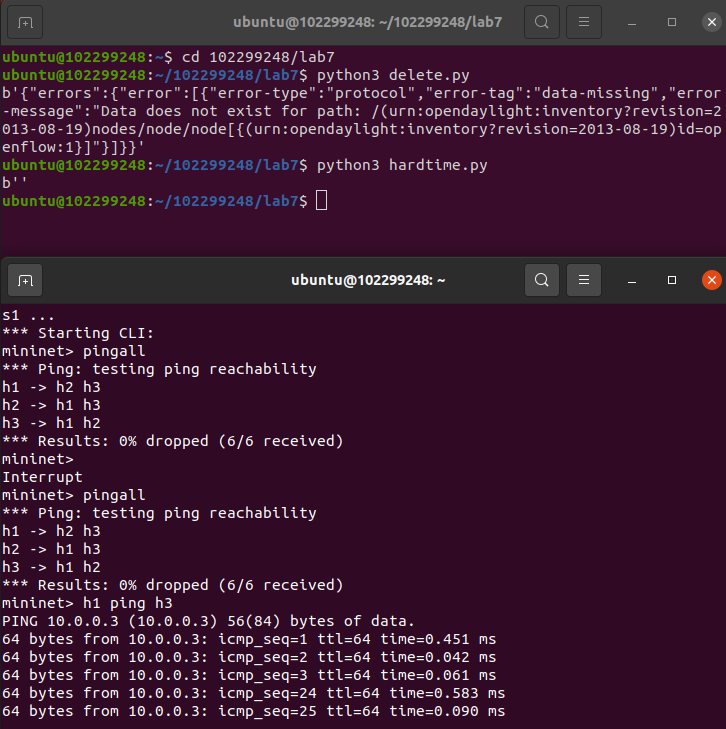
(3) 下发硬超时流表,实现拓扑内主机h1和h3网络中断20s。
hardtime.py的代码
点击查看代码
import requests

from requests.auth import HTTPBasicAuth

if __name__ == "__main__":

    url = 'http://127.0.0.1:8181/restconf/config/opendaylight-inventory:nodes/node/openflow:1/flow-node-inventory:table/0/flow/1'

    with open("./hardtime.json") as f:

        jstr = f.read()

    headers = {'Content-Type': 'application/json'}

    res = requests.put(url, jstr, headers=headers, auth=HTTPBasicAuth('admin', 'admin'))

    print (res.content)
hardtime.json的代码
点击查看代码
{

  "flow": [

    {

      "id": "1",

      "match": {

        "in-port": "1",

        "ethernet-match": {

          "ethernet-type": {

            "type": "0x0800"

          }

        },

        "ipv4-destination": "10.0.0.3/32"

      },

      "instructions": {

        "instruction": [

          {

            "order": "0",

            "apply-actions": {

              "action": [

                {

                  "order": "0",

                  "drop-action": {}

                }

              ]

            }

          }

        ]

      },

      "flow-name": "flow1",

      "priority": "65535",

      "hard-timeout": "20",

      "cookie": "2",

      "table_id": "0"

    }

  ]

}
(4) 获取s1上活动的流表数。
getflow.py的代码
点击查看代码
#!/usr/bin/python

import requests

from requests.auth import HTTPBasicAuth

if __name__ == "__main__":

    url = 'http://127.0.0.1:8181/restconf/operational/opendaylight-inventory:nodes/node/openflow:1/flow-node-inventory:table/0/opendaylight-flow-table-statistics:flow-table-statistics'

    headers = {'Content-Type': 'application/json'}

    res = requests.get(url,headers=headers, auth=HTTPBasicAuth('admin', 'admin'))

    print (res.content)

编写Python程序,调用Ryu的北向接口实现以下功能
(1) 实现上述OpenDaylight实验拓扑上相同的硬超时流表下发。

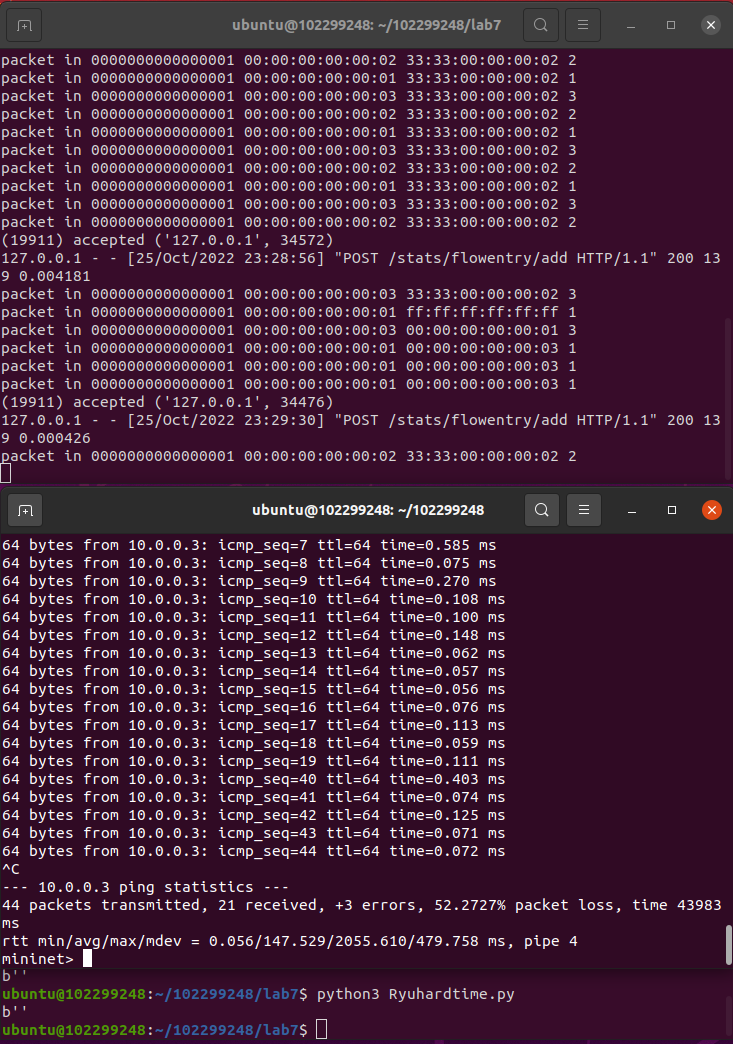
Ryuhardtime.py的代码
点击查看代码
#!/usr/bin/python

import requests

if __name__ == "__main__":

    url = 'http://127.0.0.1:8080/stats/flowentry/add'

    with open("./Ryuhardtime.json") as f:

        jstr = f.read()

    headers = {'Content-Type': 'application/json'}

    res = requests.post(url, jstr, headers=headers)

    print (res.content)
Ryuhardtime.json的代码
点击查看代码
{

    "dpid": 1,

    "cookie": 1,

    "cookie_mask": 1,

    "table_id": 0,

    "hard_timeout": 20,

    "priority": 65535,

    "flags": 1,

    "match":{

        "in_port":1,

    },

    "actions":[

    ]

 }
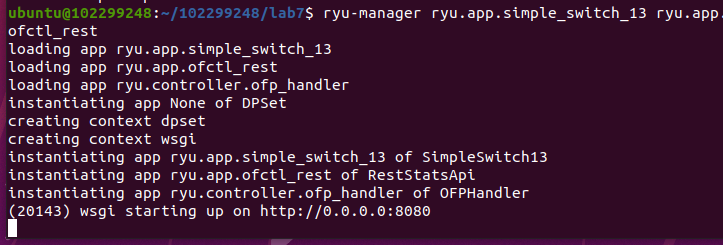
启动Ryu控制器
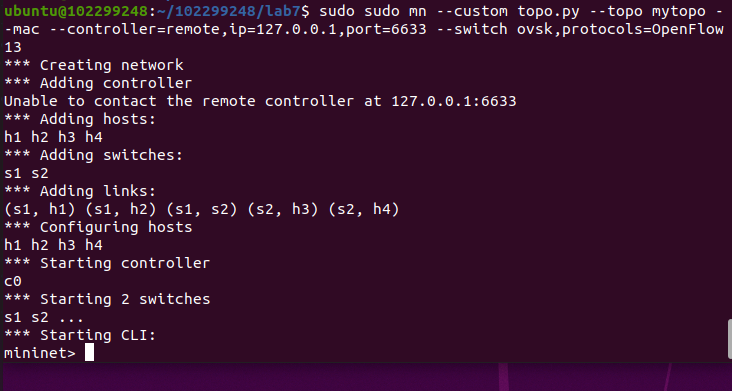
(2) 参考Ryu REST API的文档,基于VLAN实验的网络拓扑,编程实现相同的VLAN配置。
topo.py代码
点击查看代码
from mininet.topo import Topo

class MyTopo(Topo):

    def __init__(self):

        # initilaize topology

        Topo.__init__(self)

        self.addSwitch("s1")

        self.addSwitch("s2")

        self.addHost("h1")

        self.addHost("h2")

        self.addHost("h3")

        self.addHost("h4")

        self.addLink("s1", "h1")

        self.addLink("s1", "h2")

        self.addLink("s2", "h3")

        self.addLink("s2", "h4")

        self.addLink("s1", "s2")

topos = {'mytopo': (lambda: MyTopo())}
Ryuvlan.py的代码
点击查看代码
import json

import requests

if __name__ == "__main__":

    url = 'http://127.0.0.1:8080/stats/flowentry/add'

    headers = {'Content-Type': 'application/json'}

    flow1 = {

        "dpid": 1,

        "priority": 1,

        "match":{

            "in_port": 1

        },

        "actions":[

            {

                "type": "PUSH_VLAN",

                "ethertype": 33024

            },

            {

                "type": "SET_FIELD",

                "field": "vlan_vid",

                "value": 4096

            },

            {

                "type": "OUTPUT",

                "port": 3

            }

        ]

    }

    flow2 = {

        "dpid": 1,

        "priority": 1,

        "match":{

            "in_port": 2

        },

        "actions":[

            {

                "type": "PUSH_VLAN",

                "ethertype": 33024

            },

            {

                "type": "SET_FIELD",

                "field": "vlan_vid",

                "value": 4097

            },

            {

                "type": "OUTPUT",

                "port": 3

            }

        ]

    }

    flow3 = {

        "dpid": 1,

        "priority": 1,

        "match":{

            "vlan_vid": 0

        },

        "actions":[

            {

                "type": "POP_VLAN",

                "ethertype": 33024

            },

            {

                "type": "OUTPUT",

                "port": 1

            }

        ]

    }

    flow4 = {

        "dpid": 1,

        "priority": 1,

        "match": {

            "vlan_vid": 1

        },

        "actions": [

            {

                "type": "POP_VLAN",

                "ethertype": 33024

            },

            {

                "type": "OUTPUT",

                "port": 2

            }

        ]

    }

    flow5 = {

        "dpid": 2,

        "priority": 1,

        "match": {

            "in_port": 1

        },

        "actions": [

            {

                "type": "PUSH_VLAN",

                "ethertype": 33024

            },

            {

                "type": "SET_FIELD",

                "field": "vlan_vid",

                "value": 4096

            },

            {

                "type": "OUTPUT",

                "port": 3

            }

        ]

    }

    flow6 = {

        "dpid": 2,

        "priority": 1,

        "match": {

            "in_port": 2

        },

        "actions": [

            {

                "type": "PUSH_VLAN",

                "ethertype": 33024

            },

            {

                "type": "SET_FIELD",

                "field": "vlan_vid",

                "value": 4097

            },

            {

                "type": "OUTPUT",

                "port": 3

            }

        ]

    }

    flow7 = {

        "dpid": 2,

        "priority": 1,

        "match": {

            "vlan_vid": 0

        },

        "actions": [

            {

                "type": "POP_VLAN",

                "ethertype": 33024

            },

            {

                "type": "OUTPUT",

                "port": 1

            }

        ]

    }

    flow8 = {

        "dpid": 2,

        "priority": 1,

        "match": {

            "vlan_vid": 1

        },

        "actions": [

            {

                "type": "POP_VLAN",

                "ethertype": 33024

            },

            {

                "type": "OUTPUT",

                "port": 2

            }

        ]

    }

    res1 = requests.post(url, json.dumps(flow1), headers=headers)

    res2 = requests.post(url, json.dumps(flow2), headers=headers)

    res3 = requests.post(url, json.dumps(flow3), headers=headers)

    res4 = requests.post(url, json.dumps(flow4), headers=headers)

    res5 = requests.post(url, json.dumps(flow5), headers=headers)

    res6 = requests.post(url, json.dumps(flow6), headers=headers)

    res7 = requests.post(url, json.dumps(flow7), headers=headers)

    res8 = requests.post(url, json.dumps(flow8), headers=headers)
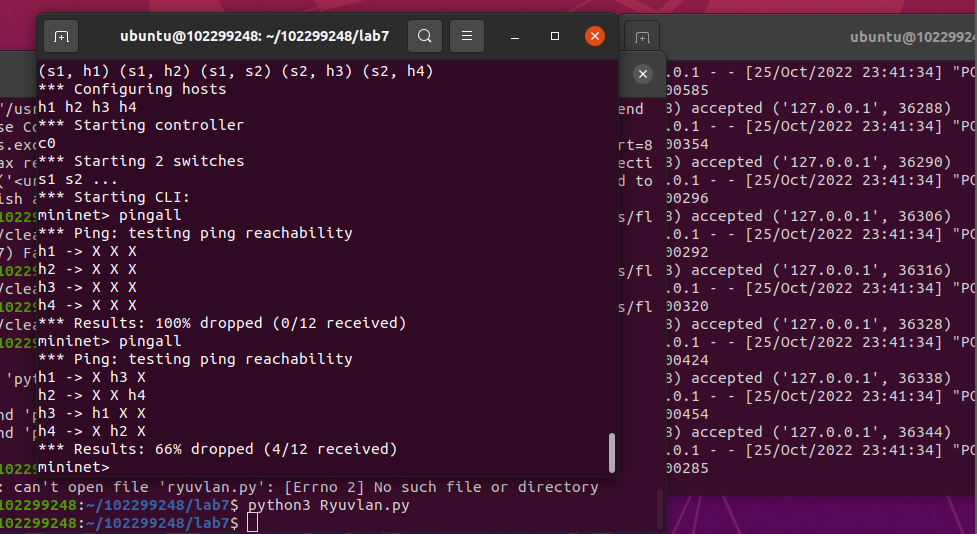
运行Ryuvlan.py之后pingall
(二)进阶要求
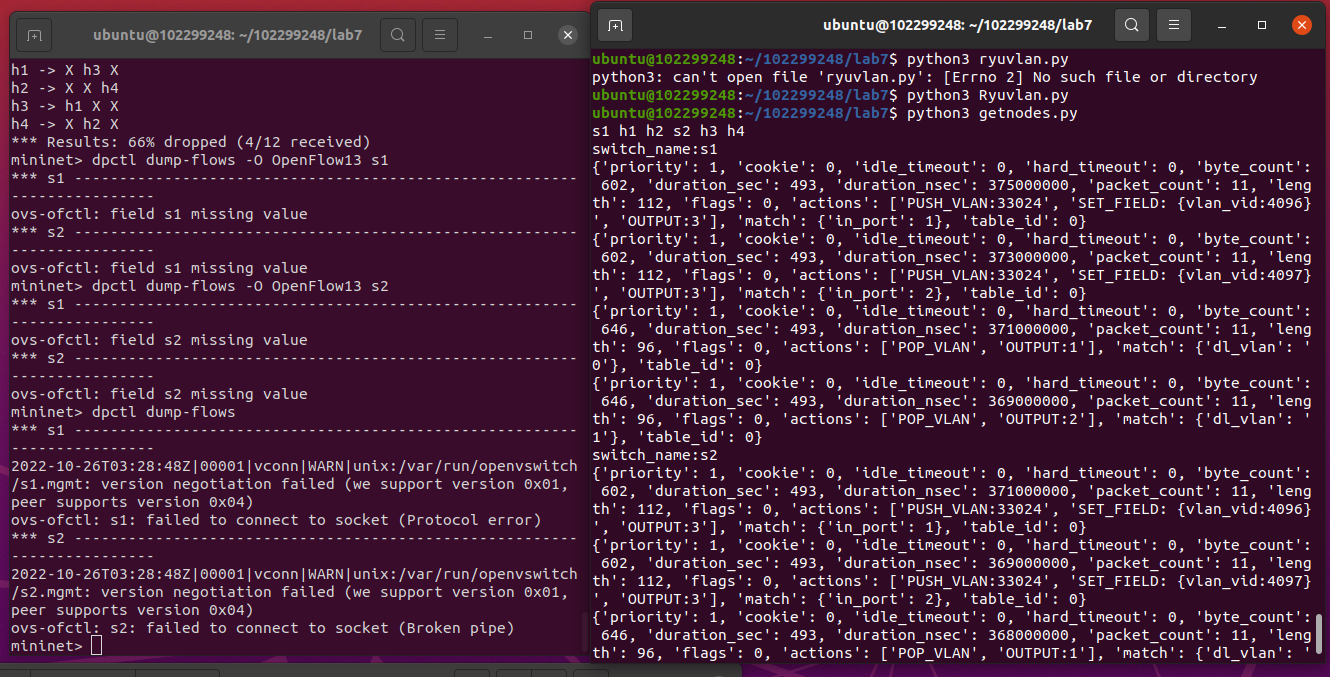
OpenDaylight或Ryu任选其一,编程实现查看前序VLAN实验拓扑中所有节点(含交换机、主机)的名称,以及显示每台交换机的所有流表项。
getnode.py的代码
点击查看代码
import requests

import time

import re

class GetNodes:

    def __init__(self, ip):

        self.ip = ip

    def get_switch_id(self):

        url = 'http://' + self.ip + '/stats/switches'

        re_switch_id = requests.get(url=url).json()

        switch_id_hex = []

        for i in re_switch_id:

            switch_id_hex.append(hex(i))

        return switch_id_hex

    def getflow(self):

        url = 'http://' + self.ip + '/stats/flow/%d'

        switch_list = self.get_switch_id()

        ret_flow = []

        for switch in switch_list:

            new_url = format(url % int(switch, 16))

            re_switch_flow = requests.get(url=new_url).json()

            ret_flow.append(re_switch_flow)

        return ret_flow

    def show(self):

        flow_list = self.getflow()

        for flow in flow_list:

            for dpid in flow.keys():

                dp_id = dpid

                switchnum= '{1}'.format(hex(int(dp_id)), int(dp_id))

                print('s'+switchnum,end = " ")

                switchnum = int(switchnum)

            for list_table in flow.values():

                for table in list_table:

                    string1 = str(table)

                    if re.search("'dl_vlan': '(.*?)'", string1) is not None:

                       num = re.search("'dl_vlan': '(.*?)'", string1).group(1);

                       if num == '0' and switchnum == 1:

                          print('h1',end = " ")

                       if num == '1' and switchnum == 1:

                          print('h2',end = " ")

                       if num == '0' and switchnum == 2:

                          print('h3',end = " ")

                       if num == '1' and switchnum == 2:

                          print('h4',end = " ")

        print("")

        flow_list = self.getflow()

        for flow in flow_list:

            for dpid in flow.keys():

                dp_id = dpid

                print('switch_name:s{1}'.format(hex(int(dp_id)), int(dp_id)))

            for list_table in flow.values():

                for table in list_table:

                    print(table)

s1 = GetNodes("127.0.0.1:8080")

s1.show()
个人总结
从配置环境开始就一直出问题的ODL,果不其然又出问题了,只能重新安装才能使用,后面的实验倒是一帆风顺,了解了相关OpenDaylight REST API和Ryu REST API的使用,学到了不少东西.
实验七:基于REST API的SDN北向应用实践的更多相关文章
- 实验7:基于REST API的SDN北向应用实践
一.实验目的 1.能够编写程序调用OpenDaylight REST API实现特定网络功能: 2.能够编写程序调用Ryu REST API实现特定网络功能. 二.实验环境 下载虚拟机软件Oracle ...
- 实验:基于http的yum源
实验:基于http的yum源 selinux,firewalld已经关闭',系统为CentOS7 repodata所在的目录就是yum源 下面介绍了如何把本地光盘通过httpd服务器变成yum源:多个 ...
- 《数据挖掘导论》实验课——实验七、数据挖掘之K-means聚类算法
实验七.数据挖掘之K-means聚类算法 一.实验目的 1. 理解K-means聚类算法的基本原理 2. 学会用python实现K-means算法 二.实验工具 1. Anaconda 2. skle ...
- Angular SPA基于Ocelot API网关与IdentityServer4的身份认证与授权(二)
上文已经介绍了Identity Service的实现过程.今天我们继续,实现一个简单的Weather API和一个基于Ocelot的API网关. 回顾 <Angular SPA基于Ocelot ...
- 实验6、Flask API使用示例和拓展
实验介绍 1. 实验内容 Flask 提供了多种API拓展,本节我们主要学习基于RESTful的Flask应用程序设计 2. 实验要点 学习和掌握多种RESTful的设计模式 3.实验环境 Cento ...
- Atitit 游戏的通常流程 attilax 总结 基于cocos2d api
Atitit 游戏的通常流程 attilax 总结 基于cocos2d api 加载音效1 加载页面1 添加精灵1 设置随机位置2 移动2 垃圾gc2 点击evt2 爆炸效果3 定时生成精灵3 加载音 ...
- Docker入门教程(七)Docker API
Docker入门教程(七)Docker API [编者的话]DockerOne组织翻译了Flux7的Docker入门教程,本文是系列入门教程的第七篇,重点介绍了Docker Registry API和 ...
- 你也可以玩转Skype -- 基于Skype API开发外壳程序入门
原文:你也可以玩转Skype -- 基于Skype API开发外壳程序入门 Skype是目前这个星球上最厉害的IM+VOIP软件,Skype现在已经改变了全球2.8亿人的生活方式.你,值得拥有! :) ...
- 基于 Aliexpress API 的小程序 : 批量 Copy 产品到不同的店铺
第一个基于 Aliexpress API 的小程序 : 批量 Copy 产品到不同的店铺 还没来得及用 API 重写软件, 先写个小程序来缓解一下手工压力: 批量Copy 产品到不同的店铺. 开网店 ...
- 【C++ 流类库与输入输出 】实验七
1. 基础练习 (1)教材习题 11-7 (2)教材习题 11-3 (3)教材习题 11-4 2. 应用练习 (1)已知有班级名单文件 list.txt(见实验 7 附件包).编写一个应用程序实现随机 ...
随机推荐
- 关于flex元素超出父元素的解决方法
左边是label, 右边是input. 设置父级为display:flex; input为flex:1; 然后label 为 white-space: nowrap; 这时input就有可能超出父级. ...
- WDA学习(24):Context Menu使用
1.17 UI Element:Context Menu使用 本实例测试创建Context Menu. 1.创建Component,View: V_CONTEXT_MENU; 2.创建Context节 ...
- 模型 线框shader
https://www.assetstore.unity3d.com/cn/?stay#!/content/21897
- js - class 操作
js - class 操作 // 添加 function addClass(dom, classNameString = '') { if (!dom.className.length) dom.cl ...
- 微信字体大小调整导致的H5页面错乱问题处理
当用户调整微信字体大小时会导致H5页面错乱,解决方案如下: ios:在css中加入-webkit-text-size-adjust: 100% !important; body { -webk ...
- 实验:笔记本电脑做桥接有线网络,笔记本通过wifi连手机热点,,硬件通过笔记本的有线网口上网
1.问题 我们需要做实验,将我们设计的W5500实验板上internet, 搭建环境比较麻烦. 1)学校上网需要先HTTP认证: 2)家里经常路由器固定位置,没有足够长的网线: 3)有时候需要临时搭 ...
- C# 屏蔽词过滤
参考:https://www.cnblogs.com/kubidemanong/p/10834993.html public class TreeNode { public char Char; pu ...
- redis 数据库在linux下的安装配置与使用
linux安装redis 完整步骤(1)安装: 1.获取redis资源 wget http://download.redis.io/releases/redis-4.0.8.tar.gz 2.解压 t ...
- 解决通过Eclipse启动Tomcat-Run On Server无法选择Tomcat v7.0的问题
在eclipse中配置Tomcat并启动右键项目 -> Run As -> Run on Server可能会出现无法选择Tomcat v7.0的现象如下图,不慌菜鸟小编带你解决!1.定位到 ...
- 在SQLServer中将数据从高版本导入低版本的方法
一般的软件都是向下兼容的,高版本通常都是可以兼容低版本.但是如果想将高版本数据库中的数据导入到低版本中,直接采用常规的备份还原或是分离附加操作就会因为结构不同而报错. 要想实现数据从高版本到低版本,除 ...