15. Spring boot CRUD
一、列表页 templates/emp/list.html
0、侧边栏链接:
<li class="nav-item">

    <a class="nav-link" href="#"  th:href="@{/emps}" th:class="${activeUrl == 'emps' ? 'nav-link active' : 'nav-link'}">

        <svg xmlns="http://www.w3.org/2000/svg" width="24" height="24" viewBox="0 0 24 24" fill="none" stroke="currentColor" stroke-width="2" stroke-linecap="round" stroke-linejoin="round" class="feather feather-users">

            <path d="M17 21v-2a4 4 0 0 0-4-4H5a4 4 0 0 0-4 4v2"></path>

            <circle cx="9" cy="7" r="4"></circle>

            <path d="M23 21v-2a4 4 0 0 0-3-3.87"></path>

            <path d="M16 3.13a4 4 0 0 1 0 7.75"></path>

        </svg>

        员工管理

    </a>

</li>
1、跳转映射请求
@GetMapping("/emps")

public String toEmpListPage(Model model) {

    return "emp/list";

}
2、列表页面源码
<div th:replace="commons/bar :: topBar"></div>

        <div class="container-fluid">

            <div class="row">

                <div th:replace="commons/bar :: sideBar(activeUrl=emps)"></div>

                <main role="main" class="col-md-9 ml-sm-auto col-lg-10 pt-3 px-4">

                    <h2><a class="btn btn-sm btn-success" href="emp" th:href="@{/emp}">员工添加</a></h2>

                        <div class="table-responsive">

                        <table class="table table-striped table-sm">

                            <thead>

                                <tr>

                                    <th>id</th>

                                    <th>姓氏</th>

                                    <th>邮箱</th>

                                    <th>性别</th>

                                    <th>部门</th>

                                    <th>生日</th>

                                    <th>操作</th>

                                </tr>

                            </thead>

                            <tbody>

                                <tr th:each="emp : ${emps}">

                                    <td th:text="${emp.id}"></td>

                                    <td th:text="${emp.lastName}">Lorem</td>

                                    <td  th:text="${emp.email}">ipsum</td>

                                    <td th:text="${emp.gender}">dolor</td>

                                    <td th:text="${emp.department.departmentName}">sit</td>

                                    <td th:text="${emp.birth}">sit</td>

                                    <td>

                                        <button class="btn btn-sm btn-primary" type="submit">编辑</button>

                                        <button class="btn btn-sm btn-danger" type="submit">删除</button>

                                    </td>

                                </tr>

                            </tbody>

                        </table>

                </main>

            </div>

        </div>
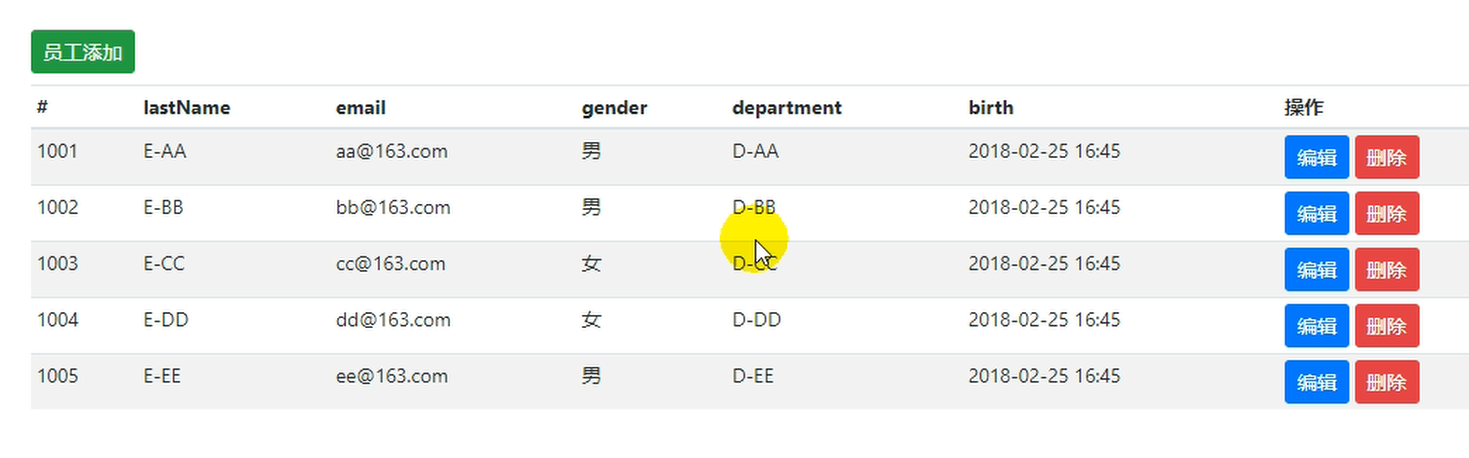
3、列表效果
二、添加页面
1.跳转链接请求
//跳转到员工添加页面

@GetMapping("/emp")

public String addEmpPage(Model model) {

    Collection<Department> departments = departmentDao.getDepartments();//部门信息

    model.addAttribute("depts", departments);

    return "emp/add";

}
2.添加页面
<!--引入抽取的topbar-->

<!--模板名:会使用thymeleaf的前后缀配置规则进行解析-->

<div th:replace="commons/bar::topbar"></div>

<div class="container-fluid">

    <div class="row">

        <!--引入侧边栏-->

        <div th:replace="commons/bar::#sidebar(activeUri='emps')"></div>

        <main role="main" class="col-md-9 ml-sm-auto col-lg-10 pt-3 px-4">

            <!--需要区分是员工修改还是添加;-->

            <form th:action="@{/emp}" method="post">

                <!--发送put请求修改员工数据-->

                <!--

                1、SpringMVC中配置HiddenHttpMethodFilter;(SpringBoot自动配置好的)

                2、页面创建一个post表单

                3、创建一个input项,name="_method";值就是我们指定的请求方式

                -->

                <input type="hidden" name="_method" value="put" th:if="${emp!=null}"/>

                <input type="hidden" name="id" th:if="${emp!=null}" th:value="${emp.id}">

                <div class="form-group">

                    <label>LastName</label>

                    <input name="lastName" type="text" class="form-control" placeholder="zhangsan" th:value="${emp!=null}?${emp.lastName}">

                </div>

                <div class="form-group">

                    <label>Email</label>

                    <input name="email" type="email" class="form-control" placeholder="zhangsan@atguigu.com" th:value="${emp!=null}?${emp.email}">

                </div>

                <div class="form-group">

                    <label>Gender</label><br/>

                    <div class="form-check form-check-inline">

                        <input class="form-check-input" type="radio" name="gender" value="1" th:checked="${emp!=null}?${emp.gender==1}">

                        <label class="form-check-label">男</label>

                    </div>

                    <div class="form-check form-check-inline">

                        <input class="form-check-input" type="radio" name="gender" value="0" th:checked="${emp!=null}?${emp.gender==0}">

                        <label class="form-check-label">女</label>

                    </div>

                </div>

                <div class="form-group">

                    <label>department</label>

                    <!--提交的是部门的id-->

                    <select class="form-control" name="department.id">

                        <option th:selected="${emp!=null}?${dept.id == emp.department.id}" th:value="${dept.id}" th:each="dept:${depts}" th:text="${dept.departmentName}">1</option>

                    </select>

                </div>

                <div class="form-group">

                    <label>Birth</label>

                    <input name="birth" type="text" class="form-control" placeholder="zhangsan" th:value="${emp!=null}?${#dates.format(emp.birth, 'yyyy-MM-dd HH:mm')}">

                </div>

                <button type="submit" class="btn btn-primary" th:text="${emp!=null}?'修改':'添加'">添加</button>

            </form>

        </main>

    </div>

</div>
3.添加功能
    //添加员工

    @PostMapping("/emp")

    public String addEmp(Employee emp) {

        System.out.println(emp);

        employeeDao.save(emp);

        //重定向防止表单重复提交

        return "redirect:/emps";

    }
4、关于日期的格式
提交的数据格式不对:生日:日期;
2017-12-12;2017/12/12;2017.12.12;
日期的格式化;SpringMVC将页面提交的值需要转换为指定的类型;
2017-12-12---Date; 类型转换,格式化;
默认日期是按照/的方式;
5、日期格式源码原理
public class WebMvcAutoConfiguration {

    @Configuration

    public static class EnableWebMvcConfiguration extends DelegatingWebMvcConfiguration {

        private final WebMvcProperties mvcProperties;

     //Spring 2.1.0的配置

        @Bean

        @Override

        public FormattingConversionService mvcConversionService() {

            WebConversionService conversionService = new WebConversionService(

                    this.mvcProperties.getDateFormat());

            addFormatters(conversionService);

            return conversionService;

        }

      //下面的是springBoot1.5版本的代码,给明了配置项名称
@Bean
@ConditionalOnProperty(prefix = "spring.mvc",name="date-format")
public Formatter<Date> dateFormatter() {return new DateFormatter(this.mvcProperties.getDateFormater())}
    }

}

@ConfigurationProperties(prefix = "spring.mvc")

public class WebMvcProperties {

    /**

     * Date format to use. For instance, `dd/MM/yyyy`.

     */

    private String dateFormat;

    public String getDateFormat() {

        return this.dateFormat;

    }

    public void setDateFormat(String dateFormat) {

        this.dateFormat = dateFormat;

    }

}
6、修改用户自己的日期格式
spring.mvc.date-format = yyyy-MM-dd HH:mm
三、编辑
1、将列表页面的【编辑】按钮改成<a>
<a class="btn btn-sm btn-primary" th:href="@{/emp/} + ${emp.id}">编辑</a>
2、跳转至修改页面请求
/**来到修改页面,查出当前员工,再页面回显*/

@GetMapping("/emp/{id}")

public String toEditEmpPage(@PathVariable("id") Integer id, Model model) {

    //员工信息

    Employee emp = employeeDao.get(id);

    model.addAttribute("emp",emp);

    //部门信息

    Collection<Department> departments = departmentDao.getDepartments();

    model.addAttribute("depts", departments);

    return "redirect:/emps";

}
3、公用add.html 添加页面判断 (新增/修改)逻辑
4、将请求方式由Post转换位PUT
共用<form method="post">的表单 ,
org.springframework.web.filter.HiddenHttpMethodFilter,这个Filter的作用就是将请求转换成我们指定的方式,所以我们要配置它。
spring Boot 源码中已经为我们自动配置了
class HiddenHttpMethodFilter {
/** Default method parameter: {@code _method} */
public static final String DEFAULT_METHOD_PARAM = "_method";
}

public class WebMvcAutoConfiguration {

    @Bean

    @ConditionalOnMissingBean(HiddenHttpMethodFilter.class)

    public OrderedHiddenHttpMethodFilter hiddenHttpMethodFilter() {

        return new OrderedHiddenHttpMethodFilter();

    }

}

public class OrderedHiddenHttpMethodFilter extends HiddenHttpMethodFilter implements Ordered {

    ......

}
5、修改页面添加如下隐藏项
<!--发送put请求修改员工数据-->

<!--

      1、SpringMVC中配置HiddenHttpMethodFilter;(SpringBoot自动配置好的)

      2、页面创建一个post表单

      3、创建一个input项,name="_method";值就是我们指定的请求方式

-->

<input type="hidden" name="_method" value="put" th:if="${emp!=null}"/>

<input type="hidden" name="id" th:if="${emp!=null}" th:value="${emp.id}">
6、修改员工信息
/**来到修改页面,查出当前员工,再页面回显*/

@PutMapping("/emp")

public String editEmp(Employee emp) {

    System.out.println(emp);

    //员工信息

    employeeDao.save(emp);

    return "emp/add";

}
四、删除员工信息
@DeleteMapping("/emp/{id}")

public String deleteEmp(@PathVariable Integer id) {

    System.out.println(id);

    //员工信息

    employeeDao.delete(id);

    return "emp/list";     //这种直接返回页面的方式,没有经过Controller方法,页面没有数据,不对
   return "forward:/emps";  //这种写法是错的,因为本方法中是DELETE请求,而 /emps是get请求,不兼容,不对
    return "redirect:/emps";  //这种写法是对的

}
1.删除按钮
<td>

    <a class="btn btn-sm btn-primary"  th:href="@{/emp/} + ${emp.id}">编辑</a>

    <form th:action="@{/emp/} + ${emp.id}" method="post" th:method="post">

        <button class="btn btn-sm btn-danger" type="submit">删除</button>

        <input type="hidden" name="_method" value="delete"/>

    </form>

</td>
但是这种form表单的html删除按钮写法太笨重,页面展现效果也不好。修改如下:
<td>

    <a class="btn btn-sm btn-primary"  th:href="@{/emp/} + ${emp.id}">编辑</a>

    <button th:attr="delete_uri=@{/emp/} + ${emp.id}" class="btn btn-sm btn-danger deleteBtn" type="submit">删除</button>
    <!-- delete_uri=@{}  这里一定要用@,用$会出错 -->

</td>
在遍历循环外的提交删除操作的 <form>表单
<form id="deleteEmpForm"  th:method="post">

    <input type="hidden" name="_method" value="delete"/>

</form>
<script>

    /**根据删除按钮的属性动态设置表单action地址*/

    $(".deleteBtn").click(function(){

        $("#deleteEmpForm").attr("action",$(this).attr("delete_uri")).submit();

        return false;

    });

</script>
15. Spring boot CRUD的更多相关文章
- Spring Boot CRUD+分页(基于Mybatis注解方式)
步骤一:关于Mybatis Mybatis 是用来进行数据库操作的框架.其中分页使用Mybatis中的PageHelper插件. Mybatis与hibernate对比: 1.hibernate是一个 ...
- 【spring boot】15.spring boot项目 采用Druid数据库连接池,并启用druid监控功能
在http://www.cnblogs.com/sxdcgaq8080/p/9039442.html的基础上,来看看spring boot项目中采用Druid连接池. GitHub地址:示例代码 == ...
- 【SpringBoot】15. Spring Boot核心注解
Spring Boot核心注解 1 @SpringBootApplication 代表是Spring Boot启动的类 2 @SpringBootConfiguration 通过bean对象来获取配置 ...
- Spring Boot CRUD+分页(基于JPA规范)
步骤一:JPA概念 JPA(Java Persistence API)是Sun官方提出的Java持久化规范,用来方便大家操作数据库. 真正干活的可能是Hibernate,TopLink等等实现了JPA ...
- 15 Spring Boot Shiro 验证码
1. <dependency> <groupId>com.github.axet</groupId> <artifactId>kaptcha</a ...
- Spring Boot 系列(二)单元测试&网络请求
实际开发中,Junit单元测试是必不可少的.在spring-boot 中可以通过测试模块(spring-boot-starter-test)快速使用单元测试功能. 开始 本示例在 spring boo ...
- 国内最全的Spring Boot系列之二
历史文章 <国内最全的Spring Boot系列之一> 视频&交流平台 SpringBoot视频:http://t.cn/R3QepWG Spring Cloud视频:http:/ ...
- Spring Boot 2.x 学习专栏
Spring Boot 2.0 入门指南 Spring Boot 2.0 返回JSP页面实战 Spring Boot 2.0 热部署指南 Spring Boot 2.0 整合FreeMarker模板引 ...
- Spring Boot 实战与原理分析视频课程
Spring Boot 实战与原理分析视频课程 链接:https://pan.baidu.com/share/init?surl=PeykcoeqZtd1d9lN9V_F-A 提取码: 关注公众号[G ...
随机推荐
- Angular生成二维码
Installation - Angular 5+, Ionic NPM npm install angularx-qrcode --save Yarn yarn add angularx-qrcod ...
- Idea for Mac 过期 IntelliJ IDEA 2017 完美注册方法(附idea for Mac破解方法)
Idea 不能使用了: 开始破解: (1)首先下载 jar包: https://download.csdn.net/download/engerla/10573069 放到位置: /Applicati ...
- loadrunner基础学习笔记八-分析场景
analysis会话的目的是查找系统的性能问题,然后找出这些问题的根源 如: 是否达到了预期的测试目标,在负载下对用户终端的事务响应时间是多少 是否符合sla还是偏离了目标 事务的平均响应时间是多少 ...
- js對象構造
創建對象的3種方式: 1. var a=new Object() a.attributes=“1”: 2. var a={attributes:"1",aa:"2&quo ...
- linux python3 selenuim firefox
1.官网下载火狐浏览器最新版本复制到/usr/local/softwar 下 cd /usr/local/softwar 下 tar jxvf Firefox-latest-x86_64.tar.bz ...
- Django-website 程序案例系列-14 缓存的应用配置文件的写法
由于Django是动态网站,所有每次请求均会去数据进行相应的操作,当程序访问量大时,耗时必然会更加明显,最简单解决方式是使用:缓存,缓存将一个某个views的返回值保存至内存或者memcache中,5 ...
- BZOJ3207花神的嘲讽计划Ⅰ——主席树+hash
题目描述 背景 花神是神,一大癖好就是嘲讽大J,举例如下: “哎你傻不傻的![hqz:大笨J]” “这道题又被J屎过了!!” “J这程序怎么跑这么快!J要逆袭了!” …… 描述 这一天DJ在给吾等众蒟 ...
- java 使用 WebUploader
参考: http://blog.csdn.net/finalAmativeness/article/details/54668090 最近项目需要多文件上传. 所以使用了 baidu的 webuplo ...
- 自学Zabbix3.12.6-动作Action-Escalations配置
点击返回:自学Zabbix之路 点击返回:自学Zabbix4.0之路 点击返回:自学zabbix集锦 3.12.6 自学Zabbix3.12.6-动作Action-Escalations配置 1. 概 ...
- 【Luogu4719】动态dp
题面 洛谷 题解 等下发链接 代码: #include<iostream> #include<cstdio> #include<cstdlib> #include& ...