XFire+Spring构建Web Service经验总结
使用工具 MyEclipse:6.5 ,tomcat6.x.
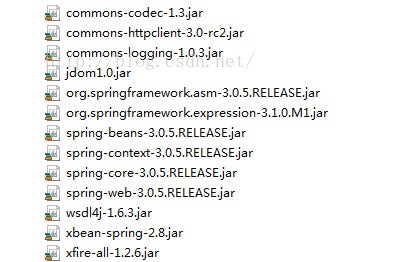
1.新建web项目,要导入用的包:
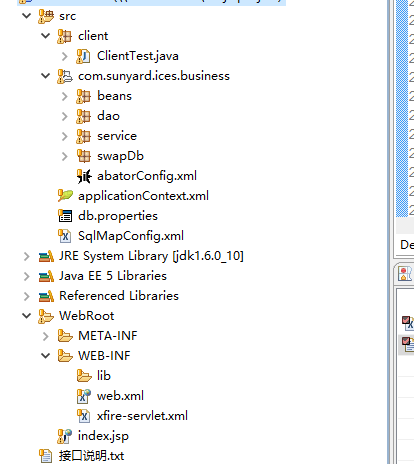
2程序结构:
3 web.xml配置文件
- <?xml version="1.0" encoding="UTF-8"?>
- <web-app version="2.4" xmlns="http://java.sun.com/xml/ns/j2ee"
- xmlns:xsi="http://www.w3.org/2001/XMLSchema-instance"
- xsi:schemaLocation="http://java.sun.com/xml/ns/j2ee
- http://java.sun.com/xml/ns/j2ee/web-app_2_4.xsd">
- <display-name>webtest2</display-name>
- <welcome-file-list>
- <welcome-file>index.html</welcome-file>
- <welcome-file>index.htm</welcome-file>
- <welcome-file>index.jsp</welcome-file>
- <welcome-file>default.html</welcome-file>
- <welcome-file>default.htm</welcome-file>
- <welcome-file>default.jsp</welcome-file>
- </welcome-file-list>
- <context-param>
- <param-name>contextConfigLocation</param-name>
- <param-value>classpath*:applicationContext*.xml,/WEB-INF/xfire-servlet.xml</param-value>
- </context-param>
- <listener>
- <listener-class>org.springframework.web.context.ContextLoaderListener</listener-class>
- </listener>
- <session-config>
- <session-timeout>30</session-timeout>
- </session-config>
- <servlet>
- <servlet-name>xfire</servlet-name>
- <servlet-class>
- org.springframework.web.servlet.DispatcherServlet
- </servlet-class>
- </servlet>
/*主要部分*/- <servlet-mapping>
- <servlet-name>xfire</servlet-name>
- <url-pattern>/service/*</url-pattern>
- </servlet-mapping>
- </web-app>
4接口及其实现类
- public interface IHelloWorld {
- public String getHello();
- public User getUser(User user);
- }
- public class HelloWorld implements IHelloWorld {
- public String getHello() {
- return "Hello";
- }
- public User getUser(User user) {
- User helloUser = new User();
- helloUser.setName("hello," + user.getName());
- return helloUser;
- }
- }
5 在spring配置文件中的配置
- <bean id="posVouch"class="com.sunyard.ices.business.service.impl.HelloWorld"> </bean>
6xfire-servlet.xml文件的配置
- <?xml version="1.0" encoding="UTF-8"?>
- <!DOCTYPE beans PUBLIC "-//SPRING//DTD BEAN 2.0//EN" "http://www.springframework.org/dtd/spring-beans-2.0.dtd">
- <beans default-lazy-init="true">
- <import resource="classpath:org/codehaus/xfire/spring/xfire.xml" />
- <bean
- class="org.springframework.web.servlet.handler.SimpleUrlHandlerMapping">
- <property name="urlMap">
- <map>
- <!--同步 -->
- <entry key="/posVouch">
- <ref bean="posvouch"/>
- </entry>
- </map>
- </property>
- </bean>
- <bean id="baseWebService"
- class="org.codehaus.xfire.spring.remoting.XFireExporter"
- lazy-init="false" abstract="true">
- <property name="serviceFactory" ref="xfire.serviceFactory" />
- <property name="xfire" ref="xfire" />
- </bean>
- <!-- web Service 方法 -->
- <bean id="posvouch" parent="baseWebService">
- <property name="serviceBean" ref="posVouch" />
- <property name="serviceClass"
- value="com.sunyard.ices.business.service.IHelloWorld " />
</bean>
</beans>
以上相信大家在别的博客那边也能找到类似代码,下面我要说的我在构建Web Service时遇到的一个问题:
上面的都写好就要启动测试Webservice,但我在这上面却翻了个很大的跟头,究其原因就是URL错误导致的。后来我成功后,
我总结了访问wsdl文件的url的公式:
具体的根据web.xml文件中url-pattern来,这是我的,
- <url-pattern>/service/*</url-pattern>
以及xfire-servlet.xml文件中的同步配置中的key
- <map>
- <!--同步 -->
- <entry key="/posVouch">
- <ref bean="posvouch"/>
- </entry>
- </map>
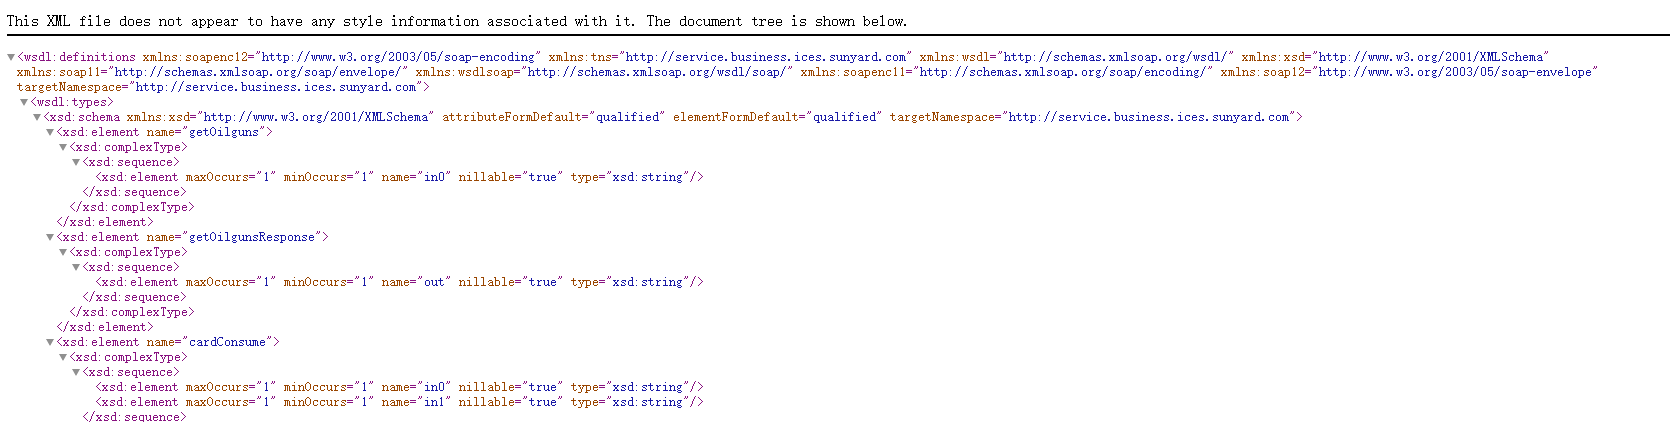
那么正确的URL= 访问项目路径/service/posVouch?wsdl
XFire+Spring构建Web Service经验总结的更多相关文章
- 使用XFire+Spring构建Web Service(一)——helloWorld篇
转自:http://www.blogjava.net/amigoxie/archive/2007/09/26/148207.html原文出处:http://tech.it168.com/j/2007- ...
- 使用XFire+Spring构建Web Service
XFire是与Axis 2并列的新一代Web Service框架,通过提供简单的API支持Web Service各项标准协议,帮助你方便快速地开发Web Service应用. 相 对于Axis来说,目 ...
- XFire构建web service客户端的五种方式
这里并未涉及到JSR 181 Annotations 的相关应用,具体的三种方式如下 ① 通过WSDL地址来创建动态客户端 ② 通过服务端提供的接口来创建客户端 ③ 使用Ant通过WSDL文件来生成客 ...
- MyEclipse构建Web Service(Xfire框架)
以下是本人原创,如若转载和使用请注明转载地址.本博客信息切勿用于商业,可以个人使用,若喜欢我的博客,请关注我,谢谢!博客地址 任务要求: 使用Xfire实现一个简单的CalculatorWebServ ...
- Spring实战5-基于Spring构建Web应用
主要内容 将web请求映射到Spring控制器 绑定form参数 验证表单提交的参数 写在前面:关于Java Web,首先推荐一篇文章——写给java web一年左右工作经验的人,这篇文章的作者用精练 ...
- Spring实战5:基于Spring构建Web应用
主要内容 将web请求映射到Spring控制器 绑定form参数 验证表单提交的参数 对于很多Java程序员来说,他们的主要工作就是开发Web应用,如果你也在做这样的工作,那么你一定会了解到构建这类系 ...
- 2.3 Apache Axis2 快速学习手册之 ADB 构建Web Service
使用ADB生成服务(根据ADB 命令将wsdl 文件还原成Java代码) 要使用Axis2数据绑定框架(ADB)生成和部署服务,请执行以下步骤. 通过在Axis2_HOME / samples / q ...
- 2.1 Apache Axis2 快速学习手册之 POJO 构建Web Service
1. 准备:创建一个Maven Web App 项目 这里让我们使用Maven 模板创建一个Web App 项目 1. New------> Maven Project 2. 使用默认配置,点击 ...
- Eclipse利用Axis2插件构建Web Service并测试
在学习Web Service的时候,从网上找到前辈的博客http://www.cnblogs.com/hexinlin/p/3358558.html,并依此文的方法按部就班:编写欲发布的java类He ...
随机推荐
- python计算斐波那契数列
斐波那契数列就是黄金分割数列 第一项加第二项等于第三项,以此类推 第二项加第三项等于第四项 代码如下 这一段代码实现fib(n)函数返回第n项,PrintFN(m,n,i)函数实现输出第i项斐波那契数 ...
- Python菜鸟快乐游戏编程_pygame(4)
Python菜鸟快乐游戏编程_pygame(博主录制,2K分辨率,超高清) https://study.163.com/course/courseMain.htm?courseId=100618802 ...
- (五) vivi代码分析
目录 vivi代码分析 初始化注册 使用open/read/ioctl 系统调用分析 ioctl流程一览 总结 title: vivi代码分析 date: 2019/4/23 19:30:00 toc ...
- Shell脚本统计文件行数
Shell脚本统计文件行数 转自 http://www.jb51.net/article/61943.htm 示例:row_count.sh文件 awk '{print NR}' row_cou ...
- C++预编译头文件 – stdafx.h
预编译头文件的由来 也许请教了别的高手之后,他们会告诉你,这是预编译头,必须包含.可是,这到底是为什么呢?预编译头有什么用呢? 咱们从头文件的编译原理讲起.其实头文件并不神秘,其在编译时的作用,就是把 ...
- [Reinforcement Learning] 动态规划(Planning)
动态规划 动态规划(Dynamic Programming,简称DP)是一种通过把原问题分解为相对简单的子问题的方式求解复杂问题的方法. 动态规划常常适用于具有如下性质的问题: 具有最优子结构(Opt ...
- Selenium+PhantomJS替代方案
问题描述: python3在使用selenium+PhantomJS动态抓取网页时,出现如下报错信息: UserWarning: Selenium support for PhantomJS has ...
- vo类,model类,dto类的作用及划分
1.entity里的每一个字段,与数据库相对应, 2.dto里的每一个字段,是和你前台页面相对应, 3.VO,这是用来转换从entity到dto,或者从dto到entity的中间的东西. 举个例子 ...
- 关于URL隐藏index.php方法
在phpstudy上修改了php版本5.6以上后,tp5框架原URL重写模式发生变化.需要在public目录下的.htaccess作出如图修改,原理未知.
- python3字符串
Python3 字符串 Python字符串运算符 + 字符串连接 a + b 输出结果: HelloPython * 重复输出字符串 a*2 输出结果:HelloHello [] 通过索引获取字符串中 ...