iOS开发基础篇-手写控件
一、手写控件的步骤
1)使用相应的控件类创建控件对象;
2)设置该控件的各种属性;
3)添加空间到视图中;
4)如果是 UIButton 等控件,还需考虑控件的单击事件等;
二、添加 UIButton 单击事件
[topbtn addTarget:self action:@selector(move:) forControlEvents:UIControlEventTouchUpInside];
1) addTarget:forControlEvents: 方法定义在 UIControl 类中,意味着所有继承自 UIControl 类的对象均可添加;
2)第一个参数为对象本身;
3)第二个参数为监听控件的事件。
 @interface ViewController ()

 @property (nonatomic, weak) IBOutlet UIButton *headImageView;  //被控制用于移动的按钮

 @end
 //手工添加上下左右、放大缩小按钮
 1 - (void)viewDidLoad {

     [super viewDidLoad];

     //设置按钮对象为自定义型

     UIButton *headbtn = [UIButton buttonWithType:UIButtonTypeCustom];

     //设置按钮对象普通状态下的各项属性

     headbtn.frame = CGRectMake(, , , );

     [headbtn setBackgroundImage:[UIImage imageNamed:@"beauty10"] forState:UIControlStateNormal];

     [headbtn setTitle:@"点我!" forState:UIControlStateNormal];

     [headbtn setTitleColor:[UIColor redColor] forState:UIControlStateNormal];

     //设置按钮对象高亮状态下的属性

     [headbtn setBackgroundImage:[UIImage imageNamed:@"beauty11"] forState:UIControlStateHighlighted];

     [headbtn setTitle:@"还行吧~~" forState:UIControlStateHighlighted];

     [headbtn setTitleColor:[UIColor blueColor] forState:UIControlStateHighlighted];

     //将按钮对象添加到视图中显示出来

     [self.view addSubview:headbtn];

     self.headImageView = headbtn;  //建立IBOutlet连接

     //向上移动的按钮

     UIButton *topbtn = [UIButton buttonWithType:UIButtonTypeCustom];

     topbtn.frame = CGRectMake(, , , );

     [topbtn setTitle:@"上移" forState:UIControlStateNormal];

     [topbtn setTitleColor:[UIColor blueColor] forState:UIControlStateNormal];

     [topbtn setTag:];

     [self.view addSubview:topbtn];

     //添加按钮的单击事件

     [topbtn addTarget:self action:@selector(move:) forControlEvents:UIControlEventTouchUpInside];

     //向下移动的按钮

     UIButton *downbtn = [UIButton buttonWithType:UIButtonTypeCustom];

     downbtn.frame = CGRectMake(, , , );

     [downbtn setTitle:@"下移" forState:UIControlStateNormal];

     [downbtn setTitleColor:[UIColor blueColor] forState:UIControlStateNormal];

     [downbtn setTag:];

     [self.view addSubview:downbtn];

     //添加按钮的单击事件

     [downbtn addTarget:self action:@selector(move:) forControlEvents:UIControlEventTouchUpInside];

     //向左移动的按钮

     UIButton *leftbtn = [UIButton buttonWithType:UIButtonTypeCustom];

     leftbtn.frame = CGRectMake(, , , );

     [leftbtn setTitle:@"左移" forState:UIControlStateNormal];

     [leftbtn setTitleColor:[UIColor blueColor] forState:UIControlStateNormal];

     [leftbtn setTag:];

     [self.view addSubview:leftbtn];

     //添加按钮的单击事件

     [leftbtn addTarget:self action:@selector(move:) forControlEvents:UIControlEventTouchUpInside];

     //向右移动的按钮

     UIButton *rightbtn = [UIButton buttonWithType:UIButtonTypeCustom];

     rightbtn.frame = CGRectMake(, , , );

     [rightbtn setTitle:@"右移" forState:UIControlStateNormal];

     [rightbtn setTitleColor:[UIColor blueColor] forState:UIControlStateNormal];

     [rightbtn setTag:];

     [self.view addSubview:rightbtn];

     //添加按钮的单击事件

     [rightbtn addTarget:self action:@selector(move:) forControlEvents:UIControlEventTouchUpInside];

     //放大的按钮

     UIButton *zoombtn = [UIButton buttonWithType:UIButtonTypeCustom];

     zoombtn.frame = CGRectMake(, , , );

     [zoombtn setTitle:@"放大" forState:UIControlStateNormal];

     [zoombtn setTitleColor:[UIColor blueColor] forState:UIControlStateNormal];

     [zoombtn setTag:];

     [self.view addSubview:zoombtn];

     //添加按钮的单击事件

     [zoombtn addTarget:self action:@selector(zoom:) forControlEvents:UIControlEventTouchUpInside];

     //缩小的按钮

     UIButton *minusbtn = [UIButton buttonWithType:UIButtonTypeCustom];

     minusbtn.frame = CGRectMake(, , , );

     [minusbtn setTitle:@"缩小" forState:UIControlStateNormal];

     [minusbtn setTitleColor:[UIColor blueColor] forState:UIControlStateNormal];

     [minusbtn setTag:];

     [self.view addSubview:minusbtn];

     //添加按钮的单击事件

     [minusbtn addTarget:self action:@selector(zoom:) forControlEvents:UIControlEventTouchUpInside];

 }
先声明上下左右移动的枚举类型,及移动或放大缩小的常量值:
 //ViewController.m

 typedef NS_ENUM(NSUInteger, kMovingDir)

 {

     kMovingDirTop = ,

     kMovingDirButtom,

     kMovingDirLeft,

     kMovingDirRight,

 };

 CGFloat const kMovingDelta = 50.0;      //移动系数

 CGFloat const kZoomingDelta = 50.0;     //放大缩小系数
实现按钮的事件:
 - (void)move:(id)sender {

     UIButton *button = (UIButton *)sender;

     CGPoint p = self.headImageView.center;

     switch (button.tag) {

         case kMovingDirTop: p.y -= kMovingDelta; break;  //往上移动

         case kMovingDirButtom: p.y += kMovingDelta; break;  //往下移动

         case kMovingDirLeft: p.x -= kMovingDelta; break; //往左移动

         case kMovingDirRight: p.x += kMovingDelta; break; //往右移动

     }

     [UIView beginAnimations:nil context:nil];

     [UIView setAnimationDuration:2.0];

     self.headImageView.center = p;

     [UIView commitAnimations];

 }

 - (void)zoom:(id)sender {

     UIButton *button = (UIButton *)sender;

     CGRect rect = self.headImageView.bounds;

     if (button.tag) {   //缩小

         rect.size.width -= kZoomingDelta;

         rect.size.height -= kZoomingDelta;

     } else {            //放大

         rect.size.width += kZoomingDelta;

         rect.size.height += kZoomingDelta;

     }

     [UIView beginAnimations:nil context:nil];

     [UIView setAnimationDuration:2.0];

     self.headImageView.bounds = rect;

     [UIView commitAnimations];

 }
示图如下:
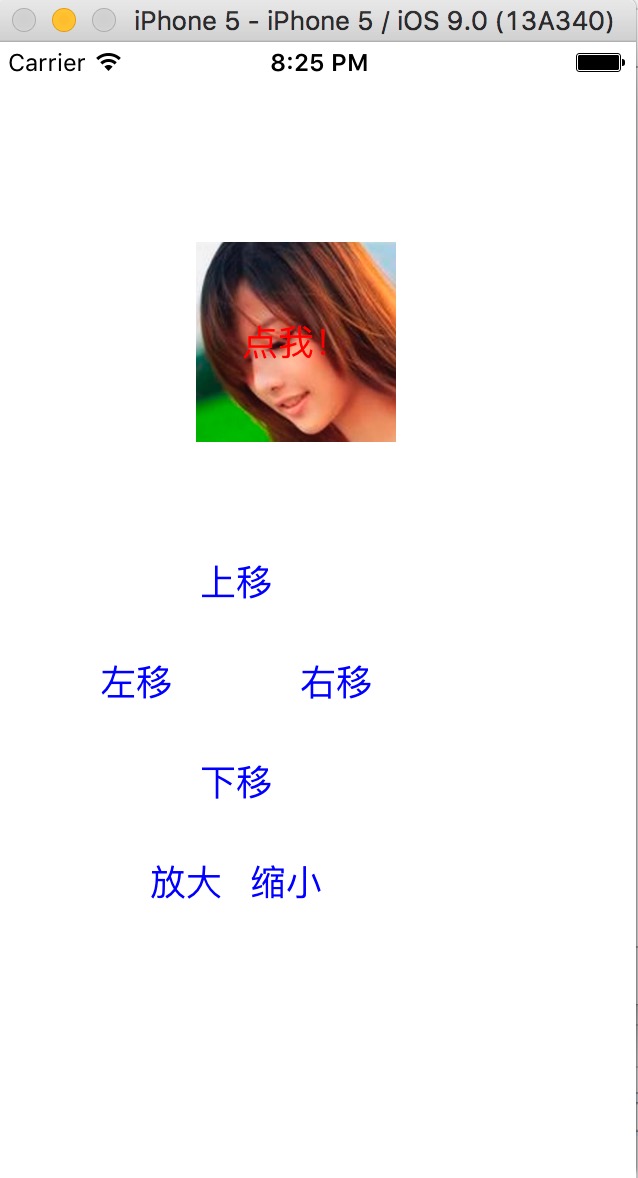
示例代码:http://pan.baidu.com/s/1i3SainN
三、简单的动画
1)开始动画;
2)设置动画相关的参数,如时间等;
3)参与动画的行动
4)提交动画。
示例代码如下:
     [UIView beginAnimations:nil context:nil];

     [UIView setAnimationDuration:2.0];

     self.headImageView.bounds = rect;

     [UIView commitAnimations];
参考博客:iOS开发UI基础—手写控件,frame,center和bounds属性
iOS开发基础篇-手写控件的更多相关文章
- iOS开发UI篇—手写控件,frame,center和bounds属性
iOS开发UI基础—手写控件,frame,center和bounds属性 一.手写控件 1.手写控件的步骤 (1)使用相应的控件类创建控件对象 (2)设置该控件的各种属性 (3)添加控件到视图中 (4 ...
- iOS开发UI基础—手写控件,frame,center和bounds属性
iOS开发UI基础—手写控件,frame,center和bounds属性 一.手写控件 1.手写控件的步骤 (1)使用相应的控件类创建控件对象 (2)设置该控件的各种属性 (3)添加控件到视图中 (4 ...
- 手写控件,frame,center和bounds属性
一.手写控件 1.手写控件的步骤 (1)使用相应的控件类创建控件对象 (2)设置该控件的各种属性 (3)添加控件到视图中 (4)如果是button等控件,还需考虑控件的单击事件等 (5)注意:View ...
- iOS开发UI篇—实现UItableview控件数据刷新
iOS开发UI篇—实现UItableview控件数据刷新 一.项目文件结构和plist文件 二.实现效果 1.说明:这是一个英雄展示界面,点击选中行,可以修改改行英雄的名称(完成数据刷新的操作). 运 ...
- iOS开发基础篇-transform属性
一. transform 属性 在OC中,通过 transform 属性可以修改对象的平移.缩放比例和旋转角度. 1)创建“基于控件初始位置”的形变 CGAffineTransformMakeRot ...
- iOS开发基础篇-Button基础
一.简单介绍 UIButton 的功能:响应用户操作.显示文字.显示图片.调整内部图片和文字的位置. 二. UIButton 的状态 UIControlStateNormal :普通状态,为默认情 ...
- iOS开发——基础篇——iOS开发 Xcode8中遇到的问题及改动
iOS开发 Xcode8中遇到的问题及改动 新版本发布总会有很多坑,也会有很多改动. 一个一个填吧... 一.遇到的问题 1.权限以及相关设置 iOS10系统下调用系统相册.相机功能,或者苹果健康 ...
- cocos2dx基础篇(10) 按钮控件CCControlButton
[3.x] (1)去掉 “CC” (2)对象类 CCObject 改为 Ref (3)按钮事件回调依旧为 cccontrol_selector ,没有使用 CC_CALLBACK_2 (4)按钮状态 ...
- C#-WebForm-WebForm开发基础、如何给控件注册事件?——事件委托写法、http无状态性、三层结构
(小知识 - xml:可扩展的标记语言 html:超文本标记语言) 一.创建WebForm:新建→网站 此时文件夹中只有一个 config 文件,打开后 二.在项目下右键添加新项 在设计页面中打开 从 ...
随机推荐
- 开发函数计算的正确姿势 —— 使用 Fun Local 本地运行与调试
前言 首先介绍下在本文出现的几个比较重要的概念: 函数计算(Function Compute): 函数计算是一个事件驱动的服务,通过函数计算,用户无需管理服务器等运行情况,只需编写代码并上传.函数计算 ...
- 阿里云ACE共创空间——MQ消息队列产品测试
一.产品背景消息队列是阿里巴巴集团自主研发的专业消息中间件. 产品基于高可用分布式集群技术,提供消息订阅和发布.消息轨迹查询.定时(延时)消息.资源统计.监控报警等一系列消息云服务,是企业级互联网架构 ...
- linux 远程复制 scp
把本地/home/crawler/warning/python/alarmRun.sh 复制到67cralwer用户/home/crawler/warning/python/ 下面 scp -r /h ...
- 一统江湖的大前端(2)—— Mock.js + Node.js 如何与后端潇洒分手
<一统江湖的大前端>系列是自己的前端学习笔记,旨在介绍javascript在非网页开发领域的应用案例和发现各类好玩的js库,不定期更新.如果你对前端的理解还是写写页面绑绑事件,那你真的是有 ...
- Request.Params
在开发中有时会用到Request.Params["id"]来获取参数,那么到底是从什么地方接收参数呢? 一般情况下,有三种方式进行参数传递1.GET 方式,通过url传递,如?id ...
- [Go] golang原子函数锁住共享资源
1.atomic包里的几个函数以及sync包里的mutex类型,提供了解决方案2.原子函数能够以很底层的加锁机制来同步访问整型变量和指针3.atomic.AddInt64(&counter, ...
- Eclipse Ctrl+Space 无法工作的问题
Window->preference->Keys 然后找到content Assist,然后重新设置为自己想要的Short cut 就好了
- Chrome 下input的默认样式
一.去除默认边框以及padding border: none;padding:0 二.去除聚焦蓝色边框 outline: none; 三.form表单自动填充变色 1.给input设置内置阴影,至少要 ...
- 洛谷P5108 仰望半月的夜空(后缀数组)
题意 题目链接 Sol warning:下面这个做法只有95分,本地拍了1w+组都没找到错误我表示十分无能为力 我们考虑每个串的排名去更新答案,显然排名为\(1\)的后缀的前缀一定是当前长度的字典序最 ...
- Vue-指令
1. v-text:这个指令用于将vue实例中的data内的属性渲染到标签内.有两种写法: 1. `<div v-text="数据"></div>`:该写法 ...