Spring MVC + Spring + MyBatis 框架整合
本文介绍使用SSM框架开发web项目Demo.
一、创建一个web-Poject项目
1.导入相关jar文件至lib下。“相关jar文件” --提取密码 oraw
2.修改web.xml文件
<?xml version="1.0" encoding="UTF-8"?>

<web-app version="3.0"

    xmlns="http://java.sun.com/xml/ns/javaee"

    xmlns:xsi="http://www.w3.org/2001/XMLSchema-instance"

    xsi:schemaLocation="http://java.sun.com/xml/ns/javaee

    http://java.sun.com/xml/ns/javaee/web-app_3_0.xsd">

  <display-name></display-name>

  <welcome-file-list>

    <welcome-file>index.jsp</welcome-file>

  </welcome-file-list>

  <!-- 加载spring容器 -->

   <listener>

      <listener-class>org.springframework.web.context.ContextLoaderListener</listener-class>

  </listener>

  <context-param>

      <param-name>contextConfigLocation</param-name>

      <param-value>classpath:app.xml</param-value>

  </context-param>

  <!-- 前端控制器 -->

  <servlet>

      <servlet-name>DispatcherServlet</servlet-name>

      <servlet-class>org.springframework.web.servlet.DispatcherServlet</servlet-class>

     <init-param>

         <param-name>contextConfigLocation</param-name>

         <param-value>classpath:springmvc-servlet.xml</param-value>

     </init-param>

  </servlet>

  <servlet-mapping>

          <servlet-name>DispatcherServlet</servlet-name>

          <url-pattern>/</url-pattern>

  </servlet-mapping>

  <!-- 解决post方式的乱码的过滤器 -->

  <filter>

      <filter-name>characterEncodingFilter</filter-name>

      <filter-class>org.springframework.web.filter.CharacterEncodingFilter</filter-class>

      <init-param>

          <param-name>encoding</param-name>

          <param-value>UTF-8</param-value>

      </init-param>

  </filter>

  <filter-mapping>

          <filter-name>characterEncodingFilter</filter-name>

          <url-pattern>/*</url-pattern>

  </filter-mapping>

</web-app>
二、创建相关配置文件。
1.mybatis核心配置文件---mybatis-config.xml
<?xml version="1.0" encoding="UTF-8"?>

    <!DOCTYPE configuration

        PUBLIC "-//mybatis.org//DTD Config 3.0//EN"

        "http://mybatis.org/dtd/mybatis-3-config.dtd">

        <!-- 配置懒加载 -->

    <configuration>

        <settings>

            <setting name="lazyLoadingEnabled" value="false" />

        </settings>


    <!-- 配置别名 -->

       <typeAliases>

           <package name="com.test.pojo"/>

       </typeAliases>

   </configuration>
2.创建jdbc.properties文件,用于连接数据库相关配置(案例连接mysql数据库)
 driverClassName=com.mysql.jdbc.Driver

 url=jdbc\:mysql\://localhost\:端口号/数据库名?useUnicode\=true&characterEncoding\=UTF-8

 password=ok

 uname=root
注意:需要改写上面文件中的端口号和数据库名方可使用,mysql默认端口为3306;
3.创建spring核心配置文件,本文案例名称为app.xml,可根据自己喜好起名(特殊字符除外),但是要和web.xml映射的spring配置文件名一致。
<?xml version="1.0" encoding="UTF-8"?>

<beans xmlns="http://www.springframework.org/schema/beans"

    xmlns:xsi="http://www.w3.org/2001/XMLSchema-instance" xmlns:p="http://www.springframework.org/schema/p"

    xmlns:aop="http://www.springframework.org/schema/aop" xmlns:tx="http://www.springframework.org/schema/tx"

    xmlns:context="http://www.springframework.org/schema/context"

    xsi:schemaLocation="http://www.springframework.org/schema/beans

     http://www.springframework.org/schema/beans/spring-beans-3.0.xsd

     http://www.springframework.org/schema/tx

     http://www.springframework.org/schema/tx/spring-tx.xsd

     http://www.springframework.org/schema/aop

     http://www.springframework.org/schema/aop/spring-aop-3.0.xsd

     http://www.springframework.org/schema/context

     http://www.springframework.org/schema/context/spring-context-3.0.xsd">

    <!-- 扫包(service层) -->

    <context:component-scan base-package="com.test.service" />

    <!-- 导入连接池配置文件 -->

    <context:property-placeholder location="classpath:jdbc.properties" />

    <!-- 数据源 -->

    <bean id="dataSource" class="org.apache.commons.dbcp.BasicDataSource"

        destroy-method="close" scope="singleton">

        <property name="driverClassName" value="${driverClassName}"></property>

        <property name="url" value="${url}"></property>

        <property name="username" value="${uname}"></property>

        <property name="password" value="${password}"></property>

    </bean>

    <!-- 配置mybatis SqlSessionFactoryBean -->

    <bean id="sqlSessionFactory" class="org.mybatis.spring.SqlSessionFactoryBean">

        <property name="dataSource" ref="dataSource" />

        <property name="configLocation" value="classpath:mybatis-config.xml" />

    </bean>

    <!-- Mapper接口所在包名,Spring会自动查找其下的Mapper -->

    <bean class="org.mybatis.spring.mapper.MapperScannerConfigurer">

        <property name="basePackage" value="com.test.mapper" />

    </bean>

    <!-- 事务管理器 -->

    <bean id="transactionManager"

        class="org.springframework.jdbc.datasource.DataSourceTransactionManager">

        <property name="dataSource" ref="dataSource"></property>

    </bean>

    <!-- 事务管理 -->

    <tx:advice id="transactionAdvice" transaction-manager="transactionManager">

        <tx:attributes>

            <tx:method name="add*" propagation="REQUIRED" read-only="false"

                isolation="DEFAULT" />

            <tx:method name="del*" propagation="REQUIRED" read-only="false"

                isolation="DEFAULT" />

            <tx:method name="update*" propagation="REQUIRED" read-only="false"

                isolation="DEFAULT" />

            <tx:method name="get*" propagation="NEVER" read-only="true" />

            <tx:method name="query*" propagation="NEVER" read-only="true" />

        </tx:attributes>

    </tx:advice>

    <aop:config>

        <!-- 定义切点 -->

        <aop:pointcut expression="execution(* com.test.service..*.*(..))"

            id="pointCut" />

        <aop:advisor advice-ref="transactionAdvice" pointcut-ref="pointCut" />

    </aop:config>

</beans>
4.创建springmvc核心配置文件,本文案例名称为springmvc-servlet.xml,可根据自己喜好起名(特殊字符除外),但是要和web.xml中前端控制器映射的配置文件名一致。
<?xml version="1.0" encoding="UTF-8"?>

<beans xmlns="http://www.springframework.org/schema/beans"

    xmlns:xsi="http://www.w3.org/2001/XMLSchema-instance" xmlns:context="http://www.springframework.org/schema/context"

    xmlns:aop="http://www.springframework.org/schema/aop" xmlns:tx="http://www.springframework.org/schema/tx"

    xmlns:mvc="http://www.springframework.org/schema/mvc" xmlns:p="http://www.springframework.org/schema/p"

    xsi:schemaLocation="http://www.springframework.org/schema/beans

           http://www.springframework.org/schema/beans/spring-beans-2.5.xsd

           http://www.springframework.org/schema/context

           http://www.springframework.org/schema/context/spring-context-2.5.xsd

           http://www.springframework.org/schema/aop

           http://www.springframework.org/schema/aop/spring-aop-2.5.xsd

           http://www.springframework.org/schema/tx

           http://www.springframework.org/schema/tx/spring-tx-2.5.xsd

              http://www.springframework.org/schema/mvc

           http://www.springframework.org/schema/mvc/spring-mvc.xsd">

    <context:component-scan base-package="com.test.controller"></context:component-scan>

    <mvc:annotation-driven>

        <mvc:message-converters>

            <bean

                class="com.alibaba.fastjson.support.spring.FastJsonHttpMessageConverter">

                <property name="supportedMediaTypes">

                    <list>

                        <value>text/html;charset=UTF-8</value>

                        <value>application/json</value>

                    </list>

                </property>

                <property name="features">

                    <list>

                        <value>WriteDateUseDateFormat</value>

                    </list>

                </property>

            </bean>

            <bean class="org.springframework.http.converter.StringHttpMessageConverter">

                <property name="supportedMediaTypes">

                    <list>

                        <value>application/json;charset=UTF-8</value>

                    </list>

                </property>

            </bean>

        </mvc:message-converters>

    </mvc:annotation-driven>

    <bean

        class="org.springframework.web.servlet.view.ContentNegotiatingViewResolver">

        <property name="favorParameter" value="true"></property>

        <property name="mediaTypes">

            <map>

                <entry key="json" value="application/json;charset=UTF-8"></entry>

                <entry key="html" value="text/html;charset=UTF-8"></entry>

            </map>

        </property>

        <property name="viewResolvers">

            <list>

                <bean

                    class="org.springframework.web.servlet.view.InternalResourceViewResolver">

                    <property name="prefix" value="/WEB-INF/jsp/"></property>

                    <property name="suffix" value=".jsp"></property>

                </bean>

            </list>

        </property>

    </bean>

</beans>
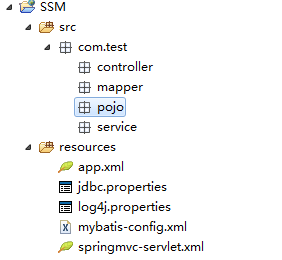
三、创建需要的包。
先创建一个简单的数据库。别忘记修改jdbc.properties文件连接数据库相关配置。

1.实体类、2.控制器 3.数据访问层 4.业务逻辑层
1.创建实体类----属性和数据库字段名最好一致,方便映射。
 package com.test.pojo;

 public class Person {

     private int id;

     private String name;

     public int getId() {

         return id;

     }

     public void setId(int id) {

         this.id = id;

     }

     public String getName() {

         return name;

     }

     public void setName(String name) {

         this.name = name;

     }

 }
2.创建mapper接口和mapper.xml,注意mapper接口和mapper.xml文件名一致,扫包spring容器管理机制.

(1)mapper接口。(查询操作)
package com.test.mapper;

import java.util.List;

import com.test.pojo.Person;

public interface PersonMapper {

    List<Person> getPerson();//查询所有数据

}
(2)mapper.xml
 <?xml version="1.0" encoding="UTF-8"?>

 <!DOCTYPE mapper SYSTEM "http://mybatis.org/dtd/mybatis-3-mapper.dtd" >

 <mapper namespace="com.test.mapper.PersonMapper">

     <select id="getPerson" resultType="Person">

         SELECT * FROM person

     </select>

 </mapper>
3.创建service层。
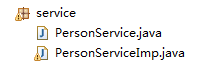
(1)service接口
 package com.test.service;

 import java.util.List;

 import com.test.pojo.Person;

 public interface PersonService {

     List<Person> getPerson();

 }
(2)service实现类
 package com.test.service;

 import java.util.List;

 import javax.annotation.Resource;

 import org.springframework.beans.factory.annotation.Autowired;

 import org.springframework.stereotype.Service;

 import com.test.mapper.PersonMapper;

 import com.test.pojo.Person;

 @Service

 public class PersonServiceImp implements PersonService {

     //两种注入方式 任选其一

     // @Resource注入,按名称注入 名称为mapper接口名首字母小写

     @Resource(name = "personMapper")

     private PersonMapper personMapper;

     /* @Autowired注入,按类型注入

     @Autowired

     private PersonMapper personMapper;*/

     @Override

     public List<Person> getPerson() {

         return personMapper.getPerson();

     }

 }
4.创建控制器。
package com.test.controller;

import java.util.List;

import org.springframework.beans.factory.annotation.Autowired;

import org.springframework.stereotype.Controller;

import org.springframework.web.bind.annotation.RequestMapping;

import org.springframework.web.bind.annotation.ResponseBody;

import com.test.pojo.Person;

import com.test.service.PersonService;

@Controller

public class PersonController {

	@Autowired

	private PersonService personService;


     //返回json格式数据

	@RequestMapping("/index")

	@ResponseBody

	public Object show(){

		List<Person> list = personService.getPerson();

		return list;

	}

}
5.部署项目运行。

Spring MVC + Spring + MyBatis 框架整合的更多相关文章
- spring、spring mvc、mybatis框架整合基本知识
学习了一个多月的框架知识了,这两天很想将它整合一下.网上看了很多整合案例,基本都是基于Eclipse的,但现在外面公司基本都在用Intellij IDEA了,所以结合所学知识,自己做了个总结,有不足之 ...
- IDEA下创建Maven项目,并整合使用Spring、Spring MVC、Mybatis框架
项目创建 本项目使用的是IDEA 2016创建. 首先电脑安装Maven,接着打开IDEA新建一个project,选择Maven,选择图中所选项,下一步. 填写好GroupId和ArtifactId, ...
- spring mvc与mybatis事务整合
之前公司用的是mybatis,但事务管理这块是用ejb的CMT容器管理的事务.基本原理是ejb请求进来,业务代码会创建一个mybatis的session然后放入当前线程,之后所有的方法操作涉及到数据库 ...
- SSM(Spring MVC +Spring+Mybatis)整合——maven工程
所谓的SSM 其实就是Spring MVC下整合mybatis. 具体的定义网络上都有,很详细. 这里只说项目的搭建步骤. 第一步 新建maven工程 工程目录如下: 配置pom.xml文件,引入所需 ...
- SSM 三大框架系列:Spring 5 + Spring MVC 5 + MyBatis 3.5 整合(附源码)
之前整理了一下新版本的 SSM 三大框架,这篇文章是关于它的整合过程和项目源码,版本号分别为:Spring 5.2.2.RELEASE.SpringMVC 5.2.2.RELEASE.MyBatis ...
- SSM 即所谓的 Spring MVC + Spring + MyBatis 整合开发。
SSM 即所谓的 Spring MVC + Spring + MyBatis 整合开发.是目前企业开发比较流行的架构.代替了之前的SSH(Struts + Spring + Hibernate) 计划 ...
- 转载 Spring、Spring MVC、MyBatis整合文件配置详解
Spring.Spring MVC.MyBatis整合文件配置详解 使用SSM框架做了几个小项目了,感觉还不错是时候总结一下了.先总结一下SSM整合的文件配置.其实具体的用法最好还是看官方文档. ...
- ssm(spring,spring mvc,mybatis)框架
ssm框架各个技术的职责 spring :spring是一个IOC DI AOP的 容器类框架 spring mvc:spring mvc 是一个mvc框架 mybatis:是一个orm的持久层框架 ...
- SSM(Spring+SpringMVC+MyBatis)框架整合开发流程
回忆了 Spring.SpringMVC.MyBatis 框架整合,完善一个小demo,包括基本的增删改查功能. 开发环境 IDEA MySQL 5.7 Tomcat 9 Maven 3.2.5 需要 ...
- SSM(Spring,SpringMVC,Mybatis)框架整合项目
快速上手SSM(Spring,SpringMVC,Mybatis)框架整合项目 环境要求: IDEA MySQL 8.0.25 Tomcat 9 Maven 3.6 数据库环境: 创建一个存放书籍数据 ...
随机推荐
- Delphi 导出数据至Excel的7种方法
一; delphi 快速导出excel uses ComObj,clipbrd; function ToExcel(sfilename:string; ADOQuery:TADOQuery):bool ...
- WIFI Manager
Vistumbler - wifi managerhttps://www.vistumbler.net/downloads.htmlhttps://github.com/RIEI
- Long Shadows Generate是一款在线使用纯CSS3实现长阴影的效果,一款强大的扁平化长投影制造器。
Long Shadows Generate是一款在线使用纯CSS3实现长阴影的效果,一款强大的扁平化长投影制造器. Long Shadows Generate 彩蛋爆料直击现场 Long Shadow ...
- RtlAdjustPrivilege进程提权,权限ID对照表
SeCreateTokenPrivilege 0x2 SeAssignPrimaryTokenPrivilege 0x3 SeLockMemoryPrivilege ...
- JavaScript规定了几种语言类型?
JavaScript中的每一个值都有它自己的类型,JavaScript规定了七种语言类型: 1.Undefined 2.Null 3.Boolean 4.String 5.Number 6.Symbo ...
- SYN591型 多功能数字面板表
SYN591型 多功能数字面板表 多功能数字面板表数字面板表使用说明视频链接: http://www.syn029.com/h-pd-248-0_310_44_-1.html 请将此链接复制到浏 ...
- hadoop之hive集合数据类型
除了string,boolean,date等基本数据类型之外,hive还支持三种高级数据类型: 1.ARRAY ARRAY类型是由一系列相同数据类型的元素组成,这些元素可以通过下标来访问.比如有一个A ...
- AcWing 164. 可达性统计
给定一张N个点M条边的有向无环图,分别统计从每个点出发能够到达的点的数量. 输入格式 第一行两个整数N,M,接下来M行每行两个整数x,y,表示从x到y的一条有向边. 输出格式 输出共N行,表示每个点能 ...
- EditPlus 格式化HTML JS CSS
首先你得安装一个EditPlus,然后下载你想格式化的xxxformatter.js文件,也就是网上说的EDTOOLS 1.在你的工具里边找到-->配置自定义工具 具体做法如下: 第5步 命令: ...
- VMware克隆CentOS7,解决网络配置问题
问题: 安装CentOS7 mini版,静态IP配置完毕后,关闭虚机CentOS7-1,克隆虚拟机为CentOS-2.克隆出来的虚拟机使用ifconfig命令,无法发现网卡,只有一个lo设备.虚机无法 ...