FastDFS安装部署
博主本人平和谦逊,热爱学习,读者阅读过程中发现错误的地方,请帮忙指出,感激不尽
服务器信息:
Storage:192.168.247.20
Traker:192.168.247.21
一、搭建环境准备:
1.1 yum检查安装
- yum -y install zlib zlib-devel pcre pcre-devel gcc gcc-c++ openssl openssl-devel libevent libevent-devel perl unzip net-tools wget
1.2 非yum安装:
- Fastdfs:
- https://github.com/happyfish100
- NGINX:
- http://nginx.org/download/
- zib:
- http://www.zlib.net/
- pcre-devel:
- https://centos.pkgs.org/6/centos-x86_64/pcre-devel-7.8-7.el6.x86_64.rpm.html
- pcre rpm:
- http://mirrors.163.com/centos/6/os/x86_64/Packages/pcre-7.8-7.el6.x86_64.rpm
1.3 环境准备注意事项:
- 1.3.1注意1
- pcre和pcre-devel版本必须保持一致
- 检查版本命令:
- [root@localhost /]# rpm -qa pcre
- pcre-.el6.i686
- 安装pcre
- rpm -ivh pcre-.el6.x86_64.rpm
- 注意2
- 添加Zlib安装指向必须是软件包解压的位置而不是编译安装的目录
- 例如:with-zlib=/usr/local/src/zlib-
二、traker安装部署(192.168.247.21)
2.1 安装libfastcommon
- 解压与查看
- unzip libfastcommon-master.zip
- cd libfastcommon-master
- ll
- 编译安装
- ./make.sh
- ./make.sh install
- 创建软连接
- ln -s /usr/lib64/libfastcommon.so /usr/local/lib/libfastcommon.so
- ln -s /usr/lib64/libfdfsclient.so /usr/local/lib/libfdfsclient.so
- ln -s /usr/lib64/libfdfsclient.so /usr/lib/libfdfsclient.so
2.2 FastDFS安装(traker)
- 解压与编译安装
- unzip fastdfs-5.11.zip
- cd fastdfs-5.11
- ./make.sh
- ./make.sh install
- 查看fdfs是否存在以下文件:
- [root@localhost tansk]# cd /etc/fdfs/
- [root@localhost fdfs]# ll
- -rw-r--r-- root root Jun : client.conf.sample
- -rw-r--r-- root root Jun : storage.conf.sample
- -rw-r--r-- root root Jun : tracker.conf.sample
- 在/etc/fdfs/目录下复制配置文件
- 执行命令:
- cp client.conf.sample client.conf
- cp storage.conf.sample storage.conf
- cp tracker.conf.sample tracker.conf
- chmod *
- 或是:
- cat client.conf.sample | grep -v '^#'>client.conf
- cat tracker.conf.sample |grep -v '^#'>tracker.conf
- cat storage.conf.sample | grep -v '^#'>storage.conf
- traker安装与配置
- 创建目录如下:
- /usr/tansk/dev/fastdfs/fastdfs_tracker #这个是我在192.168.247.21最终创建的目录
- mkdir /usr/tansk/dev/fastdfs/fastdfs_tracker -p
- 配置tracker
- cd /etc/fdfs
- vi tracker.conf
- 修改以下四个地方:
- .disabled=false #默认开启
- .port= #默认端口号 .base_path=/usr/tansk/dev/fastdfs/fastdfs_tracker #刚刚创建的目录 .http.server_port= #默认端口是8080
- 启动与验证traker
- 启动命令:service fdfs_trackerd start
- 成功之后可以看见:
- [root@localhost fdfs]# service fdfs_trackerd startStarting fdfs_trackerd (via systemctl): [ OK ]
- 如果不能成功启动,可以通systemctl命令:systemctl start fdfs_trackerd
- 验证traker:
- 启动后发现目录多了data和log两个目录
- [root@localhost fdfs]# cd /usr/tansk/dev/fastdfs/fastdfs_tracker/
- [root@localhost fastdfs_tracker]# ll
- total
- drwxr-xr-x root root Jun : data
- drwxr-xr-x root root Jun : logs
- 查看tracker端口监听情况:
- [root@localhost fastdfs_tracker]# netstat -unltp|grep fdfs
- tcp /fdfs_trackerd
- 到此22122端口监听成功。
2.3 添加traker开机启动
- 添加可执行权限:
- chmod +x /etc/rc.d/rc.local
- 添加开机启动
- vim /etc/rc.d/rc.local
- 在最后添加:
- touch /var/lock/subsys/local
- service fdfs_trackerd start
- 保存退出即可
- 或是:
- [root@traker ~]# /sbin/chkconfig fdfs_trackerd on
三、storage安装部署(192.168.247.20)
3.1 安装libfastcommon
(参考上文)
3.2 FastDFS安装(storage)
- 解压与编译安装
- unzip fastdfs-5.11.zip
- cd fastdfs-5.11
- ./make.sh
- ./make.sh install
- 查看fdfs是否存在以下文件:
- [root@localhost tansk]# cd /etc/fdfs/
- [root@localhost fdfs]# ll
- -rw-r--r-- root root Jun : client.conf.sample
- -rw-r--r-- root root Jun : storage.conf.sample
- -rw-r--r-- root root Jun : tracker.conf.sample
- 在/etc/fdfs/目录下复制配置文件
- 执行命令:
- cp client.conf.sample client.conf
- cp storage.conf.sample storage.conf
- cp tracker.conf.sample tracker.conf
- chmod *
- 或是:
- cat client.conf.sample | grep -v '^#'>client.conf
- cat tracker.conf.sample |grep -v '^#'>tracker.conf
- cat storage.conf.sample | grep -v '^#'>storage.conf
- storage安装与配置
- 创建目录如下:
- #这个是我在192.168.247.20最终创建的目录
- mkdir /usr/tansk/dev/fastdfs/fastdfs_storage -p (新增-ln)
- mkdir /usr/tansk/dev/fastdfs/fastdfs_storage_data -p
- mkdir /usr/tansk/dev/fastdfs/fastdfs_tracker -p
- 修改storage配置文件
- vi /etc/fdfs/storage.conf
- 找到如下8个地方修改即可
- .disabled=false
- .group_name=group1 #组名,根据实际情况修改
- .port= #设置storage的端口号,默认是23000,同一个组的storage端口号必须一致
- .base_path=/usr/tansk/dev/fastdfs/fastdfs_storage #设置storage数据文件和日志目录
- .store_path_count= #存储路径个数,需要和store_path个数匹配 .store_path0=/usr/tansk/dev/fastdfs/fastdfs_storage_data #实际文件存储路径
- .tracker_server= #我traker的ip地址与服务端口 .http.server_port= #设置 http 端口号,与traker的端口号相同
- 保存之后 创建软引用
- ln -s /usr/bin/fdfs_storaged /usr/local/bin
- 启动storage
- service fdfs_storaged start
- 成功应该是如下
- [root@localhost fdfs]# service fdfs_stroaged startStarting fdfs_storaged (via systemctl): [ OK ]
- 同理 如果不能启动可以用下述命令
- systemctl start fdfs_storaged
3.3 设置开机启动
- 添加可执行权限:
- chmod +x /etc/rc.d/rc.local
- 添加开机启动
- vim /etc/rc.d/rc.local
- 在最后添加:
- touch /var/lock/subsys/local
- service fdfs_storaged start
- 保存退出即可
- 或是:
- /sbin/chkconfig fdfs_storaged on
- 查看服务是否启动
- [root@localhost fastdfs]# netstat -unltp | grep fdfs
- tcp /fdfs_storaged
3.4 检查storage是否注册到了tracker中去。
- 执行以下命令:
- /usr/bin/fdfs_monitor /etc/fdfs/storage.conf
- 成功后可以看到:
- ip_addr = 192.168.247.20 (localhost.localdomain) ACTIVE 的字样
四、客户端配置(在storage服务器上)
4.1 修改客户端配置
- vim /etc/fdfs/client.conf
- .base_path=/usr/tansk/dev/fastdfs/fastdfs_tracker #tracker服务器文件路径
- .tracker_server= #tracker服务器IP地址和端口号
- .http.tracker_server_port= # tracker 服务器的 http端口号,必须和tracker的设置对应起来
4.2 上传图片测试验证
- /usr/bin/fdfs_upload_file /etc/fdfs/client.conf /root/测试.jpg
- #你上传的图片路径(linux上的)
- 成功之后会返回图片的路径
- group1/M00///wKiWhFrdeCeAC_vCAABqgowGIFg399.jpg

- 进入上传的路径查看是否上传成功
- find / -name wKiWhFrdeCeAC_vCAABqgowGIFg399.jpg (新增-ln)
- cd /usr/tansk/dev/fastdfs/fastdfs_storage_data/data/M00//
- [root@localhost ]# ls
- wKiWhFrdeCeAC_vCAABqgowGIFg399.jpg
五、NGINX安装配置(在storage服务器)
5.1 fastdfs-nginx-module安装与配置
- 创建这个目录:
- /usr/tansk/dev/nginx /
- 上传fastdfs-nginx-module模块
- 将fastdfs-nginx-module上传至该目录下
- /usr/tansk/dev/nginx /
- 解压fastdfs-nginx-module unzip fastdfs-nginx-module.zip
- 打印目录
- 进入src,打印目录(在后面用到)
- /usr/tansk/dev/nginx/fastdfs-nginx-module/src
5.2 NGINX安装与配置
- 解压
- tar -zxvf nginx-.tar.gz
- 编译安装
- 依次执行以下命令:
- ./configure --prefix=/usr/local/nginx --add-module=/usr/tansk/dev/nginx/fastdfs-nginx-module/src
- make
- make install
5.3 配置storage nginx
- 进入配置文件目录:
- cd /usr/local/nginx/conf
- 修改配置文件(绿色为修改的内容,如有不明白,可登录150.142查看):
- user root; #(补充-ln:如果要设置nginx worker process 所属用户、群组,可以在./configure user=nginx --group=nginx 指定配置;或者在nginx.conf中指定,例如:user nginx ngxin【前提是先创建好用户useradd -M -s /sbin/nologin nginx】)
- worker_processes ;
- error_log logs/error.log;
- events {
- worker_connections ;
- }
- http {
- include mime.types;
- default_type application/octet-stream;
- server {
- listen ;
- server_name tansk.com;
- location /{
- root html;
- index index.html index.htm;
- }
- location ~/group([-])/M00 {
- ngx_fastdfs_module;
- }
- error_page /50x.html;
- location = /50x.html {
- root html;
- }
- }
- }
5.4 修改模块配置,使其生效
- 复制FastDFS配置文件
- 然后进入FastDFS安装时的解压过的目录,将http.conf和mime.types拷贝到/etc/fdfs目录下:
- [root@ZL-FSL-FTP-AP conf]# cd /usr/local/fastdfs/fastdfs-5.11/conf
- [root@ZL-FSL-FTP-AP conf]# ls
- anti-steal.jpg http.conf storage.conf tracker.conf
- client.conf mime.types storage_ids.conf
- [root@ZL-FSL-FTP-AP conf]#
- cp http.conf /etc/fdfs/
- cp mime.types /etc/fdfs/
- 复制模块配置文件
- 另外还需要把fastdfs-nginx-module安装目录中src目录下的mod_fastdfs.conf也拷贝到/etc/fdfs目录下:
- cp /usr/tansk/dev/nginx/fastdfs-nginx-module/src/mod_fastdfs.conf /etc/fdfs/
- 对刚刚拷贝的mod_fastdfs.conf文件进行修改:
- cd /etc/fdfs/
- chmod *
- vim /etc/fdfs/mod_fastdfs.conf
- .base_path=/usr/tansk/dev/fastdfs/fastdfs_storage #保存日志目录
- .tracker_server= #tracker服务器的IP地址以及端口号
- .storage_server_port= #storage服务器的端口号
- .url_have_group_name = true #文件 url 中是否有 group 名
- .store_path0=/usr/tansk/dev/fastdfs/fastdfs_storage_data #存储路径
- .group_count = #设置组的个数
- .在文件的最后,设置group
- [group1]
- group_name=group1
- storage_server_port=
- store_path_count=
- store_path0=/usr/tansk/dev/fastdfs/fastdfs_storage_data
- store_path1=/usr/tansk/dev/fastdfs/fastdfs_storage_data
5.5 测试验证
- 开启NGINX
- 图片验证
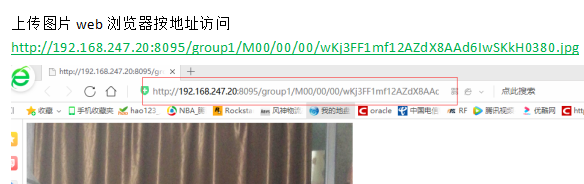
- 上传图片web浏览器按地址访问
- http://192.168.247.20:8095/group1/M00/00/00/wKj3FF1mf12AZdX8AAd6IwSKkH0380.jpg
六、结尾
至此,FastDFS塔建成功,感谢查阅,如有遗漏,欢迎联系与补充
转载需注明出处:https://www.cnblogs.com/tanshouke/p/12187915.html
FastDFS安装部署的更多相关文章
- 分布式文件系统之FastDFS安装部署
前面我们了解了分布式文件系统mogilefs的框架以及安装部署和简单使用,回顾请参考https://www.cnblogs.com/qiuhom-1874/tag/MogileFS/:今天我们来了解下 ...
- FastDFS安装步骤
FastDFS是用c语言编写的一款开源的分布式文件系统,充分考虑了冗余备份.负载均衡.线性扩容等机制,并注重高可用.高性能等指标,使用FastDFS很容易搭建一套高性能的文件服务器集群提供文件上传.下 ...
- 分布式文件系统 - FastDFS 在 CentOS 下配置安装部署
少啰嗦,直接装 看过上一篇分布式文件系统 - FastDFS 简单了解一下的朋友应该知道,本次安装是使用目前余庆老师开源的最新 V5.05 版本,是余庆老师放在 Github 上的,和目前你能在网络上 ...
- 安装部署FastDFS
安装部署FastDFS 此篇博文是在安装好虚拟机和CentOS7的前提和转自以下几篇博客得来: 1.开启CentOS的网络连接: 1.1.网址:http://blog.csdn.net/white ...
- docker安装部署、fastDFS文件服务器搭建与springboot项目接口
一.docker安装部署 1.更新yum包:sudo yum update 2.安装需要的软件包,yum-util 提供yum-config-manager功能,另外两个是devicemapper驱动 ...
- FastDFS安装、配置、部署(一)-安装和部署 (转)
FastDFS是一个开源的,高性能的的分布式文件系统,他主要的功能包括:文件存储,同步和访问,设计基于高可用和负载均衡,FastDFS非常适用于基于文件服务的站点,例如图片分享和视频分享网站 Fast ...
- FastDFS学习总结(1)--FastDFS安装和部署
FastDFS是一个开源的,高性能的的分布式文件系统,他主要的功能包括:文件存储,同步和访问,设计基于高可用和负载均衡,FastDFS非常适用于基于文件服务的站点,例如图片分享和视频分享网站 Fast ...
- FastDFS+Nginx部署详细教程
本例使用到的所有tar和zip包地址:http://download.csdn.net/detail/corey_jk/9758664 本例中使用CentOS1.CentOS2两台机器实现. 1 GC ...
- FastDFS 安装与使用
FastDFS 安装与使用 1. 什么是 FastDFS FastDFS是一个开源的高性能分布式文件系统(DFS). 它的主要功能包括:文件存储,文件同步和文件访问,以及高容量和负载平衡的设计. Fa ...
随机推荐
- P(Y=y|x;θ)表示什么意思
https://blog.csdn.net/jh1137921986/article/details/88999539 在机器学习中,特别是学习到关于概率/似然估计方面的内容,经常看到类似P(Y=y| ...
- 吴裕雄--天生自然MySQL学习笔记:MySQL ALTER命令
需要修改数据表名或者修改数据表字段时,就需要使用到MySQL ALTER命令. root@host# mysql -u root -p password; Enter password:******* ...
- 吴裕雄--天生自然 JAVASCRIPT开发学习: 验证 API
<!DOCTYPE html> <html> <head> <meta charset="utf-8"> </head> ...
- Git 报错:Updates were rejected because the tip of your current branch is behind
刚开始学习 git 命令,发现会出现很多的错误,所以就总结下出现的错误,以此来加深理解和掌握吧! 环境:在本地库操作了一系列的 add 和 commit 操作后,想把本地仓库推送到远端,但是发生以下错 ...
- idea指定启动参数、环境变量
1. 点击Edit Configurations 2 # VM Arguments 是设置的虚拟机的属性 # VM options # 环境变量参数 这里需要指定-D参数 -server -XX:M ...
- Django的模板变量
变量的值来自context中的数据字典, 类似于字典对象的keys到values的映射关系. 变量是被}}和{{括起来的部分 变量看起来就像是这样: {{ variable }}. 当模版引擎遇到一个 ...
- ubuntu搭建web服务器
https://www.linuxidc.com/Linux/2015-11/125477.htm 到“sudo apt-get install libapache2-mod-php5”出现1错误.
- Thinkcmf子栏目获取父级栏目所有子栏目列表
网站建设时经常需要输出某个栏目的子栏目,对应的在子栏目列表页也需要输出父级栏目的子栏目列表,thinkcmf可以输出所有子栏目,但却无法在子栏目列表页也适用, 因此就需要通过对数据库表查询来完成需求: ...
- CodeForces 1287B Hyperset
N^2遍历所有得(i,j)然后可以根据(i,j)字符串构造出来第三个T字符串,然后查找一下是否有这个T存在即可,注意最后答案要/3因为会重复出现. #include <stdio.h> # ...
- Python 学习笔记:Python 连接 SQL Server 报错(20009, b'DB-Lib error message 20009, severity 9)
问题及场景: 最近需要使用 Python 将数据写到 SQL Server 数据库,但是在进行数据库连接操作时却报以下错误:(20009, b'DB-Lib error message 20009, ...