【第二十章】 springboot + consul(1)
consul的具体安装与操作查看博客的consul系列。
一、启动consul
(1个server+1个client,方便起见,client使用本机):查看:http://www.cnblogs.com/java-zhao/p/5375132.html
1、开启虚拟机-->切换到vagrantFile中配置的节点
- vagrant up
- vagrant ssh n110
2、启动server(n110)
consul agent -server -bootstrap-expect=1 -data-dir=/tmp/consul -node=server-110 -bind=192.168.21.110 -dc=zjgdc1 -client 0.0.0.0 -ui
说明:-client 0 0 0 0 -ui-->使得客户端可以直接通过url访问服务端的consul ui
3、启动client(local)
- consul agent -data-dir=/tmp/consul -node=client-my -bind=xxx -dc=zjgdc1
说明:xxx代表本机IP
4、client加入server
- consul join 192.168.21.110
二、java部分
1、pom.xml
<!-- consul-client -->
        <dependency>
            <groupId>com.orbitz.consul</groupId>
            <artifactId>consul-client</artifactId>
            <version>0.10.0</version>
        </dependency>
        <!-- consul需要的包 -->
        <dependency>
            <groupId>org.glassfish.jersey.core</groupId>
            <artifactId>jersey-client</artifactId>
            <version>2.22.2</version>
        </dependency>
说明:consul的java客户端有两个:consul-client和consul-api。
consul-client的github地址:https://github.com/OrbitzWorldwide/consul-client
2、ConsulService
package com.xxx.firstboot.service;

import java.net.MalformedURLException;
import java.net.URI;
import java.util.List;

import org.springframework.stereotype.Service;

import com.orbitz.consul.AgentClient;
import com.orbitz.consul.Consul;
import com.orbitz.consul.HealthClient;
import com.orbitz.consul.KeyValueClient;
//import com.orbitz.consul.NotRegisteredException;
import com.orbitz.consul.StatusClient;
import com.orbitz.consul.model.health.ServiceHealth;

@Service
public class ConsulService {

    /**
     * 注册服务
     * 并对服务进行健康检查
     * servicename唯一
     * serviceId:没发现有什么作用
     */
    public void registerService(String serviceName, String serviceId) {
        Consul consul = Consul.builder().build();            //建立consul实例
        AgentClient agentClient = consul.agentClient();        //建立AgentClient

        try {
            /**
             * 注意该注册接口:
             * 需要提供一个健康检查的服务URL,以及每隔多长时间访问一下该服务(这里是3s)
             */
            agentClient.register(8080, URI.create("http://localhost:8080/health").toURL(), 3, serviceName, serviceId, "dev");
        } catch (MalformedURLException e) {
            e.printStackTrace();
        }
//        try {
//            agentClient.pass(serviceId);//健康检查
//        } catch (NotRegisteredException e) {
//            e.printStackTrace();
//        }
    }

    /**
     * 发现可用的服务
     */
    public List<ServiceHealth> findHealthyService(String servicename){
        Consul consul = Consul.builder().build();
        HealthClient healthClient = consul.healthClient();//获取所有健康的服务
        return healthClient.getHealthyServiceInstances(servicename).getResponse();//寻找passing状态的节点
    }

    /**
     * 存储KV
     */
    public void storeKV(String key, String value){
        Consul consul = Consul.builder().build();
        KeyValueClient kvClient = consul.keyValueClient();
        kvClient.putValue(key, value);//存储KV
    }

    /**
     * 根据key获取value
     */
    public String getKV(String key){
        Consul consul = Consul.builder().build();
        KeyValueClient kvClient = consul.keyValueClient();
        return kvClient.getValueAsString(key).get();
    }

    /**
     * 找出一致性的节点(应该是同一个DC中的所有server节点)
     */
    public List<String> findRaftPeers(){
        StatusClient statusClient = Consul.builder().build().statusClient();
        return statusClient.getPeers();
    }

    /**
     * 获取leader
     */
    public String findRaftLeader(){
        StatusClient statusClient = Consul.builder().build().statusClient();
        return statusClient.getLeader();
    }

}
列出了常用API。
注意:
- 服务注册的时候不需要传递IP
- 服务注册的时候需要给出health check的url和时间间隔。该url是一个服务(要提供该服务,需要使用spring boot actuator,具体操作如下:)。
直接在pomx.ml中加入:
         <dependency>
             <groupId>org.springframework.boot</groupId>
             <artifactId>spring-boot-starter-actuator</artifactId>
         </dependency>
此时重启应用后,访问http://localhost:8080/health,得到如下结果一个json串:
{
status: "UP",
diskSpace: - {
status: "UP",
total: 249769230336,
free: 182003318784,
threshold: 10485760
},
rabbit: - {
status: "UP",
version: "3.6.1"
},
mongo: - {
status: "UP",
version: "3.2.6"
},
db: - {
status: "UP",
myTestDbDataSource: - {
status: "UP",
database: "MySQL",
hello: 1
},
myTestDb2DataSource: - {
status: "UP",
database: "MySQL",
hello: 1
},
dataSource: - {
status: "UP",
database: "MySQL",
hello: 1
}
},
_links: - {
self: - {
href: "http://localhost:8080/health"
}
}
}
Format online
说明:status
- UP:服务器正常(以上只要有一个组件DOWN,服务器就处于DOWN,所以我需要启动服务器上的mongo和rabbitmq,这里我之前使用了这两个组件)
- DOWN:服务器挂了
3、ConsulController
package com.xxx.firstboot.web;

import java.util.List;

import org.springframework.beans.factory.annotation.Autowired;
import org.springframework.web.bind.annotation.PathVariable;
import org.springframework.web.bind.annotation.RequestMapping;
import org.springframework.web.bind.annotation.RequestMethod;
import org.springframework.web.bind.annotation.RestController;

import com.orbitz.consul.model.health.ServiceHealth;
import com.xxx.firstboot.service.ConsulService;

import io.swagger.annotations.Api;
import io.swagger.annotations.ApiOperation;

@Api("consul相关API")
@RestController
@RequestMapping("/consul")
public class ConsulController {
    @Autowired
    private ConsulService consulService;

    /*******************************服务注册与发现*******************************/
    @ApiOperation("注册服务")
    @RequestMapping(value="/registerService/{servicename}/{serviceid}",method=RequestMethod.POST)
    public void registerService(@PathVariable("servicename") String serviceName,
                                @PathVariable("serviceid") String serviceId) {
        consulService.registerService(serviceName, serviceId);
    }

    @ApiOperation("发现服务")
    @RequestMapping(value="/discoverService/{servicename}",method=RequestMethod.GET)
    public List<ServiceHealth> discoverService(@PathVariable("servicename") String serviceName) {
        return consulService.findHealthyService(serviceName);
    }

    /*******************************KV*******************************/
    @ApiOperation("store KV")
    @RequestMapping(value="/kv/{key}/{value}",method=RequestMethod.POST)
    public void storeKV(@PathVariable("key") String key,
                        @PathVariable("value") String value) {
        consulService.storeKV(key, value);
    }

    @ApiOperation("get KV")
    @RequestMapping(value="/kv/{key}",method=RequestMethod.GET)
    public String getKV(@PathVariable("key") String key) {
        return consulService.getKV(key);
    }

    /*******************************server*******************************/
    @ApiOperation("获取同一个DC中的所有server节点")
    @RequestMapping(value="/raftpeers",method=RequestMethod.GET)
    public List<String> findRaftPeers() {
        return consulService.findRaftPeers();
    }

    @ApiOperation("获取leader")
    @RequestMapping(value="/leader",method=RequestMethod.GET)
    public String leader() {
        return consulService.findRaftLeader();
    }
}
4、测试(通过swagger测试+通过consul UI查看结果)
- swagger:http://localhost:8080/swagger-ui.html
- consul UI:http://192.168.21.110:8500/ui/
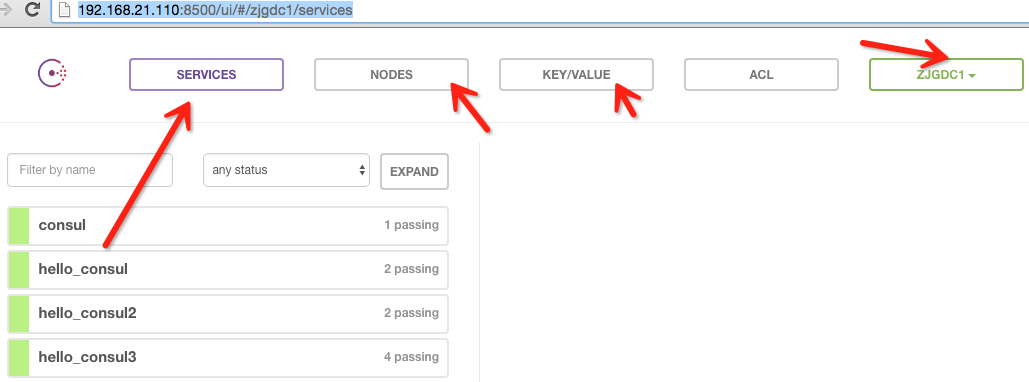
上图展示了consul UI所展示的所有东西。services、nodes、kv、datacenter
【第二十章】 springboot + consul(1)的更多相关文章
- 第二十章 springboot + consul(1)
consul的具体安装与操作查看博客的consul系列. 一.启动consul (1个server+1个client,方便起见,client使用本机):查看:http://www.cnblogs.co ...
- JavaScript高级程序设计:第二十章
第二十章 一.语法 JSON的语法可以表示以下三种类型的值: (1)简单值 (2)对象 JSON的对象与javascript字面量有一些不同.例如,在javascript中,前面的对象字面量可以写成下 ...
- 第二十章 Django数据库实战
第二十章 Django数据库实战 第一课 获取单表单数据的三种方式: urls.py中的路由代码: path('busniess',views.busniess), views.py中代码: def ...
- Gradle 1.12翻译——第二十章. 构建环境
有关其他已翻译的章节请关注Github上的项目:https://github.com/msdx/gradledoc/tree/1.12,或访问:http://gradledoc.qiniudn.com ...
- “全栈2019”Java多线程第二十章:同步方法产生死锁的例子
难度 初级 学习时间 10分钟 适合人群 零基础 开发语言 Java 开发环境 JDK v11 IntelliJ IDEA v2018.3 文章原文链接 "全栈2019"Java多 ...
- “全栈2019”Java异常第二十章:自定义异常详解
难度 初级 学习时间 10分钟 适合人群 零基础 开发语言 Java 开发环境 JDK v11 IntelliJ IDEA v2018.3 文章原文链接 "全栈2019"Java异 ...
- “全栈2019”Java第二十章:按位与、按位或、异或、反码、位运算
难度 初级 学习时间 10分钟 适合人群 零基础 开发语言 Java 开发环境 JDK v11 IntelliJ IDEA v2018.3 文章原文链接 "全栈2019"Java第 ...
- 2017.3.14 activiti实战--第二十章--REST服务
学习资料:<Activiti实战> 第二十章 REST服务 20.1 通信协议概述 略. 20.2 REST API概述 资源分类 资源基础URI 说明 Deployments manag ...
- python 教程 第二十章、 数据库编程
第二十章. 数据库编程 环境设置 1).安装MySQL-python http://www.lfd.uci.edu/~gohlke/pythonlibs/ MySQL-python-1.2.3.win ...
- 20190920 On Java8 第二十章 泛型
第二十章 泛型 多态的泛化机制: 将方法的参数类型设为基类: 方法以接口而不是类作为参数: 使用泛型: 泛型实现了参数化类型 简单泛型 Java 泛型的核心概念:你只需告诉编译器要使用什么类型,剩下的 ...
随机推荐
- getParameter和getAttribute区别
(1)HttpServletRequest类有setAttribute()方法,而没有setParameter()方法 (2)当两个Web组件之间为链接关系时,被链接的组件通过getParameter ...
- 【F12】Console命令,让js调试更简单
Console命令,让js调试更简单 一.显示信息的命令 console.log("normal"); // 用于输出普通信息 console.info("informa ...
- 【Pyton】【小甲鱼】异常处理:你不可能总是对的
Exception 1.assertionerror举例 >>> my_list=['小甲鱼是帅哥'] >>> assert len(my_list)>0 & ...
- Tensorflow(一)
一.安装Ubantu环境 下载ios 网址:http://cn.ubuntu.com/download/ 2.配合虚拟机进行安装环境 虚拟机直接百度下载即可 虚拟机采用 3.配置 4.安装中 5.安装 ...
- 001-读书笔记-企业IT架构转型之道-阿里巴巴中台战略思想与架构实战-第一章 阿里巴巴集团中台战略引发的思考
1.1.阿里中台发展 组件中台可能问题:组织间业务协作.业务核心能力的沉淀.组织KPI考核等 1.2.企业信息中心发展的症结 1.烟囱式系统建设模式 独立构建独立维护 缺点:1.重复功能建设和维护带来 ...
- 010-spring cloud gateway-过滤器-自定义局部、全局过滤器、区别
一.自定义局部过滤器 自定义过滤器需要实现GatewayFilter和Ordered.其中GatewayFilter中的这个方法就是用来实现你的自定义的逻辑的 Mono<Void> fil ...
- 混淆矩阵在Matlab中PRtools模式识别工具箱的应用
声明:本文用到的代码均来自于PRTools(http://www.prtools.org)模式识别工具箱,并以matlab软件进行实验. 混淆矩阵是模式识别中的常用工具,在PRTools工具箱中有直接 ...
- jQuery内部原理和实现方式浅析
这篇文章主要介绍了jQuery内部原理和实现方式浅析,本文试图从整体来阐述一下jQuery的内部实现,需要的朋友可以参考下 这段时间在学习研究jQuery源码,受益于jQuery日益发展强大,研究jQ ...
- MutationObserver 监听DOM树变化
1 概述 Mutation observer 是用于代替 Mutation events 作为观察DOM树结构发生变化时,做出相应处理的API.为什么要使用mutation observer 去代替 ...
- NC_Verilog中的工具ICC
Cadence中的Incisive Comprehensive Coverage(ICC) solusion提供在仿真中的覆盖率分析. ICC中的覆盖率类型有两大类: 1)Code Coverage: ...