【原】【BG】-一次虚拟化环境实践简要记录
部分涉及到Linux、Nginx、tomcat、MySQL等的点滴操作记录,时间长了,就忘掉了,偶尔整理一下操作的history,就此简要备份一下:
【原】【BG】-一次虚拟化环境实践简要记录: https://www.cnblogs.com/haochuang/p/8862640.htmll
【原】【BG】KVM虚拟化管理 virt manager常用操作:https://www.cnblogs.com/haochuang/p/9540812.html
【原】【BG】三块SAS新磁盘RAID扩展及LVM、mdadm与数据备份等:https://www.cnblogs.com/haochuang/p/9889220.html
【原】【BG】多tomcat+Nginx+Mysql+多服务环境配置及部分过程记录:https://www.cnblogs.com/haochuang/p/9889158.html
SQL相关:
【原】【BG】部分问题处理SQL:https://www.cnblogs.com/haochuang/p/9640356.html
【原】【BG】【SQL之二】批量生成SQL语句及多表查询:https://www.cnblogs.com/haochuang/p/9889491.html
前几天,搞了一台PowerEdge R720机架服务器,在上面搭建了一套虚拟化环境,将一台硬件虚成了多台,满足基本使用。
恰好今天有空,这里做一下简单的记录。
1.过去的记忆
上次搞虚拟化之类服务器这种事情,还是2011年的时候了。
记得那时候用的还是Ubuntu 11.04,而且那时候搞得比现在要复杂得多,那时候Openstack才刚刚兴起,还不稳定,整天看的都是英文文档,在与openstack的各种不稳定作斗争;
那时候我去还参与openstack初期时候的中国区会议,还申请帮忙一起进行活动场地相关准备与支持性工作;
转眼这些年,技术迭代了Docker、K8S,热门技术又变了,沧海桑田一般。
2.关于云的看法
另外关于自建服务器,可能每个人的观点不同。我自己的看法如下:
1.相对具体的数据本身而言,选择云服务器比本地服务器,更为安全;我这里说的安全,是指数据不丢失,是云本身的IAAS层RAID+多副本+异地灾备等天然属性所决定的;但账号密码等上层应用服务层的安全是另外一回事;很多人认为云不安全,其实是对后者不放心;但就IAAS层而言,还无争议的肯定是云服务更安全;
2.云服务的成本更低,效率更高;选择云服务,云服务供应商的规模化运营降低了成本,技术资源更强大,处理问题更快;本地的话可能需要运维人员,需要另外增加额外成本,而且单枪匹马,难以与一个技术team的战斗力匹敌;
3.云服务集成的第三方附加产品可以使用,很多不需要再去自建,节省时间;
4.云服务扩展更灵活,按需采购使用,而不是像本地,搭建环境时候的架构本身就决定了可以支撑多少计算、存储、网络能力;
。。。
anyway,做好当下的事情,说干就干,我先把云服务搞起来再说,前几天已经高过了,现在将部分要点简要记录一下;
在搞得过程中,我参考了部分其他人的经验,部分可能还有用处,参考的部分URL如下:
QEMU-KVM安装部署虚拟机:https://www.linuxidc.com/Linux/2017-05/143292.htm
CentOS 7下如何配置KVM虚拟化环境:https://www.centos.bz/2018/02/centos-7%E4%B8%8B%E5%A6%82%E4%BD%95%E9%85%8D%E7%BD%AEkvm%E8%99%9A%E6%8B%9F%E5%8C%96%E7%8E%AF%E5%A2%83/
Centos7.4安装kvm虚拟机(使用virt-manager管理):http://www.cnblogs.com/kevingrace/p/8377645.html
KVM 虚拟化 virsh,virt-manager 删除虚拟机:https://www.linuxidc.com/Linux/2017-01/140009.htm
centos7 通过kvm+vnc 实现远程桌面虚拟化和创建windows、Linux虚拟机:https://blog.csdn.net/qq_21398167/article/details/46413107
KVM和远程管理工具virt-manager的部署:https://blog.csdn.net/qq271757232/article/details/18949707
本来想详细分步骤记录一下,但是时间紧急,就偷懒了,我先把主要思路写一下,然后通过history中把之前部分用到的命令贴出来,如果有需要的可以参考;
-------------------------------------------------------------------
基本步骤要点:
1.先检查硬件配置,并给硬件设备做RAID;
2.下载系统镜像,推荐CentOS或者UbuntuServer版本;
3.使用USB制作虚拟启动盘;
4.使用虚拟盘安装操作系统;
5.Centos网络与桥接配置等;
6.虚拟化层(Virt-manager\QEMU-KVM)安装;
7.VNC-Viewer安装;
8.虚拟机镜像制作;
9.虚拟机集群规划管理,单台虚拟机启动与配置等;
10.虚拟机内部环境配置,虚拟机之间配置与管理;
-------------------------------------------------------------------
硬件服务器:戴尔PowerEdge R720 机架式服务器
具体操作步骤,现在不详细记录了,我直接history了一下操作的部分历史如下,供参考:
[root@localhost ~]# history | cut -c - > history

su - haochuang

clear

yum install -y net-tools

dmesg |grep eth

ls /sbin

ls /sbin/if*

ls /etc/sysconfig/network-scripts/

cd /etc/sysconfig/network-scripts/

ls

cat ifcfg-em1

dmesg |grep -in  eth

ifconfig

cat /etc/default/grub

yum install -n net-tools

cat /etc/default/grub

service start network

service restart network

sudo reboot

yum install -n net-tools

yum install -y net-tools

ping www.baidu.com

cd /etc/sysconfig/network-scripts/

ls -la

vi ifcfg-em1

cat ifcfg-em1

cat ifcfg-em2

cat ifcfg-em1

vi ifcfg-em1

sudo reboot

ping www.baidu.com

vi /etc/sysconfig/network-scripts/

cd  /etc/sysconfig/network-scripts/

ls

cp ifcfg-em1 ifcfg-eth0

vi ifcfg-eth0

service network restart

systemctl

ifup eth1

ifup eth0

systemctl

systemctl list-unit-files

vi ifcfg-eth0

ls

cp ifcfg-em1 ifcfg-em0

cp ifcfg-eth0 ifcfg-em1

service network restart

systemctl

ifdown ifcfg-em1

ifup ifcfg-em1

ip addr

cat ifcfg-em1

ifdown ifcfg-em1

ifup ifcfg-em1

find / name  "ifconfig"

find / name  "ifconfig" | more

/etc/init.d/network  restart

systemctl

ip addr

ip link whow

ip link show

ip addr show

ls -la

cat ifcfg-em1

cat ifcfg-em4

vi ifcfg-em4

ifup ifcfg-em4

ip addr

ifconfig

ping www.baidu.com

service sshd status

yum install net-tools

ifconfig

pwd

ls -la

cat ifcfg-em4

uname -a

arch

cat lsb_release

cat /prod/lsb_release

yum install qemu-kvm libvirt virt-install bridge-utils

yum install qemu-kvm libvirt virt-install bridge-utilslsmod | grep kvm

lsmod | grep kvm

systemctl start libvirt

yum install qemu-kvm libvirt virt-install bridge-utils

systemctl start libvirtd

systemctl enable libvirtd

pwd

ls -la

cp ifcfg-em0 ifcfg-br0

vi ifcfg-br0

ping 192.168.1.100

ping 192.168.1.101

ping 192.168.1.200

vi ifcfg-br0

ls -la

cp ifcfg-em4 ifcfg-bond0

vi ifcfg-bond0

ifconfig

vi ifcfg-br0

ifconfig

systemctl  restart network

ls -la

vi ifcfg-bond0

vi ifcfg-em4

cat ifcfg-em4 ifcfg-bond0

mv ifcfg-em4 ifcfg-em4.bak

mv ifcfg-bond0  ifcfg-em4

ifconfig

ifconfig | more

systemctl  restart network

ifconfig |

systemctl  restart network | moew

systemctl  restart network | more

systemctl  restart network

ls -la

vi ifcfg-br0

vi ifcfg-em4

systemctl  restart network

systemctl status network.service

ifdown ifcfg-br0

ifdown ifcfg-em4

vi ifcfg-em4

ifdown ifcfg-em4

ifconfig

ifup br0

ifup ifcfg-em4

vi ifcfg-em4

ifconfig

vi ifcfg-em4

systemctl status network.service

systemctl  restart network

systemctl status network.service

ls-la

ls -la

ip addr

ip a

ifup ifcfg-br0

ip addr

ip a

ifconfig

ifconfig | more

ls /vat/lib/libvirt/images

ls /var/lib/libvirt/images

ls /var/kvm/images

mkdir -p /var/kvm/images

ls /var/kvm/images

man virt-manager

ifconfig | more

cat ifcfg-em4

cat ifcfg-br0

vi ifcfg-em4

systemctl  restart network

ifdown ifcfg-em4

ifdown ifcfg-br0

ifconfig | more

ifup ifcfg-br0

ifconfig | more

ifup ifcfg-em4

cat ifcfg-em4

cat ifcfg-br0

df -lh

egrep '(vmx|svm)' /proc/cpuinfo

vi /etc/sysconfig/selinux

yum install epel-release net-tools vim unzip zip wget

ping www.baidu.com

ifup  ifcfg-br0

ping www.baidu.com

ifconfig

ifconfig | more

ifup  ifcfg-br0

systemctl  restart network

ping www.baidu.com

vi ifcfg-em4

systemctl  restart network

ifup ifcfg-em4

ifdown ifcfg-em4

ifup ifcfg-em4

ip a

ifup ifcfg-br0

ifdown ifcfg-br0

ifup ifcfg-br0

ping www.baidu.com

systemctl  restart network

ping www.baidu.com

vi ifcfg-br0

vi ifcfg-em4

ls -la

cp ifcfg-em4 ifcfg-em4.bak.

ls -la

vi ifcfg-em4

systemctl  restart network

system status network.service

systemctl  status network.service

ls

mv ifcfg-eth0  bak.ifcfg-eth0

mv ifcfg-em0 bak.ifcfg-em0

ls

mv ifcfg-em4.bak bak.ifcfg-em4.bak

ls

mv ifcfg-em4.bak.   bak.ifcfg-em4.bak.

ls -la

la

ls

sudo reboot

ifcondfig

ifconfig

ifconfig | moer

ifconfig | more

ping www.baidu.com

ip  addr

service network restart

cd /etc/networks/

cd /sysconfig

ls

cd /

ls

cd /etc/sysconfig/network

cd /etc/sysconfig/network-scripts/

ls -la

ip a

cat ifcfg-br0

cat ifcfg-em4

 ip addr show

 ip addr

cat ifcfg-br0

vi ifcfg-br0

cat ifcfg-br0

cat ifcfg-em4

vi ifcfg-br0

cat ifcfg-em4

systemctl restart nwtwork

systemctl restart network

journalctl -xe

cat /var/log/messages | grep network

vi /etc/resolv.conf

vi /var/log/messages

systemctl restart network

journalctl -xe

arp -a

ifconfig

ifconfig | more

ping 192.168.1.1

journalctl -xe

service ssh status

service sshd status

journalctl -xe | more

cat /var/log/messages | grep network

clear

cat /var/log/messages | grep network | more

exit

ifconfig

yum install epel-release net-tools vim unzip zip wget ftp -y

ping www.baidu.com

ifconfig

service network  restart

journalctl -xe

ls -la

cd /etc/sysconfig/

ls -la

cd network

cd network-scripts/

ls -la

vi ifcfg-br0

service network restart

systemctl status net

systemctl status network.service

systemctl stop NetworkManager

systemctl disable NetworkManager

systemctl start network.service

ifconfig

journalctl -xe

egrep '(vmx|svm)' --color=always /proc/cpuinfo

lsmod | grep kvm

sestatus

yum install kvm libvirt python-virtinst qemu-kvm virt-viewer tunctl bridge-utils avahi dmidecode qemu-kvm-tools virt-manager qemu-img virt-instal

l net-tools libguestfs-tools -ysystemctl start libvirtd

systemctl enable libvirtd

virsh -c qemu:///system list

ifconfig

yum install qemu-kvm libvirt virt-install bridge-utils -y

systemctl start libvirtd

systemctl enable libvirtd

systemctl status libvirtd

systemctl is-enabled libvirtd

pwd

ls -la

cd

pwd

cd /home

ls -la

groupadd haogroup

useradd -g haogroup -d /home/haoop -m haoop -p haoop

ls -la

su - haochuang

mkdir iso

ls -la

cd iso

ls -la

cd ..

ls -la

mkdir -p /home/kvm-bak

ls -la

vi /etc/sudoers

yum install vsftpd

vi /etc/vsftpd/user_list

service vsftpd restart

su - haochuang

vi /etc/vsftpd/vsftpd.conf

/etc/init.d/messagebus restart

yum install -y kvmvirt-*  libvirt  bridge-utils qemu-img

virt-install

/etc/init.d/libvirtd start

mkdir /data/

ls -la

cd da

cd /data

ls -la

cat /proc/cpuinfo

virt-install --name  scm --ram  --disk path=/data/scm.img,size= --vcpus  --os-type linux --os-variant rhel7 --network bridge=br0 --graphic

s none --console pty,target_type=serial --location'http://mirrors.163.com/centos/7/os/x86_64/' --extra-args 'console=ttyS0,115200n8 serial' virt-install --name  scm --ram  --disk path=/data/scm.img,size= --vcpus  --os-type linux --os-variant rhel7 --network bridge=br0 --graphic

s none --console pty,target_type=serial --location'http://mirrors.163.com/centos/7/os/x86_64/' --extra-args 'console=ttyS0,115200n8 serial'virt-install --name  scm --ram  --disk path=/data/scm.img,size= --vcpus  --os-type linux --os-variant rhel7 --network bridge=br0 --graphic

s none --console pty,target_type=serial --location 'http://mirrors.163.com/centos/7/os/x86_64/' --extra-args 'console=ttyS0,115200n8 serial' pwd

cat /etc/ssh/sshd_config

cat /etc/ssh/sshd_config | grep X11Forwarding

vi /etc/ssh/sshd_config

passwd haoop

pwd

ls -la

cd /home

ls -la

chown haoop:haogroup iso -R

ls -la

cd iso/

ls -la

firewall-cmd --zone=public --add-port=/tcp --permanent

firewall-cmd --reload

yum install tigervnc

yum -y install tigervnc-server

ls -la

pwd

cd ..

ls -la

cp iso/CentOS--x86_64-DVD-.iso kvm-bak/

cd kvm-bak/

ls -la

cd ..

ls -la

chown haoop:haogroup kvm-bak -R

ls -la

cd kvm-bak/

ls -la

su - haoop

ls -la

virt-install --network bridge=br0,model=virtio --name hao --ram= --vcpus= --disk path=/home/kvm-bak/vm-images/hao.img,size=,bus=virtio --c

drom /home/kvm-bak/CentOS--x86_64-DVD-.iso --graphics none --noautoconsole  --acceleratels /home/kvm-bak/vm-images

rm -rf /home/kvm-bak/vm-images/hao.img

virt-install --network bridge=br0,model=virtio --name hao --ram= --vcpus= --disk path=/home/kvm-bak/vm-images/hao.img,size=,bus=virtio --c

drom /home/kvm-bak/CentOS--x86_64-DVD-.iso --graphics none --noautoconsole  --acceleratevirt-install --network bridge=br0,model=virtio --name haotest --ram= --vcpus= --disk path=/home/kvm-bak/vm-images/hao.img,size=,bus=virtio

 --cdrom /home/kvm-bak/CentOS--x86_64-DVD-.iso --graphics none --noautoconsole  --acceleratevirt-install --network bridge=br0,model=virtio --name haotest --ram= --vcpus= --disk path=/home/kvm-bak/vm-images/haotest.img,size=,bus=vi

rtio --cdrom /home/kvm-bak/CentOS--x86_64-DVD-.iso --graphics none --noautoconsole  --acceleratels -la

cd vm-images/

ls -la

virsh console haotest

ping www.baidu.com

w

ps -ef | grep virsh

kill -

pwd

ls -la

cd

ls -la

cd /home

ls -la

cd ..

ls -la

cd data

ls -la

virt-namager

virt-manager

ls -la

rm -rf scm.img

ls -la

virt-install --network bridge=br0,model=virtio --name vm1 --ram= --vcpus= --disk path=/vm-images/vm1.img,size=,bus=virtio --location 'http:

//mirrors.163.com/centos/7/os/x86_64/' --graphics none --noautoconsole  --acceleratevirt-manager

ssh -X 192.168.1.200

virt-manager

clear

virsh --help |grep undefine

virsh list --all

virsh destory scm

virsh destroy scm

yum -y install http://dl.fedoraproject.org/pub/epel/7/x86_64/e/epel-release-7-8.noarch.rpm

yum -y install git python-pip libvirt-python libxml2-python python-websockify supervisor nginx

yum -y install gcc python-devel pip install numpy

mkdir /application/

cd /application/

git clone git://github.com/retspen/webvirtmgr.git

git clone https://github.com/retspen/webvirtmgr.git

wget http://www.sqlite.org/sqlite-3.5.6.tar.gz

netstat -an |grep

service vncserver restart

yum -y install wget

wget http://www.sqlite.org/sqlite-3.5.6.tar.gz

ls -la

cd sqlite-3.5./

tar -xvf sqlite-3.5..tar.gz

cd sqlite-3.5./

ls -la

./configure --disable-tcl

make;make install

cd /application/webvirtmgr

ls -la

pip install -r requirements.txt

pip install -r

cat requirements.txt

./manage.py syncdb

rpm -y install django

pip install -r requirements.txt

yum -y install pip

export PATH=$HOME/bin:/usr/local/bin:$PATH

export PATH=$HOME/bin:/usr/local/python27/bin:/usr/local/bin:$PATH

source .zshrc

yum -y install pip

pip install -r requirements.txt

yum install epel-release

yum install -y python-pip

pip install -r requirements.txt

./manage.py syncdb

./manage.py createsuperuser

mkdir -pv /var/www

mkdir -p /var/www

cp -Rv /application/webvirtmgr /var/www/webvirtmgr

vi /etc/sysconfig/libvirtd

vi /etc/libvirt/libvirtd.conf

vi /etc/nginx/nginx.conf

systemctl restart  libvirtd.service

vi /etc/nginx/conf.d/webvirtmgr.conf

yum install -y nginx

vi /etc/nginx/conf.d/webvirtmgr.conf

ifconfig

ll /home/kvm-bak/vm-images

ll /home/kvm-bak/

clear

yum -y install qemu-kvm libvirt virt-install bridge-utils

lsmod | grep kvm

 systemctl start libvirtd

systemctl enable libvirtd

cat /etc/sysconfig/network-scripts/ifcfg-br0

cd /etc/sysconfig/network-scripts/

ls

cat ifcfg-br0

systemctl restart network

systemctl status network.service

clear

ifconfig

virt-install --network bridge=br0,model=virtio --name haochuang --ram= --vcpus= --disk path=/home/kvm-bak/vm-images/haochuang.img,size=,bus=virtio -

-cdrom /home/kvm-bak/CentOS--x86_64-DVD-.iso --graphics none --noautoconsole  --acceleratefirewall-cmd --zone=public --add-port=/tcp --permanent

firewall-cmd --reload

virsh list --all

virsh start hao

virsh start haochuang

cat /proc/cpuinfo | egrep ‘vmx|svm’

cat /proc/cpuinfo | egrep 'vmx|svm'

virsh list

virsh list --all

history

lsmod | grep kvm

ll /dev/kvm

brctl show

ifconfig |head -

 ping www.baidu.com

yum -y install libcanberra-gtk2 qemu-kvm.x86_64 qemu-kvm-tools.x86_64  libvirt.x86_64 libvirt-cim.x86_64 libvirt-client.x86_64

yum -y install libcanberra-gtk2 qemu-kvm.x86_64 qemu-kvm-tools.x86_64  libvirt.x86_64 libvirt-cim.x86_64 libvirt-client.x86_64 libvirt-java.noarc

h  libvirt-python.x86_64 libiscsi-1.7.-.el6.x86_64  dbus-devel virt-clone tunctl virt-manager libvirt libvirt-python python-virtinstyum groupinstall "X Window System"

yum install -y dejavu-lgc-sans-fonts

yum groupinstall -y "Fonts"

systemctl enable libvirtd

systemctl start libvirtd

ll /data/iso

ll /data

mkdir -p /data/iso

ls -la

ls /home/iso/

cp /home/iso/CentOS--x86_64-DVD-.iso  /data/iso

ls /data/iso

netstat -anp | grep

yum -y install kvm python-virtinst libvirt tunctl bridge-utils virt-manager qemu-kvm-tools virt-viewer

brctl show

lscpu

ls /var/lib/libvirt/images

ls -la

ls /data/iso/

virt-install --name haochuangVM0409 --ram  --vcpus  -f /home/kvm-bak/vm-images/haochuangVM0409.qcow2 --os-type linux --os-variant rhel6 --network brid

ge=br0 --cdrom /data/iso/CentOS--x86_64-DVD-.iso --graphics vnc,listen=0.0.0.0,port=5920rpm -qf /usr/bin/virt-install

ls /usr/bin/qemu-kvm

virt-install --os-variant list

virsh list --all

/usr/bin/qemu-kvm

modprobe kvm

systemctl stop firewalld.service

modprobe kvm-intel

lsmod | grep kvm

yum install -y qemu-kvm libvirt virt-manager qemu-kvm-tools

yum install vnc-server tigervnc -y

vncpasswd

qemu-img create -o preallocation=metadata -f qcow2 /home/kvm-bak/vm-images/cent7.qcow2 20G

ls /home/kvm-bak/vm-images/cent7.qcow2 -la

netstat -an | grep

ps -ef | grep vnc

yum install vnc-server tigervnc -y

service vnc status

/bin/systemctl tatus

/bin/systemctl status

ps aux | grep kvm

iptables -L

ls /etc/systemd/system/vncservice@:.service

ls /etc/systemd/system/vncservice

ls /etc/systemd/system/vncservice*

sudo systemctl stop firewalld.service

sudo systemctl disable firewalld.service

sudo systemctl daemon.reload

sudo systemctl stop firewalld.service

service vncserver restart

vncserver

 service vncserver restart

yum groupinstall Desktop

ping  www.baidu.com

yum install tigervnc-server

yum install xorg-x11-fonts-Type1

vi /etc/sysconfig/vncservers

service vncserver restart

yum update

vncserver -kill :

service vncserver stop

service vncserver restart

service vncserver start

service vncserver restart

 yum check-update

yum groupinstall "X Window System"

yum install gnome-classic-session gnome-terminal nautilus-open-terminal control-center liberation-mono-fonts

yum install tigervnc-server -y

ls /etc/systemd/system/

cd /etc/systemd/system/

ls

ls /lib/systemd/sytem/vncserver@.service

ls /lib/systemd/sytem/vncserver

ls /lib/systemd/sytem/vncserver*

ls /lib/systemd/sytem/

ls /lib/systemd/system/vncserver@.service

cp /lib/systemd/system/vncserver@.service /etc/systemd/system/vncserver@:.service

vi /etc/systemd/system/vncserver@:.service

systemctl daemon-reload

sudo systemctl enable vncserver@:.service

sudo systemctl start vncserver@:.service

systemctl start vncserver@:.service

systemctl status vncserver@:.service

ls -la /tmp

ls -la /tmp/.X11-unix

rm -rf /tmp/.X11-unix

rm -rf /tmp/.XIM-unix

ls -la /tmp

curl -s checkip.dyndns.org|sed -e 's/.*Current IP Address: //' -e 's/<.*$//'

systemctl disable vncserver@:.service

systemctl  enabled  vncserver@:.service

yum install tigervnc-server -y

systemctl daemon-reload

systemctl enable vncserver@:.service

systemctl start  vncserver@:.service

systemctl start  vncserver@:.service

rm -rf /tmp/.X11-unix/*

systemctl enable vncserver@:1.service

ps -ef | grep vnc

ps -ef | grep vnc*

ps -ef | grep *vnc*

systemctl stop firewalld.service

systemctl disable firewalld.service

yum install gnome-classic-session gnome-terminal nautilus-open-terminal control-center liberation-mono-fonts

unlink /etc/systemd/system/default.target

ln -sf /lib/systemd/system/graphical.target /etc/systemd/system/default.target

reboot

clear

service vncserver status

locate vncserver

yum -y install locate

clear

ps aux | grep vncserver

lsof -i:5901

ps aux | grep vnc

vi /etc/sysconfig/iptables-config

/sbin/iptables -I INPUT -p tcp --dport 5901 -j ACCEPT

/etc/rc.d/init.d/iptables save

/etc/init.d/iptables restart

iptables-save > /etc/iptables-config

iptables-restore < /etc/iptables-config

firewall-cmd --zone=public --add-port=5901/tcp --permanent

firewall-cmd --reload

sudo firewall–cmd—permanent—add–service vnc–server

service vncserver restart

service vncserver status

netstat -an | grep 5901

netstat -an | grep 5900

netstat -an | grep 59*

netstat -an | grep 5900

sudo firewall-cmd --permanent --add-service vnc-server

lsof -i:5901

lsof -i:5900

service vncserver status

service vncserver restart

systemctl daemon-reload

service vncserver restart

systemctl daemon-reload

service vncserver status

firewall-cmd --permanent --add-service vnc-server

systemctl restart firewalld.service

systemctl daemon-reload

ps -ef | grep vnc

systemctl enable vncserver@:1.service

systemctl start vncserver@:1.service

systemctl status vncserver@:1.service

rm -rf /tmp/.X11-unix/

vncserver -kill :1

systemctl start vncserver@:1.service

systemctl status vncserver@:1.service -l

su - haoop

systemctl daemon-reload

ps -ef | grep vnc

systemctl stop firewalld.service

systemctl disable firewalld.service

systemctl start vncserver@:1.service

systemctl status vncserver@:1.service

netstat -anp | grep 5901

service vncserver restart

systemctl daemon-reload

systemctl enable vncserver@:1.service

systemctl start  vncserver@:1.service

systemctl status vncserver@:1.service

rm -rf /tmp/.X11-unix/*

systemctl daemon-reload

ystemctl start vncserver@:1.service

systemctl start vncserver@:1.service

systemctl status vncserver@:1.service

firewall-cmd --permanent --add-service vnc-server

systemctl restart firewalld.service

rm -rf /tmp/.X11-unix/

vncserver -kill :1

systemctl start vncserver@:1.service

journalc

systemctl status vncserver@:1.service

service iptables stop

netstat -lnt |grep 590*

ls /var/log/secure

vi /var/log/secure

firewall-cmd --state

systemctl stop firewalld.service

systemctl disable firewalld.service

service iptables stop

 service iptables status

systemctl stop firewalld.service

systemctl disable firewalld.service

vi /etc/sysconfig/vncservers

vi/etc/sysconfig/iptables

vi /etc/sysconfig/iptables

ls /etc/sysconfig/iptables

iptables –A INPUT–m state –state NEW –m tcp –p tcp –dport 5901 –j ACCCEPT

iptables –A INPUT –m state –state NEW –m tcp –p tcp –dport 5901 –j ACCCEPT

iptables -A INPUT -p tcp --dport 80 -j ACCEP

iptables -h

vi /etc/sysconfig/iptables

firewall-cmd --state

firewall-cmd --list-all

 iptables -L -n -v

iptables –A INPUT –m state –state NEW –m tcp –p tcp –dport 5901 –j ACCCEPT

systemctl stop firewalld.service

systemctl disable firewalld

systemctl stop firewalld

 firewall-cmd --version

firewall-cmd status

firewall-cmd state

firewall-cmd --help

firewall-cmd --state

systemctl status firewalld

systemctl disable firewalld

 systemctl stop firewalld

systemctl stop firewalld

firewall-cmd --reload

virsh vnc display

rm -f -R /tmp/.X11-unix/

systemctl enable vncserver@:1.service

vncserver

ls /home/kvm-bak/vm-images

cd /home/kvm-bak/vm-images

ls -la

rm cent7.qcow2

ls -la

cd ..

ls -la

cp CentOS-7-x86_64-DVD-1708.iso vm-images/

df -lh

pwd

ls /dev/mapper/centos-home

du -sh */home

du -sh /home

fdisk -l

ls -la

cd /home/

ls -la

mkdir

ls /dev

mkdir LVM

ls -la

df -l

df -lh

cat /etc/sysconfig/network-scripts/ifcfg-em4

cat /etc/sysconfig/network-scripts/ifcfg-br0

ping 192.168.1.201

ping 192.168.1.202

ping 192.168.1.2023

ping 192.168.1.203

ls /var/lib/libvirt/images

du -sh /var/lib/libvirt/images

du -sh /var/lib/libvirt/

du -sh /var

yum --help

df l0h

df -lh

ls /var/lib/libvirt/images/

cd  /var/lib/libvirt/

ls -la

cd qemu/

ls -la

cd ..

ls -la

cd images/

ls -la

pwd

ls -la

ls /home/

ls /home/LVM/

ls /home/kvm-bak/vm-images/

cd /home/kvm-bak/vm-images/

ls -la

qemu-img create -f raw SCM_add.img 160G

ls -la

pwd

virsh edit test

virsh --list

virsh --help

virsh list

virsh attach-disk SCM-clone /home/kvm-bak/vm-images/SCM_add.img vdb —cache none

fdisk -l

yum -y install libguestfs-tools

ls /var/lib/libvirt/images/SCM.qcow2

ls

qemu-img info /var/lib/libvirt/images/SCM.qcow2

qemu-img info /home/kvm-bak/vm-images/SCM_add.img

ls -la

qemu-img create -f qcow2 SCM_add.img 160G

virsh edit SCM-clone

qemu-img create -f qcow2 SCM_add.qcow2  160G

ls -la

rm -rf SCM_add.img

ls -la

rm -rf SCM_add.img

virsh edit SCM-clone

pwd

ls -la

clea

clear

history

ls

history > his.txt

cat his.txt

vi his.txt

clear

cat his.txt

history

history | cut -c -

history | cut -c - > history
...
history中去除行号:
. 使用这个:

$ history | cut -c -

. awk可以帮助:

history|awk '{$1="";print substr($0,2)}'

如果history很长这个可能会失败。

. 或者,你的sed:

history | sed 's/^[ ]*[0-9]\+[ ]*//'

使用别名,你可以设置这个作为你的标准(把它贴在你的bash_profile文件):

alias history="history | sed 's/^[ ]*[0-9]\+[ ]*//'"

. history命令没有一个选项来禁止行号。你将不得不为每个人都在暗示: 例如:

history | cut -d' ' -f4- | sed 's/^ \(.*$\)/\1/g'
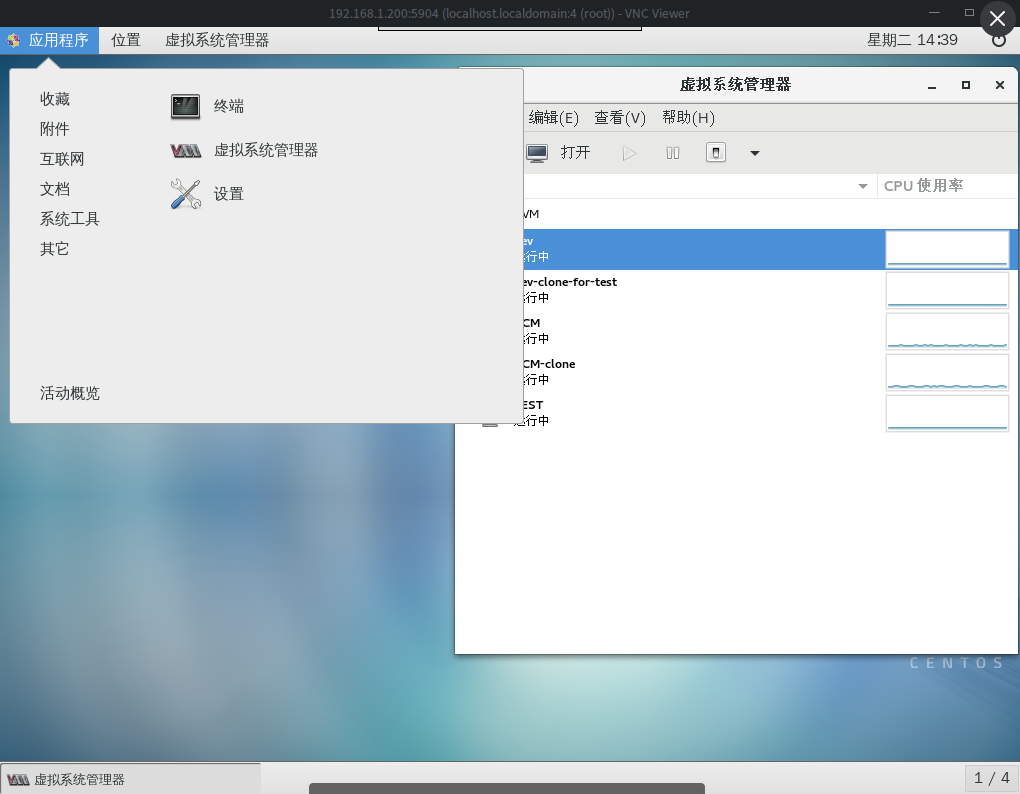
就目前而言,我基于一台机器,虚拟出了4台虚拟机,分别将其作为DevEnv、TestEnv、ScmEnv、ReleaseEnv;
目前看起来运行正常,后续如有运维或者修改需求,我在做更新和补充;
---------------------
HaoChuang @2018-04-17 10:20
后续远程维护,关于vnc的一点补充
查询vncserver状态

[root@localhost ~]# service vncserver status

查询vncserver服务

[root@localhost ~]# ps -ef | grep vnc

[root@localhost ~]# ps -ef | grep vnc

root     18375     1  0 14:10 pts/4    00:00:00 /usr/bin/Xvnc :4 -auth /root/.Xauthority -desktop localhost.localdomain:4 (root) -fp catalogue:/etc/X11/fontpath.d -geometry 1024x768 -pn -rfbauth /root/.vnc/passwd -rfbport 5904 -rfbwait 30000

root     18719 18207  0 14:11 pts/4    00:00:00 grep --color=auto vnc
参考如下信息:
[root@localhost ~]# vncserver

New 'localhost.localdomain:4 (root)' desktop is localhost.localdomain:4

Starting applications specified in /root/.vnc/xstartup

Log file is /root/.vnc/localhost.localdomain:4.log

[root@localhost ~]# ping 192.168.0.202
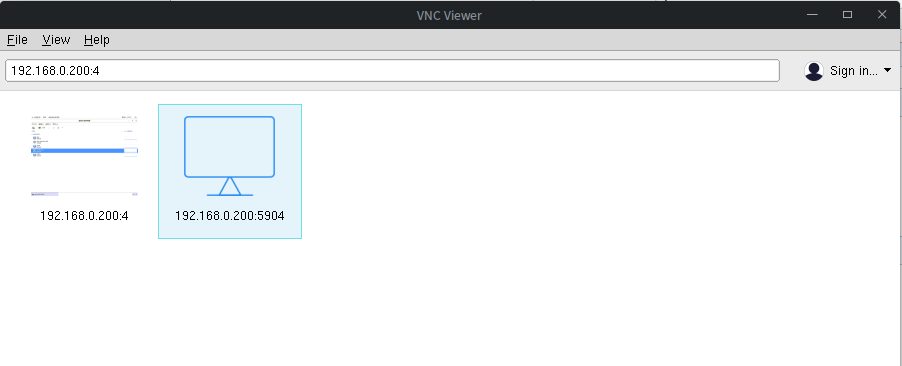
看到这样之后,可以使用vnc viewer进行远程连接
输入对应的IP:port即可,像我的目前是192.168.1.200:5904,好了,截个图,需要的同学可以看看,长这姿势:
如果某些服务访问存在问题,需要考虑关闭防火墙即可
systemctl stop firewalld
49CFRBWJ.png)
HaoChuang @2018-05-22 14:42
有问题,可以联系我,为您提供支持,娃哈哈^_^
【原】【BG】-一次虚拟化环境实践简要记录的更多相关文章
- CentosX64使用yum快速搭建xen虚拟化环境
Xen的大名想必已经被众SA所熟知.Xen 是一个开放源代码虚拟机监视器,由剑桥大学开发.它打算在单个计算机上运行多达100个满特征的操作系统.操作系统必须进行显式地修改(“移植”)以在Xen上运行( ...
- 在 CentOS 7上Virtualbox+phpVirtualBox完整虚拟化环境部署
一.phpVirtualBox简介 VirtualBox是一套为不同操作系统而设的 x86 虚拟化产品.它是一个机器/硬件的虚拟化产品,功能上与 VMware Server.Parallel ...
- 基于OVS的VLAN虚拟化简易实践方案
基于OVS的VLAN虚拟化简易实践方案 前言 本实验基于ovs的vlan流表匹配,根据端口进行vlan标签插入.手工配置ovs,使其具有vlan虚拟化方案. 实验拓扑 ---- ---- | h1 | ...
- 虚拟化环境下的CentOS7网络环境存在的问题
http://dgd2010.blog.51cto.com/1539422/1592821/ 为什么要进行一次测试? 在使用CentOS7的过程中发现网络部分有很多与CentOS6所不同的地方. 1. ...
- kvm虚拟化学习笔记(一)之kvm虚拟化环境安装
平时一直玩RHEL/CentOS/OEL系列的操作,玩虚拟化也是采这一类系统,kvm在RHEL6系列操作系统支持比较好,本文采用采用OEL6.3操作系统,网上所有文章都说KVM比xen简单,我怎么感觉 ...
- 记一次虚拟化环境下Windows IO性能的解析
前言随着云计算技术与服务的发展和进步,越来越多的客户选择将业务部署到云端.但由于引入了虚拟化层,在业务部署过程中经常会遇到IO问题,通常也不易调试.本文主要介绍利用perf.systemtap等工具, ...
- kvm虚拟化环境的搭建
首先搭建kvm的虚拟化环境,我选择的环境是在vmvare上的Centos 7的虚拟机,在该环境上搭建kvm的虚拟化环境 1:安装虚拟机(该过程自行安装) 2:操作系统环境的设置 (1)修改内核模式为兼 ...
- Django 虚拟化环境创建
A:linux下的方法: 1.用python3.6内置的venv创建名为 typeidea-env虚拟化环境: python3.6 -m venv typeidea-env 2.激活环境: cd ty ...
- 第一章:ESXi6.7虚拟化环境安装
1.1 硬件环境及镜像引导准备 1.1.1 硬件和系统资源 要安装ESXi6.7,硬件和系统资源必须满足下列要求: ESXi 6.7 要求主机至少具有两个 CPU 内核,生产环境中需要根据 ...
随机推荐
- Flume 1.5.0简单部署试用
================================================================================ 一.Flume简介 ========= ...
- MEF and AppDomain z
MEF and AppDomain - Remove Assemblies On The Fly This article will give an idea of what's involved i ...
- oracle11g忘记sys密码
目 录 1 以管理员身份运行cmd窗口 2 启动sqlplus并敲入一系列命令 3 特别注意 1以管理员身份运行cmd窗口 我安装的是oracle11.2版本,sqlplus.exe所在目录是:I: ...
- python测试开发django-19.admin后台自定义显示
前言 django的admin后台默认显示的内容很少,只显示了表的相关信息,查看字段内容需点开详情才能查看,不是很直观. 在admin.py文件里面是可以自定义相关的展示内容的,也可以添加搜索框,快速 ...
- 制作高仿QQ的聊天系统(下)—— Adapter & Activity
一.适配器 1.1 分页显示数据 因为聊天信息数目很多,所以adpter需要做分页处理,这里的分页处理是我自己实现的,如果有更好的办法欢迎在评论中告知.我们从友盟的反馈SDK中能得到聊天的list,我 ...
- 安装部署 Kubernetes 集群
安装部署 Kubernetes 集群 阅读目录: 准备工作 部署 Master 管理节点 部署 Minion 工作节点 部署 Hello World 应用 安装 Dashboard 插件 安装 Hea ...
- Ubuntu 查找文件的方法
1. whereis+文件名 用于程序名的搜索,搜索结果只限于二进制文件(参数-b).man说明文件(参数-m)和源代码文件(参数-s),如果省略参数,则返回所有信息. 2. find / -name ...
- System.Diagnostics.Debug和System.Diagnostics.Trace
在 .net 类库中有一个 system.diagnostics 命名空间,该命名空间提供了一些与系统进程.事件日志.和性能计数器进行交互的类库.当中包括了两个对开发人员而言十分有用的类——debug ...
- Valid Palindrome leetcode java
题目: Given a string, determine if it is a palindrome, considering only alphanumeric characters and ig ...
- 七牛云存储 qiniu 域名 回收 文件上传 备份 下载 MD
Markdown版本笔记 我的GitHub首页 我的博客 我的微信 我的邮箱 MyAndroidBlogs baiqiantao baiqiantao bqt20094 baiqiantao@sina ...