springMVC + Spring + MyBatis 整合
整理下SSM(基于注解)的整合
1. web.xml 配置文件
 <?xml version="1.0" encoding="UTF-8"?>

 <web-app version="2.4" xmlns="http://java.sun.com/xml/ns/j2ee"

     xmlns:xsi="http://www.w3.org/2001/XMLSchema-instance"

     xsi:schemaLocation="http://java.sun.com/xml/ns/j2ee

 http://java.sun.com/xml/ns/j2ee/web-app_2_4.xsd">

     <!-- log4j 配置 -->

         <context-param>

         <param-name>log4jConfigLocation</param-name>

         <param-value>classpath:log4j.properties</param-value>

         </context-param>

         <context-param>

         <param-name>log4jRefreshInterval</param-name>

         <param-value>60</param-value>

         </context-param>

         <listener>

         <listener-class>org.springframework.web.util.Log4jConfigListener</listener-class>

         </listener>

     <!--  设置编码 UTF-8  -->

     <filter>

         <filter-name>encodingFilter</filter-name>

         <filter-class>org.springframework.web.filter.CharacterEncodingFilter</filter-class>

         <init-param>

             <param-name>encoding</param-name>

             <param-value>UTF-8</param-value>

         </init-param>

         <init-param>

             <param-name>forceEncoding</param-name>

             <param-value>true</param-value>

         </init-param>

     </filter>

     <filter-mapping>

         <filter-name>encodingFilter</filter-name>

         <url-pattern>/*</url-pattern>

     </filter-mapping>

     <!-- 配置 Spring -->

     <context-param>

         <param-name>contextConfigLocation</param-name>

         <param-value>classpath*:/applicationContext.xml</param-value>

     </context-param>

     <listener>

         <listener-class>org.springframework.web.context.ContextLoaderListener</listener-class>

     </listener>

     <!-- 配置springmvc -->

     <servlet>

         <servlet-name>springmvc</servlet-name>

         <servlet-class>org.springframework.web.servlet.DispatcherServlet</servlet-class>

         <init-param>

             <param-name>contextConfigLocation</param-name>

             <param-value>/WEB-INF/springmvc-servlet.xml</param-value>

         </init-param>

          <load-on-startup>1</load-on-startup>

     </servlet>

     <servlet-mapping>

         <servlet-name>springmvc</servlet-name>

         <url-pattern>/</url-pattern>

     </servlet-mapping>

   <welcome-file-list>

     <welcome-file>index.html</welcome-file>

   </welcome-file-list>

 </web-app>
2 :log4j.properties
 #logger level default is INFO

 log4j.rootLogger=debug,console,file

 #append to console

 log4j.appender.console=org.apache.log4j.ConsoleAppender

 log4j.appender.console.layout=org.apache.log4j.PatternLayout

 log4j.appender.console.layout.ConversionPattern=%d %p - %m%n

 #append to file

 log4j.appender.file=org.apache.log4j.RollingFileAppender

 log4j.appender.file.File=/demo.log

 log4j.appender.file.MaxFileSize=1MB

 log4j.appender.file.MaxBackupIndex=10000

 log4j.appender.file.layout=org.apache.log4j.PatternLayout

 log4j.appender.file.layout.ConversionPattern=%d %p - %m%n

 #ibatis logger config

 log4j.logger.com.ibatis=debug

 log4j.logger.com.ibatis.common.jdbc.SimpleDataSource=debug

 log4j.logger.com.ibatis.common.jdbc.ScriptRunner=debug

 log4j.logger.com.ibatis.sqlmap.engine.impl.SqlMapClientDelegate=debug

 log4j.logger.java.sql.Connection=debug

 log4j.logger.java.sql.Statement=debug

 log4j.logger.java.sql.PreparedStatement=debug,stdout
3 :applicationContext.xml
 <?xml version="1.0" encoding="UTF-8"?>

 <beans xmlns="http://www.springframework.org/schema/beans"

     xmlns:xsi="http://www.w3.org/2001/XMLSchema-instance" xmlns:mvc="http://www.springframework.org/schema/mvc"

     xmlns:context="http://www.springframework.org/schema/context"

     xmlns:aop="http://www.springframework.org/schema/aop" xmlns:tx="http://www.springframework.org/schema/tx"

     xsi:schemaLocation="http://www.springframework.org/schema/beans

             http://www.springframework.org/schema/beans/spring-beans-3.0.xsd

             http://www.springframework.org/schema/mvc

             http://www.springframework.org/schema/mvc/spring-mvc-3.0.xsd

             http://www.springframework.org/schema/context

             http://www.springframework.org/schema/context/spring-context-3.0.xsd

             http://www.springframework.org/schema/aop

             http://www.springframework.org/schema/aop/spring-aop-3.0.xsd

             http://www.springframework.org/schema/tx

             http://www.springframework.org/schema/tx/spring-tx-3.0.xsd ">

     <!-- 扫描service、dao组件 -->

     <context:component-scan base-package="com.pro.*" />

     <!-- 分解配置 jdbc.properites -->

     <context:property-placeholder location="classpath:jdbc.properties" />

     <!-- 数据源c3p0  ... -->

     <bean id="dataSource" class="com.mchange.v2.c3p0.ComboPooledDataSource">

         <property name="driverClass" value="${jdbc.driverClassName}" />

         <property name="jdbcUrl" value="${jdbc.url}" />

         <property name="user" value="${jdbc.username}" />

         <property name="password" value="${jdbc.password}" />

         <property name="maxPoolSize" value="${c3p0.pool.size.max}" />

         <property name="minPoolSize" value="${c3p0.pool.size.min}" />

         <property name="initialPoolSize" value="${c3p0.pool.size.ini}" />

         <property name="acquireIncrement" value="${c3p0.pool.size.increment}" />

     </bean>

     <!-- sessionFactory 将spring和mybatis整合 -->

     <bean id="sqlSessionFactory" class="org.mybatis.spring.SqlSessionFactoryBean">

         <property name="dataSource" ref="dataSource" />

         <property name="configLocation" value="classpath:/mapper/sqlMapConfig.xml" />

         <property name="mapperLocations" value="classpath:/mapper/**/*Mapper.xml" />    <!-- 加载mapper文件 -->

     </bean>

     <!--       -->

     <bean id="sqlSession" class="org.mybatis.spring.SqlSessionTemplate">

         <constructor-arg index="0" ref="sqlSessionFactory" />

         <constructor-arg index="1" value="REUSE" />

     </bean>

      <!--   这个baseDao 主要是一些封装的方法,进行数据的交互    -->

     <bean id="baseDao" class="com.pro.common.BaseDao"/>

     <!-- 事务 -->

     <bean id="txManager" class="org.springframework.jdbc.datasource.DataSourceTransactionManager">

         <property name="dataSource" ref="dataSource" />

     </bean>

     <tx:advice id="txAdvice" transaction-manager="txManager">

         <tx:attributes>

             <tx:method name="insert*" propagation="REQUIRED" />

             <tx:method name="update*" propagation="REQUIRED" />

             <tx:method name="delete*" propagation="REQUIRED" />

             <tx:method name="find" read-only="true" />

             <tx:method name="get" read-only="true" />

             <tx:method name="*" propagation="REQUIRED" />

         </tx:attributes>

     </tx:advice>

     <aop:config>

         <aop:pointcut  id="pointCut"  expression="execution(* com.pro.*.*(..))"/>

         <aop:advisor advice-ref="txAdvice" pointcut-ref="pointCut" />

     </aop:config>

    <!-- 扫描service下的所有类,自动为spring容器管理 -->

     <context:component-scan base-package="com.pro.*.*.service.*"/>

      <!-- 打开面向切面工具 -->

     <aop:aspectj-autoproxy/>

 </beans>
4 : 接下来 是springmvc-servlet.xml 注意配置文件的存放位置
 <?xml version="1.0" encoding="UTF-8"?>

 <beans xmlns="http://www.springframework.org/schema/beans"

     xmlns:xsi="http://www.w3.org/2001/XMLSchema-instance" xmlns:mvc="http://www.springframework.org/schema/mvc"

     xmlns:context="http://www.springframework.org/schema/context"

     xmlns:aop="http://www.springframework.org/schema/aop" xmlns:tx="http://www.springframework.org/schema/tx"

     xsi:schemaLocation="http://www.springframework.org/schema/beans

     http://www.springframework.org/schema/beans/spring-beans-3.0.xsd

     http://www.springframework.org/schema/mvc

     http://www.springframework.org/schema/mvc/spring-mvc-3.0.xsd

     http://www.springframework.org/schema/context

     http://www.springframework.org/schema/context/spring-context-3.0.xsd

     http://www.springframework.org/schema/aop

     http://www.springframework.org/schema/aop/spring-aop-3.0.xsd

     http://www.springframework.org/schema/tx

     http://www.springframework.org/schema/tx/spring-tx-3.0.xsd ">

     <!-- 注解方式 -->

     <mvc:annotation-driven />

     <!-- 自动扫描Controller -->

     <context:component-scan base-package="com.pro.*" />

     <!-- 配置一个springmvc框架的视图解析器 -->

     <!--          一下暂时注释 ,这个主要是返回到 html 或JSP,ftl 等  如果采用这个 就想下一个配置的去掉就好 -->

   <!--

   <bean id="viewResolver" class="org.springframework.web.servlet.view.InternalResourceViewResolver">

 <  !- - 通过setter方法注入前缀 /WEB-INF/jsps/showMsg.jsp-  ->

         <property name="prefix" value="/WEB-INF/jsps/"   />

         <!- - 通过setter方法注入后缀 -  ->

       <  property name="suffix" value=".jsp" />

     </bean>

     -->

     <!--   配置这个主要是最近项目采用jQueryEasy 返回json数据 ,如果采用这个就讲上面的去掉就好    -->

     <bean class="org.springframework.web.servlet.mvc.annotation.AnnotationMethodHandlerAdapter">

         <property name="messageConverters">

             <list>

                 <bean class="org.springframework.http.converter.json.MappingJacksonHttpMessageConverter">

                      <property name="supportedMediaTypes" value="application/json" />

                 </bean>

             </list>

         </property>

     </bean>

       <!-- 错误页面 -->

     <bean class="org.springframework.web.servlet.handler.SimpleMappingExceptionResolver">

         <property name="exceptionMappings">

             <props>

                 <prop key="org.apache.shiro.authz.UnauthorizedException">error/403</prop>

             </props>

         </property>

     </bean>

     <!-- 支持文件上传 -->

     <bean id="multipartResolver" class="org.springframework.web.multipart.commons.CommonsMultipartResolver">

 <!-- 设置上传文件的最大尺寸为50MB -->

 <property name="maxUploadSize">

    <value>52428800</value>

         </property>

     </bean>

 </beans>
5:sqlMapConfig.xml
 <?xml version="1.0" encoding="UTF-8" ?>

 <!DOCTYPE configuration

     PUBLIC "-//mybatis.org//DTD Config 3.0//EN"

     "http://mybatis.org/dtd/mybatis-3-config.dtd">

 <configuration>

     <!-- 定义别名 -->

     <typeAliases>

         <typeAlias alias="SysUser"  type="com.pro.system.entity.SysUser" />

     </typeAliases>

     <!-- 这里不需要再注册mybatis的SQL映射文件 ,因为在Spring的配置文件中配置sqlSessionFactory时注册了mapper的路径-->

 </configuration>
6 :jdbc.properties
 jdbc.driverClassName=oracle.jdbc.driver.OracleDriver

 jdbc.url=jdbc:oracle:thin:@localhost:1521:dbname

 jdbc.username=usename

 jdbc.password=password

 c3p0.pool.size.max=20

 c3p0.pool.size.min=5

 c3p0.pool.size.ini=3

 c3p0.pool.size.increment=2
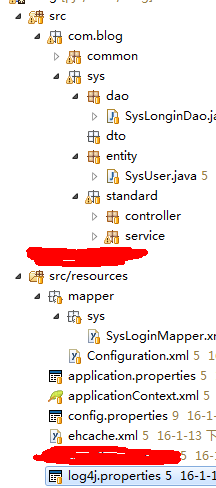
包结构 :
QQ:871820604
springMVC + Spring + MyBatis 整合的更多相关文章
- 3.springMVC+spring+Mybatis整合Demo(单表的增删该查,这里主要是贴代码,不多解释了)
前面给大家讲了整合的思路和整合的过程,在这里就不在提了,直接把springMVC+spring+Mybatis整合的实例代码(单表的增删改查)贴给大家: 首先是目录结构: 仔细看看这个目录结构:我不详 ...
- SpringMVC+Spring+Mybatis整合
SpringMVC+Spring+Mybatis整合 导包 配置jdbc.properties.log4j.properties jdbc.driver=com.mysql.jdbc.Driver j ...
- Springmvc+Spring+Mybatis整合开发(架构搭建)
Springmvc+Spring+Mybatis整合开发(架构搭建) 0.项目结构 Springmvc:web层 Spring:对象的容器 Mybatis:数据库持久化操作 1.导入所有需要的jar包 ...
- 2.springMVC+spring+Mybatis整合
前面已经说了,springMVC+spring+Mybatis的整合思路了,现在就照着这个思路来做一下: 在开始之前先来看一下工程的目录结构: config这个目录底下放的都是配置文件: mybati ...
- ztree使用系列三(ztree与springmvc+spring+mybatis整合实现增删改查)
在springmvc+spring+mybatis里整合ztree实现增删改查,上一篇已经写了demo,以下就仅仅贴出各层实现功能的代码: Jsp页面实现功能的js代码例如以下: <script ...
- mybatis学习(十一)——springmvc++spring+mybatis整合
做任何一个项目都以一个需求,这里先定义一下需求:利用三大框架查询酒店列表. 一.搭建开发环境 1.创建一个web项目 我这里用的是 jdk1.8+tomact7.0 2.创建hotel表 CREATE ...
- JavaWeb_(SpringMVC框架)SpringMVC&Spring&MyBatis整合
JavaWeb_(SpringMVC框架)测试SpringMVC&Spring&MyBatis三大整合 传送门 1.整合ssm 3大框架 过程 a)导包 -> spring_Ja ...
- SpringMVC Spring Mybatis整合篇
1.创建WEB项目 创建项目:(ssmbuild)步骤略........ 给项目添加lib文件夹,用于存放jar包: 在WEB-INF目录下创建lib文件夹: 创建完成:运行项目时需要把jar导入到l ...
- SpringMVC+Spring+Mybatis整合,使用druid连接池,声明式事务,maven配置
一直对springmvc和mybatis挺怀念的,最近想自己再搭建下框架,然后写点什么. 暂时没有整合缓存,druid也没有做ip地址的过滤.Spring的AOP简单配置了下,也还没具体弄,不知道能不 ...
随机推荐
- UltraEdit 所有快捷键 说明
快捷键 命令 说明 -------------------+------- ...
- JSBinding / Code Snippets
new a gameobject & overloaded methds var go1 = new UnityEngine.GameObject.ctor(); var go2 = new ...
- ASP.NET应用程序与页面生命周期
http://www.cnblogs.com/suizhouqiwei/archive/2012/08/15/2637775.html
- javascript_data
var now = new Date(); // Wed Jun 24 2015 19:49:22 GMT+0800 (CST) now; // 2015, 年份 now.getFullYear(); ...
- 解决wamp的Apache服务器不能重启
由于工作需要,现在开始研究PHP语言.刚开始搭建服务器环境就困难重重啊.首先看了下配置说明,很复杂很复杂(超级想念Visual Studio).然后问了下群里的老鸟,他们都是安装WAMPServer环 ...
- 【转】编译quickfast解析库(沪深level2行情转码库)
转自http://blog.csdn.net/hacode/article/details/7065889 编译quickfast解析库(沪深level2行情转码库) 目录(?)[-] 1 下载源代 ...
- phoenix创建二级索引
create table user (id varchar primary key, firstname varchar, lastname varchar); create index user_i ...
- PHP入门part1
有人说php是世界上最好的语言,那它好在哪呢. 它是开源自由的软件,能够在所有的操作平台上稳定的运行,入门比较简单.对于我这种没学过什么计算机语言的人是最好的起步点. PHP现在的含义:Hypetex ...
- Junit4常用注解
Junit4注解 JUnit4的测试类不用再继承TestCase类了.使用注解会方便很多. @Before:初始化方法@After:释放资源@Test:测试方法,在这里可以测试期望异常和超时时间@Ig ...
- MyEclipse中查询
在当前文件中查询: Ctrl + F 在整个项目中查询: Ctrl + H(选File Search)