.net学习笔记---webconfig的读与写
System.ConfigurationManager类用于对配置文件的读取。其具有的成员如下:
一、AppSettings
AppSetting是最简单的配置节,读写非常简单。
| 名称 | 说明 |
| AppSettings | 获取当前应用程序默认配置的 AppSettingsSection 数据 |
| ConnectionStrings | 获取当前应用程序默认配置的 ConnectionStringsSection 数据 |

<?xml version="1.0" encoding="utf-8" ?>

<configuration>

  <appSettings>

    <add key="DB" value="Access" />

  </appSettings>

  <connectionStrings>

    <add name="connstr" connectionString="Provider=Microsoft.Jet.OLEDB.4.0;Data Source=F:\C#Code\DBOperation\ykjj.mdb"/>

  </connectionStrings>

</configuration>
示例:
    class Program

    {

        static void Main(string[] args)

        {

            string strAppSettings = System.Configuration.ConfigurationManager.AppSettings["DB"];  //通过属性索引获取值

            Console.WriteLine(strAppSettings);

            string strConnection = System.Configuration.ConfigurationManager.ConnectionStrings["connstr"].ToString();

            Console.WriteLine(strConnection);

            Console.ReadKey();

        }

    }

对于以上这一个appSettings与connectionStrings都是由ConfigurationManager提供的两个属性来读取的。通常大多数的配置信息都可以放在appSettings里。但是如果你觉得不够用了,你还可以使用自定义配置信息。
二、自定义配置节
1、自带Handler
关于自定义配置节,Configuration提供了很多Handler类来供你选择使用。甚至如果你觉得不够,还可以自定义处理Handler。
先来学下使用怎么使用三个简单的Handler:
- System.Configuration.NameValueSectionHandler
- System.Configuration.DictionarySectionHandler
- System.Configuration.SingleTagSectionHandler
配置文件代码示例:
<?xml version="1.0" encoding="utf-8" ?>

<configuration>

  <configSections>

    <section name="Person" type="System.Configuration.NameValueSectionHandler"/> <!--以NameValue键值/对的形式返回配置节中的信息-->

    <section name="Man" type="System.Configuration.DictionarySectionHandler"/>  <!--以Dictionary字典键值对的形式返回配置节中的信息-->

    <section name="Name" type="System.Configuration.SingleTagSectionHandler" /> <!--基础结构。处理 .config 文件中由单个 XML 标记所表示的各配置节。-->

  </configSections>

  <Person>

    <add key="老大" value="刘备" />

    <add key="老二" value="关羽" />

    <add key="老三" value="张飞" />

  </Person>

  <Man>

    <add key="老大" value="曹操" />

    <add key="老二" value="典韦" />

    <add key="老三" value="郭嘉" />

  </Man>

  <Name one="1" two="2" three="3" four="4" five="5" /> <!--注意是要单个节SingleTagSectionHandler才能处理,但是无论你索性有多少个也能处理-->

</configuration>
读取代码示例:
static void Main(string[] args)

{

    //读取人名

    NameValueCollection nvc = (NameValueCollection)ConfigurationManager.GetSection("Person");

    foreach (string key in nvc.AllKeys)

    {

        Console.WriteLine(key + ":" + nvc[key]);

    }

    //读取男人

    IDictionary dict = (IDictionary)ConfigurationManager.GetSection("Man");

    foreach (string key in dict.Keys)

    {

        Console.WriteLine(key + ":" + dict[key]);

    }

    IDictionary dict1 = (IDictionary)ConfigurationManager.GetSection("Name");

    foreach (string key in dict1.Keys)

    {

        Console.WriteLine(key + ":" + dict1[key]);

    }

    Console.ReadKey();

}
输出结果如下:

2、自定义Handler
自定义读取节点需要实现接口IConfigurationSectionHandler,并提供Create的具体实现。
Appconfig代码:
<?xml version="1.0" encoding="utf-8" ?>

<configuration>

  <configSections>    <!--后面的type是处理处理节点PersonHandler所在的位置第二个参数是程序集,你可以不要Version开始之后的-->

      <section name="Person" type="ConsoleApplication1.PersonHandler,ConsoleApplication1,Version=1.0.0.0,Culture=neutral,PublicKeyToken=null" allowLocation="true" allowDefinition="Everywhere" />

  </configSections>

  <Person age="23" name="刘备" />

</configuration>
主程序代码:
class Program
{
static void Main(string[] args)
{
Hashtable config = ConfigurationManager.GetSection("Person") as Hashtable;
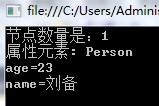
Console.WriteLine("节点数量是:" + config.Count);
//2重键值对的方式,其中deKey又可以再次转化为一个Hashtable
foreach (DictionaryEntry deKey in config)
{
Console.WriteLine("属性元素: " + deKey.Key.ToString());
Hashtable attribs = (Hashtable)deKey.Value;
foreach (DictionaryEntry deAttrib in attribs)
{
Console.WriteLine(deAttrib.Key.ToString() + "=" + deAttrib.Value.ToString());
}
} Console.ReadKey();
}
} //注意必须要实现IConfigurationSectionHandler接口
class PersonHandler : IConfigurationSectionHandler
{
public object Create(object parent, object configContext, System.Xml.XmlNode section)
{
Hashtable myConfig = new Hashtable();
// 本节元素,获取的任何属性。
Hashtable myAttribs = new Hashtable();
//遍历当前节点的属性
foreach (XmlAttribute attrib in section.Attributes)
{
//如果当前节点是属性节点,则添加进入myAttribs
if (XmlNodeType.Attribute == attrib.NodeType)
{
myAttribs.Add(attrib.Name, attrib.Value);
}
}
//把当前属性节点集合添加进myConfig
myConfig.Add(section.Name, myAttribs);
return myConfig;
}
}
输出结果如下:
这样的配置代码看起来还是有点吃力,毕竟Hashtable的层次有两层。
3、property属性的方式读取
- 使用这种方法,需要自定义一个类,并且要继承自ConfigurationSection基类。ConfigurationProperty的构造函数中传入的name字符串将会用于config文件中,表示各参数的属性名称。
- 属性的值的读写要调用this[]或base[],由基类去保存,请不要自行设计Field来保存。
- 为了能使用配置节点能被解析,需要在<configSections>中注册: <section name="Person" type="ConsoleApplication1.PersonSection,ConsoleApplication1,Version=1.0.0.0,Culture=neutral,PublicKeyToken=null" allowLocation="true" allowDefinition="Everywhere" /> ,且要注意name="Person"要与<Person ..... >是对应的。
先来看看配置文件的写法:
<?xml version="1.0" encoding="utf-8" ?>

<configuration>

  <configSections>    <!--后面的type是处理处理节点PersonSection所在的位置第二个参数是程序集,你可以不要Version开始之后的-->

      <section name="Person" type="ConsoleApplication1.PersonSection,ConsoleApplication1,Version=1.0.0.0,Culture=neutral,PublicKeyToken=null" allowLocation="true" allowDefinition="Everywhere" />

  </configSections>

  <Person age="23" name="刘备" />

</configuration>
然后程序代码:
    class Program

    {

        static void Main(string[] args)

        {

            PersonSection person = ConfigurationManager.GetSection("Person") as PersonSection;

            Console.WriteLine("name={0},age={1}", person.Age, person.Name);

            Console.ReadKey();

        }

    }

    //注意 这里是继承自System.Configuration.ConfigurationSection了

    class PersonSection : System.Configuration.ConfigurationSection

    {

        [ConfigurationProperty("age", IsRequired = false, DefaultValue = 0)]

        public int Age

        {

            get { return (int)base["age"]; }

            set { base["age"] = value; }

        }

        [ConfigurationProperty("name", IsRequired = false, DefaultValue = "")]

        public string Name

        {

            get { return (string)base["name"]; }

            set { base["name"] = value; }

        }

    }
输出结果如下:

4、配置子元素
对于稍微在复杂一点的结构,子元素的Model类要继承自ConfigurationElement。
config文件代码:
<?xml version="1.0" encoding="utf-8" ?>

<configuration>

  <configSections>

    <section name="complex" type="ConsoleApplication1.ComplexSection,ConsoleApplication1"/>

  </configSections>

  <complex height="182">

    <child firstName="张" lastName="飞"/>

  </complex>

</configuration>
主程序代码:
  class Program

    {

        static void Main(string[] args)

        {

            ComplexSection sec = ConfigurationManager.GetSection("complex") as ComplexSection;

            Console.WriteLine(sec.Height);          //访问属性

            Console.WriteLine(sec.Child.FirstName); //访问子节点属性

            Console.WriteLine(sec.Child.LastName);  //访问子节点属性

            Console.ReadKey();

        }

    }

    public class ComplexSection : ConfigurationSection

    {

        [ConfigurationProperty("height", IsRequired = true)]

        public int Height

        {

            get { return (int)base["height"]; }

            set { base["height"] = value; }

        }

        [ConfigurationProperty("child", IsDefaultCollection = false)]

        public ChildSection Child

        {

            get { return (ChildSection)base["child"]; }

            set { base["child"] = value; }

        }

    }

    public class ChildSection : ConfigurationElement

    {

        [ConfigurationProperty("firstName", IsRequired = true, IsKey = true)]

        public string FirstName

        {

            get { return (string)base["firstName"]; }

            set { base["firstName"] = value; }

        }

        [ConfigurationProperty("lastName", IsRequired = true)]

        public string LastName

        {

            get { return (string)base["lastName"]; }

            set { base["lastName"] = value; }

        }

    }
输出结果如图所示:

5、配置文件中的CDATA
有时候,在配置文件里可能会包含一些比较复杂的代码段,这时候就要用到XML的CDATA了。
<?xml version="1.0" encoding="utf-8" ?>

<configuration>

  <configSections>

    <section name="MySection" type="ConsoleApplication1.MySection, ConsoleApplication1" />

  </configSections>

  <MySection>

    <HTML>

      <![CDATA[

          <div style="# font-size:24px">加粗显示</div>

      ]]>

    </HTML>

    <SQL>

      <![CDATA[

          SELECT TOP 10 * FROM Person

      ]]>

    </SQL>

  </MySection>

</configuration>
主程序代码如下:
namespace ConsoleApplication1

{

    class Program

    {

        static void Main(string[] args)

        {

            MySection section = ConfigurationManager.GetSection("MySection") as MySection;

            Console.WriteLine("{0}{1}", section.HTML.CommandText, section.SQL.CommandText);

            Console.ReadKey();

        }

    }

    //注意 这里是继承自System.Configuration.ConfigurationSection了

    class MySection : System.Configuration.ConfigurationSection

    {

        [ConfigurationProperty("HTML", IsRequired = false)]

        public MyTextElement HTML

        {

            get { return (MyTextElement)base["HTML"]; }

            set { base["HTML"] = value; }

        }

        [ConfigurationProperty("SQL", IsRequired = false)]

        public MyTextElement SQL

        {

            get { return (MyTextElement)base["SQL"]; }

            set { base["SQL"] = value; }

        }

    }

    public class MyTextElement : ConfigurationElement

    {

        protected override void DeserializeElement(System.Xml.XmlReader reader, bool serializeCollectionKey)

        {

            CommandText = reader.ReadElementContentAs(typeof(string), null) as string;

        }

        protected override bool SerializeElement(System.Xml.XmlWriter writer, bool serializeCollectionKey)

        {

            if (writer != null)

            {

                writer.WriteCData(CommandText);

            }

            return true;

        }

        [ConfigurationProperty("data", IsRequired = false)]

        public string CommandText

        {

            get { return this["data"].ToString(); }

            set { this["data"] = value; }

        }

    }

}
输出如下:

6、配置元素Collection
类似下面的配置方式,在ASP.NET的HttpHandler, HttpModule中太常见了。
<?xml version="1.0" encoding="utf-8" ?>

<configuration>

  <configSections>

    <section name="MySection" type="ConsoleApplication1.MySection, ConsoleApplication1" />

  </configSections>

  <MySection>

    <add key="a" value="刘备"></add>

    <add key="b" value="关羽"></add>

    <add key="c" value="张飞"></add>

  </MySection>

</configuration>
实现代码如下:
    class Program

    {

        static void Main(string[] args)

        {

            MySection section = ConfigurationManager.GetSection("MySection") as MySection;

            foreach (MyKeyValueSetting add in section.KeyValues)

            {

                Console.WriteLine(add.Key + ":" + add.Value);

            }

            Console.ReadKey();

        }

    }

    public class MySection : ConfigurationSection    // 所有配置节点都要选择这个基类

    {

        private static readonly ConfigurationProperty s_property = new ConfigurationProperty(string.Empty, typeof(MyKeyValueCollection), null, ConfigurationPropertyOptions.IsDefaultCollection);

        [ConfigurationProperty("", Options = ConfigurationPropertyOptions.IsDefaultCollection)]

        public MyKeyValueCollection KeyValues

        {

            get

            {

                return (MyKeyValueCollection)base[s_property];

            }

        }

    }

    [ConfigurationCollection(typeof(MyKeyValueSetting))]

    public class MyKeyValueCollection : ConfigurationElementCollection        // 自定义一个集合

    {

        // 基本上,所有的方法都只要简单地调用基类的实现就可以了。

        public MyKeyValueCollection() : base(StringComparer.OrdinalIgnoreCase)    // 忽略大小写

        {

        }

        // 其实关键就是这个索引器。但它也是调用基类的实现,只是做下类型转就行了。

        new public MyKeyValueSetting this[string name]

        {

            get { return (MyKeyValueSetting)base.BaseGet(name); }

        }

        // 下面二个方法中抽象类中必须要实现的。

        protected override ConfigurationElement CreateNewElement()

        {

            return new MyKeyValueSetting();

        }

        protected override object GetElementKey(ConfigurationElement element)

        {

            return ((MyKeyValueSetting)element).Key;

        }

        // 说明:如果不需要在代码中修改集合,可以不实现Add, Clear, Remove

        public void Add(MyKeyValueSetting setting)

        {

            this.BaseAdd(setting);

        }

        public void Clear()

        {

            base.BaseClear();

        }

        public void Remove(string name)

        {

            base.BaseRemove(name);

        }

    }

    public class MyKeyValueSetting : ConfigurationElement    // 集合中的每个元素

    {

        [ConfigurationProperty("key", IsRequired = true)]

        public string Key

        {

            get { return this["key"].ToString(); }

            set { this["key"] = value; }

        }

        [ConfigurationProperty("value", IsRequired = true)]

        public string Value

        {

            get { return this["value"].ToString(); }

            set { this["value"] = value; }

        }

    }
输出如下:

小结:
1. 为每个集合中的参数项创建一个从ConfigurationElement继承的派生类。
2. 为集合创建一个从ConfigurationElementCollection继承的集合类,具体在实现时主要就是调用基类的方法。
3. 在创建ConfigurationSection的继承类时,创建一个表示集合的属性就可以了,注意[ConfigurationProperty]的各参数。
7、配置节点的写入
写入配置节点的示例如下:
    Configuration config = ConfigurationManager.OpenExeConfiguration(ConfigurationUserLevel.None);

    PersonSection Section = config.GetSection("Person") as PersonSection;

    Section.Name = "撼地神牛";

    Section.Age = 10000;

    config.Save();

    ConfigurationManager.RefreshSection("Person");  //让修改之后的结果生效
在修改配置节点前,我们需要调用ConfigurationManager.OpenExeConfiguration(),然后调用config.GetSection()在得到节点后,转成我们定义的节点类型, 然后就可以按照强类型的方式来修改我们定义的各参数项,最后调用config.Save();即可。
注意:
- .net为了优化配置节点的读取操作,会将数据缓存起来,如果希望使用修改后的结果生效,您还需要调用ConfigurationManager.RefreshSection(".....")。
- 如果是修改web.config,则需要使用 WebConfigurationManager。
8、读取.Net Framework中已经定义的节点
.Net Framework已定义节点的读取很简单:
  <system.web>

    <httpModules>

      <add name="ScriptModule" type="System.Web.Handlers.ScriptModule, System.Web.Extensions, Version=3.5.0.0, Culture=neutral, PublicKeyToken=31BF3856AD364E35"/>

      <add name="UrlRoutingModule" type="System.Web.Routing.UrlRoutingModule, System.Web.Routing, Version=3.5.0.0, Culture=neutral, PublicKeyToken=31BF3856AD364E35"/>

    </httpModules>

  </system.web>
主程序如下:
public ActionResult Index()

    {

        HttpModulesSection section = ConfigurationManager.GetSection("system.web/httpModules") as HttpModulesSection;

        foreach (HttpModuleAction action in section.Modules)

        {

            Response.Write(action.Name + "<br/>");

        }

        return Content("");

    }
输出如下:

注意,连服务器上mechine里面的配置都会一起读出来。
在Web.config里是只读的,写不了,而非Web程序的写与上面的例子一样,此处不再复述。
.net学习笔记---webconfig的读与写的更多相关文章
- java之jvm学习笔记六-十二(实践写自己的安全管理器)(jar包的代码认证和签名) (实践对jar包的代码签名) (策略文件)(策略和保护域) (访问控制器) (访问控制器的栈校验机制) (jvm基本结构)
java之jvm学习笔记六(实践写自己的安全管理器) 安全管理器SecurityManager里设计的内容实在是非常的庞大,它的核心方法就是checkPerssiom这个方法里又调用 AccessCo ...
- SVM学习笔记(二)----手写数字识别
引言 上一篇博客整理了一下SVM分类算法的基本理论问题,它分类的基本思想是利用最大间隔进行分类,处理非线性问题是通过核函数将特征向量映射到高维空间,从而变成线性可分的,但是运算却是在低维空间运行的.考 ...
- ELK学习笔记之logstash将配置写在多个文件
0x00 概述 我们用Logsatsh写配置文件的时候,如果读取的文件太多,匹配的正则过多,会使配置文件动辄成百上千行代码,可能会造成阅读和修改困难.这时候,我们可以将配置文件的输入.过滤.输出分别放 ...
- 《NVM-Express-1_4-2019.06.10-Ratified》学习笔记(6.15)-- 写命令
6.15 Write command 写命令 写命令写数据和元数据,如果适用介质,发到逻辑块相应的I/O controller.主机也可以指定保护信息,作为操作的一部分包含进来. 命令用Command ...
- .net学习笔记----WebConfig常用配置节点介绍
一.配置文件入门 .Net提供了一种保存项目配置信息的办法,就是利用配置文件,配置文件的后缀一般是.config.在WinForm程序中配置文件一般是App.config.在Asp.net中一般默认是 ...
- java jvm学习笔记五(实践自己写的类装载器)
欢迎装载请说明出处:http://blog.csdn.net/yfqnihao 课程源码:http://download.csdn.net/detail/yfqnihao/4866501 前面第三和 ...
- 【deep learning学习笔记】最近读的几个ppt(四)
这几个ppt都是在微博上看到的,是百度的一个员工整理的. <Deep Belief Nets>,31页的一个ppt 1. 相关背景 还是在说deep learning好啦,如特征表示云云. ...
- 【DM642学习笔记四】flash烧写过程——错误记录…
(欢迎批评指正) 一,打开.cdd配置文件时出错: 解决:在FlashBurn配置窗口中,Conversion Cmd一栏可不用管: 菜单Program—Download FBTC,load ...
- 这篇SpringBoot整合JSON的学习笔记,建议收藏起来,写的太细了
前言 JSON(JavaScript Object Notation, JS 对象标记) 是一种轻量级的数据交换格式,目前使用特别广泛. 采用完全独立于编程语言的文本格式来存储和表示数据. 简洁和清晰 ...
随机推荐
- Struts2 验证规则配置文件
1. Action级别校验命名格式: ActionClassName-validation.xml 2. Action中某个方法的校验命名格式: ActionClassName-ActionAlias ...
- class training
实验3-1 分别使用while循环.do while循环.for循环求 (即求1+2+3+ --+100). 参考: 源码 方法一#include<stdio.h> int main(){ ...
- mac 搭建APK反编译环境[转]
APKtool 用途:获取mainifest.xml res等资源文件 下载:http://ibotpeaches.github.io/Apktool/install/ 使用:apktool d te ...
- BZOJ 3665: maths
Sol 矩阵乘法+快速幂+欧拉定理. 首先观察题目可以发现 \(A_n\) 可以表示成关于 \(K\) 和 \(A_0\) 的几次幂的形式. \(A_0\) 就比较简单了 \(m^n\) 所以第一部分 ...
- c语言数据问题
变量都有作用域,链接属性,和存储类型3个属性,这三个属性决定了变量的作用域和生存期的问题 在c语言中包含4中类型, 整形 浮点型 指针 聚合类型(数组,结构体等) ------------------ ...
- PE355
似乎我和lyx讨论过这题..? LP可解决..(~0.8s)
- gjd
#include <cstdio> #include <cstring> #include <malloc.h> #define radix (1u<< ...
- Linux下多网卡同网段多IP网络分流设定方法
Linux下多网卡同网段多IP网络分流设定方法 -- :: 标签:Linux下多网卡同网段多IP网络分流设定方法 当服务器需要较高的网络流量时,在其它资源不造成瓶颈的情况下无疑会用到多网卡. 第1选项 ...
- 使用Gitosis搭建Git服务器
使用Gitosis搭建Git服务器 作者: JeremyWei | 可以转载, 但必须以超链接形式标明文章原始出处和作者信息及版权声明 网址: http://weizhifeng.net/build- ...
- win7下配置Apache本地虚拟主机
我们有时候从网上下载下来的php源码很多都是应用在网站根目录下的,而我们又想在本地先测试一遍确定没有问题了再上传空间,但一换到子目录下的时候因为路径问题,使得许多图片.内容都无法显示. 这个时候我们就 ...