Android 高级UI设计笔记23:Android 夜间模式之 两种常用方法(降低屏幕亮度+替换theme)
1. 夜间模式
所谓的夜间模式,就是能够根据不同的设定,呈现不同风格的界面给用户,而且晚上看着不伤眼睛。特别是一些新闻类App实现夜间模式是非常人性化的,增强用户体验。
2. 我根据网上的资料 以及自己代码亲测,总结如下两种方法:
(1)降低屏幕亮度
(2)替换theme
3. 夜间模式之 降低屏幕亮度:
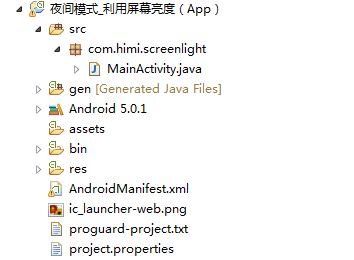
(1)创建一个Android工程,命名为"夜间模式_利用屏幕亮度(App)",如下:
(2)首先我们来到主布局之中,如下:
 <LinearLayout xmlns:android="http://schemas.android.com/apk/res/android"

     xmlns:tools="http://schemas.android.com/tools"

     android:layout_width="match_parent"

     android:layout_height="match_parent"

     android:orientation="vertical"

     tools:context="com.himi.screenlight.MainActivity" >

     <Button

         android:onClick="SetAppBrightness"

         android:layout_width="match_parent"

         android:layout_height="wrap_content"

         android:text="设置应用程序内亮度" />

 </LinearLayout>
(3)来到MainActivity,如下:
 package com.himi.screenlight;

 import android.app.Activity;

 import android.os.Bundle;

 import android.view.View;

 import android.view.WindowManager;

 /**

  *

  * 降低屏幕的亮度

  * 该方法缺点是不能将亮度值保存起来,可以通过SharedPreferences来保存数据。

  * @author hebao

  *

  */

 public class MainActivity extends Activity {

     private static int init = 1;

     @Override

     protected void onCreate(Bundle savedInstanceState) {

         super.onCreate(savedInstanceState);

         setContentView(R.layout.activity_main);

     }

     /****************设置应用程序的亮度*****************/

     public void SetAppBrightness(View view) {

          switch(init % 5){

          case 0:

              setBrightness(50);

              break;

          case 1:

              setBrightness(100);

              break;

          case 2:

              setBrightness(150);

              break;

          case 3:

              setBrightness(200);

              break;

          case 4:

              setBrightness(255);

              break;

          }

          init ++;

     }

     public void setBrightness(int brightness) {

         WindowManager.LayoutParams lp = getWindow().getAttributes();

         lp.screenBrightness = brightness / 255.0f;

         getWindow().setAttributes(lp);

     }

 }
运行到手机上是可以改变屏幕亮度的,这种方法实际开发中使用得不多。
上面关于设置屏幕亮度的核心代码如下:
WindowManager.LayoutParams lp = getWindow().getAttributes();
lp.screenBrightness = brightness / 255.0f;
getWindow().setAttributes(lp);
4. 夜间模式之 替换theme:
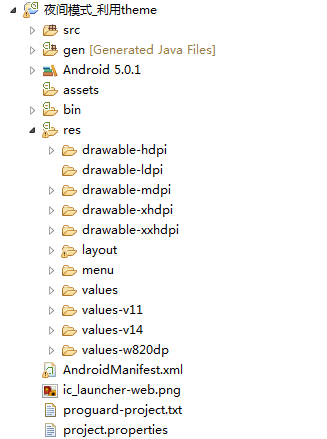
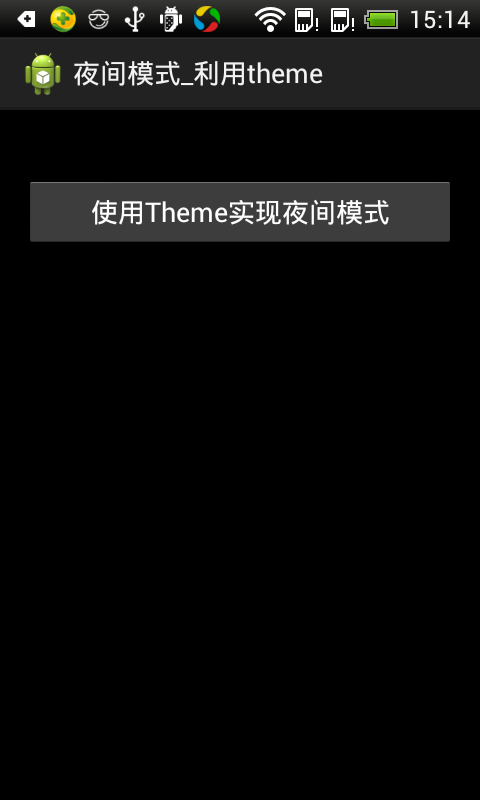
(1)创建一个Android工程,命名为"夜间模式_利用theme",如下:
(2)在工程 res/values/attrs.xml 文件中,增加自定义属性。
 <?xml version="1.0" encoding="utf-8"?>

 <resources>

     <declare-styleable name="NightMode">

         <attr name="day_night_background" format="color" />

         <attr name="day_night_text_color" format="color" />

     </declare-styleable>

 </resources>
(3)在工程res/values/colors.xml文件中,增加自定义属性用到的颜色。
 <?xml version="1.0" encoding="utf-8"?>

 <resources>

     <color name="night_color">#000000</color>

     <color name="light_color">#ffffff</color>

 </resources>
(4)在工程 res/values/styles.xml 文件中,增加"AppSunTheme" 和"AppNightTheme",parent 均为AppBaseTheme. 同时在这两个styles中一一对应的加入attrs.xml文件中的属性。
 <resources>

     <!--

         Base application theme, dependent on API level. This theme is replaced

         by AppBaseTheme from res/values-vXX/styles.xml on newer devices.

     -->

     <style name="AppBaseTheme" parent="android:Theme.Light">

         <!--

             Theme customizations available in newer API levels can go in

             res/values-vXX/styles.xml, while customizations related to

             backward-compatibility can go here.

         -->

     </style>

     <!-- Application theme. -->

     <style name="AppTheme" parent="AppBaseTheme">

         <!-- All customizations that are NOT specific to a particular API-level can go here. -->

     </style>

     <!-- 自定义的 Application theme. -->

    <style name="AppSunTheme" parent="AppBaseTheme">

        <item name="day_night_background">@color/light_color</item>

        <item name="day_night_text_color">@color/night_color</item>

    </style>

    <style name="AppNightTheme" parent="AppBaseTheme">

        <item name="day_night_background">@color/night_color</item>

        <item name="day_night_text_color">@color/light_color</item>

    </style>

 </resources>
(5)来到主布局文件之中,将主布局activity_main.xml中需要根据主题改变的元素的background 和 color 设为自定义attrs中的属性:
 <RelativeLayout xmlns:android="http://schemas.android.com/apk/res/android"

     xmlns:tools="http://schemas.android.com/tools"

     android:layout_width="match_parent"

     android:layout_height="match_parent"

     android:background="?attr/day_night_background"

     android:paddingBottom="@dimen/activity_vertical_margin"

     android:paddingLeft="@dimen/activity_horizontal_margin"

     android:paddingRight="@dimen/activity_horizontal_margin"

     android:paddingTop="@dimen/activity_vertical_margin"

     tools:context=".MainActivity" >

     <Button

         android:id="@+id/btn_theme"

         android:layout_width="match_parent"

         android:layout_height="wrap_content"

         android:layout_alignLeft="@+id/night"

         android:layout_below="@+id/night"

         android:layout_marginTop="28dp"

         android:text="使用Theme实现夜间模式"

         android:textColor="?attr/day_night_text_color" />

 </RelativeLayout>
(6)在工程中加入NightModeUtils类来配置应用主题。因为这里要改变整个APP的主题,所以传给NightModeUtils的Context应该是Application的Context。
 package com.himi.screen;

 import android.app.Activity;

 import android.content.Context;

 import android.content.Intent;

 import android.content.SharedPreferences;

 import android.view.View;

 import android.widget.TextView;

 public class NightModeUtils {

     public final static int THEME_SUN = 1;

     public final static int THEME_NIGHT = 2;

     /**

      * Set the theme of the Activity, and restart it by creating a new Activity

      * of the same type.

      */

     public static void changeToTheme(Activity activity) {

         int theme1=getDayNightMode(activity);

         int theme =( theme1 == THEME_SUN ? THEME_NIGHT : THEME_SUN);

         setDayNightMode(activity, theme);

         activity.finish();

         activity.startActivity(new Intent(activity, activity.getClass()));

     }

     /** Set the theme of the activity, according to the configuration. */

     public static void onActivityCreateSetTheme(Activity activity) {

         int theme = getDayNightMode(activity);

         switch (theme) {

             case THEME_SUN:

                 activity.setTheme(R.style.AppSunTheme);

                 break;

             case THEME_NIGHT:

                 activity.setTheme(R.style.AppNightTheme);

                 break;

             default:

                 break;

         }

     }

     public static void setBackGroundColor(Context context, View view, int theme) {

         int color = context.getResources().getColor(

                 theme == THEME_SUN ? R.color.light_color : R.color.night_color);

         view.setBackgroundColor(color);

     }

     public static void setTextColor(Context context, View view, int theme) {

         int color = context.getResources().getColor(

                 theme == THEME_SUN ? R.color.night_color : R.color.light_color);

         TextView textView = (TextView)view;

         textView.setTextColor(color);

     }

     public static int getSwitchDayNightMode(Context context) {

         int mode = getDayNightMode(context);

         return mode == THEME_SUN ? THEME_NIGHT : THEME_SUN;

     }

60     //设置theme属性值存入xml文件之中

     public static void setDayNightMode(Context context, int mode) {

         SharedPreferences sharedPreferences = getSharedPreferences(context);

         SharedPreferences.Editor sharedPreferencesEditor = sharedPreferences.edit();

         sharedPreferencesEditor.putInt("SUN_NIGHT_MODE", mode);

         sharedPreferencesEditor.apply();

     }

     //获取xml文件中theme属性值

     public static int getDayNightMode(Context context) {

         SharedPreferences sharedPreferences = getSharedPreferences(context);

         return sharedPreferences.getInt("SUN_NIGHT_MODE", THEME_SUN);

     }

72     //设置xml文件

     private static SharedPreferences getSharedPreferences(Context context) {

         return context.getSharedPreferences("NightModeDemo", Context.MODE_APPEND);

     }

 }
(7) 在每个Activity中增加调用nightModeUtils类的设置主题方法,注意要加在setContentView方法之前。
setTheme方法只能在onCreate方法中实现,所以如果要改变当前Activity的注意要将当前Activity先finish,再重新启动Activity。
 package com.himi.screen;

 import android.app.Activity;

 import android.content.Context;

 import android.content.Intent;

 import android.os.Bundle;

 import android.view.View;

 import android.view.View.OnClickListener;

 import android.widget.Button;

 public class MainActivity extends Activity {

     private Button btn_theme;

     @Override

     protected void onCreate(Bundle savedInstanceState) {

         super.onCreate(savedInstanceState);

18        // 设置启动时默认theme

         NightModeUtils.onActivityCreateSetTheme(this);

         setContentView(R.layout.activity_main);

         btn_theme = (Button) findViewById(R.id.btn_theme);

         btn_theme.setOnClickListener(new OnClickListener() {

             @Override

             public void onClick(View v) {

                 // 获取当前theme

                 int theme = NightModeUtils.getDayNightMode(MainActivity.this);

                 Context context = getApplicationContext();

                 if (theme == NightModeUtils.THEME_SUN)

                     NightModeUtils.setDayNightMode(context,

                             NightModeUtils.THEME_NIGHT);

                 else

                     NightModeUtils.setDayNightMode(context,

                             NightModeUtils.THEME_SUN);

                 // 注意改过主题后一定要,把activity finish在重开一遍,因为更改主题只能在oncreat中进行

                 finish();

                 startActivity(new Intent(MainActivity.this, MainActivity.this.getClass()));

             }

         });

     }

 }
注意的是:当我们替换主题的时候,我们需要finish掉旧Activity,重新使用startActivity开启新Activity,这是因为我们只是替换主题属性,界面并没有重新绘制,需要Activity重新渲染界面,所以需要根据新的属性,重新绘制Activity。
(8)将Mainfest配置文件中Application 的theme设为默认的AppSunTheme:
 <?xml version="1.0" encoding="utf-8"?>

 <manifest xmlns:android="http://schemas.android.com/apk/res/android"

     package="com.himi.screen"

     android:versionCode="1"

     android:versionName="1.0" >

     <uses-sdk

         android:minSdkVersion="15"

         android:targetSdkVersion="21" />

     <application

         android:allowBackup="true"

         android:icon="@drawable/ic_launcher"

         android:label="@string/app_name"

         android:theme="@style/AppSunTheme" >

         <activity

             android:name=".MainActivity"

             android:label="@string/app_name" >

             <intent-filter>

                 <action android:name="android.intent.action.MAIN" />

                 <category android:name="android.intent.category.LAUNCHER" />

             </intent-filter>

         </activity>

     </application>

 </manifest>
上面设置了应用程序初始状态的主题样式为AppSunTheme
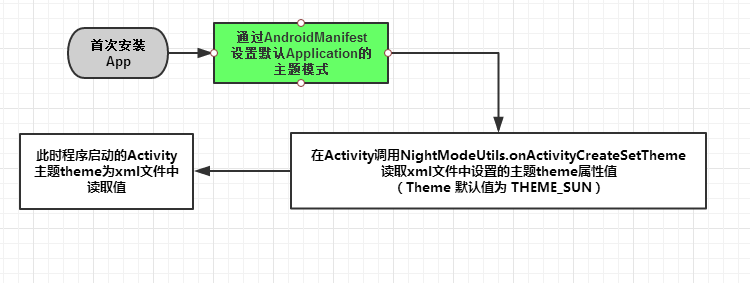
总结如下:
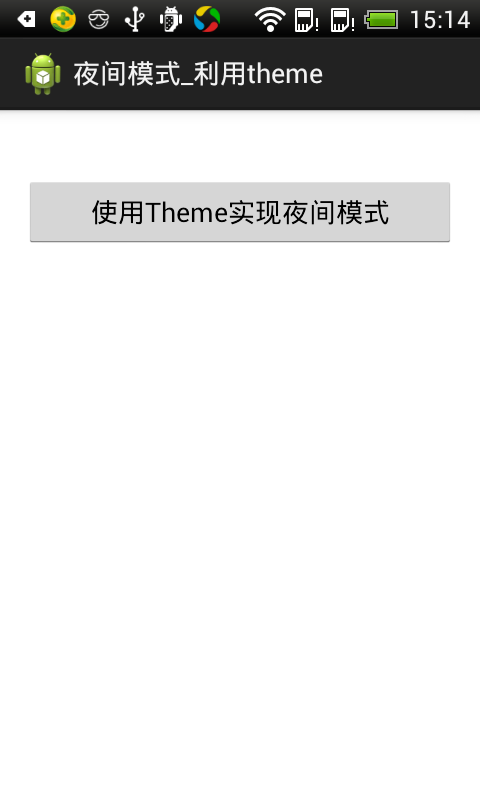
(9)部署程序到手机上测试,如下:
本文示例代码下载地址:http://download.csdn.net/detail/hebao5201314/9591112
Android 高级UI设计笔记23:Android 夜间模式之 两种常用方法(降低屏幕亮度+替换theme)的更多相关文章
- Android 高级UI设计笔记07:RecyclerView 的详解
1. 使用RecyclerView 在 Android 应用程序中列表是一个非常重要的控件,适用场合非常多,如新闻列表.应用列表.消息列表等等,但是从Android 一出生到现在并没有非常 ...
- Android 高级UI设计笔记24:Android 夜间模式之 WebView 实现白天 / 夜间阅读模式 (使用JavaScript)
1. 问题引入: 前面我们是使用方法 降低屏幕亮度(不常用) 和 替换theme,两者都是针对Activity的背景进行白天.夜间模式的交换,但是如果我们显示的是Html的内容,这个时候改怎么办? 分 ...
- Android 高级UI设计笔记21:Android SegmentView(分段选择控件)
1. 分段控制(SegmentView) 首先我们先看看什么是SegmentView的效果,如下: 分段控制这个View控件是ios7的分段控制,和QQ消息页面顶部的效果一样,android没有这个控 ...
- Android 高级UI设计笔记19:PopupWindow使用详解
1. PopupWindow使用 PopupWindow这个类用来实现一个弹出框,可以使用任意布局的View作为其内容,这个弹出框是悬浮在当前activity之上的. 2. PopupWindow使用 ...
- Android 高级UI设计笔记22:Android 指示引导页(带圆点)
1. 引导页: 我们在安装某个软件首次运行时,大部分都会有一个引导页的提示,介绍软件新功能的加入或者使用说明等,支持滑动且下面会有几个圆点,显示共有多少页和当前图片的位置,类似如下效果: 2. 引导页 ...
- Android 高级UI设计笔记20:RecyclerView 的详解之RecyclerView添加Item点击事件
1. 引言: RecyclerView侧重的是布局的灵活性,虽说可以替代ListView但是连基本的点击事件都没有,这篇文章就来详细讲解如何为RecyclerView的item添加点击事件,顺便复习一 ...
- Android 高级UI设计笔记15:HorizontalScrollView之 实现画廊式图片浏览器
1. HorizontalScrollView 本来,画廊式的图片浏览器,使用Android中的Gallery就能轻松完成,但是Google说Gallery每次切换图片时都要新建视图,造成太多的资源浪 ...
- Android 高级UI设计笔记14:Gallery(画廊控件)之 3D图片浏览
1. 利用Gallery组件实现 3D图片浏览器的功能,如下: 2. 下面是详细的实现过程如下: (1)这里我是测试性代码,我的图片是自己添加到res/drawable/目录下的,如下: 但是开发中不 ...
- Android 高级UI设计笔记11:Gallery(画廊控件)之Gallery基本使用
1. 这里要向大家介绍Android控件Gallery(画廊控件) Gallery控件主要用于横向显示图像列表,不过按常规做法.Gallery组件只能有限地显示指定的图像.也就是说,如果为Galler ...
随机推荐
- 父页面向iframe子页面传递参数
父页面: <iframe src="video.html" width="100%" height="400" name=" ...
- 机器学习classification_report方法及precision精确率和recall召回率 说明
classification_report简介 sklearn中的classification_report函数用于显示主要分类指标的文本报告.在报告中显示每个类的精确度,召回率,F1值等信息. 主要 ...
- java SE 入门之八大内置基本类型(第二篇)
本文采用eclipse 工具演示,如果您对eclipse 工具不了解,请先学习下 eclipse 工具的使用,这个里面只是简单的介绍下输出和注释: 安装完成eclipse 以后,双击进入 后一次点击 ...
- Redis与Memcached简单对比(转)
很多开发者都认为Redis不可能比Memcached快,Memcached完全基于内存,而Redis具有持久化保存特性,即使是异步的,Redis也不可能比Memcached快.但是测试结果基本是Red ...
- 关于pycharm 打不开某些文件夹和文件打不开的问题
在使用pycharm的时候遇到了一个情况, 下载了一个文件,自己修改了文件夹名称后再打开文件夹里的py文件, 打不开了,pycharm没有反应, 百度了一下,没有类似的问题,觉得应该是个个例... 然 ...
- DNS必知必会
什么是DNS? DNS服务器(Domain Name Server,域名服务器)是进行域名和与之相对应的IP地址进行转换的服务器. 基本概念 DNS服务器中保存了一张域名和与之相对应的IP地址 的表, ...
- check选择样式
样式一(H5): <form action="#"> <div class="wrapper"> <div class=& ...
- windows 设置CapsLock键开启大写后使用shift键取消大写
1.打开控制面板——>时钟.语言和区域——>更改键盘或其它输入法——>更改键盘——>高级键设置——>要关闭Caps Lock 2.ok
- 切片和append操作
本文转自:http://meia.fun/article/1541470004286 学习切片时,被append这个方法困扰了半天:在main方法中把一个切片作为实参传递给另一个函数,并在这个函数内调 ...
- Object、T(以下代指泛型)、?的区别
因为最近看了很多项目底层都使用了T,?泛型,于是百度了一下有如下理解 我们先来试着理解一下Object类,学习Java的应该都知道Object是所有类的父类,注意:那么这就意味着它的范围非常广!首先记 ...