一步一步实现web程序信息管理系统之一----登陆界面实现
一步一步实现web程序信息管理系统
在web程序中特别是信息管理系统,登陆功能必须有而且特别重要。每一个学习程序开发或以后工作中,都会遇到实现登陆功能的需求。而登陆功能最终提供给客户或展现给客户的最基本的就是2个文本框一个按钮用户名与密码,外加一个登陆按钮。本篇记录一下登陆功能的前端界面的实现。
1.界面布局
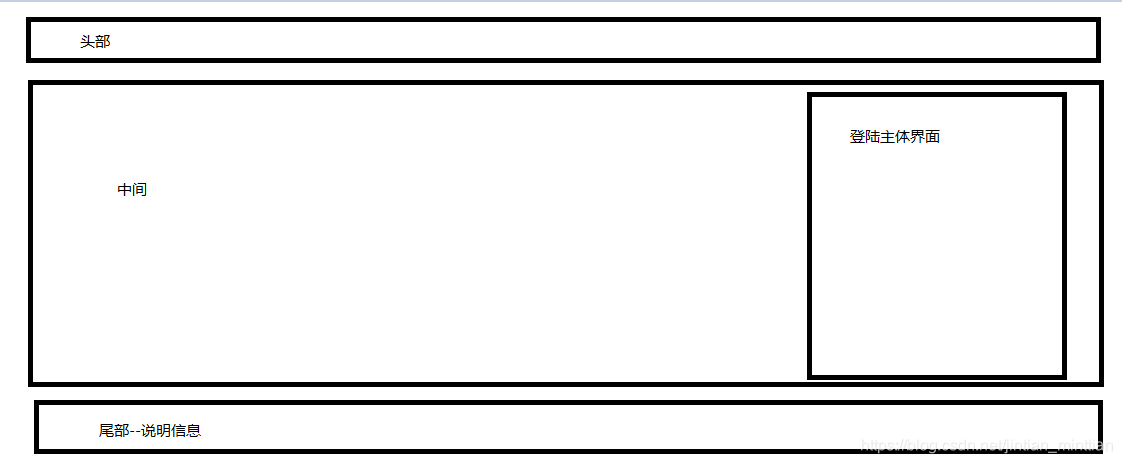
整个页面的布局分为3个部分
- 上部 可以放置公司logo
- 中部 登陆功能主体部分
- 尾部 可以放置 说明信息、版权等
2.实现
- 头部实现
html代码
 <div id="ops-login-header">

        <div class="ops-logo ops-main-content">

            <h1><a href="#" title="xxx平台">账号登录</a></h1>

            <ul class="ops-login-header-linker">

                <li><a href="#">关于我们</a></li>

                <li><a href="#">帮助中心</a></li>

            </ul>

        </div>

    </div>
css代码
.ops-logo{

    height: 74px;

    line-height: 74px;

}

.ops-main-content{

    margin:0 auto;

    width:1200px;

}

.ops-logo h1{

    float:left;

}

.ops-logo h1 a{

    display: block;

    height: 74px;

    padding-left: 170px;

    line-height: 80px;

    font-weight: bold;

    font-size: 18px;

    color:#000;

    background:url('../images/login/login_logo2.png?14622422798') left center no-repeat;

}

.ops-logo h1 a:hover{

    text-decoration:none;

}

.ops-logo .ops-login-header-linker{

    float:right;

}

.ops-logo .ops-login-header-linker li{

    float:left;

    margin-left:20px;

    font-size:12px;

}

.ops-logo .ops-login-header-linker li a{

    color:#808080;

}
最终效果展示

- 中间主体部分
html代码
<div id="login-bd" class="ops-login-bd">

        <div class="ops-main-content">

            <div class="ops-input-box">

                <div class="ops-input-title">

                    <h2>用户登录</h2>

                </div>

                <div class="ops-input-area">

                    <form>

                        <div class="ops-input-item">

                            <p>登录名:</p>

                            <input type="text" id="username"  placeholder="请输入账号/邮箱" />

                        </div>

                        <div class="ops-input-item">

                            <p>登录密码:</p>

                            <input type="password" id="password"  placeholder="请输入密码" />

                        </div>

                        <div class="ops-input-item">

                            <p>验证码:</p>

                            <input type="text" placeholder="" id="code"  class="ops-img-code" />

                            <img src="../images/login/1.png" id="codeImg" alt="点击更换" title="点击更换" />

                        </div>

                        <div class="ops-login-btn" onclick="loginCheck();">登录</div>

                    </form>

                    <p class="ops-input-other">忘记密码?<a href="#">联系我们</a></p>

                </div>

            </div>

        </div>

    </div>
css代码
.ops-login-bd{

    margin-bottom: 38px;

    height:529px;

    background: #00a2ca; /*#29a176*/

}

.ops-login-bd .ops-main-content{

    position: relative;

    height:100%;

    background: url('../images/login/loginbg.png?14622422798') no-repeat;

}

.ops-login-bd .ops-input-box{

    position: absolute;

    right: 80px;

    top:50%;

    margin-top:-200px;

    background:#fff;

    box-shadow: 2px 2px 3px #696363,-2px 0 3px #696363;

}

.ops-login-bd .ops-input-box .ops-input-title{

    margin-top:22px;

    padding:0 10px;

    border-left:4px solid #fc880c;

    font-size:22px;

    color:#000;

}

.ops-login-bd .ops-input-box .ops-input-title h2{

    padding-bottom:8px;

    border-bottom:1px solid #d9d9d9;

    font-size: 20px;

}

.ops-login-bd .ops-input-box .ops-input-area{

    padding:0 22px;

    padding-top:20px;

}

.ops-login-bd .ops-input-box .ops-input-area .ops-input-item{

    margin-bottom:15px;

}

.ops-login-bd .ops-input-box .ops-input-area .ops-input-item p{

    margin-bottom:5px;

    font-size:12px;

    font-weight:bold;

}

.ops-login-bd .ops-input-box .ops-input-area .ops-input-item img{

    cursor:pointer;

    width:98px;

    height:32px;

}

.ops-login-bd .ops-input-box .ops-input-area input{

    padding:0 10px;

    border:1px solid #cacaca;

    width:264px;

    height:32px;

    outline:none;

    border-radius: 3px;

    background:url('../images/login/logininputbg.png?14622422798');

}

.ops-login-bd .ops-input-box .ops-input-area .ops-img-code{

    float:left;

    width:160px;

    margin-right:5px;

    border-radius: 3px;

}

.ops-login-bd .ops-input-box .ops-input-area .ops-login-btn{

    display:block;

    width:100%;

    height:36px;

    line-height: 36px;

    text-align:center;

    background:#00a2ca;

    border-radius: 4px;

    border:none;

    color:#fff;

    cursor: pointer;

    font-size:16px;

    outline:none;

}

.ops-login-bd .ops-input-box .ops-input-other{

    padding:22px;

    text-align:right;

}

.ops-login-bd .ops-input-box .ops-input-other a{

    margin-left:10px;

}
效果图展示
- 尾部信息
html代码
<div id="login-footer" class="ops-login-footer">
<div class="ops-footer-copyright">
<p class="ops-clearfix ops-links">
<a href="javascript:;" target="_blank">关于我们</a>
<a href="javascript:;" target="_blank">法律声明</a>
<a href="javascript:;" target="_blank">服务条款</a>
<a href="javascript:;" target="_blank">联系方式</a>
<p style="font-family:arial;">地址:xxxxxxxxxxxxxxxx xxxxxxxxxx许可证B1-20160901 COPYRIGHT © 2010-2016<a href="http://www.uimaker.com">uimaker</a> 版权所有 ICP证:苏A2-20160101</p>
<p style="font-family:arial;">xxxxxxx许可证B1-20150962 xxxxx 版权所有</p>
</p>
</div>
</div>
css代码
.ops-login-footer{

    padding-top:20px;

    padding-bottom: 35px;

    border-top:1px solid #e5e5e5;

    font-size:12px;

}

.ops-login-footer .ops-footer-copyright{

    text-align: center;

}

.ops-login-footer .ops-footer-copyright p{

    color:#999;

    margin-top:10px;

}

.ops-login-footer .ops-footer-copyright p:first-child{

    margin-top:0px;

}

.ops-login-footer .ops-footer-copyright .ops-links a {

    margin-left:15px;

    color:#666666;

}

.ops-login-footer .ops-footer-copyright .ops-links a:first-child {

    margin-left:0

}
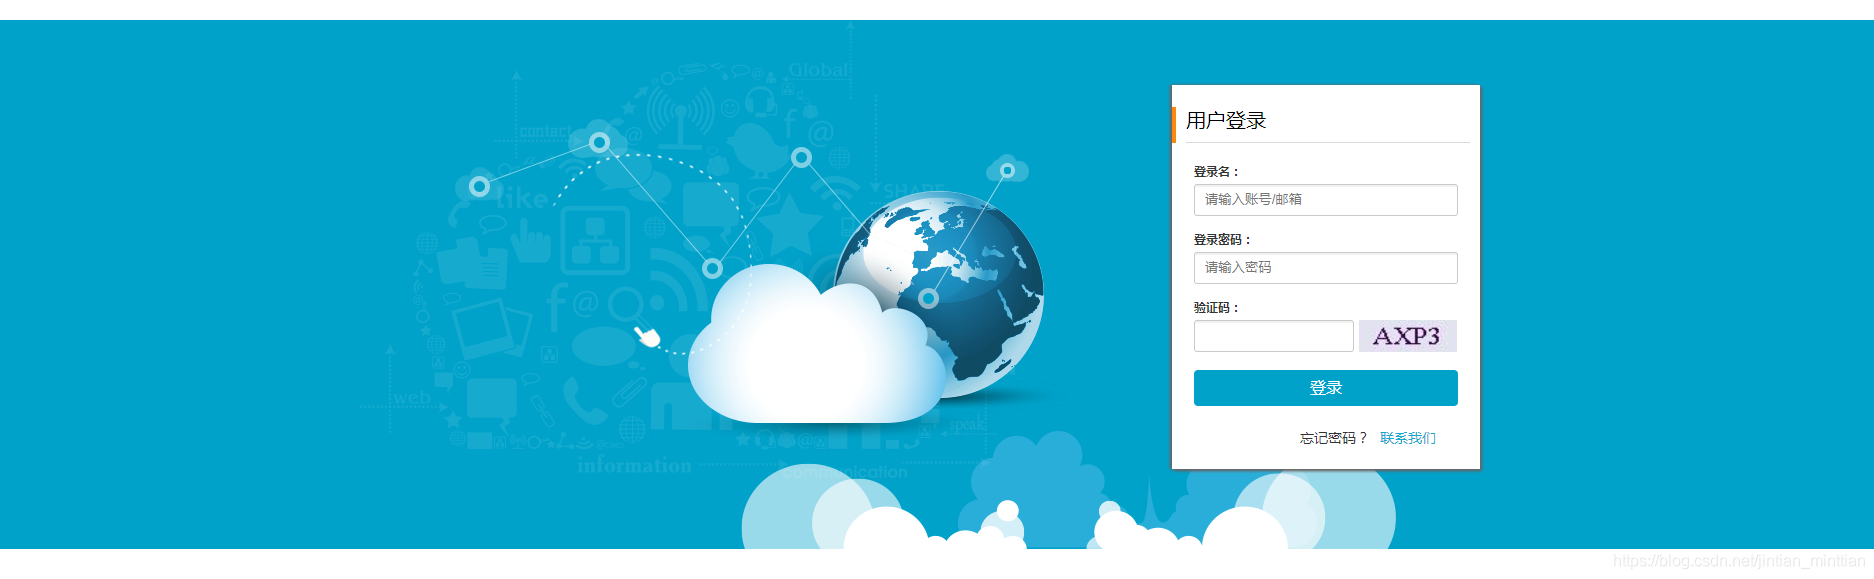
3.最终整体界面效果图

到此,整个登陆界面完成。
资源下载链接
一步一步实现web程序信息管理系统之一----登陆界面源码下载
一步一步实现web程序信息管理系统之一----登陆界面实现的更多相关文章
- 一步一步实现web程序信息管理系统之三----登陆业务逻辑实现(验证码功能+参数获取)
本篇紧接着上一篇文章[一步一步实现web程序信息管理系统之二----后台框架实现跳转登陆页面] 验证码功能 一般验证码功能实现方式为,前端界面访问一个url请求,后端服务代码生成一个图片流返回至浏览器 ...
- 一步一步实现web程序信息管理系统之二----后台框架实现跳转登陆页面
SpringBoot springboot的目的是为了简化spring应用的开发搭建以及开发过程.内部使用了特殊的处理,使得开发人员不需要进行额外繁锁的xml文件配置的编写,其内部包含很多模块的配置只 ...
- 一个低级shell简易学生信息管理系统-新增登陆注册功能
还有bug 不修改了 小声bb一下 这玩意真的要控制版本 随手保存 本来有个超完整的版本 一开心被我rm - f 了 后续还出现了 更多的bug 仔细仔细 源码如下: record=stu.db if ...
- .NET跨平台:在Mac上跟着错误信息一步一步手写ASP.NET 5程序
今天坐高铁时尝试了一种学习ASP.NET 5的笨方法,从空文件夹开始,根据运行dnx . kestrel命令的错误信息,一步一步写代码,直至将一个最简单的ASP.NET程序运行起来. 尝试的具体步骤如 ...
- 一步一步学习SignalR进行实时通信_9_托管在非Web应用程序
原文:一步一步学习SignalR进行实时通信_9_托管在非Web应用程序 一步一步学习SignalR进行实时通信\_9_托管在非Web应用程序 一步一步学习SignalR进行实时通信_9_托管在非We ...
- 干净win7要做几步才能运行第一个Spring MVC 写的动态web程序
干净win7要做几步才能运行第一个Spring MVC 写的动态web程序: 1. 下载安装jdk 2. 配置Java环境变量 3. 测试一下第1,2两步是否完全成功:http://jingyan.b ...
- 【新手出发】从搭虚拟机开始,一步一步在CentOS上跑起来.Net Core程序
文章背景 微软6月26号发布core 1.0版本后,园子里关于这方面的文章就更加火爆了,不管是从文章数量还是大家互动的热情来看,绝对是最热门的技术NO.1.我从去年底开始接触.net core到现在也 ...
- 一步一步创建ASP.NET MVC5程序[Repository+Autofac+Automapper+SqlSugar](一)
前言 大家好,我是Rector 从今天开始,Rector将为大家推出一个关于创建ASP.NET MVC5程序[Repository+Autofac+Automapper+SqlSugar]的文章系列, ...
- 一步一步创建ASP.NET MVC5程序[Repository+Autofac+Automapper+SqlSugar](九)
前言 童鞋们,大家好 我是专注.NET开发者社区建设的实践者Rector. 首先,为自己间隔了两个星期五再更新本系列文章找个不充分的理由:Rector最近工作,家庭的各种事务所致,希望大家谅解. 本文 ...
随机推荐
- 前端html页面学习---html部分
作为一个后台开发人员:本篇博客主要是关注前后台交互时需要掌握的html技术,不涉及css这一块的内容:主要是自学过程中的备忘 1:html常用标签标签的学习:不列出结束标签 <p>:段落: ...
- centos 7 初始化脚本
#!/bin/bash # 时间: 2018-11-21 # 作者: HuYuan # 描述: CentOS 7 初始化脚本 # 加载配置文件 if [ -n "${1}" ];t ...
- 原生Js弹窗插件|web弹出层组件|对话框
wcPop.js 是一款基于原生javascript开发的前端 web版 弹窗组件,遵循原生 H5/css3/JS 的书写规范,简单实用.拿来即用(压缩后仅10KB).已经兼容各大主流浏览器.内含多种 ...
- vsto之一简介(系列文章为转载)
该系列文章转载自 http://bbs.51cto.com/thread-1017338-1.html 参考资料 http://www.excelpx.com/thread-184209-1-1 ...
- An assembly specified in the application dependencies manifest
.Net Core 运行的时候报错 An assembly specified in the application dependencies manifest (xxx.deps.json) was ...
- MapReduce求最大值最小值问题
import java.io.File; import java.io.IOException; import org.apache.hadoop.conf.Configuration; import ...
- 一桩由X509Certificate2引发的血案
A process serving application pool '. The data field contains the error number. 在某次网站更新后,发现wcf服务不可用了 ...
- 【树】Construct Binary Tree from Inorder and Postorder Traversal
题目: Given inorder and postorder traversal of a tree, construct the binary tree. 思路: 后序序列的最后一个元素就是树根, ...
- Android Studio打开项目提示找不到sdk路径的问题。
问题如图: 这是由于所打开的项目不是本机创建的,所使用的sdk路径不一致所导致. 解决方案: 打开项目所在目录,找到local.properties文件并打开,发现sdk.dir=D\:\\Andro ...
- Android 开发工具类 13_ SaxService
网络 xml 解析方式 package com.example.dashu_saxxml; import java.io.IOException; import java.io.InputStream ...