从零打造“乞丐版” React(一)——从命令式编程到声明式编程
这个系列的目的是通过使用 JS 实现“乞丐版”的 React,让读者了解 React 的基本工作原理,体会 React 带来的构建应用的优势
1 HTML 构建静态页面
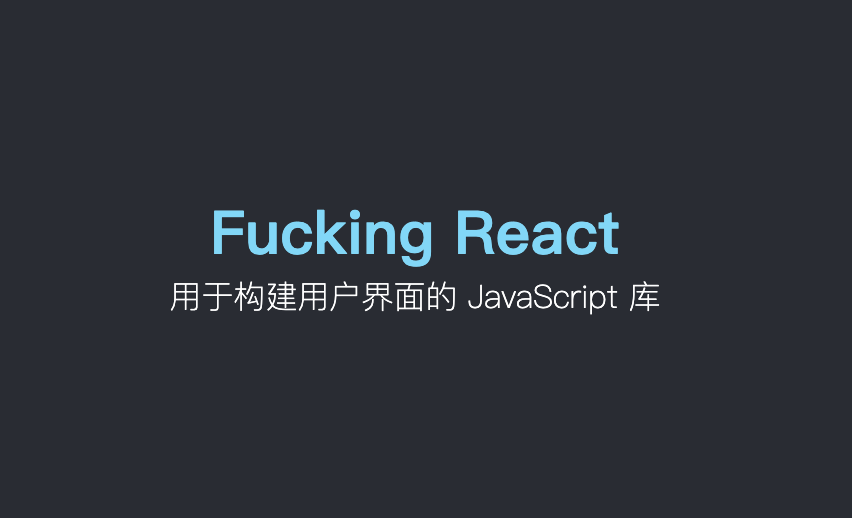
使用 HTML 和 CSS,我们很容易可以构建出上图中的页面
<!DOCTYPE html>

<html lang="en">

  <head>

    <title>Build my react</title>

    <style>

      div {

        text-align: center;

      }

      .father {

        display: flex;

        flex-direction: column;

        justify-content: center;

        height: 500px;

        background-color: #282c34;

        font-size: 30px;

        font-weight: 700;

        color: #61dafb;

      }

      .child {

        color: #fff;

        font-size: 16px;

        font-weight: 200;

      }

    </style>

  </head>

  <body>

    <div class="father">

      Fucking React

      <div class="child">用于构建用户界面的 JavaScript 库</div>

    </div>

  </body>

</html>
当然这只是一个静态的页面,我们知道,网站中最重要的活动之一是和用户产生交互,用户通过触发事件来让网页产生变化,这时就需要用到 JS
2 DOM 构建页面
使用 DOM 操作,我们也可以构建上面的静态页面,并且可以动态地改变页面、添加事件监听等来让网页活动变得更加丰富
我们先改写一下 HTML 的 body(如果没有特殊说明,本文不会更改 CSS 的内容),我们将 body 中的内容都去掉,新增一个 id 为 root 都 div 标签,并且引入index.js。
 <div id="root"></div>

 <script src="./index.js"></script>
index.js内容如下:
const text = document.createTextNode("Fucking React");

const childText = document.createTextNode("用于构建用户界面的 JavaScript 库");

const child = document.createElement("div");

child.className = "child";

child.appendChild(childText);

const father = document.createElement("div");

father.className = "father";

father.appendChild(text);

father.appendChild(child);

const container = document.getElementById("root");

container.appendChild(father);
使用 DOM 操作,我们也可以构建出同样的页面内容,但是缺点很明显
<div class="father">

   Fucking React

   <div class="child">用于构建用户界面的 JavaScript 库</div>

</div>
原本只要寥寥几行 HTML 的页面。使用 DOM 之后,为了描述元素的嵌套关系、属性、内容等,代码量骤增,并且可读性非常差。这就是命令式编程,我们需要一步一步地指挥计算机去做事
这还只是一个简单的静态页面,没有任何交互,试想一下,如果一个非常复杂的网页都是用 DOM 来构建,不好意思,我不想努力了~
3 从命令式到声明式
观察上述 index.js,我们不难发现,在创建每个节点的时候其实可以抽象出一组重复操作:
- 根据类型创建元素
- 添加元素属性(如 className)
- 逐一添加子元素
对于元素的嵌套关系和自身属性,我们可以利用对象来描述
const appElement = {

  type: "div",

  props: {

    className: "father",

    children: [

      {

        type: "TEXT",

        props: {

          nodeValue: "Fucking React",

          children: [],

        },

      },

      {

        type: "div",

        props: {

          className: "child",

          children: [

            {

              type: "TEXT",

              props: {

                nodeValue: "用于构建用户界面的 JavaScript 库",

                children: [],

              },

            },

          ],

        },

      },

    ],

  },

};
其中,type表示元素类型,特殊地,对于字符串文本,我们用TEXT表示;props对象用来描述元素自身的属性,比如 CSS 类名、children 子元素、nodeValue
我们将页面中的元素用 JS 对象来描述,天然地形成了一种树状结构,接着利用递归遍历对象就可以将重复的 DOM 操作去除,我们构建如下 render 函数来将上述 JS 对象渲染到页面上:
const render = (element, container) => {

  const dom =

    element.type == "TEXT"

      ? document.createTextNode("")

      : document.createElement(element.type);

  Object.keys(element.props)

    .filter((key) => key !== "children")

    .forEach((prop) => (dom[prop] = element.props[prop]));

  element.props.children.forEach((child) => render(child, dom));

  container.appendChild(dom);

};
调用 render 函数:
render(appElement, document.getElementById("root"));
现在我们只需要将我们想要的页面结构通过 JS 对象描述出来,然后调用 render 函数,JS 就会帮我们将页面渲染出来,而无需一步步地书写每一步操作
这就是声明式编程,我们需要做的是描述目标的性质,让计算机明白目标,而非流程。
对比命令式和声明式编程,体会两者的区别
4 JSX
对比 JS 对象和 HTML,JS 对象的可读性还是不行,所以 React 引入了 JSX 这种 JavaScript 的语法扩展
我们的 appElement 变成了这样:
// jsx

const appElement = (

  <div className="father">

    Fucking React

    <div className="child">"用于构建用户界面的 JavaScript 库"</div>

  </div>

);
现在描述元素是不是变得超级爽!
然而这玩意儿 JS 并不认识,所以我们还得把这玩意儿解析成 JS 能认识的语法,解析不是本文的重点,所以我们借助于 babel 来进行转换,我们在浏览器中引入 babel
<script src="https://unpkg.com/@babel/standalone/babel.min.js"></script>
并将包含jsx的script的type改为type/babel
<script type="text/babel">

const appElement = (

  <div className="father">

    Fucking React

    <div className="child">"用于构建用户界面的 JavaScript 库"</div>

  </div>

);

</script>
默认情况下,babel 解析 jsx 时会调用React.createElement来创建 React 元素
我们可以自定义创建元素的方法,我们这里的元素就是我们自定义的对象,见 appElement。通过添加注解即可指定创建元素的方法,此处指定 createElement
const createElement = (type, props, ...children) => {

  console.log(type);

  console.log(props);

  console.log(children);

};

/** @jsx createElement  */

const appElement = (

  <div className="father">

    Fucking React

    <div className="child">"用于构建用户界面的 JavaScript 库"</div>

  </div>

);
现在 babel 进行转换的时候会调用我们自定义的 createElement 函数,该函数接受的参数分别为:元素类型type、元素属性对象props、以及剩余参数children即元素的子元素
现在我们要做的是通过这几个参数来创建我们需要的 js 对象,然后返回即可
const createElement = (type, props, ...children) => {

  return {

    type,

    props: {

      ...props,

      children,

    },

  };

};

/** @jsx createElement  */

const appElement = (

  <div className="father">

    Fucking React

    <div className="child">用于构建用户界面的 JavaScript 库</div>

  </div>

);

console.log(appElement);
打印一下转换后的 appElement:
{

  type: "div",

  props: {

    className: "father",

    children: [

      "Fucking React",

      {

        type: "div",

        props: {

          className: "child",

          children: ["用于构建用户界面的 JavaScript 库"],

        },

      },

    ],

  },

};
对比一下我们需要的结构,稍微有点问题,如果节点是字符串,我们需要转换成这种结构:
{

  type: "TEXT",

  props: {

    nodeValue: "Fucking React",

    children: [],

  },

},
改进一下createElement
const createElement = (type, props, ...children) => {

  return {

    type,

    props: {

      ...props,

      children: children.map((child) =>

        typeof child === "string"

          ? {

              type: "TEXT",

              props: {

                nodeValue: child,

                children: [],

              },

            }

          : child

      ),

    },

  };

};
现在我们可以在代码中使用 jsx 而不用再写对象了,babel 会帮我们把 jsx 转换成对应的对象结构,然后调用 render 方法即可渲染到页面上
5 总结
至此,我们完成了从命令式编程到声明式编程的转变,我们已经完成了“乞丐版 React”的功能有:
createElement创建元素render渲染元素到页面- 支持
jsx
接下来我们会从不同方向继续完善我们的“洪七公”,敬请期待!
6 完整代码
<!DOCTYPE html>

<html lang="en">

  <head>

    <meta charset="UTF-8" />

    <meta http-equiv="X-UA-Compatible" content="IE=edge" />

    <meta name="viewport" content="width=device-width, initial-scale=1.0" />

    <title>Build my react</title>

    <style>

      div {

        text-align: center;

      }

      .father {

        display: flex;

        flex-direction: column;

        justify-content: center;

        height: 500px;

        background-color: #282c34;

        font-size: 30px;

        font-weight: 700;

        color: #61dafb;

      }

      .child {

        color: #fff;

        font-size: 16px;

        font-weight: 200;

      }

    </style>

    <script src="https://unpkg.com/@babel/standalone/babel.min.js"></script>

  </head>

  <body>

    <div id="root"></div>

    <script type="text/babel" src="./index.js"></script>

  </body>

</html>
// index.js

const createElement = (type, props, ...children) => {

  return {

    type,

    props: {

      ...props,

      children: children.map((child) =>

        typeof child === "string"

          ? {

              type: "TEXT",

              props: {

                nodeValue: child,

                children: [],

              },

            }

          : child

      ),

    },

  };

};

/** @jsx createElement  */

const appElement = (

  <div className="father">

    Fucking React

    <div className="child">用于构建用户界面的 JavaScript 库</div>

  </div>

);

const render = (element, container) => {

  const dom =

    element.type == "TEXT"

      ? document.createTextNode("")

      : document.createElement(element.type);

  Object.keys(element.props)

    .filter((key) => key !== "children")

    .forEach((prop) => (dom[prop] = element.props[prop]));

  element.props.children.forEach((child) => render(child, dom));

  container.appendChild(dom);

};

render(appElement, document.getElementById("root"));
从零打造“乞丐版” React(一)——从命令式编程到声明式编程的更多相关文章
- Facebook 开源安卓版 React Native,开发者可将相同代码用于网页和 iOS 应用开发
转自:http://mt.sohu.com/20150915/n421177212.shtml Facebook 创建了React Java 库,这样,Facebook 的工程团队就可以用相同的代码给 ...
- 打造MacOS版“XShell”
1.背景 XShell作为一个强大的安全终端模拟软件,它支持SSH1, SSH2, 以及Microsoft Windows 平台的TELNET 协议.作为server端开发,几乎是必备工具了. 很多刚 ...
- 乞丐版JAVA扫雷
事先声明:本人是一位刚接触Java不久的菜鸟,所以代码写的略显臃肿,敬请谅解!这个扫雷是我在暑假时做的,灵感来源于csdn上某位大神的博客,不过我个人实在不喜欢他的代码实现,于是我自己写了一个实现上不 ...
- 200行代码实现简版react🔥
200行代码实现简版react
- 从零打造在线网盘系统之Struts2框架起步
欢迎浏览Java工程师SSH教程从零打造在线网盘系统系列教程,本系列教程将会使用SSH(Struts2+Spring+Hibernate)打造一个在线网盘系统,本系列教程是从零开始,所以会详细以及着重 ...
- 从零打造在线网盘系统之Struts2框架配置全解析
欢迎浏览Java工程师SSH教程从零打造在线网盘系统系列教程,本系列教程将会使用SSH(Struts2+Spring+Hibernate)打造一个在线网盘系统,本系列教程是从零开始,所以会详细以及着重 ...
- 从零打造在线网盘系统之Struts2框架核心功能全解析
欢迎浏览Java工程师SSH教程从零打造在线网盘系统系列教程,本系列教程将会使用SSH(Struts2+Spring+Hibernate)打造一个在线网盘系统,本系列教程是从零开始,所以会详细以及着重 ...
- 从零打造在线网盘系统之Hibernate框架起步
欢迎浏览Java工程师SSH教程从零打造在线网盘系统系列教程,本系列教程将会使用SSH(Struts2+Spring+Hibernate)打造一个在线网盘系统,本系列教程是从零开始,所以会详细以及着重 ...
- 从零打造在线网盘系统之Hibernate配置O/R映射
欢迎浏览Java工程师SSH教程从零打造在线网盘系统系列教程,本系列教程将会使用SSH(Struts2+Spring+Hibernate)打造一个在线网盘系统,本系列教程是从零开始,所以会详细以及着重 ...
随机推荐
- JS中通过Input中id获取输入框中的值
HTML中 <input type="text" id="ONE" oninput="kpi()"> JS中 function ...
- Jenkins安装推荐插件前,更换插件源
网上找了很多都解决不了问题,直到看到jenkins-update-center,还有一个问题,就是尽量在实体机上装,感觉docker坑太多.... 安装jenkins,以Debian系为例 安装包在这 ...
- (一)java基础篇---第一个程序
先认识java的基础知识 1.变量命名规则 :1)变量名由数字字母下划线组成,2)不能使用java的关键字,比如public这种,3)遵循小驼峰命名法 2.数据类型 2.1基本数据类型有8种 其中分为 ...
- MLX90640 红外热成像仪测温模块简要介绍说明
MLX90640 红外热成像仪测温模块简要介绍说明 (1) A 型和 B 型的区别 区别主要有以下几点 视场角不同: A 型为 110*75° , B 型为 55*35° ,通俗一点讲就是 A 型是广 ...
- DongDong认亲戚 来源:牛客网
题目 链接:https://ac.nowcoder.com/acm/contest/28886/1021 来源:牛客网 时间限制:C/C++ 1秒,其他语言2秒 空间限制:C/C++ 131072K, ...
- 对象的反序列化流_ObjectInputStream和transient关键字瞬态关键字
对象的反序列化流_ObjectInputStream package com.yang.Test.ObjectStreamStudy; import java.io.FileInputStream; ...
- ubu18时间设置
ubu18 日期设置 1.date date 命令修改系统时间,重启失效,需要写入硬件Bios #查看日期 date #修改日期 date -s "2022-01-14 09:32:00&q ...
- 如何设计一个分布式 ID 发号器?
大家好,我是树哥. 在复杂的分布式系统中,往往需要对大量的数据和消息进行唯一标识,例如:分库分表的 ID 主键.分布式追踪的请求 ID 等等.于是,设计「分布式 ID 发号器」就成为了一个非常常见的系 ...
- jquery转换为同步请求
$.ajax({ async: false, //采用异步的方式提交,不添加默认是异步,布尔值为 true type : 'POST', url : 'https://i-beta.cnblogs.c ...
- Java面试题(三)--虚拟机
1 内存结构 1.简述一下JVM的内存结构?(高频) JVM在执行Java程序时,会把它管理的内存划分为若干个的区域,每个区域都有自己的用途和创建销毁时间.如下图所示,可以分为两大部分,线程私有区和共 ...