SpringBoot--Thymeleaf入门使用
一、概述
今天学习到了SpringBoot中的WEB开发,SpringBoot提供了spring-boot-stater-web为web开发给予支持,它里面内嵌了以下依赖:
<dependencies>

    <dependency>

      <groupId>org.springframework.boot</groupId>

      <artifactId>spring-boot-starter</artifactId>

      <version>2.1.0.RELEASE</version>

      <scope>compile</scope>

    </dependency>

    <dependency>

      <groupId>org.springframework.boot</groupId>

      <artifactId>spring-boot-starter-json</artifactId>

      <version>2.1.0.RELEASE</version>

      <scope>compile</scope>

    </dependency>

    <dependency>

      <groupId>org.springframework.boot</groupId>

      <artifactId>spring-boot-starter-tomcat</artifactId>

      <version>2.1.0.RELEASE</version>

      <scope>compile</scope>

    </dependency>

    <dependency>

      <groupId>org.hibernate.validator</groupId>

      <artifactId>hibernate-validator</artifactId>

      <version>6.0.13.Final</version>

      <scope>compile</scope>

    </dependency>

    <dependency>

      <groupId>org.springframework</groupId>

      <artifactId>spring-web</artifactId>

      <version>5.1.2.RELEASE</version>

      <scope>compile</scope>

    </dependency>

    <dependency>

      <groupId>org.springframework</groupId>

      <artifactId>spring-webmvc</artifactId>

      <version>5.1.2.RELEASE</version>

      <scope>compile</scope>

    </dependency>

  </dependencies>
主要是Tomcat和Spring MVC的依赖,而web相关的自动配置则在spring-boot-autoconfigure.jar的org.springframework.boot.autoconfigure.web下,如下图所示:
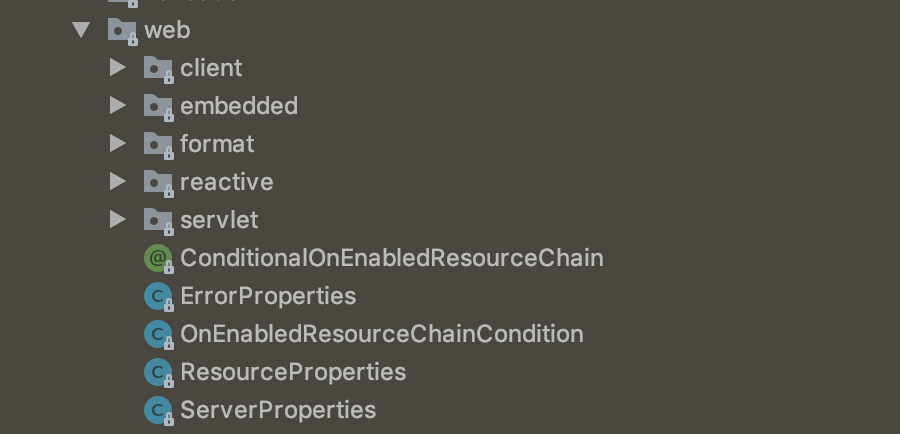
springboot提供的模板引擎有:FreeMarker[fri'mɑːkə(r)]、Groovy['ɡruvi]、Thymeleaf[taɪm'lif]、Velocity[və'lɑsəti]、Mastache['mʌstæʃ],为了准确读出,我加了它们的音标,springboot中推荐使用Thymeleaf作为模板引擎,因为它提供了完美的SpringMVC的支持。关于Thymleaf的语法可以通过官网进行学习https://www.thymeleaf.org/doc/articles/thymeleaf3migration.html
二、通过一个简单的实例举例说明
本例以Thymleaf为模板引擎,从服务端获取数据并展示在页面。
第一步:创建一个Javabean用来在模板页面展示数据person.java
/**

 * 模板数据

 */

public class Person {

    private String userName;

    private int age;

    public Person(String userName, int age) {

        this.userName = userName;

        this.age = age;

    }

    public String getUserName() {

        return userName;

    }

    public void setUserName(String userName) {

        this.userName = userName;

    }

    public int getAge() {

        return age;

    }

    public void setAge(int age) {

        this.age = age;

    }

}
第二步:创建Controller
@Controller

@SpringBootApplication

public class WebdemoApplication {

    @RequestMapping("/")

    public String index(Model model) {

        Person person = new Person("张三", 26);

        List<Person> people = new ArrayList<>();

        Person p1 = new Person("李四", 27);

        Person p2 = new Person("王五", 27);

        Person p3 = new Person("赵六", 27);

        people.add(p1);

        people.add(p2);

        people.add(p3);

        model.addAttribute("singlePerson", person);

        model.addAttribute("people", people);

        return "index";

    }

    public static void main(String[] args) {

        SpringApplication.run(WebdemoApplication.class, args);

    }

}
上面红色加粗部分是将一个用户个一个用户列表设置到model中,传给前页面index.html,所以接下来再创建一个index.html。
第三步:创建页面index.html获取数据
<html xmlns:th="http://www.thymeleaf.org">

<head>

    <meta content="text/html;charset=UTF-8">

    <meta http-equiv="X-UA-Compatible" content="IE=edge">

    <meta name="viewport" content="width=device-width,initial-scale=1">

    <link th:href="@{bootstrap/css/bootstrap.css}" rel="stylesheet">

    <link th:href="@{bootstrap/css/bootstrap-theme.css}" rel="stylesheet">

    <link th:href="@{css/demo.css}" rel="stylesheet">

    <title>Title</title>

</head>

<body>

<div class="panel panel-primary">

    <div class="panel-heading">

        <h3 class="panel-title">访问model</h3>

    </div>

    <div class="panel-body">

        <label>姓名:</label><span th:text="${singlePerson.userName}"/>

        <label>年龄:</label><span th:text="${singlePerson.age}"/>

    </div>

</div>

<div th:if="${not #lists.isEmpty(people)}">

    <div class="panel panel-primary">

        <div class="panel-heading">

            <h3 class="panel-title">访问列表</h3>

        </div>

    </div>

    <div class="panel-body">

        <ul class="list-group">

            <li class="list-group-item">

                <span class="span1">用户名</span>

                <span class="span1">密码</span>

                <span class="span3">操作</span>

            </li>

            <li class="list-group-item" th:each="person:${people}">

                <span class="span2" th:text="${person.userName}"></span>

                <span class="span2" th:text="${person.age}"></span>

                <!--<button class="btn" th:onclick="'getName(\''+[[${person.userName}]]+'\');'">获取姓名</button>-->

                <button class="btn btn-info" th:onclick="getName([[${person.userName}]],[[${person.age}]],this);">

                    获取用户信息

                </button>

            </li>

        </ul>

    </div>

</div>

<script th:src="@{jquery-1.8.3.min.js}" type="text/javascript"></script>

<script th:src="@{bootstrap/js/bootstrap.js}" type="text/javascript"></script>

<script th:inline="javascript">

    var single = [[${singlePerson}]];

    console.log(single.userName + "--" + single.age);

    function getName(name, age, obj) {

        var html = "My name is " + name + " and i am " + age + " years old.";

        $(obj).parent().append(html);

    }

</script>

</body>

</html>
创建完之后的目录结构如下:
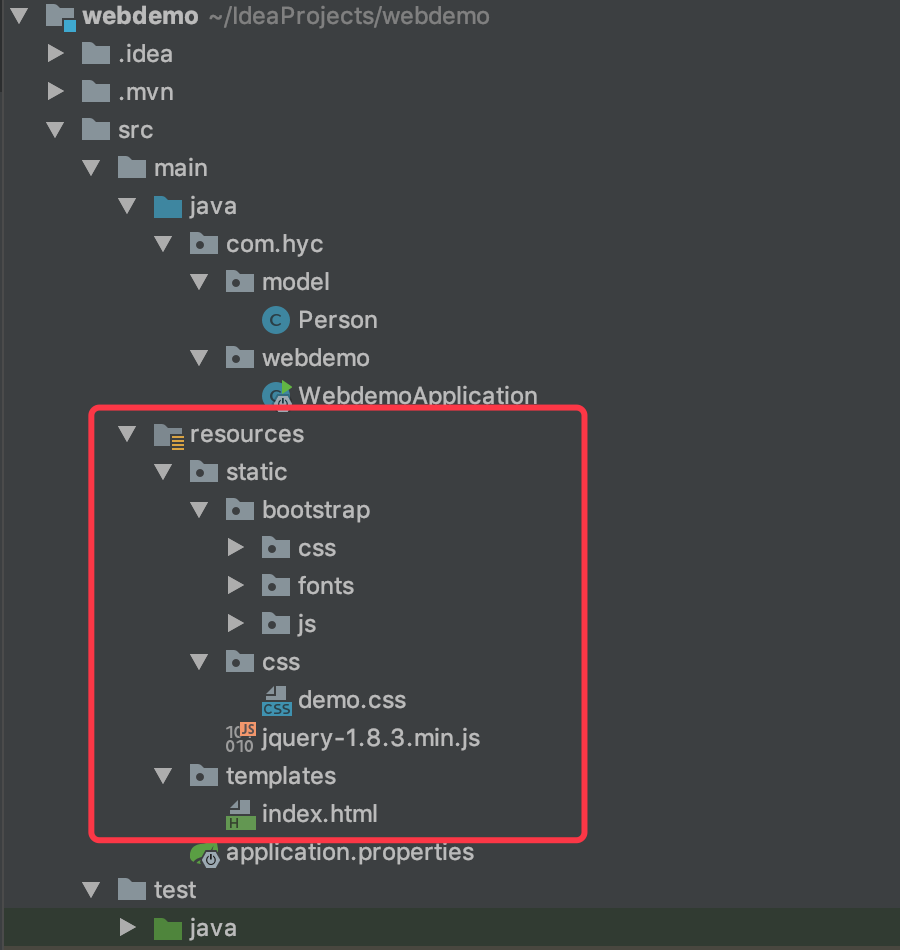
红色方框中的是web文件的目录,都放在resource目录下了。至此,所有文件创建完成,页面访问效果如下:
这是一个简单的入门例子,主要是熟悉一下Thymeleaf模板的使用,这个例子中用到的主要知识点有以下几个:
1、引入Thymeleaf
- 通过<html xmlns:th="http://www.thymeleaf.org">命名空间,将静态页面转换为动态视图。需要进行动态处理的元素需要使用"th:"作为前缀;
- 通过“@{}”引用web静态资源,如js、css、image等文件;
2、访问model中的数据
- 通过${}访问:如这句<span class="span2" th:text="${person.userName}"></span>,通过“${}” 获取
- 通过[[${}]]访问:如下面这句
<button class="btn btn-info" th:onclick="getName([[${person.userName}]],[[${person.age}]],this);">

    获取用户信息

</button>
这种方式一般用来在javascript中访问model中的数据
3、model中的数据迭代
使用th:each来循环迭代,如
<li class="list-group-item" th:each="person:${people}">

                <span class="span2" th:text="${person.userName}"></span>

                <span class="span2" th:text="${person.age}"></span>

                <button class="btn btn-info" th:onclick="getName([[${person.userName}]],[[${person.age}]],this);">

                    获取用户信息

                </button>

</li>
person作为迭代元素来使用,这样在下面的元素中就可以通过${person.*}来获取对象的属性了。
4、数据判断
<div th:if="${not #lists.isEmpty(people)}">

    .........省略......

</div>
上面代码中,在div内部使用列表数据之前要先判断列表是否为空,就用了${not #list.isEmpty(people)}这样的句式。
Thymeleaf还支持>、<、>=、<=、==、!=等作为条件比较。
以上就是这个入门实例中用到的Thymeleaf中的相关知识,需要注意的是下面这两句:
1、<button class="btn" th:onclick="'getName(\''+[[${person.userName}]]+'\');'">获取姓名</button>

2、<button class="btn btn-info" th:onclick="getName([[${person.userName}]],[[${person.age}]],this);">获取用户信息</button>
这两句都是在HTML中调用js函数时传递model数据的写法,但是第一种会报错!!!
SpringBoot--Thymeleaf入门使用的更多相关文章
- springBoot从入门到源码分析
先分享一个springBoot搭建学习项目,和springboot多数据源项目的传送门:https://github.com/1057234721/springBoot 1. SpringBoot快速 ...
- SpringData 基于SpringBoot快速入门
SpringData 基于SpringBoot快速入门 本章通过学习SpringData 和SpringBoot 相关知识将面向服务架构(SOA)的单点登录系统(SSO)需要的代码实现.这样可以从实战 ...
- org.springframework.expression.spel.SpelEvaluationException: EL1004E: Method call: Method service() cannot be found on com.my.blog.springboot.thymeleaf.util.MethodTest type
前言 本文中提到的解决方案,源码地址在:springboot-thymeleaf,希望可以帮你解决问题. 至于为什么已经写了一篇文章thymeleaf模板引擎调用java类中的方法,又多此一举的单独整 ...
- springboot+thymeleaf+pageHelper带条件分页查询
html层 <div> <a class="num"><b th:text="'共 '+ ${result.resultMap['pages ...
- springboot+thymeleaf简单使用
关于springboot想必很多人都在使用,由于公司项目一直使用的是SpringMVC,所以自己抽空体验了一下springboot的简单使用. 环境搭建 springbooot的环境搭建可以说很灵活, ...
- SpringBoot Docker入门,SpringBoot Docker安装
SpringBoot Docker入门,SpringBoot Docker安装 ================================ ©Copyright 蕃薯耀 2018年4月8日 ht ...
- SpringBoot thymeleaf使用方法,thymeleaf模板迭代
SpringBoot thymeleaf使用方法,thymeleaf模板迭代 SpringBoot thymeleaf 循环List.Map ============================= ...
- SpringBoot thymeleaf模板页面没提示,SpringBoot thymeleaf模板插件安装
SpringBoot thymeleaf模板插件安装 SpringBoot thymeleaf模板Html页面没提示 SpringBoot thymeleaf模板页面没提示 SpringBoot t ...
- SpringBoot thymeleaf模板版本,thymeleaf模板更换版本
SpringBoot thymeleaf模板版本 thymeleaf模板更换版本 修改thymeleaf模板版本 ================================ ©Copyright ...
- Springboot+Thymeleaf框架的button错误
---恢复内容开始--- 在做公司项目时,遇到了一个Springboot+Thymeleaf框架问题: 使用框架写网站时,没有标明type类型的button默认成了‘submit’类型,每次点击按钮都 ...
随机推荐
- 判断访问浏览器客户端类型(pc,mac,ipad,iphone,android)
<script type="text/javascript"> //平台.设备和操作系统 var system = { win: false, mac: false, ...
- BZOJ 3626: [LNOI2014]LCA(树剖+差分+线段树)
传送门 解题思路 比较有意思的一道题.首先要把求\(\sum\limits_{i=l}^r dep[lca(i,z)]\)这个公式变一下.就是考虑每一个点的贡献,做出贡献的点一定在\(z\)到根节点的 ...
- APIO 2007 风铃
题目描述 你准备给弟弟 Ike 买一件礼物,但是,Ike 挑选礼物的方式很特别:他只喜欢那些能被他排成有序形状的东西. 你准备给 Ike 买一个风铃.风铃是一种多层的装饰品,一般挂在天花板上. 每个风 ...
- Shader实现新手指引挖空圆形和矩形
这个是参考这个做的:https://blog.csdn.net/tracyzly/article/details/80279692 Shader "UI/ImageWithHole" ...
- GoF著作中未提到的设计模式(2):Interceptor
转:http://www.cnblogs.com/west-link/archive/2011/06/22/2086591.html 拦截器模式为我们提供了一种拦截方法调用或消息的途径,整个过程是自动 ...
- [Android开发常见问题-4] RunTime.exec()如何以root权限执行多条指令?
转:http://blog.csdn.net/alexander_xfl/article/details/9150971 RunTime.exec()这个接口可以说是给我们开发者提供了一个很好的直观操 ...
- P2004 领地选择
P2004 领地选择 题目描述 作为在虚拟世界里统帅千军万马的领袖,小Z认为天时.地利.人和三者是缺一不可的,所以,谨慎地选择首都的位置对于小T来说是非常重要的. 首都被认为是一个占地C*C的正方形. ...
- 引入CSS的方法
##1 关于引入css样式的方法: 1 外部引入: <link rel="stylesheet" type="text/css" href="& ...
- Codeforces 1167C - News Distribution
题目链接:http://codeforces.com/problemset/problem/1167/C 题意:大概就是分成几个小团体,给每个人用1 - n编号,当对某个人传播消息的时候,整个小团体就 ...
- ECMAScript1.2 表达式|语句|break|continue
表达式 一个表达式可以产生一个值,有可能是运算,函数调用, 有可能是字面量,表达式可以放在任何需要值的地方. 语句 语句可以理解为一个行为,循环语句和判断语句就是典型的语句. 一个程序有很多个语句组成 ...