python3 线程池-threadpool模块与concurrent.futures模块
一、 既然多线程可以缩短程序运行时间,那么,是不是线程数量越多越好呢?
显然,并不是,每一个线程的从生成到消亡也是需要时间和资源的,太多的线程会占用过多的系统资源(内存开销,cpu开销),而且生成太多的线程时间也是可观的,很可能会得不偿失,这里给出一个最佳线程数量的计算方式:
最佳线程数的获取:
1、通过用户慢慢递增来进行性能压测,观察QPS(即每秒的响应请求数,也即是最大吞吐能力。),响应时间
2、根据公式计算:服务器端最佳线程数量=((线程等待时间+线程cpu时间)/线程cpu时间) * cpu数量
3、单用户压测,查看CPU的消耗,然后直接乘以百分比,再进行压测,一般这个值的附近应该就是最佳线程数量。
二、为什么要使用线程池?
对于任务数量不断增加的程序,每有一个任务就生成一个线程,最终会导致线程数量的失控,例如,整站爬虫,假设初始只有一个链接a,那么,这个时候只启动一个线程,运行之后,得到这个链接对应页面上的b,c,d,,,等等新的链接,作为新任务,这个时候,就要为这些新的链接生成新的线程,线程数量暴涨。在之后的运行中,线程数量还会不停的增加,完全无法控制。所以,对于任务数量不端增加的程序,固定线程数量的线程池是必要的。
三、如何实现线程池?
这里,我分别介绍三种实现方式:
1、过去:
使用threadpool模块,这是个python的第三方模块,支持python2和python3,具体使用方式如下:

#! /usr/bin/env python

# -*- coding: utf-8 -*-

import threadpool

import time

def sayhello (a):

    print("hello: "+a)

    time.sleep(2)

def main():

    global result

    seed=["a","b","c"]

    start=time.time()

    task_pool=threadpool.ThreadPool(5)

    requests=threadpool.makeRequests(sayhello,seed)

    for req in requests:

        task_pool.putRequest(req)

    task_pool.wait()

    end=time.time()

    time_m = end-start

    print("time: "+str(time_m))

    start1=time.time()

    for each in seed:

        sayhello(each)

    end1=time.time()

    print("time1: "+str(end1-start1))

if __name__ == '__main__':

    main()
运行结果如下:
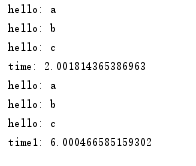
threadpool是一个比较老的模块了,现在虽然还有一些人在用,但已经不再是主流了,关于python多线程,现在已经开始步入未来(future模块)了
2、未来:
使用concurrent.futures模块,这个模块是python3中自带的模块,但是,python2.7以上版本也可以安装使用,具体使用方式如下:
#! /usr/bin/env python

# -*- coding: utf-8 -*-

from concurrent.futures import ThreadPoolExecutor

import time

def sayhello(a):

    print("hello: "+a)

    time.sleep(2)

def main():

    seed=["a","b","c"]

    start1=time.time()

    for each in seed:

        sayhello(each)

    end1=time.time()

    print("time1: "+str(end1-start1))

    start2=time.time()

    with ThreadPoolExecutor(3) as executor:

        for each in seed:

            executor.submit(sayhello,each)

    end2=time.time()

    print("time2: "+str(end2-start2))

    start3=time.time()

    with ThreadPoolExecutor(3) as executor1:

        executor1.map(sayhello,seed)

    end3=time.time()

    print("time3: "+str(end3-start3))

if __name__ == '__main__':

    main()
运行结果如下:
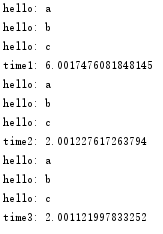
注意到一点:
concurrent.futures.ThreadPoolExecutor,在提交任务的时候,有两种方式,一种是submit()函数,另一种是map()函数,两者的主要区别在于:
2.1、map可以保证输出的顺序, submit输出的顺序是乱的
2.2、如果你要提交的任务的函数是一样的,就可以简化成map。但是假如提交的任务函数是不一样的,或者执行的过程之可能出现异常(使用map执行过程中发现问题会直接抛出错误)就要用到submit()
2.3、submit和map的参数是不同的,submit每次都需要提交一个目标函数和对应的参数,map只需要提交一次目标函数,目标函数的参数放在一个迭代器(列表,字典)里就可以。
3.现在?
这里要考虑一个问题,以上两种线程池的实现都是封装好的,任务只能在线程池初始化的时候添加一次,那么,假设我现在有这样一个需求,需要在线程池运行时,再往里面添加新的任务(注意,是新任务,不是新线程),那么要怎么办?
其实有两种方式:
3.1、重写threadpool或者future的函数:
这个方法需要阅读源模块的源码,必须搞清楚源模块线程池的实现机制才能正确的根据自己的需要重写其中的方法。
3.2、自己构建一个线程池:
这个方法就需要对线程池的有一个清晰的了解了,附上我自己构建的一个线程池:
#! /usr/bin/env python

# -*- coding: utf-8 -*-

import threading

import Queue

import hashlib

import logging

from utils.progress import PrintProgress

from utils.save import SaveToSqlite

class ThreadPool(object):

    def __init__(self, thread_num, args):

        self.args = args

        self.work_queue = Queue.Queue()

        self.save_queue = Queue.Queue()

        self.threads = []

        self.running = 0

        self.failure = 0

        self.success = 0

        self.tasks = {}

        self.thread_name = threading.current_thread().getName()

        self.__init_thread_pool(thread_num)

    # 线程池初始化

    def __init_thread_pool(self, thread_num):

        # 下载线程

        for i in range(thread_num):

            self.threads.append(WorkThread(self))

        # 打印进度信息线程

        self.threads.append(PrintProgress(self))

        # 保存线程

        self.threads.append(SaveToSqlite(self, self.args.dbfile))

    # 添加下载任务

    def add_task(self, func, url, deep):

        # 记录任务,判断是否已经下载过

        url_hash = hashlib.new('md5', url.encode("utf8")).hexdigest()

        if not url_hash in self.tasks:

            self.tasks[url_hash] = url

            self.work_queue.put((func, url, deep))

            logging.info("{0} add task {1}".format(self.thread_name, url.encode("utf8")))

    # 获取下载任务

    def get_task(self):

        # 从队列里取元素,如果block=True,则一直阻塞到有可用元素为止。

        task = self.work_queue.get(block=False)

        return task

    def task_done(self):

        # 表示队列中的某个元素已经执行完毕。

        self.work_queue.task_done()

    # 开始任务

    def start_task(self):

        for item in self.threads:

            item.start()

        logging.debug("Work start")

    def increase_success(self):

        self.success += 1

    def increase_failure(self):

        self.failure += 1

    def increase_running(self):

        self.running += 1

    def decrease_running(self):

        self.running -= 1

    def get_running(self):

        return self.running

    # 打印执行信息

    def get_progress_info(self):

        progress_info = {}

        progress_info['work_queue_number'] = self.work_queue.qsize()

        progress_info['tasks_number'] = len(self.tasks)

        progress_info['save_queue_number'] = self.save_queue.qsize()

        progress_info['success'] = self.success

        progress_info['failure'] = self.failure

        return progress_info

    def add_save_task(self, url, html):

        self.save_queue.put((url, html))

    def get_save_task(self):

        save_task = self.save_queue.get(block=False)

        return save_task

    def wait_all_complete(self):

        for item in self.threads:

            if item.isAlive():

                # join函数的意义,只有当前执行join函数的线程结束,程序才能接着执行下去

                item.join()

# WorkThread 继承自threading.Thread

class WorkThread(threading.Thread):

    # 这里的thread_pool就是上面的ThreadPool类

    def __init__(self, thread_pool):

        threading.Thread.__init__(self)

        self.thread_pool = thread_pool

    #定义线程功能方法,即,当thread_1,...,thread_n,调用start()之后,执行的操作。

    def run(self):

        print (threading.current_thread().getName())

        while True:

            try:

                # get_task()获取从工作队列里获取当前正在下载的线程,格式为func,url,deep

                do, url, deep = self.thread_pool.get_task()

                self.thread_pool.increase_running()

                # 判断deep,是否获取新的链接

                flag_get_new_link = True

                if deep >= self.thread_pool.args.deep:

                    flag_get_new_link = False

                # 此处do为工作队列传过来的func,返回值为一个页面内容和这个页面上所有的新链接

                html, new_link = do(url, self.thread_pool.args, flag_get_new_link)

                if html == '':

                    self.thread_pool.increase_failure()

                else:

                    self.thread_pool.increase_success()

                    # html添加到待保存队列

                    self.thread_pool.add_save_task(url, html)

                # 添加新任务,即,将新页面上的不重复的链接加入工作队列。

                if new_link:

                    for url in new_link:

                        self.thread_pool.add_task(do, url, deep + 1)

                self.thread_pool.decrease_running()

                # self.thread_pool.task_done()

            except Queue.Empty:

                if self.thread_pool.get_running() <= 0:

                    break

            except Exception, e:

                self.thread_pool.decrease_running()

                # print str(e)

                break
python3 线程池-threadpool模块与concurrent.futures模块的更多相关文章
- Python3【模块】concurrent.futures模块,线程池进程池
Python标准库为我们提供了threading和multiprocessing模块编写相应的多线程/多进程代码,但是当项目达到一定的规模,频繁创建/销毁进程或者线程是非常消耗资源的,这个时候我们就要 ...
- (11)线程池(最新的concurrent.futures包去开启)
'''concurrent.futures是最新的开启线程池的包'''import timefrom concurrent.futures import ThreadPoolExecutor #开启线 ...
- 创建进程池与线程池concurrent.futures模块的使用
一.进程池. 当并发的任务数量远远大于计算机所能承受的范围,即无法一次性开启过多的任务数量就应该考虑去 限制进程数或线程数,从而保证服务器不会因超载而瘫痪.这时候就出现了进程池和线程池. 二.conc ...
- Python之路(第四十六篇)多种方法实现python线程池(threadpool模块\multiprocessing.dummy模块\concurrent.futures模块)
一.线程池 很久(python2.6)之前python没有官方的线程池模块,只有第三方的threadpool模块, 之后再python2.6加入了multiprocessing.dummy 作为可以使 ...
- 线程池、进程池(concurrent.futures模块)和协程
一.线程池 1.concurrent.futures模块 介绍 concurrent.futures模块提供了高度封装的异步调用接口 ThreadPoolExecutor:线程池,提供异步调用 Pro ...
- concurrent.futures模块(进程池&线程池)
1.线程池的概念 由于python中的GIL导致每个进程一次只能运行一个线程,在I/O密集型的操作中可以开启多线程,但是在使用多线程处理任务时候,不是线程越多越好,因为在线程切换的时候,需要切换上下文 ...
- python之concurrent.futures模块
一.concurrent.futures模块简介 concurrent.futures 模块提供了并发执行调用的高级接口 并发可以使用threads执行,使用ThreadPoolExecutor 或 ...
- Python并发编程之线程池/进程池--concurrent.futures模块
一.关于concurrent.futures模块 Python标准库为我们提供了threading和multiprocessing模块编写相应的多线程/多进程代码,但是当项目达到一定的规模,频繁创建/ ...
- 《转载》Python并发编程之线程池/进程池--concurrent.futures模块
本文转载自Python并发编程之线程池/进程池--concurrent.futures模块 一.关于concurrent.futures模块 Python标准库为我们提供了threading和mult ...
随机推荐
- yum的配置文件介绍
yum 的配置文件分为两部分:main 和repository main 部分定义了全局配置选项,整个yum 配置文件应该只有一个main.常位于/etc/yum.conf 中. reposito ...
- Lab 1-3
Lab 1-3 Analyze the file Lab01-03.exe. Questions and Short Answers Upload the Lab01-03.exe file to h ...
- es的mapping设置
自定义mapping的api PUT test_index { "mappings": { #mappings关键字 "doc": { #type " ...
- Django用户认证组件
用户认证 主要分两部分: 1.auth模块 from django.contrib import auth 2.User对象 from django.contrib.auth.models imp ...
- ACM-ICPC World Finals 2019 G.First of Her Name
题意:给一颗字典树,m次查询,每次给出一个字符串,问你该字符串是字典树上多少串的后缀 题解:字典树求广义sam,每次把查询串在sam上跑一遍,最后到达的点的sz就是答案,中途没法走了,就是没有出现过 ...
- 第二阶段——个人工作总结DAY02
1.昨天做了什么:昨天学习了Intent跳转的知识. 2.今天打算做什么:来实现这个功能. 3.遇到的困难:不会用隐式跳转,只会用显式跳转.
- Python中单线程、多线程和多进程的效率对比实验
GIL机制导致如下结果: Python的多线程程序并不能利用多核CPU的优势 (比如一个使用了多个线程的计算密集型程序只会在一个单CPU上面运行)python多线程适合io操作密集型的任务(如sock ...
- python_递归实现汉诺塔 (string类型的指针出错 未解决)
在递归的时候,和数学的归纳法一致. void func( mode) { if(endCondition) { constExpression //基本项 } else { accumrateExpr ...
- 纯css实现顶部进度条随滚动条滚动
<!DOCTYPE html> <head> <meta charset="utf-8"> <meta http-equiv=" ...
- vue项目 sockjs-node一直报错问题
vue3下 vue.config.js中 devServer: { host: '0.0.0.0', port: 8080, proxy: { '/': { target: 'http://127.0 ...