WPF自定义路由事件(一)
首先自定义事件支持事件路由,需要使用 RegisterRoutedEvent 方法注册 RoutedEvent
public static RoutedEvent RegisterRoutedEvent(

	string name,

	RoutingStrategy routingStrategy,

	Type handlerType,

	Type ownerType

)
参数
- name
- 类型:System.String 路由事件的名称。该名称在所有者类型中必须是唯一的,并且不能为 null 或空字符串。
- routingStrategy
- 类型:System.Windows.RoutingStrategy 作为枚举值的事件的路由策略。
- handlerType
- 类型:System.Type 事件处理程序的类型。该类型必须为委托类型,并且不能为 null。
- ownerType
- 类型:System.Type 路由事件的所有者类类型。该类型不能为 null。
先看下xaml文件,我们可以看到button中并没有click事件

<Window x:Class="简单自定义路由事件.MainWindow"

        xmlns="http://schemas.microsoft.com/winfx/2006/xaml/presentation"

        xmlns:x="http://schemas.microsoft.com/winfx/2006/xaml"

        Title="MainWindow" Height="350" Width="525">

    <Grid>

        <Button Content="获取时间" Height="29" HorizontalAlignment="Left" Margin="192,170,0,0" Name="button1" VerticalAlignment="Top" Width="100" />

        <TextBox Height="58" HorizontalAlignment="Left" Margin="89,80,0,0" Name="textBox1" VerticalAlignment="Top" Width="339" />

        <Label Content="自定义路由事件演示" Height="38" HorizontalAlignment="Left" Margin="141,26,0,0" Name="label1" VerticalAlignment="Top" Width="208" FontSize="22" Background="BlanchedAlmond" />

    </Grid>

</Window>
后台代码简单展示:
using System;

using System.Collections.Generic;

using System.Linq;

using System.Text;

using System.Windows;

using System.Windows.Controls;

using System.Windows.Data;

using System.Windows.Documents;

using System.Windows.Input;

using System.Windows.Media;

using System.Windows.Media.Imaging;

using System.Windows.Navigation;

using System.Windows.Shapes;

namespace 简单自定义路由事件

{

    /// <summary>

    /// MainWindow.xaml 的交互逻辑

    /// </summary>

    public partial class MainWindow : Window

    {

        public MainWindow()

        {

            InitializeComponent();

            this.button1.AddHandler(Button.ClickEvent,//处理的事件

                new RoutedEventHandler(RoutedEvent)); //事件委托

            this.MEvent += new RoutedEventHandler(MainWindow_MEvent);

        }

        void MainWindow_MEvent(object sender, RoutedEventArgs e)

        {

            this.textBox1.Text = System.DateTime.Now.ToString();

        }

        private static readonly RoutedEvent MyEvent = EventManager.RegisterRoutedEvent("Event",//路由事件的名称

            RoutingStrategy.Direct,//事件的路由策略

            typeof(RoutedEvent), //事件处理程序的类型。该类型必须为委托类型

            typeof(RoutedEventArgs));//路由事件的所有者类类型

        //事件访问器,进行事件提供添加和移除。

        public event RoutedEventHandler MEvent

        {

            add

            {

                AddHandler(MyEvent, value);

            }

            remove

            {

                RemoveHandler(MyEvent, value);

            }

        }

        void RoutedEvent(object o, RoutedEventArgs e)

        {

            //关联路由事件

            RoutedEventArgs args = new RoutedEventArgs(MyEvent);

            this.RaiseEvent(args);

        }

    }

}
效果展示:
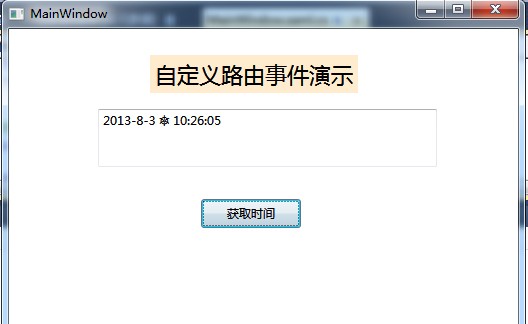 上面详细的说明建自定义路由事件的基本原理的原理,我们可以通过这样的方式来实现自己的路由事件,这样的代码移致性很高,我们可以需要的时候直接移植.
WPF自定义路由事件(一)的更多相关文章
- WPF:自定义路由事件的实现
路由事件通过EventManager,RegisterRoutedEvent方法注册,通过AddHandler和RemoveHandler来关联和解除关联的事件处理函数:通过RaiseEvent方法来 ...
- WPF自定义路由事件(二)
WPF中的路由事件 as U know,和以前Windows消息事件区别不再多讲,这篇博文中,将首先回顾下WPF内置的路由事件的用法,然后在此基础上自定义一个路由事件. 1.WPF内置路由事件 WPF ...
- 细说WPF自定义路由事件
WPF中的路由事件 as U know,和以前Windows消息事件区别不再多讲,这篇博文中,将首先回顾下WPF内置的路由事件的用法,然后在此基础上自定义一个路由事件. 1.WPF内置路由事件 W ...
- WPF 自定义路由事件
如何:创建自定义路由事件 首先自定义事件支持事件路由,需要使用 RegisterRoutedEvent 方法注册 RoutedEvent C#语法 public static RoutedEvent ...
- Wpf自定义路由事件
创建自定义路由事件大体可以分为三个步骤: ①声明并注册路由事件. ②为路由事件添加CLR事件包装. ③创建可以激发路由事件的方法. 以ButtonBase类中代码为例展示这3个步骤: public a ...
- WPF 自定义路由事件 与 附加路由事件
为student添加附件事件
- WPF自学入门(四)WPF路由事件之自定义路由事件
在上一遍博文中写到了内置路由事件,其实除了内置的路由事件,我们也可以进行自定义路由事件.接下来我们一起来看一下WPF中的自定义路由事件怎么进行创建吧. 创建自定义路由事件分为3个步骤: 1.声明并注册 ...
- WPF路由事件三:自定义路由事件
与依赖项属性类似,WPF也为路由事件提供了WPF事件系统这一组成.为一个类型添加一个路由事件的方式与为类型添加依赖项属性的方法类似,添加一个自定义路由事件的步骤: 一.声明路由事件变量并注册:定义只读 ...
- WPF的路由事件、冒泡事件、隧道事件(预览事件)
本文摘要: 1:什么是路由事件: 2:中断事件路由: 3:自定义路由事件: 4:为什么需要自定义路由事件: 5:什么是冒泡事件和预览事件(隧道事件): 1:什么是路由事件 WPF中的事件为路由事件,所 ...
随机推荐
- Oracle 11g透明网关连接Sqlserver 2000(转)
Oracle 11g透明网关连接Sqlserver 2000: http://www.cnblogs.com/lightnear/archive/2013/02/03/2890858.html 透明网 ...
- Structured Streaming教程(2) —— 常用输入与输出
上篇了解了一些基本的Structured Streaming的概念,知道了Structured Streaming其实是一个无下界的无限递增的DataFrame.基于这个DataFrame,我们可以做 ...
- Oozie分布式工作流——Action节点
前篇讲述了下什么是流控制节点,本篇继续来说一下什么是 Action Nodes操作节点.Action节点有一些比较通用的特性: Action节点是远程的 所有oozie创建的计算和处理任务都是异步的, ...
- Java 注释类之常用元注解
Java 注释类之常用元注解 自定义Java注释类时,我们使用方式如下: @Retention(RetentionPolicy.RUNTIME)@Target(ElementType.METHOD ...
- JSON序列——根据JSON生成事务性SQL2
JSON序列——根据JSON生成事务性SQL2 procedure TForm1.Button3Click(Sender: TObject); begin var json:string:=''+ ' ...
- [算法导论]插入排序 @ Python
class insertionsort(): def insertion_sort(self,Array): for i in range(1, len(Array)): key = Array[i] ...
- [Functional Programming] Using Lens to update nested object
For example, in React application, we have initial state; const data = { nextId: 4, todoFilter: 'SHO ...
- MySQL SELECT 执行的具体步骤
1:SELECT 执行的顺序 8SELECT 9DISTINCT <select_list> 1FROM <left_table> 3JOIN <right_table& ...
- 2017 33 款iOS开源库
IGListKit https://github.com/Instagram/IGListKit 由 Instagram 开发人员制作,IGListKit 是用于构建快速灵活列表的数据驱动型的 UIC ...
- echarts 通过dom获取echarts实例,批量监听reset
重点在于 echarts.getInstanceByDom 这个 API 我的js: // 懒加载优化:滚动节流策略 var __SCROLLTIMER__ = null // 重新设置 echart ...