SpringBoot集成Atomikos使用Oracle数据库mybatis、jta框架
项目中需要数据库分布式事物的实现,于是采用了atumikos技术。
因为生产上需要稳定,所以采用了springboot 1.5.9.RELEASE版本。
本文代码gitlab下载地址: https://gitlab.com/atomikos/springBootMultDB-druidOracle.git
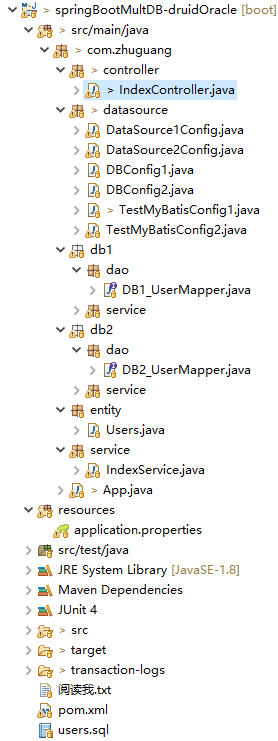
新建一个springboot项目,然后依次添加本文所有代码。我的项目结构如下:
1、pom.xml 代码
<project xmlns="http://maven.apache.org/POM/4.0.0"

    xmlns:xsi="http://www.w3.org/2001/XMLSchema-instance"

    xsi:schemaLocation="http://maven.apache.org/POM/4.0.0 http://maven.apache.org/xsd/maven-4.0.0.xsd">

    <modelVersion>4.0.0</modelVersion>

    <groupId>springBootMultDB</groupId>

    <artifactId>springBootMultDB-druidOracle</artifactId>

    <version>0.0.1-SNAPSHOT</version>

    <packaging>jar</packaging>

    <name>springBootMultDB-druidOracle</name>

    <parent>

        <groupId>org.springframework.boot</groupId>

        <artifactId>spring-boot-starter-parent</artifactId>

        <version>1.5.9.RELEASE</version>

        <relativePath />

    </parent>

    <properties>

        <project.build.sourceEncoding>UTF-8</project.build.sourceEncoding>

    </properties>

    <dependencies>

        <dependency>

            <groupId>junit</groupId>

            <artifactId>junit</artifactId>

            <version>3.8.1</version>

            <scope>test</scope>

        </dependency>

        <dependency>

            <groupId>org.springframework.boot</groupId>

            <artifactId>spring-boot-starter-web</artifactId>

            <exclusions>

                <!-- 排除spring boot默认使用的tomcat,使用jetty -->

                <exclusion>

                    <groupId>org.springframework.boot</groupId>

                    <artifactId>spring-boot-starter-tomcat</artifactId>

                </exclusion>

            </exclusions>

        </dependency>

        <dependency>

            <groupId>org.springframework.boot</groupId>

            <artifactId>spring-boot-starter-jetty</artifactId>

        </dependency>

        <dependency>

            <groupId>org.springframework.boot</groupId>

            <artifactId>spring-boot-starter-jdbc</artifactId>

        </dependency>

        <dependency>

            <groupId>org.mybatis.spring.boot</groupId>

            <artifactId>mybatis-spring-boot-starter</artifactId>

            <version>1.3.2</version>

        </dependency>

        <dependency>

            <groupId>com.alibaba</groupId>

            <artifactId>druid</artifactId>

            <version>1.1.12</version>

        </dependency>

        <dependency>

            <groupId>com.alibaba</groupId>

            <artifactId>druid-spring-boot-starter</artifactId>

            <version>1.1.10</version>

        </dependency>

        <dependency>

            <groupId>org.springframework.boot</groupId>

            <artifactId>spring-boot-starter-jta-atomikos</artifactId>

        </dependency>

        <dependency>

            <groupId>com.oracle</groupId>

            <artifactId>ojdbc6</artifactId>

            <version>11.2.0.4.0</version>

        </dependency>

    </dependencies>

</project>
这里的ojdbc6的jar注意一下,不是maven中央库能够下载到的,所以需要去oracle官方下载驱动jar包:
https://www.oracle.com/technetwork/database/enterprise-edition/jdbc-112010-090769.html
下载好驱动jar包之后,cmd命令窗口进入jar包所在目录,执行mvn安装jar到本地repository库,mvn命令:
mvn install:install-file -Dfile=d:/java-jar/ojdbc6.jar -DgroupId=com.oracle -DartifactId=ojdbc6 -Dversion=11.2.0.4.0 -Dpackaging=jar
把-Dfile的参数替换成你本地的ojdbc6的目录即可。
-Dversion版本参数查看方法:打开ojdbc6.jar,进入META-INF,打开MANIFEST.MF,找到 Implementation-Version的值,我这里是: 11.2.0.4.0
2、application.properties配置
server.port=8082

spring.application.name=springBootMultDB-druidOracle

# Oracle 1

spring.datasource.test1.url=jdbc:oracle:thin:@localhost:1521:orcl

spring.datasource.test1.username=system

spring.datasource.test1.password=ZHUwen12

spring.datasource.test1.minPoolSize = 3

spring.datasource.test1.maxPoolSize = 25

spring.datasource.test1.maxLifetime = 20000

spring.datasource.test1.borrowConnectionTimeout = 30

spring.datasource.test1.loginTimeout = 30

spring.datasource.test1.maintenanceInterval = 60

spring.datasource.test1.maxIdleTime = 60

spring.datasource.test1.testQuery = select 1 from dual

# # Oracle 2

spring.datasource.test2.url=jdbc:oracle:thin:@localhost:1521:orcl

spring.datasource.test2.username=zhuwen

spring.datasource.test2.password=ZHUwen12

spring.datasource.test2.minPoolSize = 3

spring.datasource.test2.maxPoolSize = 25

#连接最大存活时间

spring.datasource.test2.maxLifetime = 20000

#获取连接失败重新获等待最大时间

spring.datasource.test2.borrowConnectionTimeout = 30

#登入超时

spring.datasource.test2.loginTimeout = 30

# 连接回收时间

spring.datasource.test2.maintenanceInterval = 60

#最大闲置时间,超过最小连接池连接的连接将将关闭

spring.datasource.test2.maxIdleTime = 60

spring.datasource.test2.testQuery = select 1 from dual
这里的oracle两个库配置,只有username不一样,在oracle里面,两个user可视为两个数据库。
3、App.java启动类
package com.zhuguang;

import org.mybatis.spring.annotation.MapperScan;

import org.slf4j.LoggerFactory;

import org.springframework.boot.SpringApplication;

import org.springframework.boot.autoconfigure.SpringBootApplication;

import org.springframework.boot.context.properties.EnableConfigurationProperties;

import com.zhuguang.datasource.DBConfig1;

import com.zhuguang.datasource.DBConfig2;

/**

 * 非常感谢腾讯课堂烛光学院的lisa老师

 * @author zhuwen

 *

 */

@SpringBootApplication

@EnableConfigurationProperties(value = { DBConfig1.class, DBConfig2.class })

@MapperScan(basePackages = { "com.zhuguang.mapper" })

public class App {

    private static final org.slf4j.Logger LOG = LoggerFactory.getLogger(App.class);

    public static void main(String[] args) {

        SpringApplication.run(App.class, args);

    }

}
4、两个Oracle数据库配置类
package com.zhuguang.datasource;

import org.springframework.boot.context.properties.ConfigurationProperties;

@ConfigurationProperties(prefix = "spring.datasource.test1")

public class DBConfig1 {

    private String url;

    private String username;

    private String password;

    private int minPoolSize;

    private int maxPoolSize;

    private int maxLifetime;

    private int borrowConnectionTimeout;

    private int loginTimeout;

    private int maintenanceInterval;

    private int maxIdleTime;

    private String testQuery;

    getter and setter...

}
第二个数据库配置类与DBConfig1一样,唯一不同的地方在于 prefix = "spring.datasource.test2",类名叫DBConfig2
5、atomikos分布式数据源配置类
TestMyBatisConfig1
package com.zhuguang.datasource;

import java.sql.SQLException;

import javax.sql.DataSource;

import org.apache.ibatis.session.SqlSessionFactory;

import org.mybatis.spring.SqlSessionFactoryBean;

import org.mybatis.spring.SqlSessionTemplate;

import org.mybatis.spring.annotation.MapperScan;

import org.slf4j.LoggerFactory;

import org.springframework.beans.factory.annotation.Qualifier;

import org.springframework.boot.jta.atomikos.AtomikosDataSourceBean;

import org.springframework.context.annotation.Bean;

import org.springframework.context.annotation.Configuration;

import org.springframework.context.annotation.Primary;

import com.alibaba.druid.pool.xa.DruidXADataSource;

@Configuration

// basePackages 最好分开配置 如果放在同一个文件夹可能会报错

@MapperScan(basePackages = "com.zhuguang.db1", sqlSessionTemplateRef = "testSqlSessionTemplate")

public class TestMyBatisConfig1 {

    private static final org.slf4j.Logger LOG = LoggerFactory.getLogger(TestMyBatisConfig1.class);

    // 配置数据源

    @Primary

    @Bean(name = "dataSource1")

    public DataSource testDataSource(DBConfig1 testConfig) throws SQLException {

        //Atomikos统一管理分布式事务

        AtomikosDataSourceBean xaDataSource = new AtomikosDataSourceBean();

//        Properties p = new Properties();

//        p.setProperty ( "user" , testConfig.getUsername() );

//        p.setProperty ( "password" , testConfig.getPassword() );

//        p.setProperty ( "URL" , testConfig.getUrl() );

//        xaDataSource.setXaProperties ( p );

        //用druidXADataSource方式或者上面的Properties方式都可以

        DruidXADataSource druidXADataSource = new DruidXADataSource();

        druidXADataSource.setUrl(testConfig.getUrl());

        druidXADataSource.setUsername(testConfig.getUsername());

        druidXADataSource.setPassword(testConfig.getPassword());

        xaDataSource.setUniqueResourceName("oracle1");

        xaDataSource.setXaDataSource(druidXADataSource);

        xaDataSource.setXaDataSourceClassName("com.alibaba.druid.pool.xa.DruidXADataSource");

        xaDataSource.setMaxLifetime(testConfig.getMaxLifetime());

        xaDataSource.setMinPoolSize(testConfig.getMinPoolSize());

        xaDataSource.setMaxPoolSize(testConfig.getMaxPoolSize());

        xaDataSource.setBorrowConnectionTimeout(testConfig.getBorrowConnectionTimeout());

        xaDataSource.setLoginTimeout(testConfig.getLoginTimeout());

        xaDataSource.setMaintenanceInterval(testConfig.getMaintenanceInterval());

        xaDataSource.setMaxIdleTime(testConfig.getMaxIdleTime());

        xaDataSource.setTestQuery(testConfig.getTestQuery());

        LOG.info("分布式事物dataSource1实例化成功");

        return xaDataSource;

    }

    @Primary

    @Bean(name = "testSqlSessionFactory")

    public SqlSessionFactory testSqlSessionFactory(@Qualifier("dataSource1") DataSource dataSource)

            throws Exception {

        SqlSessionFactoryBean bean = new SqlSessionFactoryBean();

        bean.setDataSource(dataSource);

        return bean.getObject();

    }

    @Primary

    @Bean(name = "testSqlSessionTemplate")

    public SqlSessionTemplate testSqlSessionTemplate(

            @Qualifier("testSqlSessionFactory") SqlSessionFactory sqlSessionFactory) throws Exception {

        return new SqlSessionTemplate(sqlSessionFactory);

    }

}
再建一个一模一样的TestMyBatisConfig1类,取名叫TestMyBatisConfig2,不同的地方是注解和bean命名:
package com.zhuguang.datasource;

import java.sql.SQLException;

import java.util.Properties;

import javax.sql.DataSource;

import org.apache.ibatis.session.SqlSessionFactory;

import org.mybatis.spring.SqlSessionFactoryBean;

import org.mybatis.spring.SqlSessionTemplate;

import org.mybatis.spring.annotation.MapperScan;

import org.slf4j.LoggerFactory;

import org.springframework.beans.factory.annotation.Qualifier;

import org.springframework.context.annotation.Bean;

import org.springframework.context.annotation.Configuration;

import com.alibaba.druid.pool.xa.DruidXADataSource;

import com.atomikos.jdbc.AtomikosDataSourceBean;

import oracle.jdbc.xa.client.OracleXADataSource;

// basePackages 最好分开配置 如果放在同一个文件夹可能会报错

@Configuration

@MapperScan(basePackages = "com.zhuguang.db2", sqlSessionTemplateRef = "test2SqlSessionTemplate")

public class TestMyBatisConfig2 {

    private static final org.slf4j.Logger LOG = LoggerFactory.getLogger(TestMyBatisConfig2.class);

    // 配置数据源

    @Bean(name = "dataSource2")

    public DataSource testDataSource(DBConfig2 testConfig) throws SQLException {

        AtomikosDataSourceBean xaDataSource = new AtomikosDataSourceBean();

//        Properties p = new Properties();

//        p.setProperty ( "user" , testConfig.getUsername() );

//        p.setProperty ( "password" , testConfig.getPassword() );

//        p.setProperty ( "URL" , testConfig.getUrl() );

//        xaDataSource.setXaProperties ( p );

        //用druidXADataSource方式或者上面的Properties方式都可以

        DruidXADataSource druidXADataSource = new DruidXADataSource();

        druidXADataSource.setUrl(testConfig.getUrl());

        druidXADataSource.setUsername(testConfig.getUsername());

        druidXADataSource.setPassword(testConfig.getPassword());

        xaDataSource.setUniqueResourceName("oracle2");

        xaDataSource.setXaDataSource(druidXADataSource);

        xaDataSource.setXaDataSourceClassName("com.alibaba.druid.pool.xa.DruidXADataSource");

        xaDataSource.setMaxLifetime(testConfig.getMaxLifetime());

        xaDataSource.setMinPoolSize(testConfig.getMinPoolSize());

        xaDataSource.setMaxPoolSize(testConfig.getMaxPoolSize());

        xaDataSource.setBorrowConnectionTimeout(testConfig.getBorrowConnectionTimeout());

        xaDataSource.setLoginTimeout(testConfig.getLoginTimeout());

        xaDataSource.setMaintenanceInterval(testConfig.getMaintenanceInterval());

        xaDataSource.setMaxIdleTime(testConfig.getMaxIdleTime());

        xaDataSource.setTestQuery(testConfig.getTestQuery());

        LOG.info("分布式事物dataSource2实例化成功");

        return xaDataSource;

    }

    @Bean(name = "test2SqlSessionFactory")

    public SqlSessionFactory testSqlSessionFactory(@Qualifier("dataSource2") DataSource dataSource)

            throws Exception {

        SqlSessionFactoryBean bean = new SqlSessionFactoryBean();

        bean.setDataSource(dataSource);

        return bean.getObject();

    }

    @Bean(name = "test2SqlSessionTemplate")

    public SqlSessionTemplate testSqlSessionTemplate(

            @Qualifier("test2SqlSessionFactory") SqlSessionFactory sqlSessionFactory) throws Exception {

        return new SqlSessionTemplate(sqlSessionFactory);

    }

}
6、为两个数据库分别建立USERS表
首先在两个Oracle数据库里都建立表:
CREATE TABLE users  (

  name varchar2(20 BYTE),

  age NUMBER(*,0)

);
并建立entity:
package com.zhuguang.entity;

public class Users {

    private String id;

    private String name;

    private Integer age;

    getter and setter..

}
7、为users建立mapper类
package com.zhuguang.db1.dao;

import java.util.List;

import org.apache.ibatis.annotations.Delete;

import org.apache.ibatis.annotations.Insert;

import org.apache.ibatis.annotations.Param;

import org.apache.ibatis.annotations.Select;

import com.zhuguang.entity.Users;

public interface DB1_UserMapper {

    @Select("SELECT * FROM USERS WHERE NAME = #{name}")

    Users findByName(@Param("name") String name);

    @Insert("INSERT INTO USERS(NAME, AGE) VALUES(#{name}, #{age})")

    int insert(@Param("name") String name, @Param("age") Integer age);

    @Delete("Delete from USERS")

    void deleteAll();

    @Select("select 'oracle1' as id,t.* from USERS t")

    List<Users> queryAll();

}
package com.zhuguang.db2.dao;

import java.util.List;

import org.apache.ibatis.annotations.Delete;

import org.apache.ibatis.annotations.Insert;

import org.apache.ibatis.annotations.Param;

import org.apache.ibatis.annotations.Select;

import com.zhuguang.entity.Users;

//test1 DB

public interface DB2_UserMapper {

    @Select("SELECT * FROM USERS WHERE NAME = #{name}")

    Users findByName(@Param("name") String name);

    @Insert("INSERT INTO USERS(NAME, AGE) VALUES(#{name}, #{age})")

    int insert(@Param("name") String name, @Param("age") Integer age);

    /**

     * 用于演示插入数据库异常的情况

     */

    @Insert("INSERT INTO not_exists_table_USERS(NAME, AGE) VALUES(#{name}, #{age})")

    int insertNotExistsTable(@Param("name") String name, @Param("age") Integer age);

    @Delete("Delete from USERS")

    void deleteAll();

    @Select("select 'oracle2' as id,t.* from USERS t")

    List<Users> queryAll();

}
8、建立Controller
package com.zhuguang.controller;

import java.util.Date;

import java.util.List;

import javax.annotation.Resource;

import javax.sql.DataSource;

import org.slf4j.Logger;

import org.slf4j.LoggerFactory;

import org.springframework.beans.factory.annotation.Autowired;

import org.springframework.beans.factory.annotation.Qualifier;

import org.springframework.web.bind.annotation.RequestMapping;

import org.springframework.web.bind.annotation.RestController;

import com.zhuguang.db1.service.DB1_UserService;

import com.zhuguang.db2.service.DB2_UserService;

import com.zhuguang.service.IndexService;

/**

 *  感谢腾讯课堂烛光学院lisa老师

 * @author zhuwen

 *

 */

@RestController

public class IndexController {

    private static Logger log = LoggerFactory.getLogger(IndexController.class);

    @Autowired

    private DB1_UserService userService1;

    @Autowired

    private DB2_UserService userService2;

    @Autowired

    private IndexService indexService;

    //想查看数据源,可以这么注解

    @Resource

    @Qualifier("dataSource1")

    private DataSource dataSource1;

    @RequestMapping("/insertDB1")

    public String insertTest001(String name, Integer age) {

        // userMapperTest01.insert(name, age);

        userService1.insertDB1(name, age);

        return "success insertDB1";

    }

    @RequestMapping("/insertDB2")

    public String insertTest002(String name, Integer age) {

        userService2.insertDB2(name, age);

        return "success insertDB2";

    }

    /**

     * atomikos效果:分布式事物。两个数据库都插入值

     *

     * @param name

     * @param age

     * @return

     */

    @RequestMapping("/insertTwoDBs")

    public String insertTwoDBs(String name, Integer age) {

        indexService.insertTwoDBs(name, age);

        return "success insertTwoDBs";

    }

    /**

     * atomikos效果:分布式事物。 演示发生异常分布式事物回滚

     *

     * @param name

     * @param age

     * @return

     */

    @RequestMapping("/insertTwoDBsWithError")

    public String insertTwoDBsWithError(String name, Integer age) {

        indexService.insertTwoDBsWithError(name, age);

        return "success insertTwoDBs";

    }

    /**

     * atomikos效果:分布式事物。 演示发生异常分布式事物回滚

     *  直接调用mapper方式

     * @param name

     * @param age

     * @return

     */

    @RequestMapping("/insertTwoDBsUseMapperWithError")

    public String insertTwoDBsUseMapperWithError(String name, Integer age) {

        indexService.insertTwoDBsUseMapperWithError(name, age);

        return "success insertTwoDBsUseMapperWithError";

    }

    /**

     * 获取两个数据库的所有数据

     * @return

     */

    @RequestMapping("/queryAll")

    public List queryAll() {

        List list = indexService.queryAll();

        list.add(new Date().toLocaleString()); //加上时间戳,方便postman观察结果

        return list;

    }

    /**

     *  删除两个数据库的所有数据

     * @return

     */

    @RequestMapping("/deleteAll")

    public String deleteAll() {

        indexService.deleteAll();

        return "success delete all";

    }

}
9、建立service
package com.zhuguang.service;

import java.util.ArrayList;

import java.util.List;

import org.springframework.beans.factory.annotation.Autowired;

import org.springframework.stereotype.Service;

import org.springframework.transaction.annotation.Transactional;

import org.springframework.util.CollectionUtils;

import com.zhuguang.db1.dao.DB1_UserMapper;

import com.zhuguang.db1.service.DB1_UserService;

import com.zhuguang.db2.dao.DB2_UserMapper;

import com.zhuguang.db2.service.DB2_UserService;

import com.zhuguang.entity.Users;

@Service

public class IndexService {

    @Autowired

    private DB1_UserMapper db1UserMapper;

    @Autowired

    private DB2_UserMapper db2UserMapper;

    @Autowired

    private DB1_UserService db1UserService;

    @Autowired

    private DB2_UserService db2UserService;

    /**

     *  atomikos效果:分布式事物。两个数据库都插入值

     * @return

     */

    @Transactional

    public void insertTwoDBs(String name, Integer age) {

        db1UserMapper.insert(name, age);

        db2UserMapper.insert(name, age);

    }

    @Transactional

    public void deleteAll() {

        db1UserMapper.deleteAll();

        //不同数据库。test1,test2

        //userService2.insertDB2(name, age);

        db2UserMapper.deleteAll();//test2

//        int i = 1 / 0;//

    }

    /**

     * atomikos效果:分布式事物。

      *  演示发生异常分布式事物回滚

      *  这里无论error 1、2、3,任何一处发生异常,分布式事物都会回滚

     */

    @Transactional //(rollbackFor = { Exception.class })

    public void insertTwoDBsWithError(String name, Integer age) {

        db1UserService.insert2DB1(name, age);

        db2UserService.insert2DB2(name, age);

        //int i = 1 / 0; // error 1

    }

    /**

     * atomikos效果:分布式事物。

      *  演示发生异常分布式事物回滚

      *  这里无论error 1、2、3,任何一处发生异常,分布式事物都会回滚

      *  此方法效果等同于insertTwoDBsWithError

     */

    @Transactional

    public void insertTwoDBsUseMapperWithError(String name, Integer age) {

        db1UserMapper.insert(name, age);

        db2UserMapper.insert(name, age);

        db2UserMapper.insertNotExistsTable(name, age);

    }

    public List queryAll() {

        List all = new ArrayList();

        List<Users> list1 = db1UserService.queryAll();

        if(CollectionUtils.isEmpty(list1)) {

            all.add("db1 没有任何数据!");

        }else {

            all.addAll(list1);

        }

        List<Users> list2 = db2UserService.queryAll();

        if(CollectionUtils.isEmpty(list2)) {

            all.add("db2 没有任何数据!");

        }else {

            all.addAll(list2);

        }

        return all;

    }

}
10、使用postman验证
主要验证:/insertTwoDBsUseMapperWithError 这个效果,是否任何一处DB产生错误,都会使分布式事物回滚。

11、druid监控页面
启动App.java之后,只要在浏览器里输入http://localhost:8082/druid/index.html就可以进入druid监控页面:
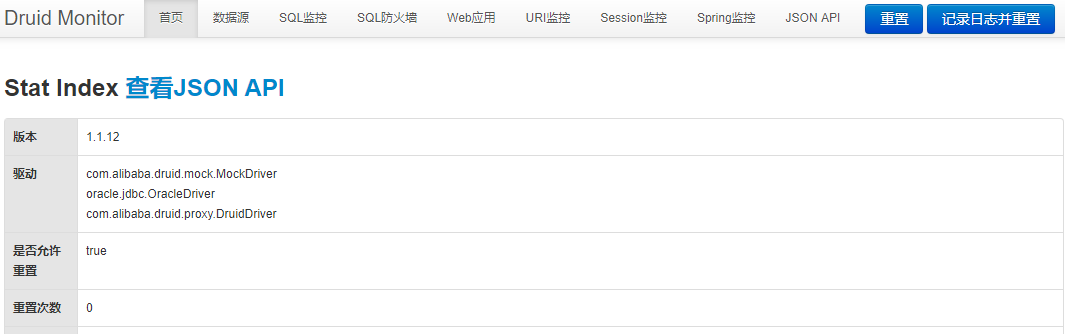
但是由于这里使用的是atomikos分布式事物DataSource,不是原本的druidDataSource,所以这里几乎监控不到任何有价值的东西,基本作废。
end.
SpringBoot集成Atomikos使用Oracle数据库mybatis、jta框架的更多相关文章
- springboot集成liquibase,h2数据库
Liquibase是一个用于跟踪.管理和应用数据库变化的开源的数据库重构工具.它将所有数据库的变化(包括结构和数据)都保存在XML文件中,便于版本控制. Liquibase具备如下特性:* 不依赖于特 ...
- Oracle数据库mybatis 插入空值时报错(with JdbcType OTHER)
参考文档: 1.https://blog.csdn.net/fishernemo/article/details/27649233 2.http://helgaxu.iteye.com/blog/21 ...
- springboot集成jpa,在postgresql数据库中创建主键自增表
依赖文件 <?xml version="1.0" encoding="UTF-8"?> <project xmlns="http:/ ...
- Oracle数据库——Mybatis在一个update标签下执行多更新语句
begin update table table1 set com1 ='1' ; update table table2 set com1 ='1' ; end;
- SpringBoot集成mybatis,同时读取一个数据库中多个数据表
SpringBoot集成mybatis,同时读取一个数据库中多个数据表: application.properties: mybatis.config-location=classpath:mybat ...
- SpringBoot 集成Mybatis 连接Mysql数据库
记录SpringBoot 集成Mybatis 连接数据库 防止后面忘记 1.添加Mybatis和Mysql依赖 <dependency> <groupId>org.mybati ...
- SpringBoot集成MyBatis的分页插件 PageHelper
首先说说MyBatis框架的PageHelper插件吧,它是一个非常好用的分页插件,通常我们的项目中如果集成了MyBatis的话,几乎都会用到它,因为分页的业务逻辑说复杂也不复杂,但是有插件我们何乐而 ...
- springBoot 集成Mysql数据库
springBoot 集成Mysql数据库 前一段时间,我们大体介绍过SpringBoot,想必大家还有依稀的印象.我们先来回顾一下:SpringBoot是目前java世界最流行的一个企业级解决方案框 ...
- springboot集成redis(mybatis、分布式session)
安装Redis请参考:<CentOS快速安装Redis> 一.springboot集成redis并实现DB与缓存同步 1.添加redis及数据库相关依赖(pom.xml) <depe ...
随机推荐
- 微信浏览器软键盘弹出与页面resize的问题
使用微信打开网页,弹出软键盘时遇到的兼容问题 过去开发中遇到过很多这种情况,页面底部需要固定定位一个按钮,广告栏或者菜单栏,页面中有表单项需要填写,在打开手机虚拟键盘的时候,底部固定定位的元素会处在软 ...
- Maven可以使用mvn package指令对项目进行打包,如果使用Java -jar xxx.java
Maven可以使用mvn package指令对项目进行打包,如果使用Java -jar xxx.jar执行运行jar文件,会出现"no main manifest attribute, in ...
- L2-002 链表去重 (25 分)
L2-002 链表去重 (25 分) 给定一个带整数键值的链表 L,你需要把其中绝对值重复的键值结点删掉.即对每个键值 K,只有第一个绝对值等于 K 的结点被保留.同时,所有被删除的结点须被保存在 ...
- int 转double , 转float
Integer log = 21424344;Double log1 = log.doubleValue() / 1000000;System.out.println(log1);BigDecimal ...
- 用TSNE进行数据降维并展示聚类结果
TSNE提供了一种有效的数据降维方式,让我们可以在2维或3维的空间中展示聚类结果. # -*- coding: utf-8 -*- from __future__ import unicode_lit ...
- configparser模块(ini配置文件生成模块)
config = configparser.ConfigParser() #初始化config对象 [DEFAULT] #设置默认的变量值,初始化 config["DEFAULT" ...
- 浅谈java中的String、StringBuffer、StringBuilder类的区别以及关系
在java中最常见的使用就是对字符串的操作:首先先说一下对字符串的理解:字符串就是一连串字符序列,Java提供了String和StringBuffer两个类来封装字符串,并提供一系列方法来操作字符串对 ...
- winedt102安装
http://www.xue51.com/soft/3171.html 安装是安装上了,还是用不了,提示系统找不到文件什么的.最后还是安装winedt7. 注意要配置,miktex,这个东西.wine ...
- AI之旅(6):神经网络之前向传播
前置知识 求导 知识地图 回想线性回归和逻辑回归,一个算法的核心其实只包含两部分:代价和梯度.对于神经网络而言,是通过前向传播求代价,反向传播求梯度.本文介绍其中第一部分. 多元分类:符号转换 ...
- NS3可视化及动画工具(PyViz和NetAnim)
一.PyViz安装 1.安装依赖包 sudo apt-get install python-dev python-pygraphviz python-kiwi python-pygoocanvas p ...