使用tableview的表头button 实现多 cell 的选择
首先声明本篇博文是作者原创,在QQ群里看到一枚猿友求助,问题描述:使用UItableView 实现在表头里点击不同的按钮,去刷新当前的界面(界面是大的 cell),自己就实现了一下。
实验原材料:故事版(storyBoard)、xib、UItableView、通知中心
技术点:多cell 的切换、通知的收发、*通知用完及时移除
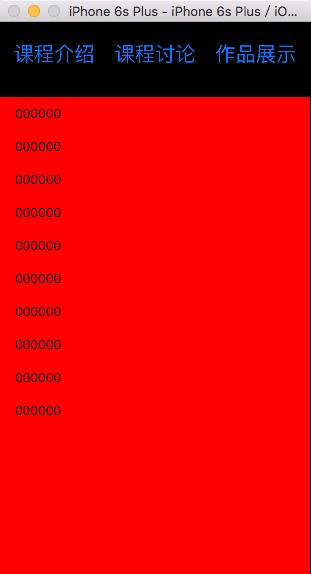
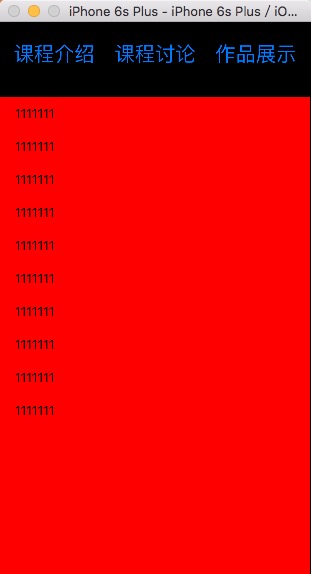
先看效果图:
默认的当前界面是左图。点击“课程介绍”按钮就刷新为左图,点击“课程讨论”按钮就刷新为中图,点击“作品介绍”按钮就刷新为右图。

实现代码上传到我的群空间,如果需要,请去QQ群 215901818 下载。
实现关键代码:
#import "ViewController.h"

#import "CellA.h"

#import "CellB.h"

#import "CellC.h"

#import "Empty.h"

@interface ViewController ()<UITableViewDelegate,UITableViewDataSource>

@property (weak, nonatomic) IBOutlet UITableView *myTableView;

@property(nonatomic,assign)BOOL isSelectA,isSelectB,isSelectC;

@end

@implementation ViewController

- (void)viewDidLoad {

    [super viewDidLoad];

    self.myTableView.backgroundColor = [UIColor redColor];

    //注册

    [self RegisterCellID];

    //通知中心去接受通知

    [self getNotify];

    //默认的设置,加载哪一个cell

    [self setBoolCell];

}

//设置,加载哪一个 cell 的 bool 值

-(void)setBoolCell{

    self.isSelectA = YES;

    self.isSelectB = NO;

    self.isSelectC = NO;

}

//接通知方法

-(void)getNotify{

    [[NSNotificationCenter defaultCenter] addObserver:self selector:@selector(changeReloading:) name:nil object:nil];

}

//接受到通知之后要办理的事情

-(void)changeReloading:(NSNotification *)notify{

    if ([notify.userInfo[@"key"] isEqualToString:@"post1"]) {

        NSLog(@"收到通知 %@",notify.userInfo[@"key"]);

        self.isSelectA = YES;

        self.isSelectB = NO;

        self.isSelectC = NO;

        [self.myTableView reloadData];

    }

    if ([notify.userInfo[@"key"] isEqualToString:@"post2"]) {

        NSLog(@"收到通知 %@",notify.userInfo[@"key"]);

        self.isSelectA = NO;

        self.isSelectB = YES;

        self.isSelectC = NO;

        [self.myTableView reloadData];

    }

    if ([notify.userInfo[@"key"] isEqualToString:@"post3"]) {

        NSLog(@"收到通知 %@",notify.userInfo[@"key"]);

        self.isSelectA = NO;

        self.isSelectB = NO;

        self.isSelectC = YES;

        [self.myTableView reloadData];

    }

}

//注册cellId 方法

-(void)RegisterCellID{

    [self.myTableView registerClass:[CellA class] forCellReuseIdentifier:@"cellA"];

    [self.myTableView registerClass:[CellB class] forCellReuseIdentifier:@"cellB"];

    [self.myTableView registerClass:[CellC class] forCellReuseIdentifier:@"cellC"];

}

//得到cellID 的方法

-(NSArray *)getCellID{

        NSArray * tempArr = [NSArray arrayWithObjects:@"cellA",@"cellB",@"cellC", nil];

        return tempArr;

}

#pragma Mark===自定义表的头部

-(UIView *)tableView:(UITableView *)tableView viewForHeaderInSection:(NSInteger)section{

    Empty * viewHead = [[[NSBundle mainBundle]loadNibNamed:@"Empty" owner:self options:nil] lastObject];

    viewHead.backgroundColor = [UIColor blackColor];

    viewHead.frame = CGRectMake(, , self.myTableView.bounds.size.width, );

    return viewHead;

}

-(CGFloat)tableView:(UITableView *)tableView heightForHeaderInSection:(NSInteger)section{

    return ;

}

#pragma Mark===必须实现的两个代理方法

- (NSInteger)tableView:(UITableView *)tableView numberOfRowsInSection:(NSInteger)section{

    return ;

}

-(UITableViewCell *)tableView:(UITableView *)tableView cellForRowAtIndexPath:(NSIndexPath *)indexPath{

    if (self.isSelectA == YES) {

        CellA * cellA = [tableView dequeueReusableCellWithIdentifier:[self getCellID][]];

        if (cellA == nil) {

            cellA = [[CellA alloc]initWithStyle:UITableViewCellStyleDefault reuseIdentifier:[self getCellID][]];

        }

        cellA.textLabel.text = @"";

        return cellA;

    }else if (self.isSelectB == YES){

        CellB * cellB = [tableView dequeueReusableCellWithIdentifier:[self getCellID][]];

        if (cellB == nil) {

            cellB = [[CellB alloc]initWithStyle:UITableViewCellStyleDefault reuseIdentifier:[self getCellID][]];

        }

        cellB.textLabel.text = @"";

        return cellB;

    }else if (self.isSelectC == YES){

        CellC * cellC = [tableView dequeueReusableCellWithIdentifier:[self getCellID][]];

        if (cellC == nil) {

            cellC = [[CellC alloc]initWithStyle:UITableViewCellStyleDefault reuseIdentifier:[self getCellID][]];

        }

        cellC.textLabel.text = @"";

        return cellC;

    }

    return nil;

}

-(NSInteger)numberOfSectionsInTableView:(UITableView *)tableView{

    return ;

}

//在合适的时候移除通知中心,由于 根视图不能移除,所以 dealloc 方法这里不管用,这里写在了页面消失的时候

-(void)viewWillDisappear:(BOOL)animated{

    [super viewWillAppear:animated];

    [[NSNotificationCenter defaultCenter] removeObserver:self forKeyPath:@"post1"];

    [[NSNotificationCenter defaultCenter] removeObserver:self forKeyPath:@"post2"];

    [[NSNotificationCenter defaultCenter] removeObserver:self forKeyPath:@"post3"];

}

@end
ViewController.m
#import "Empty.h"

@implementation Empty

-(instancetype)initWithFrame:(CGRect)frame{

    self = [super initWithFrame:frame];

    if (self) {

        NSLog(@"加载了噢噢噢噢");

    }

    return self;

}

- (IBAction)buttonA:(UIButton *)sender {

    NSLog(@"点击了--课程介绍");

    NSString * post1 = @"post1";

    [self postNotifyWith:post1];

}

- (IBAction)buttonB:(UIButton *)sender {

    NSLog(@"点击了--课程讨论");

    NSString * post1 = @"post2";

    [self postNotifyWith:post1];

}

- (IBAction)buttonC:(UIButton *)sender {

    NSLog(@"点击了--作品展示");

    NSString * post1 = @"post3";

    [self postNotifyWith:post1];

}

//发通知实现

-(void)postNotifyWith:(NSString *)sender{

    [[NSNotificationCenter defaultCenter] postNotificationName:sender object:self userInfo:@{@"key":sender}];

}

@end
Empty.m
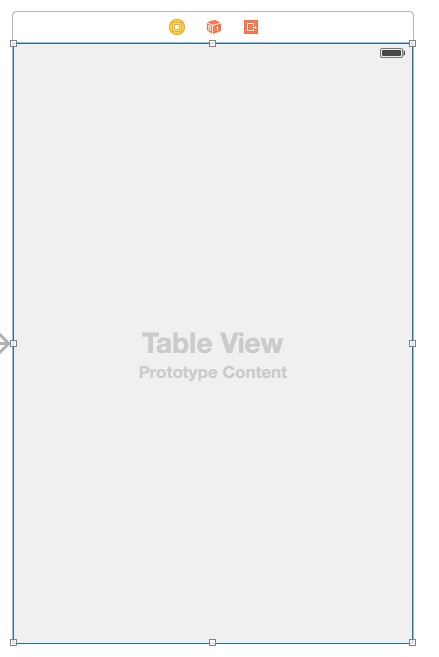
对应的故事版如下左图、对应的xib如下右图所示:

可使用领域的猜想:作为页面的加载少量数据的组件出现
有可能出现的问题:效率底下、在通知中心的使用上有可能出现问题
other(再小的组件功能实现了就是一件开心的事情)
使用tableview的表头button 实现多 cell 的选择的更多相关文章
- 防止TableView 上的tap手势隔断 cell的选择
遵循UIGestureRecognizerDelegate协议: 1.0添加手势 - (void)addTapGest { UITapGestureRecognizer *tap = [[U ...
- iOS 在tableView上添加button导致按钮没有点击效果和不能滑动的 zhuang
转载请注明出处. 今天在调试代码的时候,在tableviewcell上添加button,发现button快速点击的话,是看不出点击效果的,查找资料发现, ios7上UITableViewCell子层容 ...
- ios 获取button所在的cell对象, 注意:ios7 =< System Version < ios8 获取cell对象的差别
ios7 =< System Version< ios8 : ios7 =< System Version < ios8 下 button.superview.supervi ...
- TableView之表头、表尾,区头、区尾!
一.UITableView的UITableViewStyle 样式分为UITableViewStylePlain和UITableViewStyleGrouped两种: plain样式下区头和区尾是悬浮 ...
- 点击某个按钮在tableView某个位置动态插入一行cell
实现步骤: 1.修改数据模型数组 给模型数组的某个位置增加一个模型 2.执行以下代码 NSIndexPath *indexPath = [NSIndexPath indexPathForRow: in ...
- TableView不显示没内容的Cell怎么办?
类似这种,我不想让下面那些空的显示. 很简单: self.tableView.tableFooterView = [[UIView alloc] init]; 加完这句之后就变成了这样:
- iOS学习——tableview中带编辑功能的cell键盘弹出遮挡和收起问题解决
最近在项目中经常用到UITableView中的cell中带有UITextField或UITextView的情况,然后在这种场景下,当我们点击屏幕较下方的cell进行编辑时,这时候键盘弹出来会出现遮挡待 ...
- 实现uitable cell中点击button设置当前cell为选中状态
- (void)buttonClick:(id)senser{ NSInteger tag = [senser tag]; NSLog(@"the button tag is % ...
- IOS 取消表格单元格 TableViewCell 去掉高亮状态 点击Cell取消选择状态
以下是两种实现效果 1. 自定义cell 继承UITableViewCell 重写 -(void)setSelected:(BOOL)selected animated:(BOOL)animated ...
随机推荐
- Web知识点收集
1.微信屏蔽浏览器,打开办法: 如果微信webapp屏蔽了浏览器打开,通常是通过判断代理类型来做到的. 解决办法:进入浏览器开发者模式,修改浏览器代理为: Mozilla/5.0 (iPhone; C ...
- 《UNIX-Shell编程24学时教程》读书笔记Chap3,4 文件,目录操作
Chap3 文件操作 P28 在这章中,要着重记住一些常用的选项,要有使用正则表达式的思维,能更快达到目的.----@im天行 3.1 列文件名 .profile sh的初始化脚本: .kshr ...
- mysql 存储引擎 InnoDB 与 MyISAM 的区别和选择
http://www.blogjava.net/jiangshachina/archive/2009/05/31/279288.html 酷壳 - MySQL: InnoDB 还是 MyISA ...
- window 平台搭建简单的直播点播系统
Windows平台如何搭建简单的直播系统前文已经有介绍,今天介绍下如何搭建简单的点播系统. 同样还是利用crtmpServer,crtmpServer可以从github中下载,可以从群里下载(群里有修 ...
- 【学习笔记】C#中HashTable和快速排序的用法,从单词频率统计小程序写起
先瞎扯点别的.进入这个神圣的地方总需要些鞭策,阿西巴,我是被鞭策进来摆摊的程序猿.软件工程老师说,写程序,发博客,就来博客园.这是个号召力很强的口号.最近看网络营销 搜索引擎优化的书多一些,只能说王老 ...
- caffe搭建--caffe- win10 vs2015 编译(支持GPU)--注意在cmake的时候需要根据情况仔细修改配置
--http://blog.csdn.net/longji/article/details/60964998 注意: 在cmake的时候需要根据情况仔细修改配置,比如,如果gpu的能力不足3.0的话, ...
- iphone开发的技巧
一,改动状态栏: 1.增加[[UIApplication sharedApplication] setStatusBarHidden:YES animated:NO];但此方法仅仅是不显示状态条,状态 ...
- MongoDB之增删改查(一)
本文主要介绍MongoDB数据库增删改查操作. 增 mongoDB和其它关系型数据库一样,通过insert来添加数据到集合中去. db.collectionName.insert(内容) 显示数据库中 ...
- cmake中的变量和命令的大小写
1 cmake中要特别注意命令和变量的大小写 2 cmake的内置命令是不区分大小写的 3 cmake内置变量是区分大小写的,或者干脆就说,cmake的所有变量都是区分大小写的 这就是变量和命令的不同 ...
- port_443
GRC | Port Authority, for Internet Port 443 https://www.grc.com/port_443.htm