Nginx在Windows 10、Ubuntu16.04、Centos7下的安装
本博文介绍Nginx在Windows 10、Ubuntu16.04、Centos7下的安装方法
一. Windows 10 安装nginx
在Windows下安装相对简单,只需要下载安装包,解压即可。
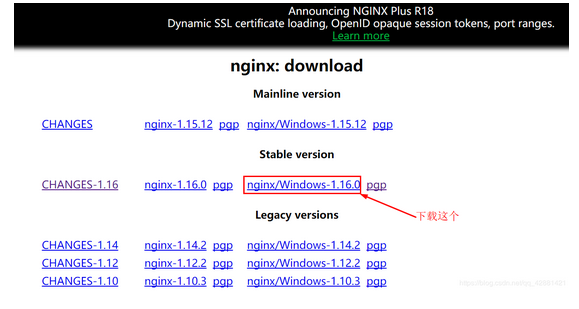
1.下载安装包
http://nginx.org/en/download.html,选择Stable version(最新的稳定版本)下载
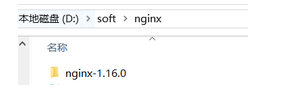
2.解压安装
右键ngin-1.16.0.zip-->解压到当前文件夹

得到如下文件夹
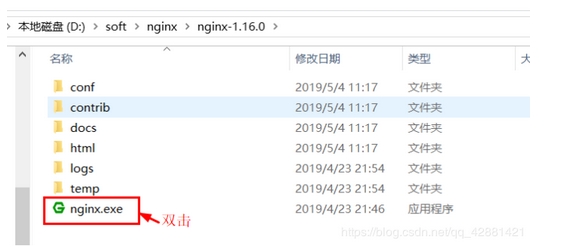
3.启动
进入解压后的文件夹nginx-1.16.0,双击nginx.exe启动nginx服务器
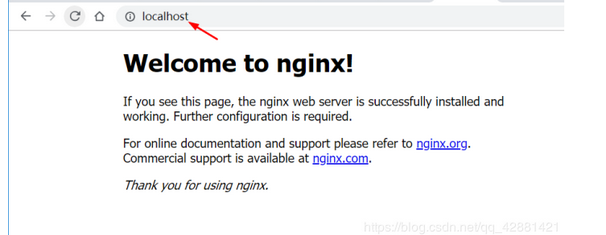
4.测试
浏览器输入localhost:80或者localhost,看到Welcome to nginx为安装成功。
二. Ubuntu16.04 安装apt nginx
1.安装必要的包
sudo apt install curl gnupg2 ca-certificates lsb-release
2.设置apt仓库安装最新稳定版本的nginx,执行以下命令
echo "deb http://nginx.org/packages/ubuntu `lsb_release -cs` nginx" \

    | sudo tee /etc/apt/sources.list.d/nginx.list
3.导入官方签名密钥
curl -fsSL https://nginx.org/keys/nginx_signing.key | sudo apt-key add -
4.验证key
sudo apt-key fingerprint ABF5BD827BD9BF62
执行后会有如下输出
pub   rsa2048 2011-08-19 [SC] [expires: 2024-06-14]

573B FD6B 3D8F BC64 1079  A6AB ABF5 BD82 7BD9 BF62

uid   [ unknown] nginx signing key <signing-key@nginx.com>
5.安装nginx
sudo apt update

sudo apt install nginx
6.启动nginx
service nginx start
7.测试
浏览器输入ip:80或主机名称:80
三. Centos7 yum安装nginx
1.安装必要的包
sudo yum install yum-utils
2.新建nginx.repo文件
sudo nano /etc/yum.repos.d/nginx.repo
nginx.repo文件内容如下:
[nginx-stable]

name=nginx stable repo

baseurl=http://nginx.org/packages/centos/$releasever/$basearch/

gpgcheck=1

enabled=1

gpgkey=https://nginx.org/keys/nginx_signing.key

[nginx-mainline]

name=nginx mainline repo

baseurl=http://nginx.org/packages/mainline/centos/$releasever/$basearch/

gpgcheck=1

enabled=0

gpgkey=https://nginx.org/keys/nginx_signing.key
4.安装nginx
sudo yum install nginx
5.启动nginx
sudo service nginx start
6.测试
四. ubuntu/centos编译安装nginx
说明:
安装使用的是阿里云ECS ubuntu14.04系统。操作过程中可能不同版本系统,会有些差异。具体问题还请网上查询相关解决办法。相关源码包会不断更新,假如看到本文时间比较久,还是建议直接上官网下载最近的版本。linux下手动编译安装用户软件,源码放在/usr/local/src中,安装路径在/usr/local/下。
准备阶段:
安装nginx的依赖包
1.安装编译需要用到的库和工具
apt-get install build-essential libtool gcc automake autoconf make
2.安装pcre,支持重写rewrite功能
源码下载地址:https://ftp.pcre.org/pub/pcre/
wget https://ftp.pcre.org/pub/pcre/pcre-8.40.tar.gz

tar -zxvf pcre-8.40.tar.gz

cd pcre-8.40.tar.gz

./configure

make && make install
3.安装zlib, 支持gzip压缩
源码下载地址:http://zlib.net
wget http://zlib.net/zlib-1.2.11.tar.gz

tar -zxvf zlib-1.2.11.tar.gz

cd zlib-1.2.11

./configure

make && make install
4.安装ssl
源码地址:https://www.openssl.org/source/
wget https://www.openssl.org/source/openssl-1.0.2o.tar.gz

tar -zxvf openssl-1.0.2o.tar.gz

cd openssl-1.0.2o

./config

make && make install
安装运行NIGINX:
- 下载nginx源码
源码地址:http://nginx.org/en/download.html
wget http://nginx.org/download/nginx-1.13.12.tar.gz

tar -zxvf nginx-1.13.12.tar.gz

cd nginx-1.13.12

./configure --prefix=/usr/local/nginx

make && make install

root@haima-PC:/usr/local/nginx/conf/conf.d# nginx -v

nginx version: nginx/1.13.12 //看到这个就说明已经成功了

root@haima-PC:/usr/local/nginx/conf# tree

.

├── fastcgi.conf

├── fastcgi.conf.default

├── fastcgi_params

├── fastcgi_params.default

├── koi-utf

├── koi-win

├── mime.types

├── mime.types.default

├── nginx.conf

├── nginx.conf_bak

├── nginx.conf.default

├── scgi_params

├── scgi_params.default

├── uwsgi_params

├── uwsgi_params.default

└── win-utf

1 directory, 17 files
nginx.conf 为配置文件
#user  nobody;

worker_processes  1;

#error_log  logs/error.log;

#error_log  logs/error.log  notice;

#error_log  logs/error.log  info;

#pid        logs/nginx.pid;

events {

    worker_connections  1024;

}

http {

    include       mime.types;

    default_type  application/octet-stream;

    #log_format  main  '$remote_addr - $remote_user [$time_local] "$request" '

    #                  '$status $body_bytes_sent "$http_referer" '

    #                  '"$http_user_agent" "$http_x_forwarded_for"';

    #access_log  logs/access.log  main;

    sendfile        on;

    #tcp_nopush     on;

    #keepalive_timeout  0;

    keepalive_timeout  65;

    #gzip  on;

    include /usr/local/nginx/conf/conf.d/*.conf;

    server {

        listen       80;

        server_name  localhost;

        #charset koi8-r;

        #access_log  logs/host.access.log  main;

        location / {

            root   html;

            index  index.html index.htm;

        }

        #error_page  404              /404.html;

        # redirect server error pages to the static page /50x.html

        #

        error_page   500 502 503 504  /50x.html;

        location = /50x.html {

            root   html;

        }

        # proxy the PHP scripts to Apache listening on 127.0.0.1:80

        #

        #location ~ \.php$ {

        #    proxy_pass   http://127.0.0.1;

        #}

        # pass the PHP scripts to FastCGI server listening on 127.0.0.1:9000

        #

        #location ~ \.php$ {

        #    root           html;

        #    fastcgi_pass   127.0.0.1:9000;

        #    fastcgi_index  index.php;

        #    fastcgi_param  SCRIPT_FILENAME  /scripts$fastcgi_script_name;

        #    include        fastcgi_params;

        #}

        # deny access to .htaccess files, if Apache's document root

        # concurs with nginx's one

        #

        #location ~ /\.ht {

        #    deny  all;

        #}

    }

    # another virtual host using mix of IP-, name-, and port-based configuration

    #

    #server {

    #    listen       8000;

    #    listen       somename:8080;

    #    server_name  somename  alias  another.alias;

    #    location / {

    #        root   html;

    #        index  index.html index.htm;

    #    }

    #}

    # HTTPS server

    #

    #server {

    #    listen       443 ssl;

    #    server_name  localhost;

    #    ssl_certificate      cert.pem;

    #    ssl_certificate_key  cert.key;

    #    ssl_session_cache    shared:SSL:1m;

    #    ssl_session_timeout  5m;

    #    ssl_ciphers  HIGH:!aNULL:!MD5;

    #    ssl_prefer_server_ciphers  on;

    #    location / {

    #        root   html;

    #        index  index.html index.htm;

    #    }

    #}

}
新建conf.d/php.hm文件夹
server{

    listen 80;

    server_name php.hm;

    access_log  /var/log/nginx/php.hm.access.log;

    #access_log  /data/logs/nginx/php.hm.access.log  main;

    location / {

        root html;

        index index.php index.html index.htm;

        }

    location ~ \.php {

        root /wwwroot/test;

        fastcgi_pass 127.0.0.1:9000;

        fastcgi_index index.php;

        fastcgi_param SCRIPT_FILENAME $DOCUMENT_ROOT$fastcgi_script_name;

        include fastcgi_params;

        }

}
配置域名
vim /etc/hosts
127.0.0.1 php.hm
常用命令
nginx -t

./sbin/nginx

nginx -s reload

nginx -s stop
Nginx在Windows 10、Ubuntu16.04、Centos7下的安装的更多相关文章
- Ubuntu16.04 LTS下apt安装WireShark
Ubuntu16.04 LTS下apt安装WireShark 安装与配置 首先通过apt安装WireShark: $ sudo apt install wireshark 会同时安装许多的依赖包,其中 ...
- Ubuntu16.04 Linux 下无痛安装、配置Gogs
本文在Win7+VMware的ubuntu 16.04中测试,安装Gogs,Install from binary. 准备工作: sudo apt-get install git sudo addus ...
- Ubuntu16.04/centos7 下为chrome/firefox安装flash player插件
为chrome安装flash: 打开终端,输入:sudo apt-get install pepperflashplugin-nonfree 或官网下载安装google-chrome-stable 为 ...
- Ubuntu16.04 Liunx下同时安装Anaconda2与Anaconda3
先根据Ubuntu预装的python2.7来安装Anaconda2,然后将Anaconda3作为其环境安装在envs文件夹下. 重要提示:有一些软件需要py2.7的环境,比如XX-Net, 最好是先安 ...
- Linux 下安装Nginx两种方法- yum安装 and Centos7下yum安装配置nginx与php
转载csdn: Linux 下安装Nginx两种方法- yum安装_在电脑前深思的博客-CSDN博客 Linux安装Nginx(两种方式)_HHRunning的博客-CSDN博客_linux 是否安装 ...
- 保姆级教程——Ubuntu16.04 Server下深度学习环境搭建:安装CUDA8.0,cuDNN6.0,Bazel0.5.4,源码编译安装TensorFlow1.4.0(GPU版)
写在前面 本文叙述了在Ubuntu16.04 Server下安装CUDA8.0,cuDNN6.0以及源码编译安装TensorFlow1.4.0(GPU版)的亲身经历,包括遇到的问题及解决办法,也有一些 ...
- chrome headless+selenium+python+(ubuntu 16.04/centos7) 下的实现
Ubuntu 16.04 下: 0x01 安装chrome 1 下载源加入系统源列表 sudo wget http://www.linuxidc.com/files/repo/google-chrom ...
- centos7 下 yum 安装Nginx
centos7 下 yum 安装和配置 Nginx 添加yum源 Nginx不在默认的yum源中,可以使用epel或者官网的yum源,这里使用官网的yum源 rpm -ivh http://nginx ...
- Ubuntu16.04环境下的硬盘挂载
需求:在Ubuntu16.04系统下,挂载一个新的硬盘 第一步:查看目前已经存在的分区的状态 命令:df -l 如上图所示,并未看到要挂载的硬盘(sda)的状态. 第二步:查看计算机硬盘的状态(包括格 ...
- 阿里云ECS服务器环境搭建——ubuntu16.04图形界面的安装
阿里云ECS服务器环境搭建——ubuntu16.04图形界面的安装 最近琢磨着想在服务器上搭建一个hexo博客,于是就在阿里云上买了一个云服务器ECS,远程接入后默认给的是一个命令窗口,没有图形界面, ...
随机推荐
- 巧用dblink 实现多进程并行查询
概述 对于分区表的大数据统计分析,由于数据量巨大,往往需要采用并行.但是数据库并行的效率相比分进程分表统计还是有比较大的差距.本文通过巧用dblink,实现分进程分分区统计数据. 例子 kingbas ...
- C++设计模式 - 门面模式(Facade)
接口隔离模式 在组件构建过程中,某些接口之间直接的依赖常常会带来很多问题.甚至根本无法实现.采用添加一层间接(稳定)接口,来隔离本来互相紧密关联的接口是一种常见的解决方案. 典型模式 Facade P ...
- C++ 数学函数、头文件及布尔类型详解
C++ 数学 C++ 有许多函数可以让您在数字上执行数学任务. 最大值和最小值 max(x, y) 函数可用于找到 x 和 y 的最大值: 示例 cout << max(5, 10); 而 ...
- C# 项目打包详解--赞
项目打包流程如下: 第一步:项目必须先安装 Microsoft Visual Studio Installer Projects 安装步骤:打开VS-->工具-->扩展和更新--> ...
- 二、Unity调用Xcode封装方法
1.开始封装Unity调用接口 我们在Xcode中 写的接口需要在extern "C"中(加上extern "C"后,会指示编译器这部分代码按C语言的进行编译) ...
- 前端使用 Konva 实现可视化设计器(4)
给上一章做一个补充,就是实现通过上下左右按键移动所选节点. 继续求 Star ,希望大家多多一键三连,十分感谢大家的支持~ 创作不易,Star 50 个,创作加速! github源码 gitee源码 ...
- HarmonyOS应用开发—资源分类与访问
应用开发过程中,经常需要用到颜色.字体.间距.图片等资源,在不同的设备或配置中,这些资源的值可能不同. ● 应用资源:借助资源文件能力,开发者在应用中自定义资源,自行管理这些资源在不同的设备或配置中 ...
- HDC2022 开发者亮点抢先看,线上线下精彩活动等你探索!
原文:https://mp.weixin.qq.com/s/A2sfpPKBvF6zwinbUsgwiw,点击链接查看更多技术内容.
- NL2SQL进阶系列(1):DB-GPT-Hub、SQLcoder、Text2SQL开源应用实践详解
NL2SQL进阶系列(1):DB-GPT-Hub.SQLcoder.Text2SQL开源应用实践详解 NL2SQL基础系列(1):业界顶尖排行榜.权威测评数据集及LLM大模型(Spider vs BI ...
- CentOS编译安装Nginx1.5.2+PHP5.5.1+ MySQL 5.6.10
CentOS编译安装Nginx1.5.2+PHP5.5.1+ MySQL 5.6.10 时间:2013-11-15 23:39 来源:blog.s135.com 作者:张宴的博客 举报 点击:1 ...